# 2 - FabLab - Formation machines & logiciels
# Alternatives grand public aux logiciels industriels
[https://github.com/KenneyNL/Adobe-Alternatives](https://github.com/KenneyNL/Adobe-Alternatives)
sinon David D. est tombé sur ça [https://graphite.rs/](https://graphite.rs/) ; qui parait tres prometteur pour la partie de generation procedurale (inpiré par le systeme nodal de Blender).
# Formations Logiciels Conception 3D
# Initiation 3D - TinkerCAD
#### **Prise en main du site :**
##### Interface :
[](https://innovation.iha.unistra.fr/uploads/images/gallery/2023-05/tKOimage.png)
Divisé en 3 parties :
1. En 1 : il s'agit de la perspective et du point de vue
- Vue de Haut, Bas, Avant, Arrière, Droite, Gauche
- Zoomer, Dézoomer
- Revenir à la vue initiale
2. En 2 : C'est le Plan de construction, c'est là où nous ferons nos conceptions, là
où nous modifierons nos objets.
3. En 3 : il s'agit des différents objets qu'on va utiliser pour créer nos modèles en 3D
Dans l'onglet 3 : cliquez sur l'objet que vous voulez ajouter et faites le glisser
sur le plan de construction :
- Si vous l'ajoutez sur un autre objet, l'objet du dessus sera ajusté sur l'objet de dessous.
- Si vous l'ajoutez sur le plan de construction, il sera "posé au sol"
Modifiez les paramètres de l'objet (rayon, étapes, longueur, largeur et
hauteur).
##### Fonctionnalités principales de TinkerCAD :
Souris :
- Bouton gauche : sélectionner en cliquant sur un objet pour le modifier
- Pour sélectionner plusieurs objet : cliquer, rester appuyé et passer par dessus les objets à sélectionner
- Bouton milieu : déplacer la vue
- Bouton droit : orienter la vue
- Molette : zoomer
Commandes / raccourcis clavier :
- Shift + Clic : Redimensionner un objet en conservant les proportions
- Alt + Clic : Redimensionner un objet en conservant son centre
- Ctrl+C Copier un objet
- Ctrl+V Coller un objet
- Ctrl+Z Revenir en arrière (défaire une action)
- Ctrl+Y Refaire une action à la suite d'un Ctrl+Z
- Ctrl+A Sélectionner toutes les pièces
- Ctrl+G Grouper solide+perçage
##### Modification d'un objet :
- Prendre un cube dans l'onglet forme simple et le placer sur le plan de travail et cliquer dessus
- En approchant la souris sur l’un des carré blanc sur les bords de l’objet, vous allez pouvoir changer la longueur, la largeur de l'objet. Le carré sur le dessus permet de modifier la hauteur de l’objet.
[](https://innovation.iha.unistra.fr/uploads/images/gallery/2023-05/B08image.png)
- Les flèches permettent de faire tourner l’objet
[](https://innovation.iha.unistra.fr/uploads/images/gallery/2023-05/rxTimage.png)
- La dernière icône permet de déplacer votre objet soit vers le haut, soit vers le bas.
[](https://innovation.iha.unistra.fr/uploads/images/gallery/2023-05/82timage.png)
- En cliquant sur les différents chiffres qui apparaissent vous pouvez directement les modifier de manière précise.
[](https://innovation.iha.unistra.fr/uploads/images/gallery/2023-05/Dfximage.png)
- Créer un cube de 20x20x20mm (Longueur x largeur x Hauteur)
- Cliquer sur votre cube et cliquer sur 'solide', vous pouvez modifier les couleurs de votre solide. [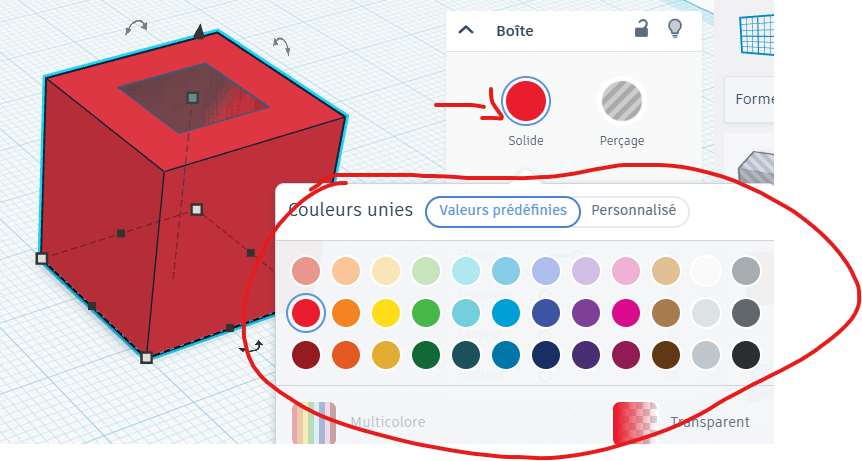](https://innovation.iha.unistra.fr/uploads/images/gallery/2025-06/QKuimage.png)
##### Aligner facilement des objets entre eux :
- Ajouter un second cube mais de 10x10x10mm [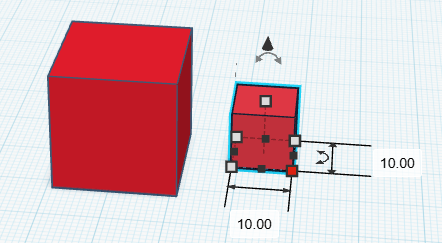](https://innovation.iha.unistra.fr/uploads/images/gallery/2025-06/vHYimage.png)
- sélectionner tous les objets à assembler avec la souris *Rappel : ctrl+A pour tout sélectionner*
- Cliquer sur la touche 'L' ou à l'aide de l'outil 'Aligner' [](https://innovation.iha.unistra.fr/uploads/images/gallery/2025-06/DVtimage.png)
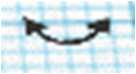
- Aligner la figure comme indiquer ci-dessous en cliquant à l'emplacement 1 puis 2[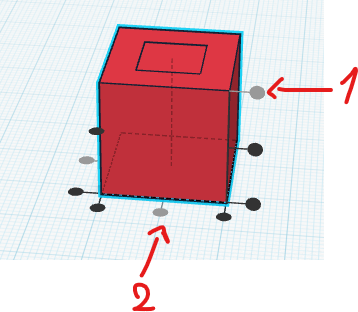](https://innovation.iha.unistra.fr/uploads/images/gallery/2025-06/CWFimage.png)
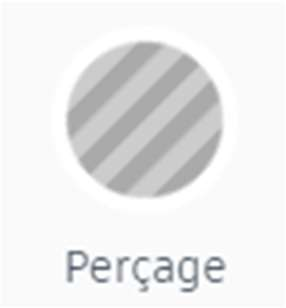
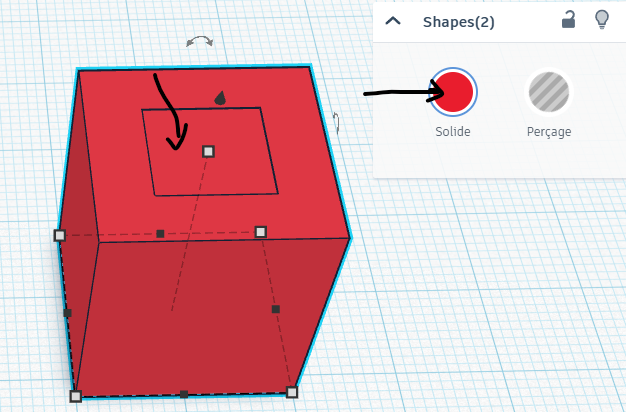
##### Assembler un solide et un perçage pour "graver/creuser" le solide :
- sélectionner le carré intérieur, il apparait en couleur comme "solide"
[](https://innovation.iha.unistra.fr/uploads/images/gallery/2025-06/KChimage.png)
- Le convertir en "perçage" en cliquant sur le bouton "Perçage", il devient gris transparent
[](https://innovation.iha.unistra.fr/uploads/images/gallery/2023-05/rO7image.png)[](https://innovation.iha.unistra.fr/uploads/images/gallery/2025-06/htMimage.png)
- sélectionner le solide et le perçage avec la souris *Rappel : ctrl+A pour tout sélectionner*
- Appuyer sur "Ctrl+G" ou cliquer sur l'icône "Regrouper" :
[](https://innovation.iha.unistra.fr/uploads/images/gallery/2023-05/WR7image.png)
- Vous avez fait un trou dans le cube
[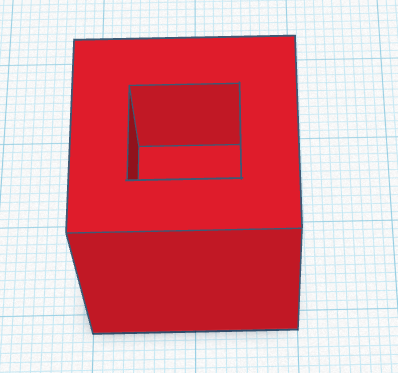](https://innovation.iha.unistra.fr/uploads/images/gallery/2025-06/BL9image.png)
Si vous vous êtes trompé vous pouvez 'dissocier' un modèle regrouper en le sélectionnant et en appuyant sur les touches 'ctrl+maj+G' ou en cliquant sur cette icone.
[](https://innovation.iha.unistra.fr/uploads/images/gallery/2025-06/abgimage.png)
##### Assembler deux solides pour étendre notre solide :
- Sélectionner le plus petit cube et repasser le en mode solide
[](https://innovation.iha.unistra.fr/uploads/images/gallery/2025-06/kmYimage.png)
- A l'aide de la flèche verticale [, montée de quelques millimètre le petit cube](https://innovation.iha.unistra.fr/uploads/images/gallery/2023-05/82timage.png)
[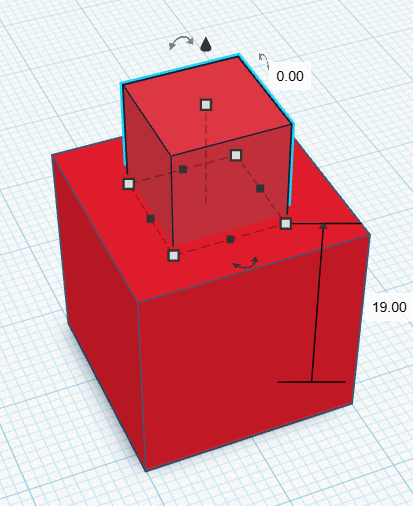](https://innovation.iha.unistra.fr/uploads/images/gallery/2025-06/orqimage.png)
- Sélectionner les deux cubes et regrouper les. Si vous les déplacer, les deux formes sont fusionnées et bougent ensemble
##### Enregistrer votre travail :
- Une fois la pièce finalisée, pour enregistrer, il faut quitter le mode édition, par exemple en cliquant sur le logo en haut à gauche :
[](https://innovation.iha.unistra.fr/uploads/images/gallery/2023-08/tinkercad.png)
- Exporter la pièce au format .STL
Maintenant que vous êtes à l'aise avec les outils de base, passons à la suite.
#### **Objectif : Réaliser notre petite maison en 3D !**
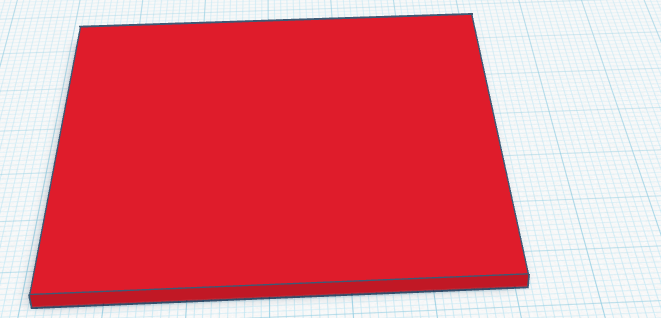
##### Etape 1 : le sol
- Prendre un cube dans la barre des formes à droite
- Le redimensionner : largeur 60 mm, longueur 60 mm, hauteur 2 mm
- Ce cube représente le sol ou le terrain de la maison
- Le placer bien au centre du plan de travail
[](https://innovation.iha.unistra.fr/uploads/images/gallery/2025-06/z8qimage.png)
Pour le moment nous obtenons cela :
##### Etape 2 : les murs
- Prendre un cube
- Dimensions :
- Largeur (X) : 60 mm
- Longueur (Y) : 60 mm
- Hauteur (Z) : 40 mm
Création du vide à l'intérieur de la maison, les murs auront une épaisseur de 2mm.
- Prendre un second cube, le mettre en mode perçage
- Dimensions :
- Largeur (X) : 58 mm (environ 3 mm de moins que le grand cube de chaque côté)
- Longueur (Y) : 58 mm
- Hauteur (Z) : 38 mm (un peu moins haut pour garder un toit solide)
- Aligner au centre les deux cubes ( sélectionner les cubes et cliquer sur l'icone Aligner ou sur la touche L)
- Appuyer sur l'outil 'Regrouper'
- Sélectionner le sol et les murs de la maison et les aligner aux milieu
Vous pouvez surélever les murs de deux millimètres grâce à la flèche verticale.[](https://innovation.iha.unistra.fr/uploads/images/gallery/2023-05/82timage.png)
Vous pouvez fusionner le sol et les murs. Les sélectionner et cliquer sur l'icone 'Regrouper'
Pour le moment nous obtenons cela :
[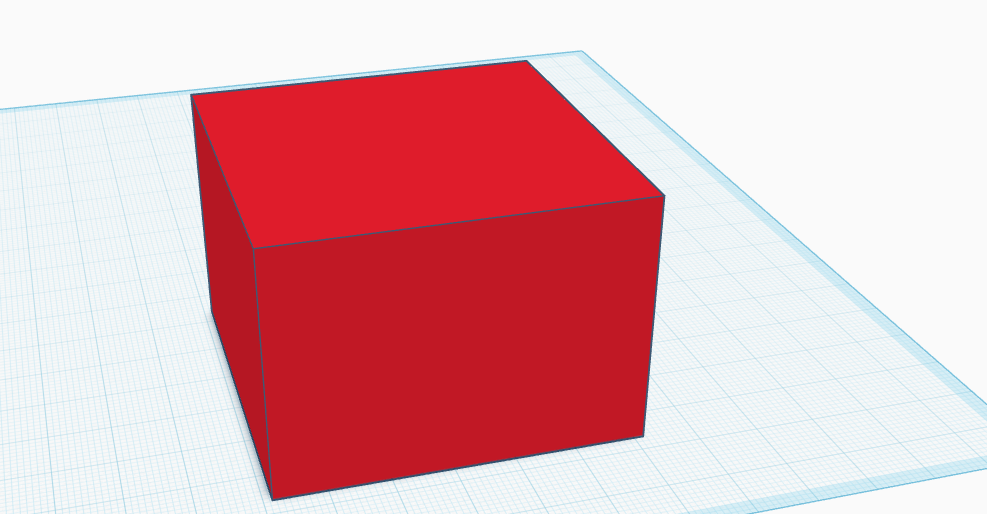](https://innovation.iha.unistra.fr/uploads/images/gallery/2025-06/BKMimage.png)
##### Etape 3 : la porte
- Prendre un cube, le mettre en mode perçage
- Dimensions :
- Largeur (X) : 10 mm
- Longueur (Y) : 10 mm
- Hauteur (Z) : 25 mm
- Le surélever de 2mm
- Aligner le avec le reste de la structure et au milieu d'une face de la maison
- Sélectionner les deux, sélectionner la maison et la porte et regrouper les.
[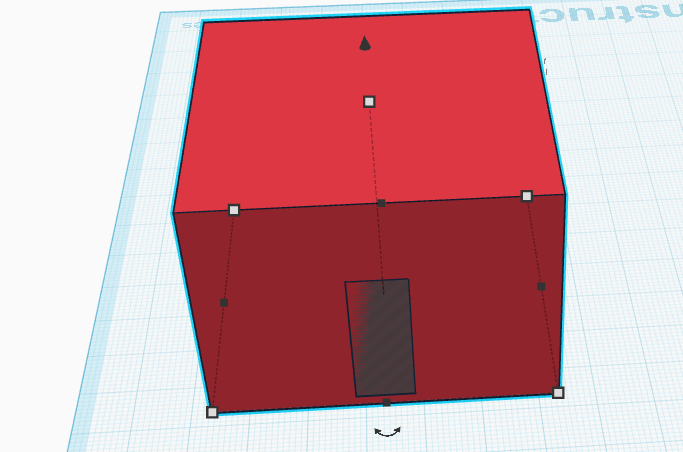](https://innovation.iha.unistra.fr/uploads/images/gallery/2025-06/9Mpimage.png)[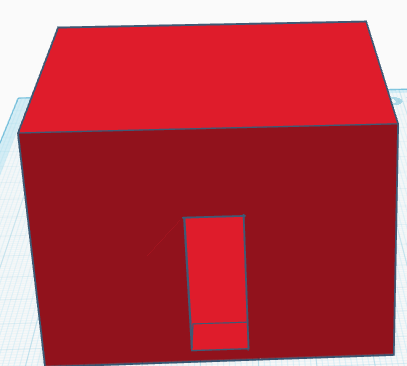](https://innovation.iha.unistra.fr/uploads/images/gallery/2025-06/fqkimage.png)
##### Etape 4 : Le toit
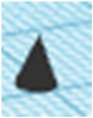
- Prendre la forme 'toit',
[](https://innovation.iha.unistra.fr/uploads/images/gallery/2025-06/P81image.png)
- Dimensions :
- Largeur (X) : 60 mm
- Longueur (Y) : 60 mm
- Hauteur (Z) : 25 mm
- Le surélever de 42mm
- Centrer le toit par rapport au reste de la maison grâce à l'outil 'Aligner'
- Sélectionner le tout, regrouper les.
##### Etape 5 : Personnalisation en autonomie
Laissez les personnaliser leurs maisons en créant leurs propres fenêtres, balcons ou encore une piscine !
# Création d'une Classe - TinkerCAD
# Création d'une classe sur TinkerCAD
### Sur l'ordinateur enseignant
- Créer un [compte sur TinkerCAD](https://www.tinkercad.com/join) en mode Enseignant
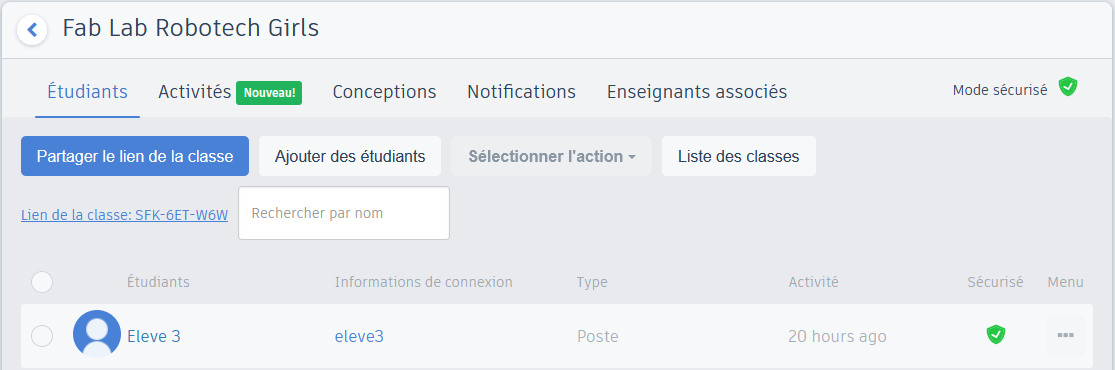
- [Créer une classe](https://www.tinkercad.com/dashboard?type=classes), par exemple "Fab Lab Robotech Girls"
- Ajouter le nombre d'étudiants nécessaire, par exemple eleve1, eleve2, etc
[](https://innovation.iha.unistra.fr/uploads/images/gallery/2023-05/pL9image.png)
- Ajouter une activité
[](https://innovation.iha.unistra.fr/uploads/images/gallery/2023-05/1IRimage.png)
- Ajouter une pièce de référence qui sera personnalisée. Exemple Pièce de 1€ (diamètre 23.25mm, épaisseur 2.33mm) --> ~7min d'impression. 1.5mm d'épaisseur --> ~5min d'impression
[](https://innovation.iha.unistra.fr/uploads/images/gallery/2023-05/P5kimage.png)
### Sur les ordinateurs des étudiants
- Numéroter les ordinateurs, par exemple avec un post-it
- Ouvrir un navigateur
- Ouvrir tinkercad.com, cliquer sur Salles de Classe --> rejoindre une classe
- Ou ouvrir [https://www.tinkercad.com/joinclass](https://www.tinkercad.com/joinclass)
- Taper le code de la classe créée par le professeur (9 caractères)
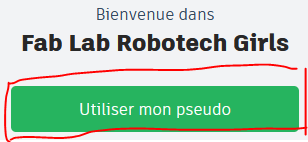
- Taper le pseudo de l'élève correspondant au numéro de l'ordinateur, ex. `eleve1`
[](https://innovation.iha.unistra.fr/uploads/images/gallery/2023-05/50himage.png)[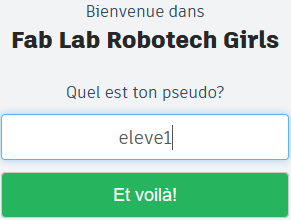](https://innovation.iha.unistra.fr/uploads/images/gallery/2023-05/JyRimage.png)
- Cliquer sur Classes et sélectionner `Fab Lab Robotech Girls`[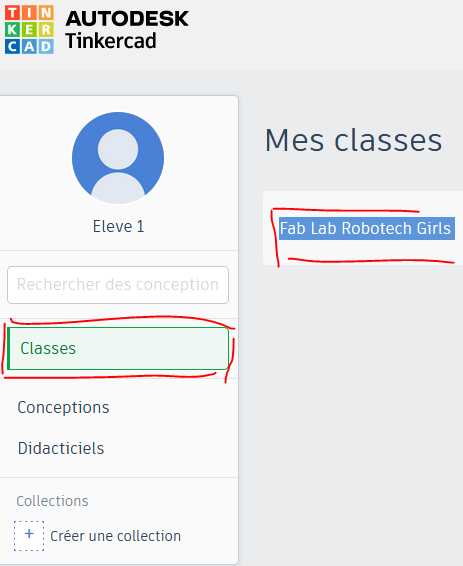](https://innovation.iha.unistra.fr/uploads/images/gallery/2023-05/urjimage.png)
- Sélectionner l'activité
- Cliquer "Copier et éditer"
[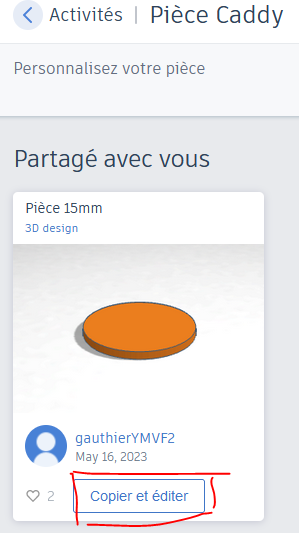](https://innovation.iha.unistra.fr/uploads/images/gallery/2023-05/2c6image.png)
# Astuces avancées - TinkerCAD
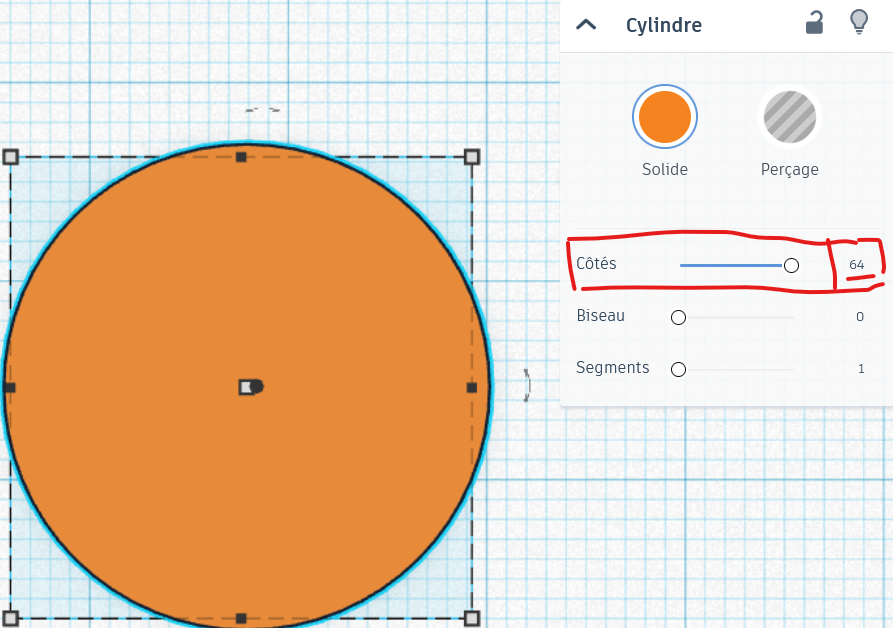
### Pièces de révolution
TinkerCAD ne gère pas les surfaces paramétriques. Par exemple un cylindre est au mieux un polygone de 64 faces :
[](https://innovation.iha.unistra.fr/uploads/images/gallery/2024-11/Ncfimage.png)
Ainsi, pour réaliser une pièce de révolution à partir d'un dessin 2D, il suffit de le faire suffisamment fin et de le copier 64 fois en le faisant tourner de 180°/64. Exemple :
[](https://innovation.iha.unistra.fr/uploads/images/gallery/2024-11/p78image.png)
- Le dessin doit être à peu près symétrique par rapport au milieu de la feuille
[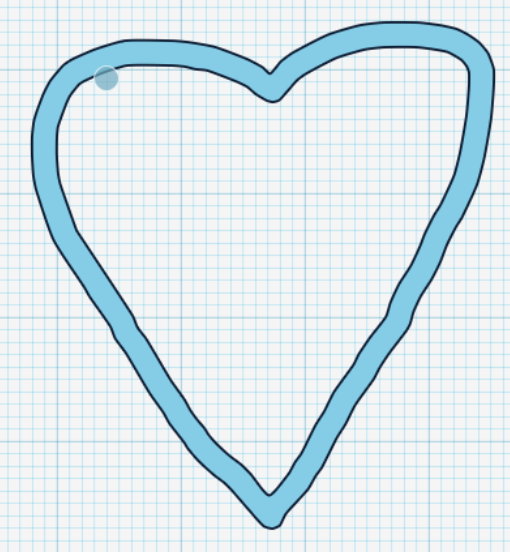](https://innovation.iha.unistra.fr/uploads/images/gallery/2024-11/HN1image.png)
- extrusion de 1mm
[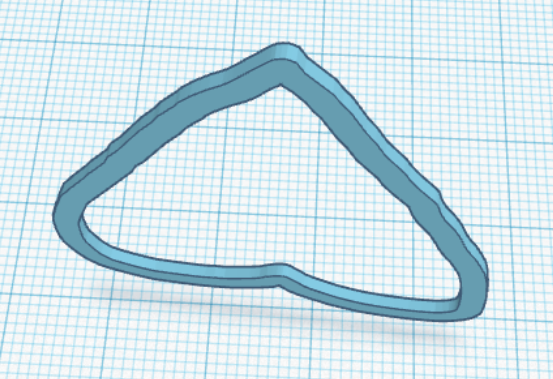](https://innovation.iha.unistra.fr/uploads/images/gallery/2024-11/IHJimage.png)
- Duplication ctrl+d et rotation de 4°
[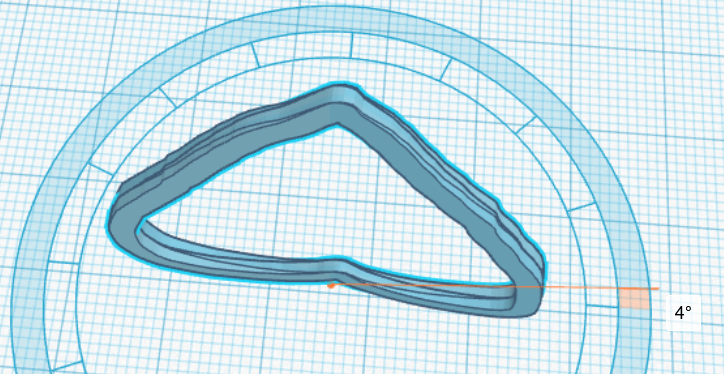](https://innovation.iha.unistra.fr/uploads/images/gallery/2024-11/cr4image.png)
[https://youtu.be/G5J1C8Iur3s?feature=shared&t=130](https://youtu.be/G5J1C8Iur3s?feature=shared&t=130)
### Réaliser des pièces courbes
[https://www.youtube.com/watch?v=jmBLSJB13OA](https://www.youtube.com/watch?v=jmBLSJB13OA)
# Modélisation 3D - FreeCAD
### Qu'est ce que FreeCAD?
FreeCAD est un logiciel de modélisation en 3D comparable à [Solidworks](https://www.solidworks.com/) ou [AutoCAD](https://www.autodesk.com/products/autocad/overview). Son grand avantage vient du fait que son code est ouvert (open-source) ainsi que sa gratuité. Il est installable sur Windows, MacOS ou Linux et son fonctionnement peut être étendu grâce à des extensions codées en Python.
Freecad est un outil paramétrique, ce qui signifie qu'un objet peut être créé et retravaillé plus tard sans que cela détruise le modèle (Sa géométrie devra uniquement être retravaillée).
### Facilité d'utilisation
Difficulté
7/10~8/10
Pré-connaissances nécéssaires
Oui
### Ressources pour apprendre à utiliser FreeCAD :
- Atelier MOOC sur la modélisation 3D via un "Workbench" FreeCAD : [https://forum.freecad.org/viewtopic.php?t=37584](https://forum.freecad.org/viewtopic.php?t=37584)
- [https://framagit.org/freecad-france/mooc-workbench](https://framagit.org/freecad-france/mooc-workbench)
- [https://nuage.freecad-france.com/s/F7dqmScjQ5yGxLa](https://nuage.freecad-france.com/s/F7dqmScjQ5yGxLa)
- [https://college-jean-mace-portes-les-valence.web.ac-grenoble.fr/article/tuto-modelisation-3d-freecad-decouverte-1](https://college-jean-mace-portes-les-valence.web.ac-grenoble.fr/article/tuto-modelisation-3d-freecad-decouverte-1)
- [https://wiki.atelierso.fr/Fablab/Freecad-les-bases](https://wiki.atelierso.fr/Fablab/Freecad-les-bases)
- [http://www.fablab-utopi.org/sinitier-a-freecad/](http://www.fablab-utopi.org/sinitier-a-freecad/)
- BIEN DEMARRER AVEC FreeCAD [https://www.youtube.com/playlist?list=PLmCpX3se4fUlRZIIgG4Ply7Rxj6PYFisX](https://www.youtube.com/playlist?list=PLmCpX3se4fUlRZIIgG4Ply7Rxj6PYFisX)
-
- La chaîne Youtube de [CAD printer](https://www.youtube.com/channel/UChwUxlPx6EP4hKFQyA4rCuQ) est un bon moyen de débuter sur Freecad.
Lien Seafile :
\- [https://seafile.unistra.fr/smart-link/2c15c1b8-21bd-4cdc-855f-df7b9378bafa/](https://seafile.unistra.fr/smart-link/2c15c1b8-21bd-4cdc-855f-df7b9378bafa/)
En Anglais :
- Le Wiki/Guide utilisateur de FreeCAD:
- [https://www.freecadweb.org/wiki/Manual:Introduction](https://www.freecadweb.org/wiki/Manual:Introduction)
- [https://www.youtube.com/channel/UC\_9HwDkwxllq5lFGkYBIH9g](https://www.youtube.com/channel/UC_9HwDkwxllq5lFGkYBIH9g)
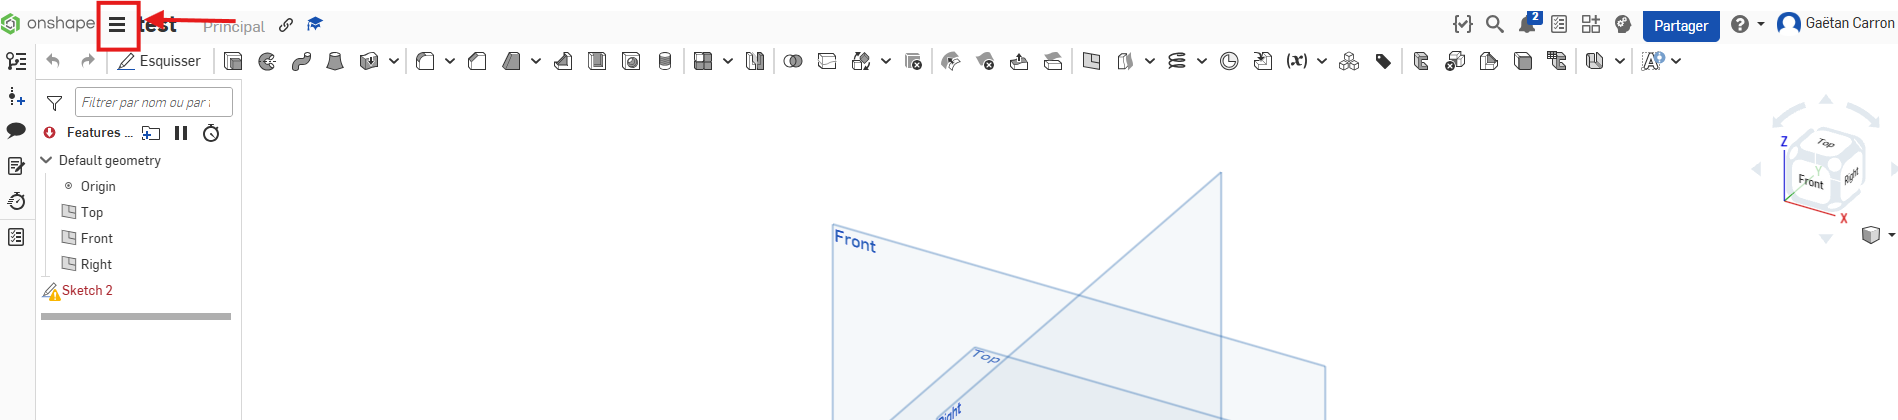
# Modélisation 3D - ONSHAPE
**Onshape** est un logiciel de **CAO (Conception Assistée par Ordinateur) 3D** entièrement basé sur le **cloud**. Il permet de **modéliser des pièces, des assemblages et des dessins techniques** directement depuis un navigateur web, sans besoin d'installation.
Dans un premier temps, rendez vous sur le site de onshape via le lien suivant et créer vous un compte:
[https://www.onshape.com/fr/](https://www.onshape.com/fr/)
Une fois votre compte créer et que vous vous êtes connecter, vous arrivez sur cette vue.
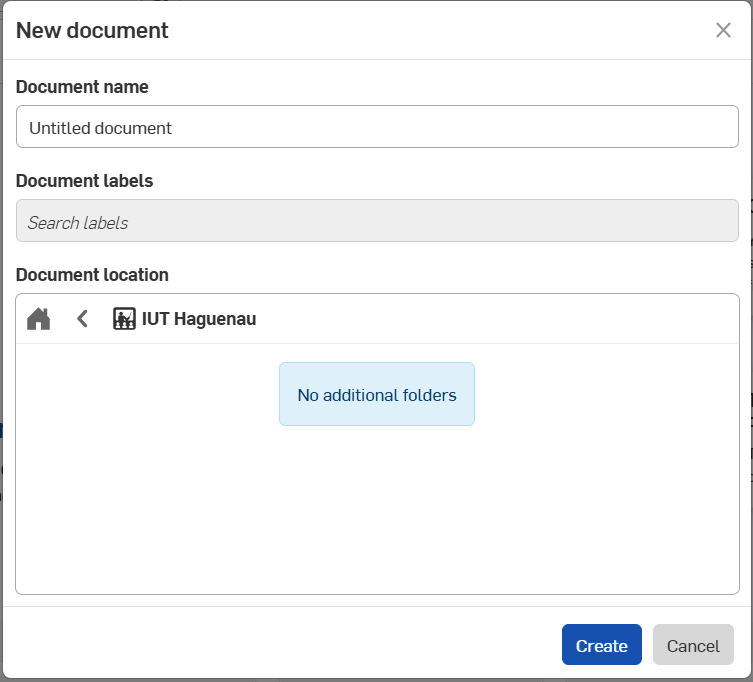
Cliquer sur "Create" puis "Document".
[](https://innovation.iha.unistra.fr/uploads/images/gallery/2025-05/9O7image.png)
Dans la partie "Document name" vous pouvez donner un nom à votre document.
[](https://innovation.iha.unistra.fr/uploads/images/gallery/2025-05/O99image.png)
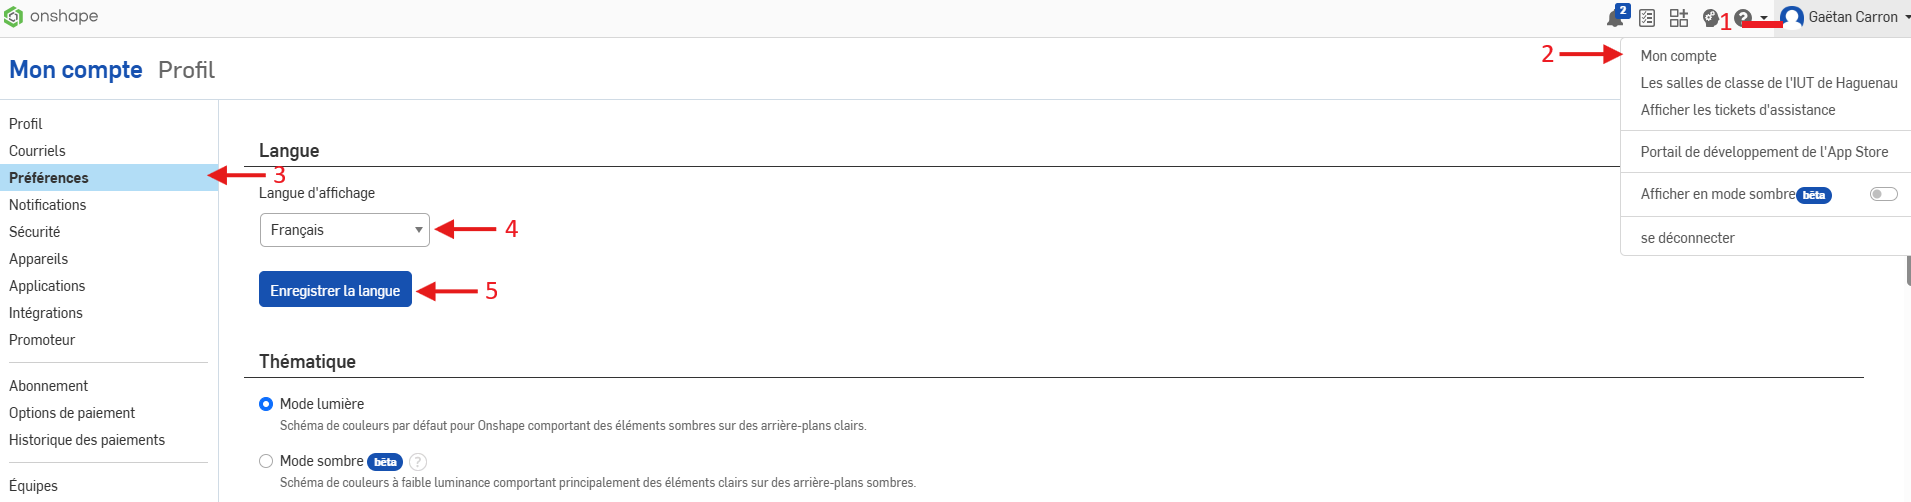
##### **Changer la langue de l'interface :**
1\) Cliquer sur votre profil
2\) Aller dans "My account"
3\) Aller dans "Preferences"
4\) Sélectionner la langue souhaité
5\) Enregistrez les changement
[](https://innovation.iha.unistra.fr/uploads/images/gallery/2025-10/Kfqimage.png)
##### **Sélection de l'unité de mesure :**
Cliquer sur le bouton du menu déroulant.
Sélectionner "Unités d'espace de travail..."
[](https://innovation.iha.unistra.fr/uploads/images/gallery/2025-10/image.png)
##### **Découverte de l'interface :**
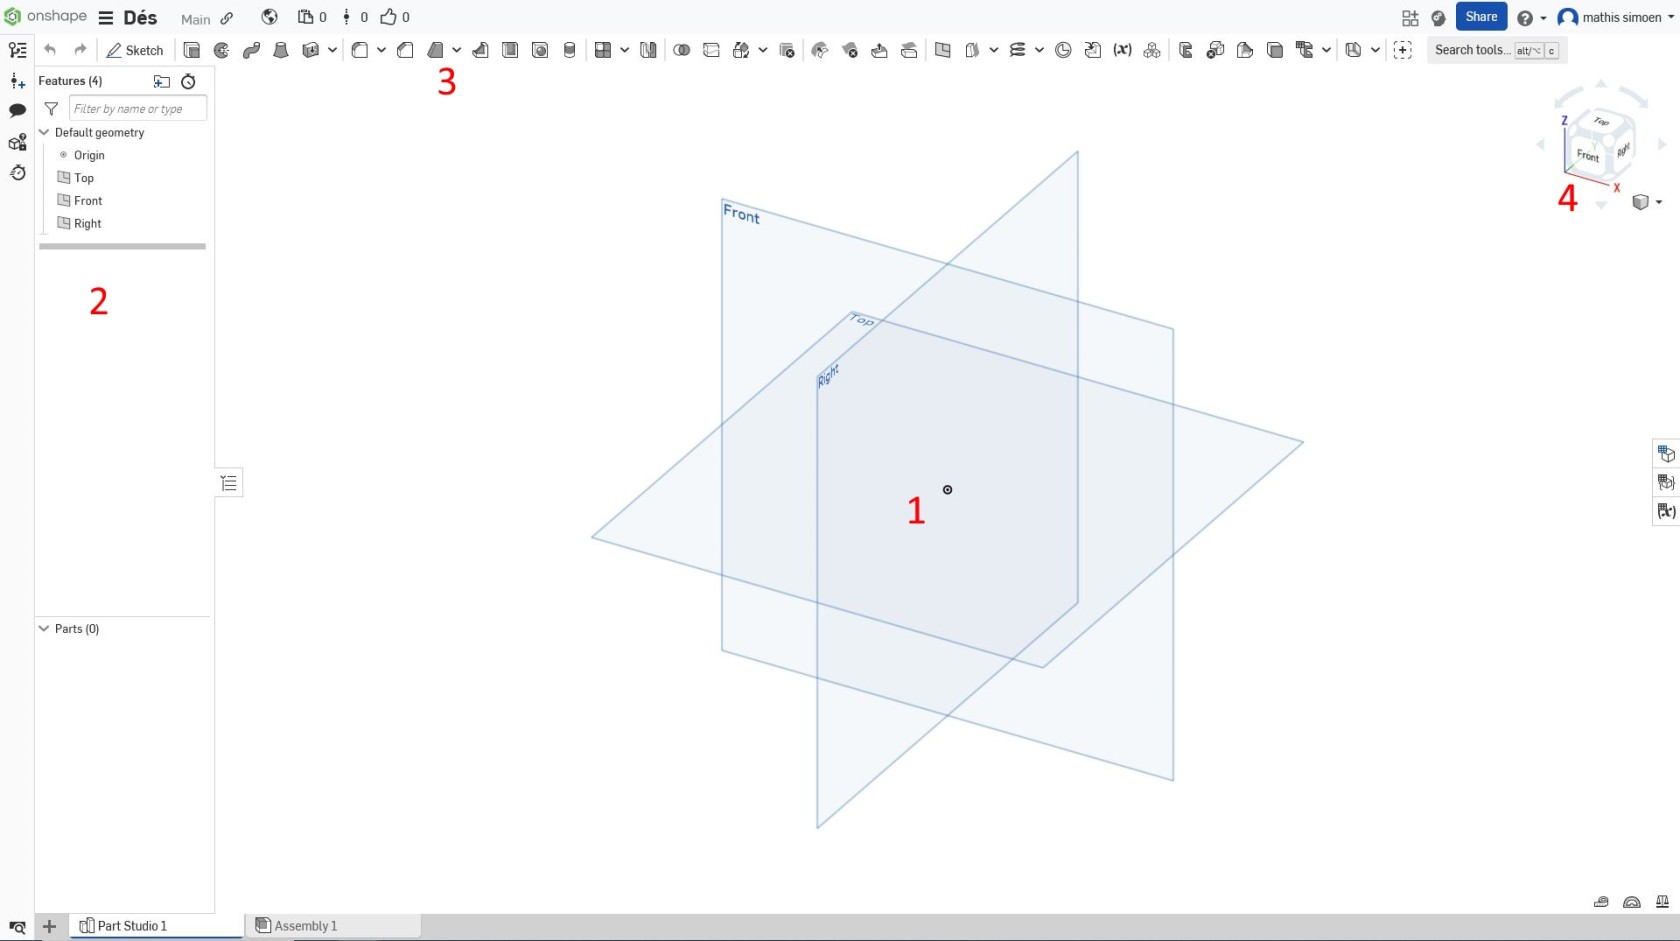
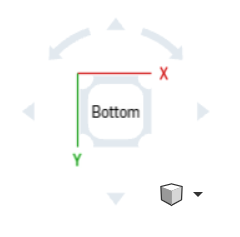
Zone 1 : Représente notre espace de travail. Les 3 carrés nommées "Front" "Top" et "Right" représentent les différents plans ou vous pouvez travailler
Zone 2 : Ceci est l'arborescence, nous allons retrouver chaque esquisse, chaque fonction que nous utilisons chronologiquement, ce qui permet de revenir en arrière pour faire des modifications facilement
Zone 3 : Représente tout les outils que vous pourrez utiliser pour créer votre projet. En fonction des outils que vous utilisez la zone 3 peut afficher de nouveaux outils.
Zone 4 : Permet changer de vue plus facilement :
- Cliquer gauche sur les faces pour vous déplacer sur la face souhaité
- Maintenez clique droit de votre souris et la déplacer pour obtenir la vue souhaité
[](https://innovation.iha.unistra.fr/uploads/images/gallery/2025-06/KoMimage.png)
Pour vous changer de vue dans la zone de travail vous pouvez maintenir :
- Le clique molette
- Le clique droit
de votre souris et la déplacer.
##### **Création d'une boite :**
Pour le tutoriel nous modéliserons une boîte de rangement avec couvercle coulissant :
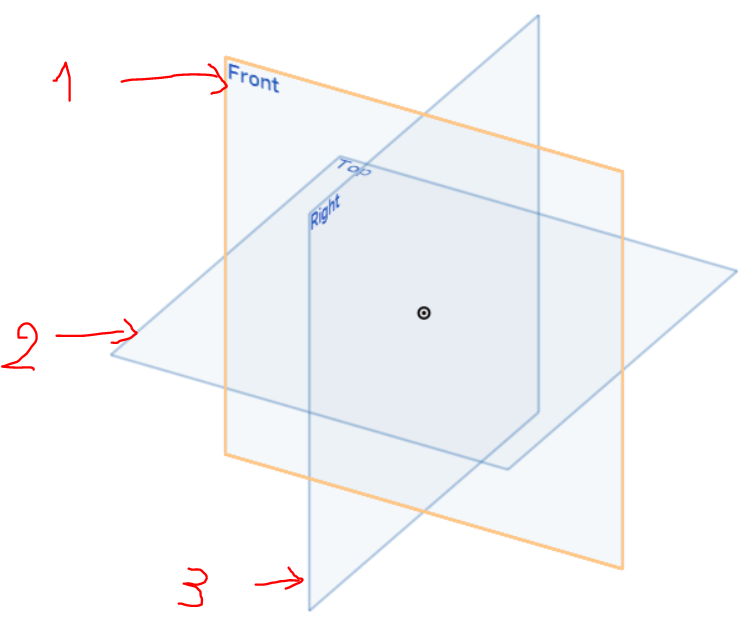
\- Sélectionner le plan sur lequel vous voulez travailler ->"Front" (1), "Top" (2) ou "Right"" (3)
[](https://innovation.iha.unistra.fr/uploads/images/gallery/2025-05/6l7image.png)
\- Appuyer sur "Sketch" afin de pouvoir créer une esquisse en deux dimensions que nous pourrons extruder par la suite pour obtenir un modèle en trois dimensions
[](https://innovation.iha.unistra.fr/uploads/images/gallery/2025-05/98Eimage.png)
La barre d'outils à changer afin d'obtenir de nouveaux outils utiles pour esquisser notre modèle en deux dimensions.
[](https://innovation.iha.unistra.fr/uploads/images/gallery/2025-05/aPZimage.png)
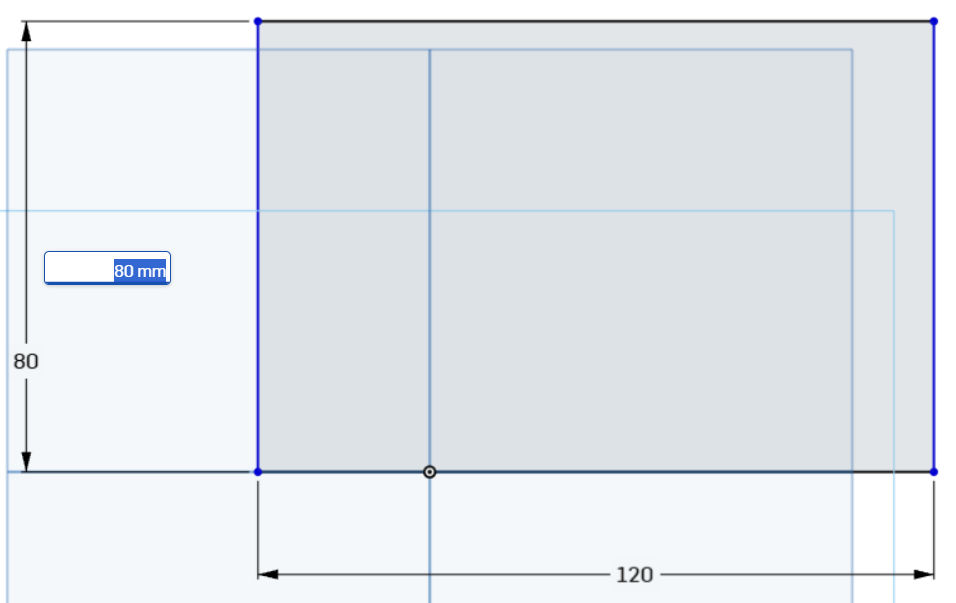
Sélectionner l'outil création de rectangle, cliquer gauche sur le plan de travail pour faire apparaitre le rectangle et cliquer à nouveau à un autre endroit pour finaliser le rectangle.
[](https://innovation.iha.unistra.fr/uploads/images/gallery/2025-06/tyhimage.png)
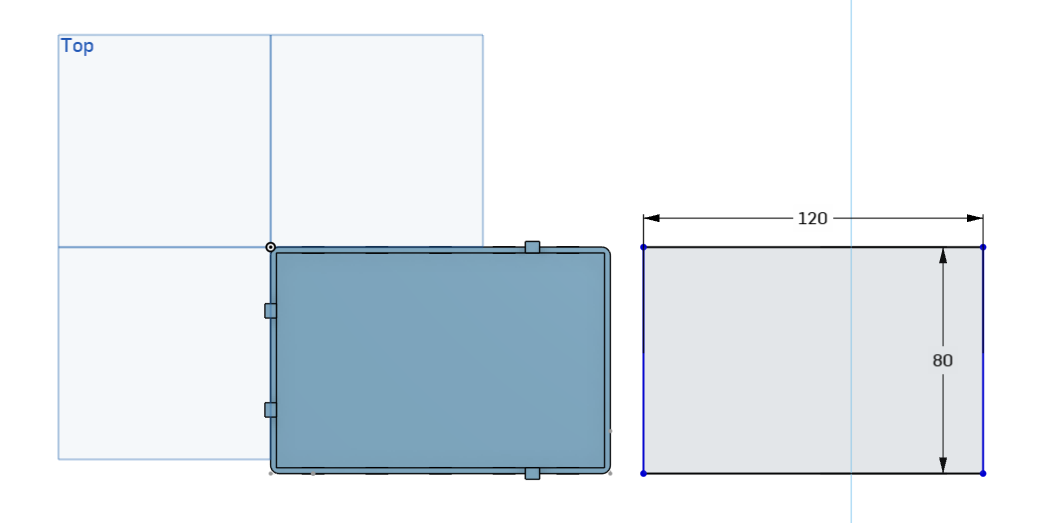
Pour attribuer les bonnes cotations(dimensions) à notre esquisse, cliquer sur "Dimension" ou sur la touche "D" du clavier et cliquer sur un côté puis recliquer dans le vide. Ecrire dans la case blanche la dimension souhaité -> 80mm de largeur et 120mm de longueur.
[](https://innovation.iha.unistra.fr/uploads/images/gallery/2025-06/LcWimage.png)
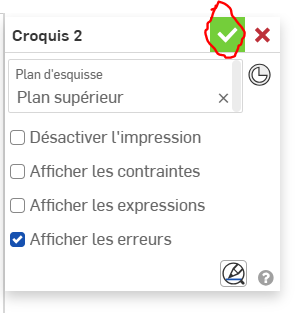
Vous pouvez confirmer l'esquisse
[](https://innovation.iha.unistra.fr/uploads/images/gallery/2025-06/ftOimage.png)
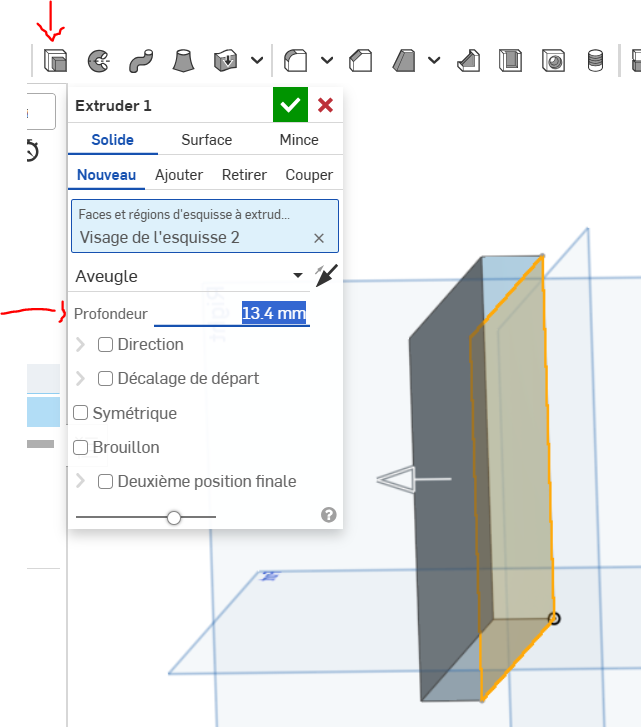
Cliquer sur l'outil "Extruder" (Maj+E) puis cliquer sur votre rectangle. Dans "Profondeur" écrire "50" puis cliquez sur la touche entrée du clavier. Nous aurons un pavé de dimensions 120x80x50mm.
[](https://innovation.iha.unistra.fr/uploads/images/gallery/2025-06/cF6image.png)
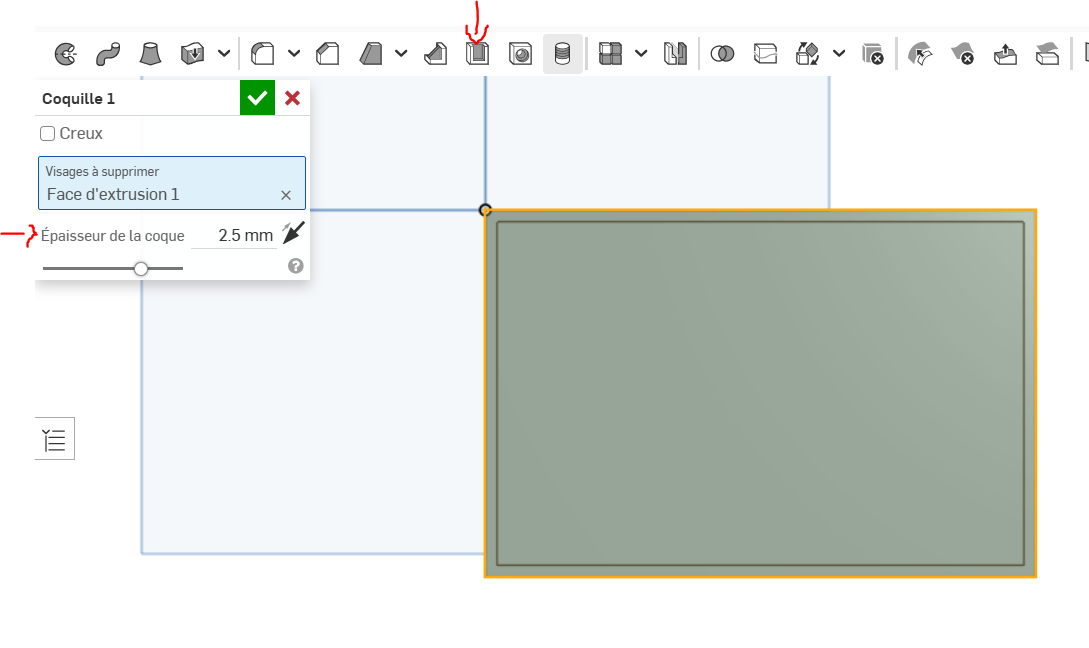
Ensuite, cliquer sur l'outil "coquille" puis sur le pavé. Dans "Epaisseur de la coque" entrer "2" et appuyer sur la touche entrée du clavier.
[](https://innovation.iha.unistra.fr/uploads/images/gallery/2025-06/mrRimage.png)
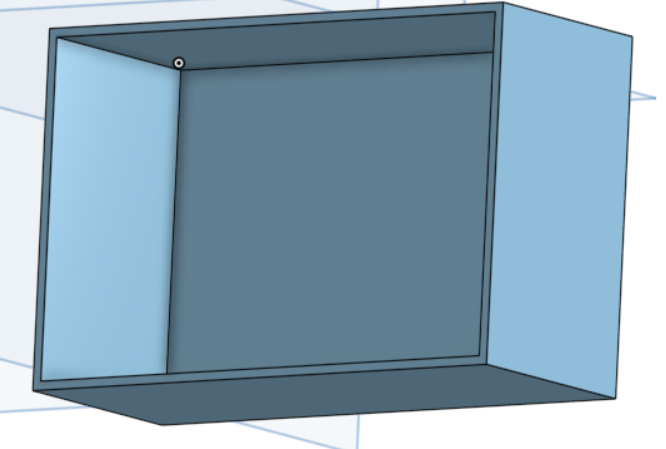
Vous devez obtenir une forme comme celle-ci
[](https://innovation.iha.unistra.fr/uploads/images/gallery/2025-06/G4Gimage.png)
Nous allons créer des trous rond d'aération autour de cette boite.
Cliquez sur "Esquisser" puis sur une des faces de coté avec la plus grande longueur de la boîte.
[](https://innovation.iha.unistra.fr/uploads/images/gallery/2025-06/Pnuimage.png)
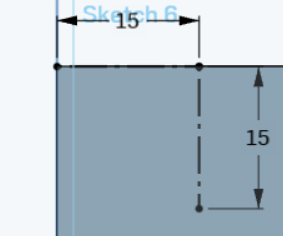
Nous allons créer des traits de construction afin de nous aider à placer notre trou d'aération à 15mm du bord de la boîte.
[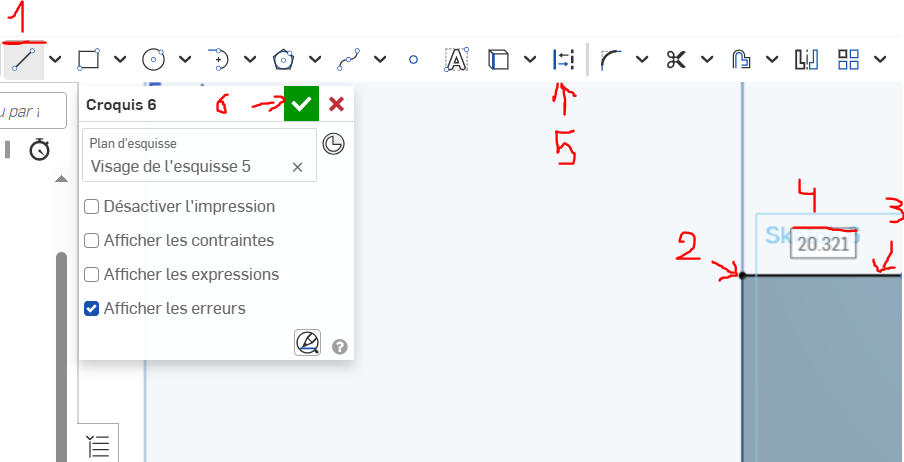](https://innovation.iha.unistra.fr/uploads/images/gallery/2025-06/ujOimage.png)
1\) Sélectionner l'outil trait
2\) Cliquer sur le coin en haut à gauche de votre pièce
3\) Puis rester sur l'arrête de votre boîte et créer un trait en cliquant un peu plus loin
4\) Un rectangle blanc avec un valeur apparait. Il suffit d'écrire la dimension souhaiter puis appuyer sur la touche entrer. Ici 15 mm.
5\) Appuyer sur la touche "Echap" avant de sélectionner le trait que vous venez de crée et de cliquer sur l'outil "Trait de construction"
6\) Valider votre esquisse en cliquant sur le bouton vert
Réaliser les mêmes étapes précédente mais cette fois-ci pour réaliser un trait de construction perpendiculaire à celui déjà réalisée (voir image ci-dessous).
[](https://innovation.iha.unistra.fr/uploads/images/gallery/2025-06/SRrimage.png)
-Créer un nouveau Sketch/Esquisse
[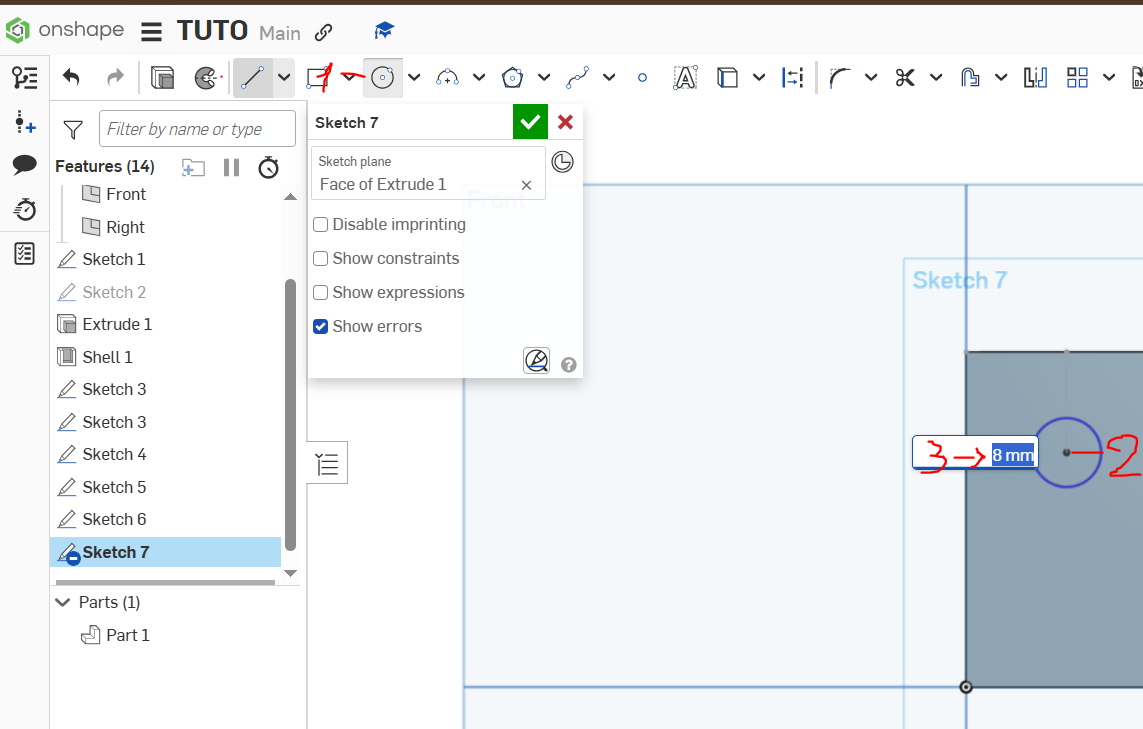](https://innovation.iha.unistra.fr/uploads/images/gallery/2025-06/oELimage.png)
1\) Utiliser l'outil cercle
2\) Cliquer sur le point du dernier trait de construction que vous avez réaliser, Cliquer à nouveau pour créer le cercle.
3\) Indiquer la dimension souhaitée : 8mm de diamètre et appuyer sur la touche 'entrée'.
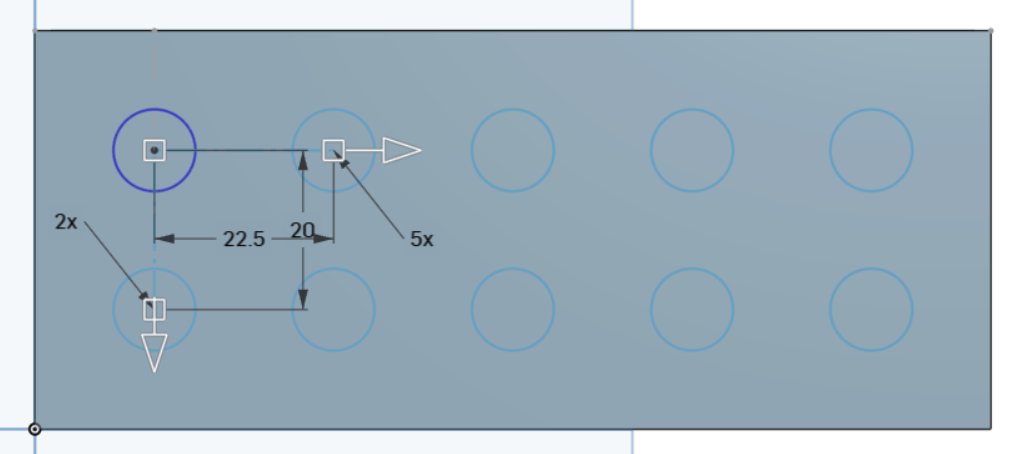
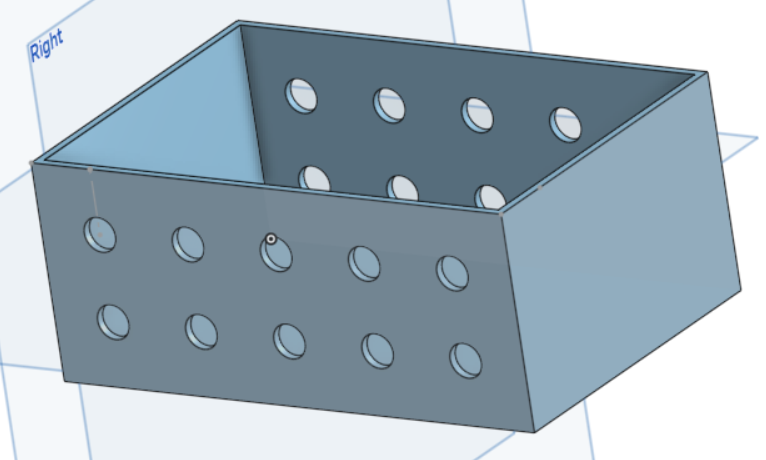
- Cliquer sur l'outil "linear pattern" [](https://innovation.iha.unistra.fr/uploads/images/gallery/2025-06/aCTimage.png) puis sur votre cercle. Modifier les valeurs pour qu'elles correspondent à l'image ci-dessous
Vous devez obtenir cela avant de valider votre esquisse
[](https://innovation.iha.unistra.fr/uploads/images/gallery/2025-06/JaSimage.png)
[](https://innovation.iha.unistra.fr/uploads/images/gallery/2025-06/81simage.png)
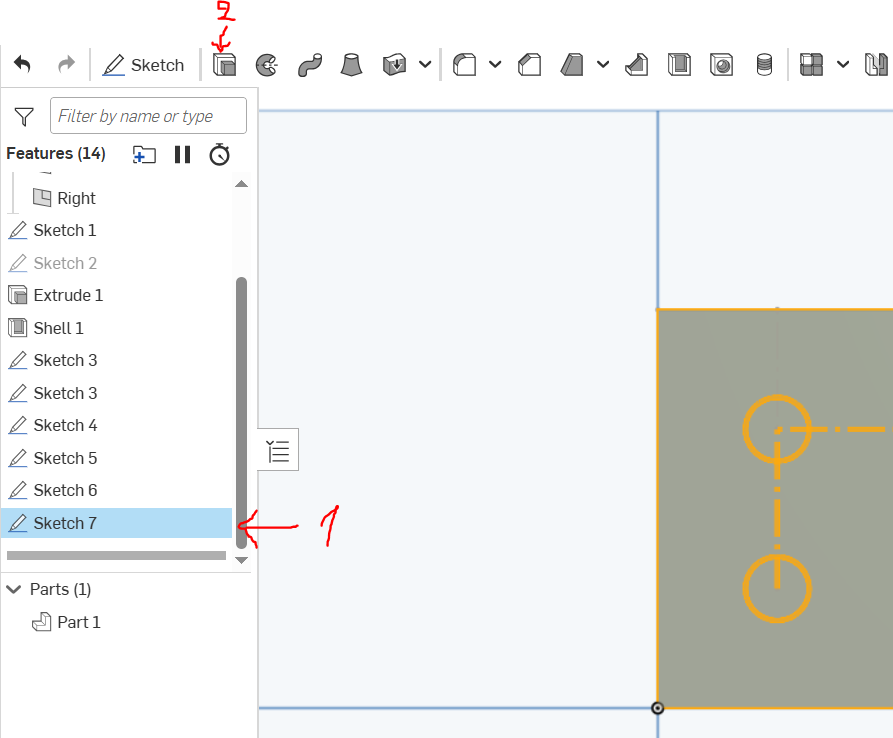
1\) Sélectionner l'esquisse que vous venez de réaliser
2\) Cliquer sur l'outil 'Extruder'
[](https://innovation.iha.unistra.fr/uploads/images/gallery/2025-06/s4dimage.png)[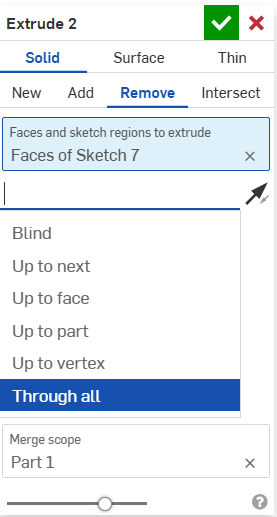](https://innovation.iha.unistra.fr/uploads/images/gallery/2025-06/V9Wimage.png)
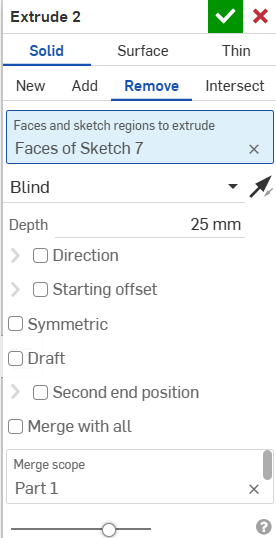
Cette petite fenêtre s'ouvre, allez dans 'Remove' puis dans la liste déroulante sélectionner 'Through all' et valider.
[](https://innovation.iha.unistra.fr/uploads/images/gallery/2025-06/uUlimage.png)
Maintenant que vous connaissez les outils de base, je vais à chaque fois vous indiquer la forme à obtenir. Vous pourrez vous référer aux consignes plus haut dans le tuto pour vous rafraichir la mémoire si vous avez un doute.
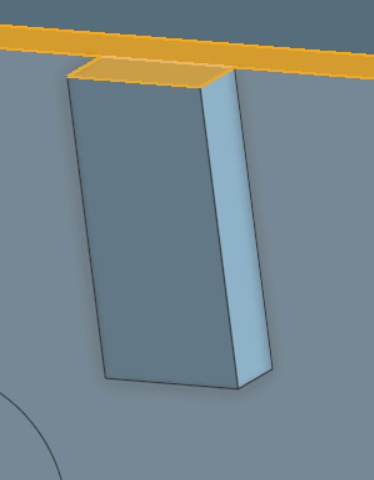
-Placer vous en face d'une des faces non trouées de votre boîte de votre modèle et réaliser un trait de construction de 20 mm de longueur sur l'arrête la plus haute.
[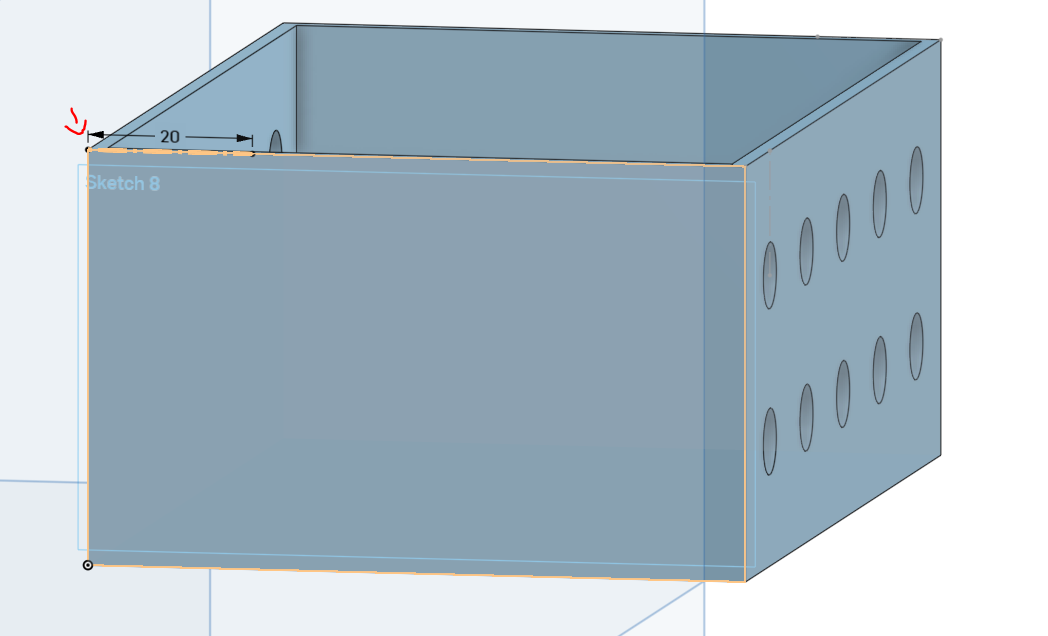](https://innovation.iha.unistra.fr/uploads/images/gallery/2025-06/mLPimage.png)
\- Réaliser un rectangle de 5mm par 10mm au bout des 20mm et en utilisant l'outil linear pattern le doubler à 35mm comme ci-dessous.
[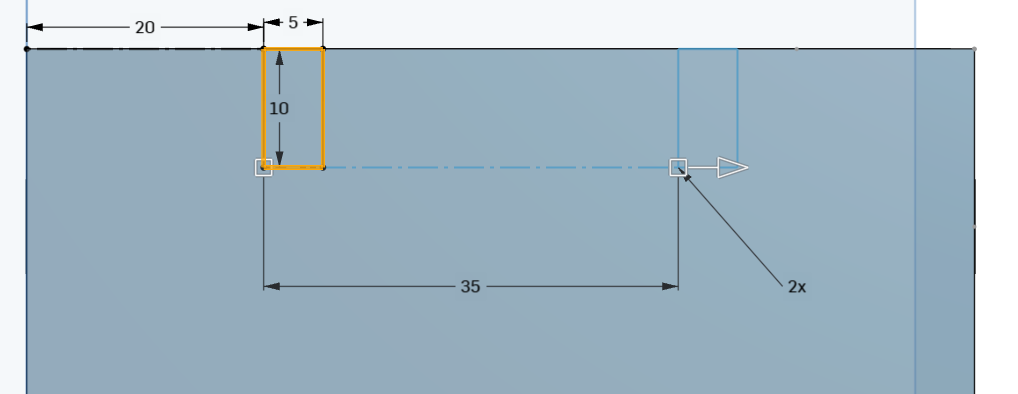](https://innovation.iha.unistra.fr/uploads/images/gallery/2025-06/6n3image.png)
\- Valider votre esquisse et extruder la à 2mm de profondeur
[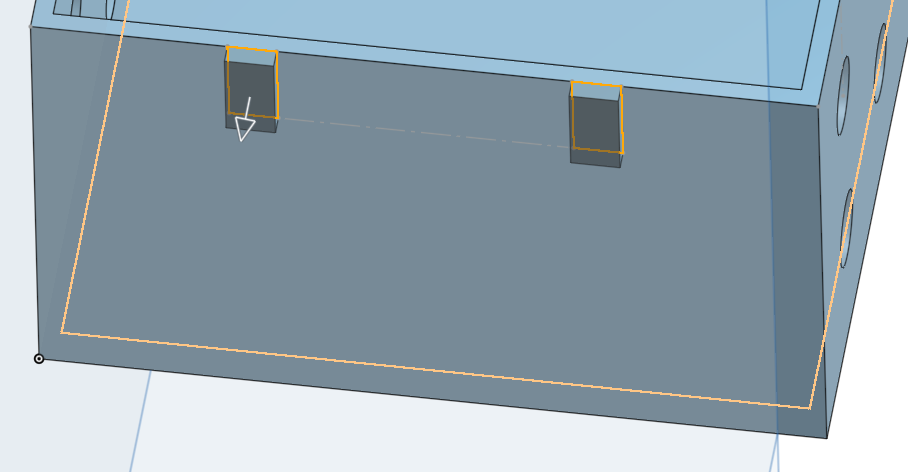](https://innovation.iha.unistra.fr/uploads/images/gallery/2025-06/3jYimage.png)
\- Placer vous en vue de dessus de votre modèle
[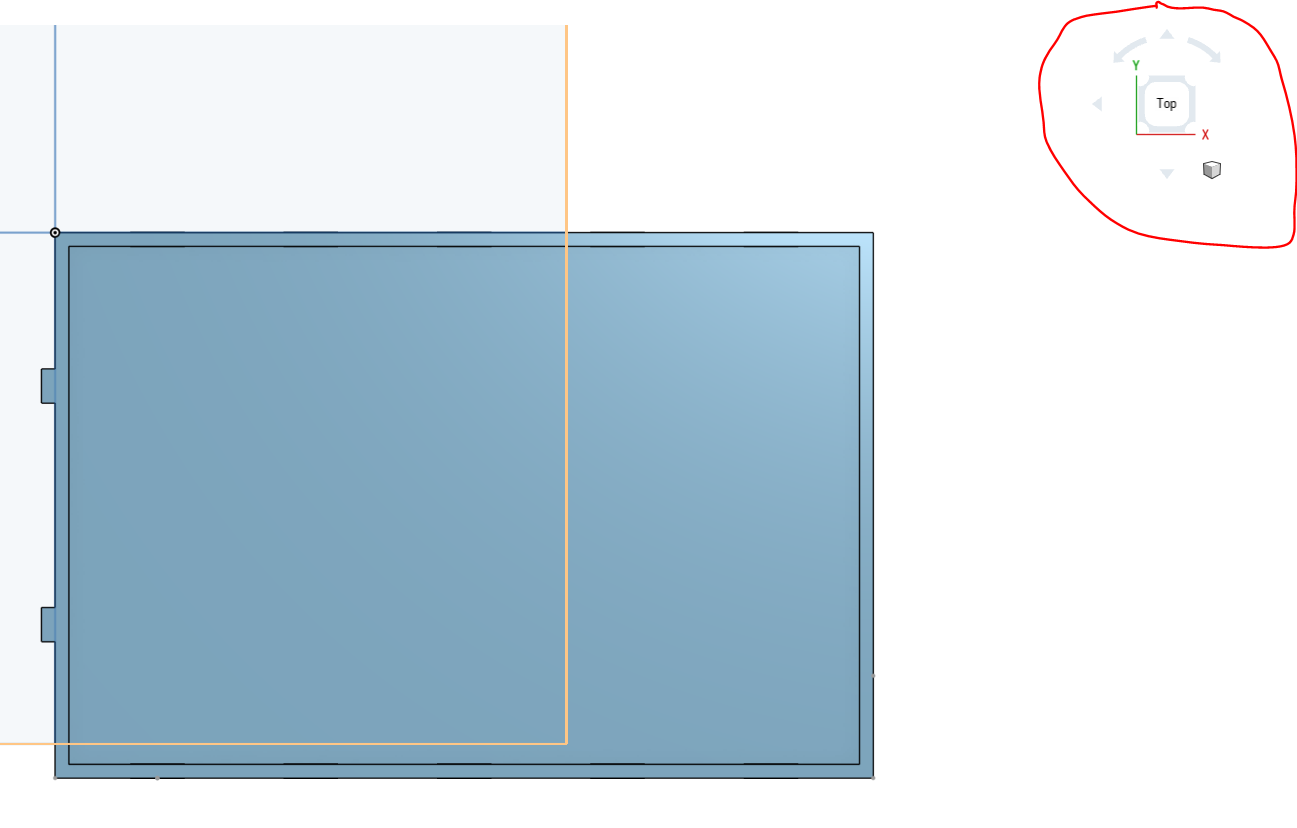](https://innovation.iha.unistra.fr/uploads/images/gallery/2025-06/H3fimage.png)
\- Créer une nouvelle esquisse en sélectionnant l'épaisseur de votre boîte.[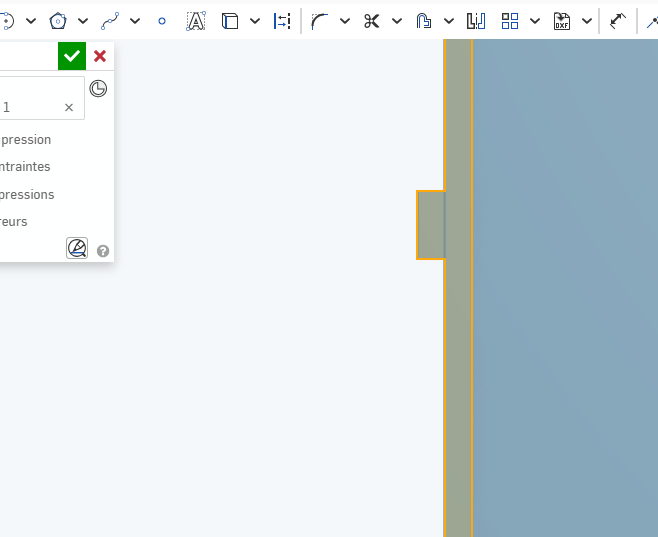](https://innovation.iha.unistra.fr/uploads/images/gallery/2025-06/O7Fimage.png)
\- En utilisant l'outil 'ligne'', fermer la forme rectangle comme ci-dessous. Si vous ne pouvez pas extruder votre pièce en ayant utilisé l'outil ligne, utiliser l'outil rectangle et repasser sur le rectangle.
[](https://innovation.iha.unistra.fr/uploads/images/gallery/2025-06/Xddimage.png)
\- Sélectionner les deux rectangles que vous venez de créer et extruder les de 4mm
[](https://innovation.iha.unistra.fr/uploads/images/gallery/2025-06/3J2image.png)
\- Créer une nouvelle esquisse en sélectionnant les deux faces avant de la forme que vous venez de créer. En utilisant l'outil 'rectangle' séparer la face en deux comme indiqué ci-dessous.
[](https://innovation.iha.unistra.fr/uploads/images/gallery/2025-06/P6himage.png)
\- Sélectionner les et extruder les de 2 mm.
[](https://innovation.iha.unistra.fr/uploads/images/gallery/2025-06/iitimage.png)
\- Sélectionner les deux arrêtes comme ci-dessous et appuyer sur l'outil 'chanfrein' [](https://innovation.iha.unistra.fr/uploads/images/gallery/2025-06/Eaqimage.png)
[](https://innovation.iha.unistra.fr/uploads/images/gallery/2025-06/ZyRimage.png)
[](https://innovation.iha.unistra.fr/uploads/images/gallery/2025-06/PXtimage.png)
Cela va nous servir à accueillir le couvercle glissant.
Réaliser la même chose sur les cotés de votre boite au endroit indiquer ci dessous en répétant les étapes ci dessus.
Pour rappel :
\- Sélectionner la face sur laquelle on travail
\- Créer une esquisse
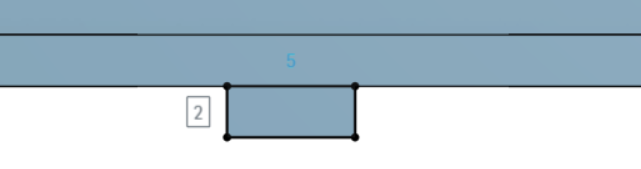
\- Créer un trait de construction de 25 mm à l'horizontale sur l'arrête du haut de votre esquisse comme indiqué ci-dessous
\- Utiliser l'outil rectangle pour obtenir un rectangle de 5x10mm
[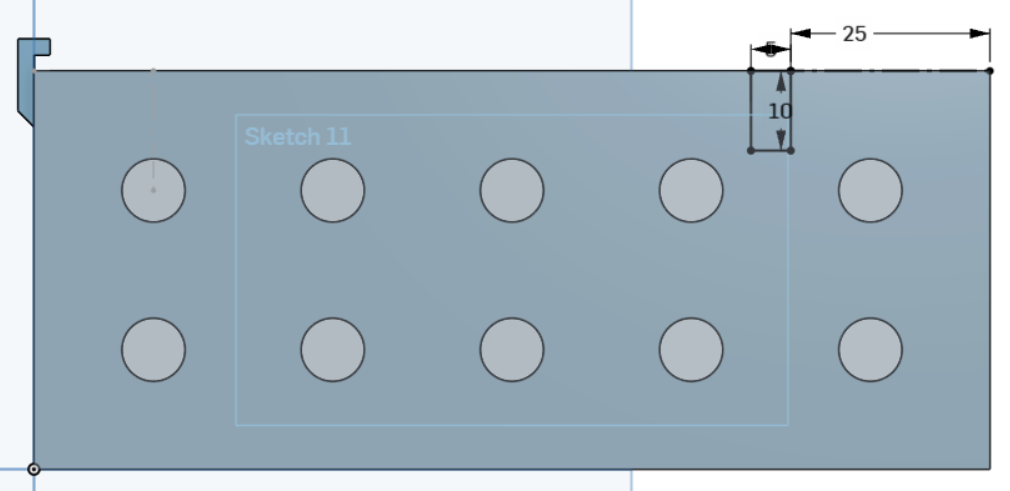](https://innovation.iha.unistra.fr/uploads/images/gallery/2025-06/jroimage.png)
\- Extruder de 2mm
\- Placer vous en vue du dessous, sélectionner la face du dessus et créer une nouvelle esquisse
[](https://innovation.iha.unistra.fr/uploads/images/gallery/2025-06/q4Limage.png)
-Utiliser l'outil rectangle pour réaliser un rectangle sur la face supérieur de l'esquisse que vous venez d'extruder puis extruder la.
[](https://innovation.iha.unistra.fr/uploads/images/gallery/2025-06/Ldcimage.png)[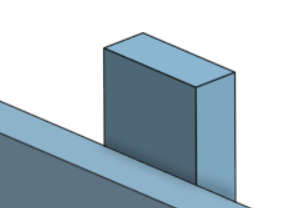](https://innovation.iha.unistra.fr/uploads/images/gallery/2025-06/HVkimage.png)
\- Placer vous sur la face intérieure de la pièce que vous venez d'extruder et sélectionner la, créer une nouvelle esquisse et réaliser un rectangle sur la moitié de cette dernière. Extruder la de 2mm.
[](https://innovation.iha.unistra.fr/uploads/images/gallery/2025-06/GiAimage.png)[](https://innovation.iha.unistra.fr/uploads/images/gallery/2025-06/4ghimage.png)
[](https://innovation.iha.unistra.fr/uploads/images/gallery/2025-06/AZ0image.png)
\- Reproduisez les étapes sur la face opposée.
Afin de ne pas avoir les bord trop pointus, nous allons les arrondir.
Sélectionner les 4 arrêtes verticales de votre boîtes et appuyer sur l'outil 'congé' [](https://innovation.iha.unistra.fr/uploads/images/gallery/2025-06/IEsimage.png)
[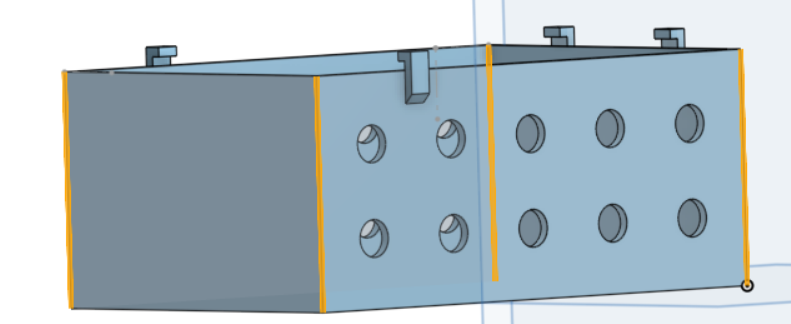](https://innovation.iha.unistra.fr/uploads/images/gallery/2025-06/25wimage.png)
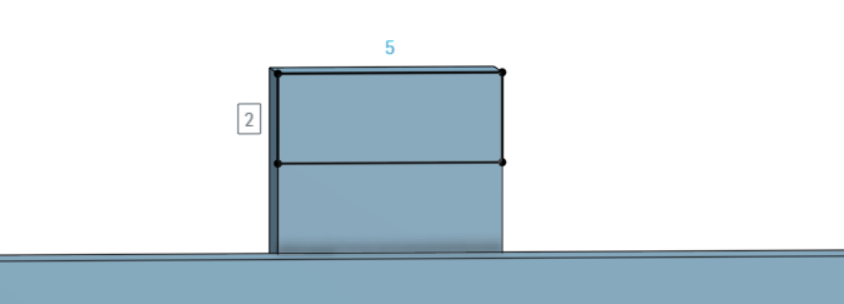
##### **Création du couvercle :**
\- Placer vous en vue du dessus et créer une nouvelle esquisse
\- Créer un rectangle de 120x80 puis l'extruder de 2mm (aligné à la boîte réalisée précédemment)
[](https://innovation.iha.unistra.fr/uploads/images/gallery/2025-06/DFtimage.png)
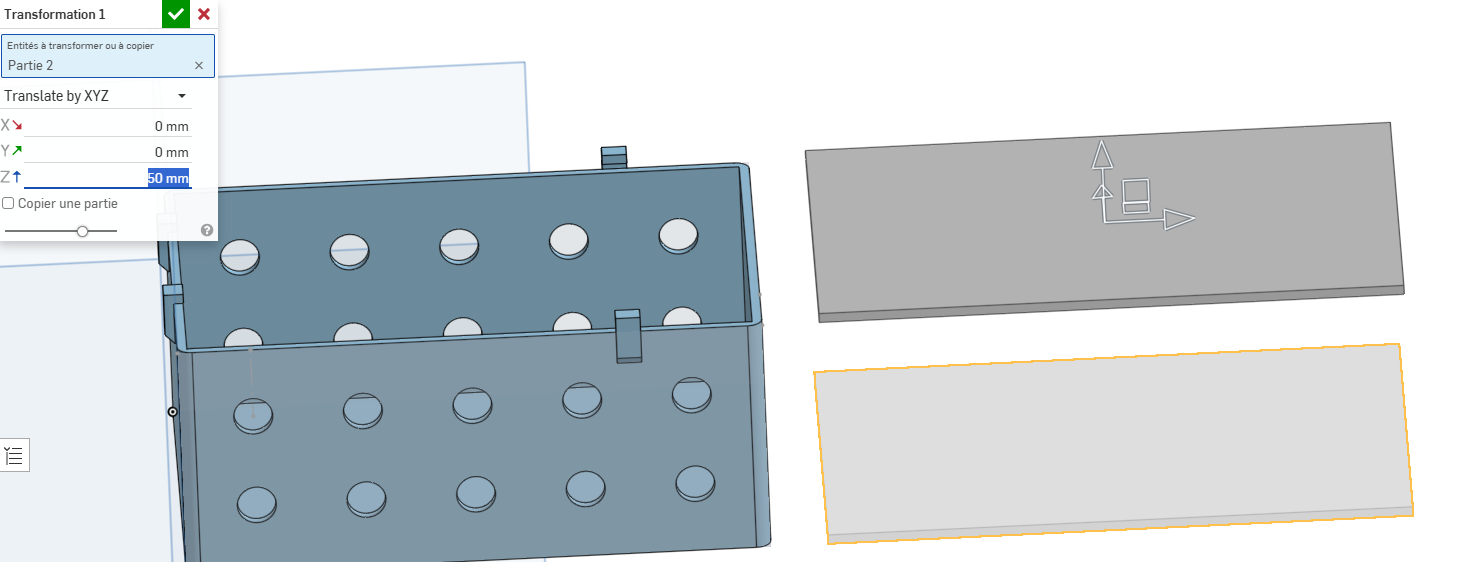
1\) Sélectionner votre couvercle
2\) Utiliser l'outil 'transformation'
3\) Sélectionner 'Traduit par XYZ'
[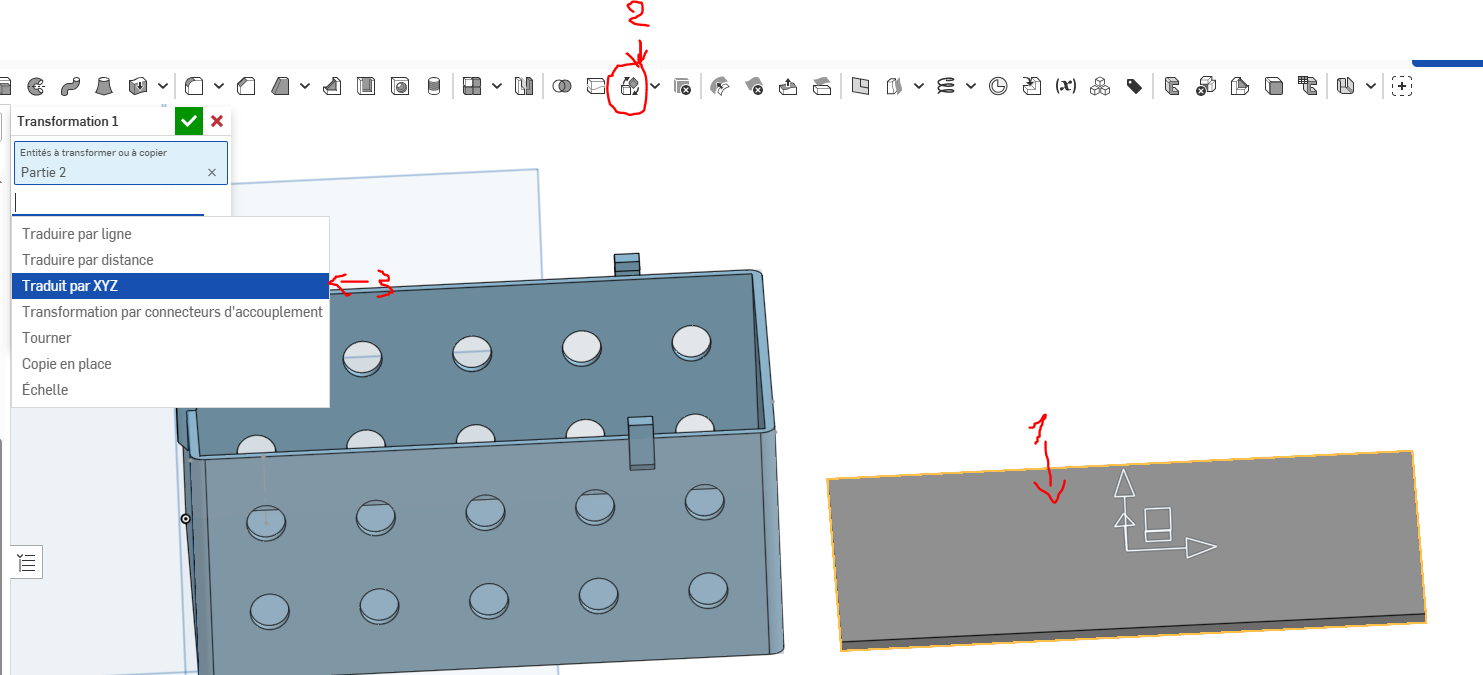](https://innovation.iha.unistra.fr/uploads/images/gallery/2025-06/iW3image.png)
\- Placer votre couvercle à 50mm de hauteur et valider
[](https://innovation.iha.unistra.fr/uploads/images/gallery/2025-06/yPtimage.png)
\- Sélectionner les 4 arrêtes verticales de votre couvercles et appuyer sur l'outil 'congé' [](https://innovation.iha.unistra.fr/uploads/images/gallery/2025-06/IEsimage.png)
\- Placer vous sur la vue du dessus de votre couvercle, sélectionner le et créer une nouvelle esquisse
\- En utilisant des traits de construction, on va définir l'endroit ou l'on va commencer notre poignet. Réaliser l'esquisse pour obtenir un résultat comme ci-dessous
\- >Diviser la face en deux par l'horizontal. A partir du milieu, deux trait de construction symétrique un vers le haut et un vers le bas de 20mm chacun. Puis partir de l'extrémité de ces traits de construction pour aller perpendiculairement vers le bord droit de la boite.
[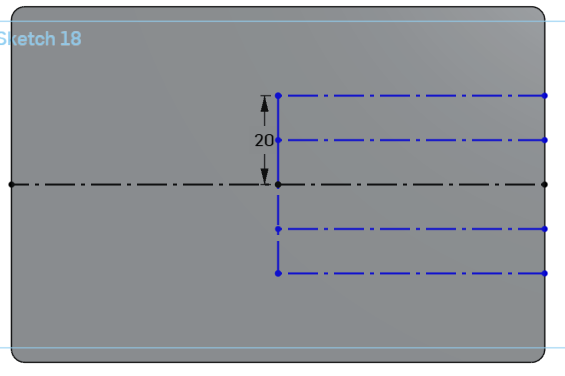](https://innovation.iha.unistra.fr/uploads/images/gallery/2025-06/ciAimage.png)
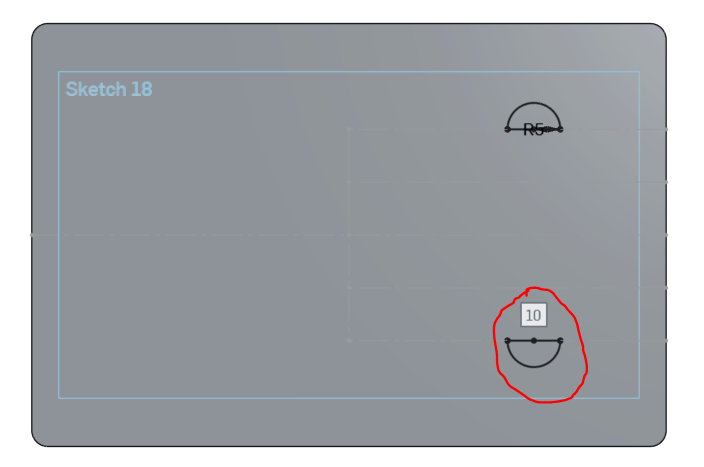
\- Utiliser l'outil '3 points arc(a)'[ et attribuer lui un diamètre de 5mm en partant du milieu du trait du construction le plus haut](https://innovation.iha.unistra.fr/uploads/images/gallery/2025-06/IBHimage.png)
Fonctionnement de l'outil :
Premier clique pour poser le premier point, deuxième clique pour poser le second point (diamètre du demi-cercle), troisième clique pour finir le demi-cercle (sélectionner la hauteur du demi-cercle).
[](https://innovation.iha.unistra.fr/uploads/images/gallery/2025-06/rZtimage.png)
\- Sélectionner l'outil 'trait' et fermer le demi-cercle[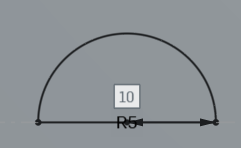 et valider l'esquisse](https://innovation.iha.unistra.fr/uploads/images/gallery/2025-06/Fvtimage.png)
\- Faire de même de l'autre coté en symétrie horizontale (voir image ci-dessous)
[](https://innovation.iha.unistra.fr/uploads/images/gallery/2025-06/hMvimage.png)
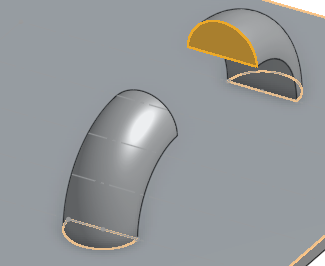
\- Sélectionner votre demi-cercle et cliquer sur l'outil 'Revolution' [](https://innovation.iha.unistra.fr/uploads/images/gallery/2025-06/fzTimage.png)
1\) Sélectionner votre demi-cercle
2\) Sélectionner l'axe de référence pour la révolution.
3\) Sélectionner 'One direction' dans la liste déroulante et dans "Revolve angle" mettre 90° pour lui indiquer que l'on veut que notre révolution n'aille que dans un sens et de 90 degrés
[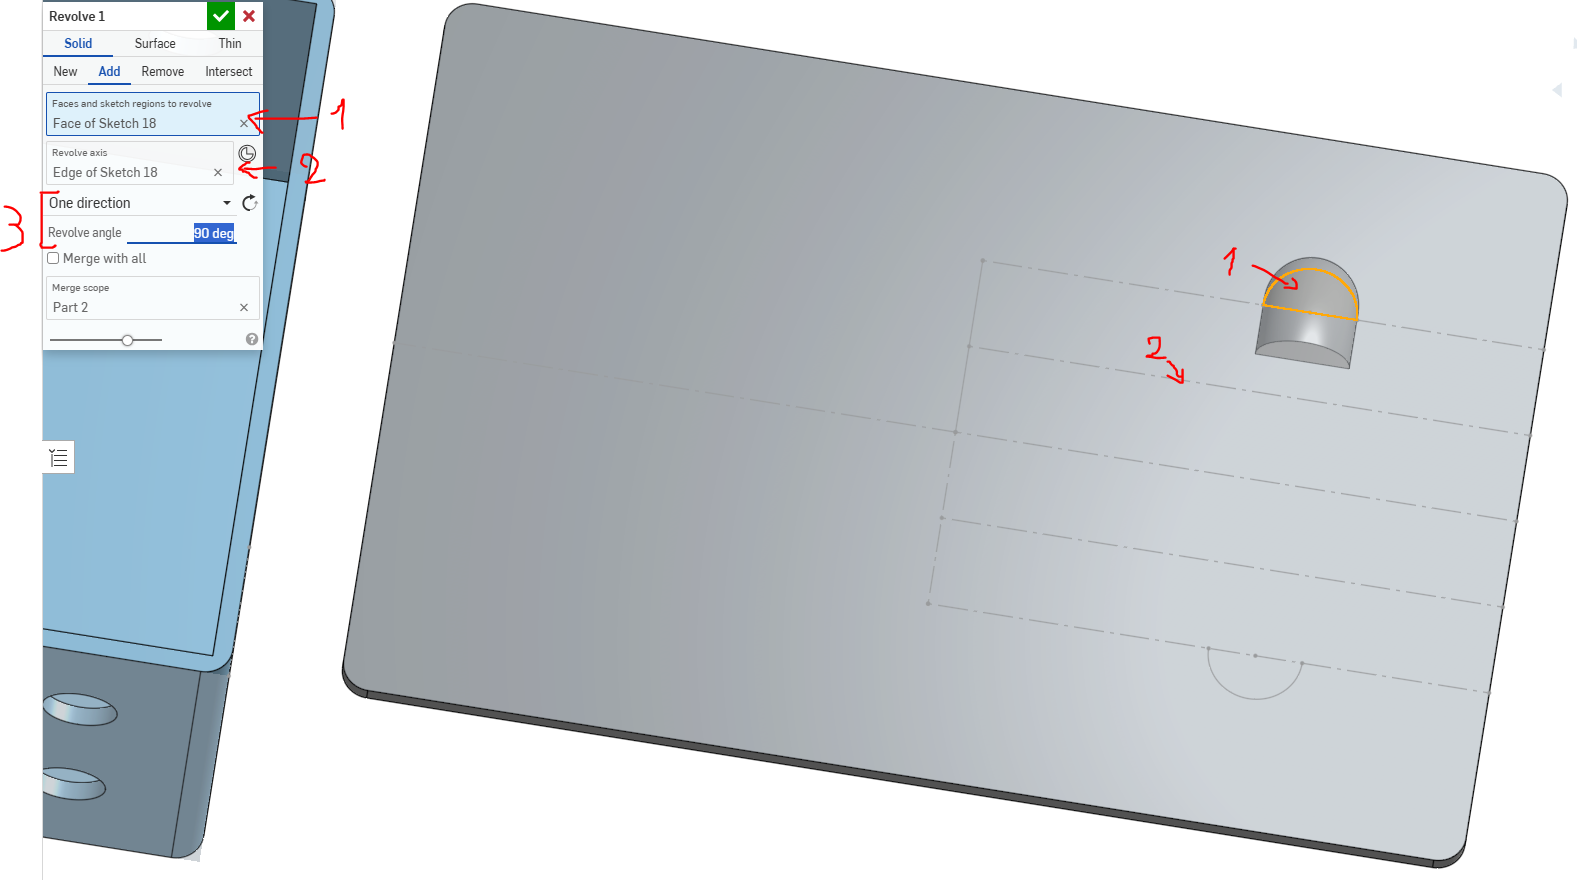](https://innovation.iha.unistra.fr/uploads/images/gallery/2025-06/g7Wimage.png)
\- Réaliser la même chose pour l'autre demi-cercle.
[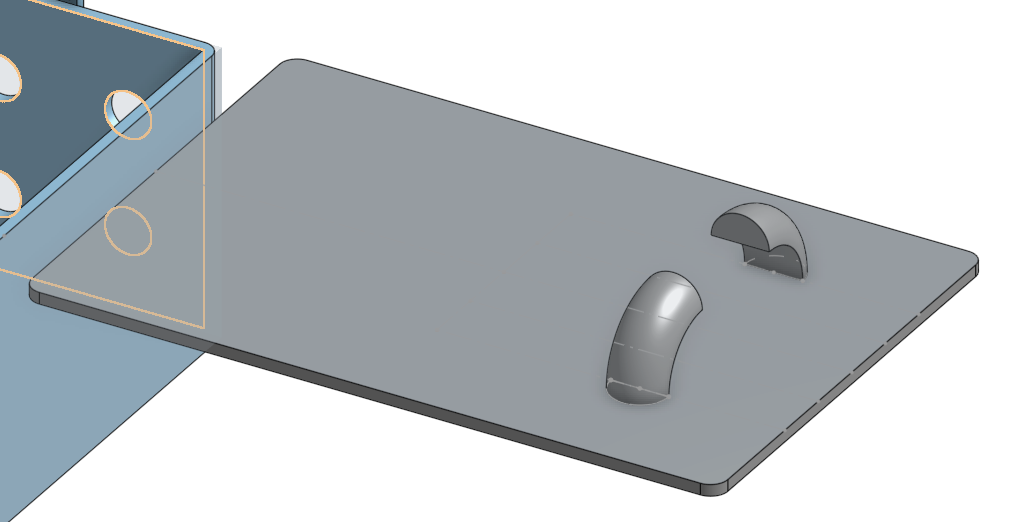](https://innovation.iha.unistra.fr/uploads/images/gallery/2025-06/vt1image.png)
-Sélectionner la face avant de votre révolution et extruder la de 20mm
[](https://innovation.iha.unistra.fr/uploads/images/gallery/2025-06/Lheimage.png)[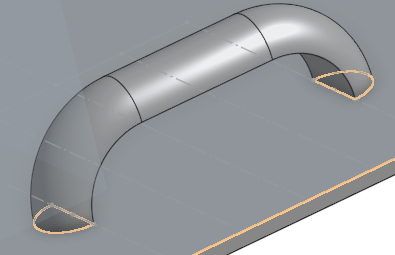](https://innovation.iha.unistra.fr/uploads/images/gallery/2025-06/RJuimage.png)
Félicitation, vous avez réalisée votre boite en 3D !
[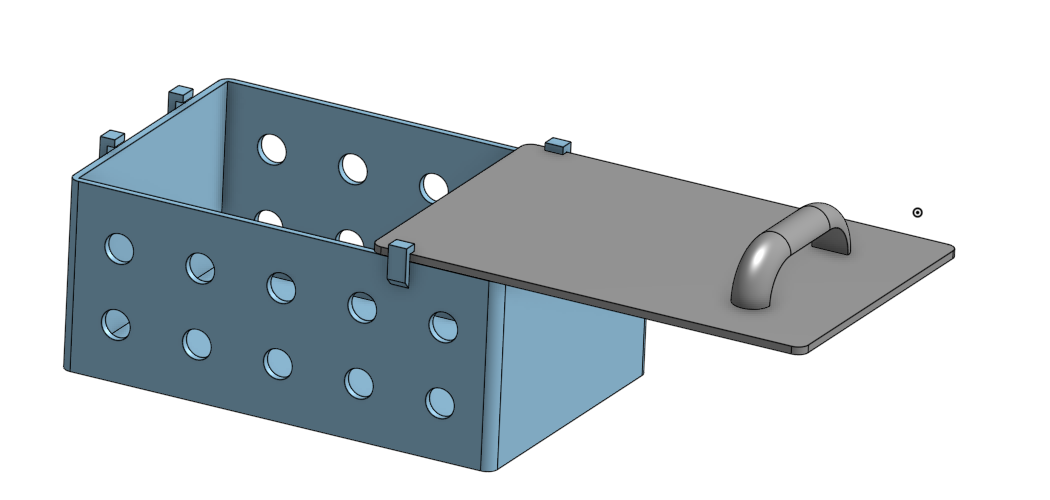](https://innovation.iha.unistra.fr/uploads/images/gallery/2025-06/Y2oimage.png)
# Blender
### Principe de Blender
Blender est un logiciel de modélisation 3D libre, proposant de nombreuses fonctionnalités. Même s'il est principalement tourné vers la modélisation pour le rendu et l'animation, il est possible de travailler aussi sur de la conception ou du montage vidéo par exemple.
Le travail sur un projet Blender s'organise le plus souvent de façon incrémentale : on va commencer par créer des formes simples (par exemple, des formes planes ou des objets 3D basiques comme des cubes ou des sphères), puis on va déformer et complexifier ces objets pour y ajouter des détails.
Ce fonctionnement se traduit aussi dans le système d'onglets de Blender, qui se présente comme ceci :
[](https://innovation.iha.unistra.fr/uploads/images/gallery/2025-02/t7dimage.png)
En ignorant le premier onglet, qui sert de vue par défaut, on travaille donc sur :
1. La modélisation, pour commencer le projet avec un travail grossier sur les objets
2. La sculpture, pour un travail plus fin ressemblant à de la sculpture sur argile
3. L'édition UV, la peinture de texture et le *shading*, pour modifier l'apparence (couleur, brillance, ...) des objets
4. L'animation pour déformer des objets, notamment des personnages
5. Le rendu (et le compositing) pour générer des images ou vidéos
6. Les nœuds de géométrie pour générer automatiquement des déformations sur les objets, voire des paysages entiers
7. Le scriptage pour du travail basé sur de la programmation
### Création d'un objet
#### Génération d'une forme de départ
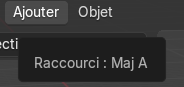
La première étape en modélisation sous Blender est d'ajouter une forme de base, à laquelle on pourra ajouter des détails par la suite. On essaie en général de choisir la forme qui se rapproche le plus de l'objet final désiré (par exemple, un cube pour une armoire ou un cylindre pour une bouteille), ou au moins d'une partie de l'objet (par exemple, un cube pour le haut d'une table ou un cylindre pour le torse d'un personnage). L'ajout se fait dans le menu *Ajouter* (aussi accessible avec *Shift+A*)
[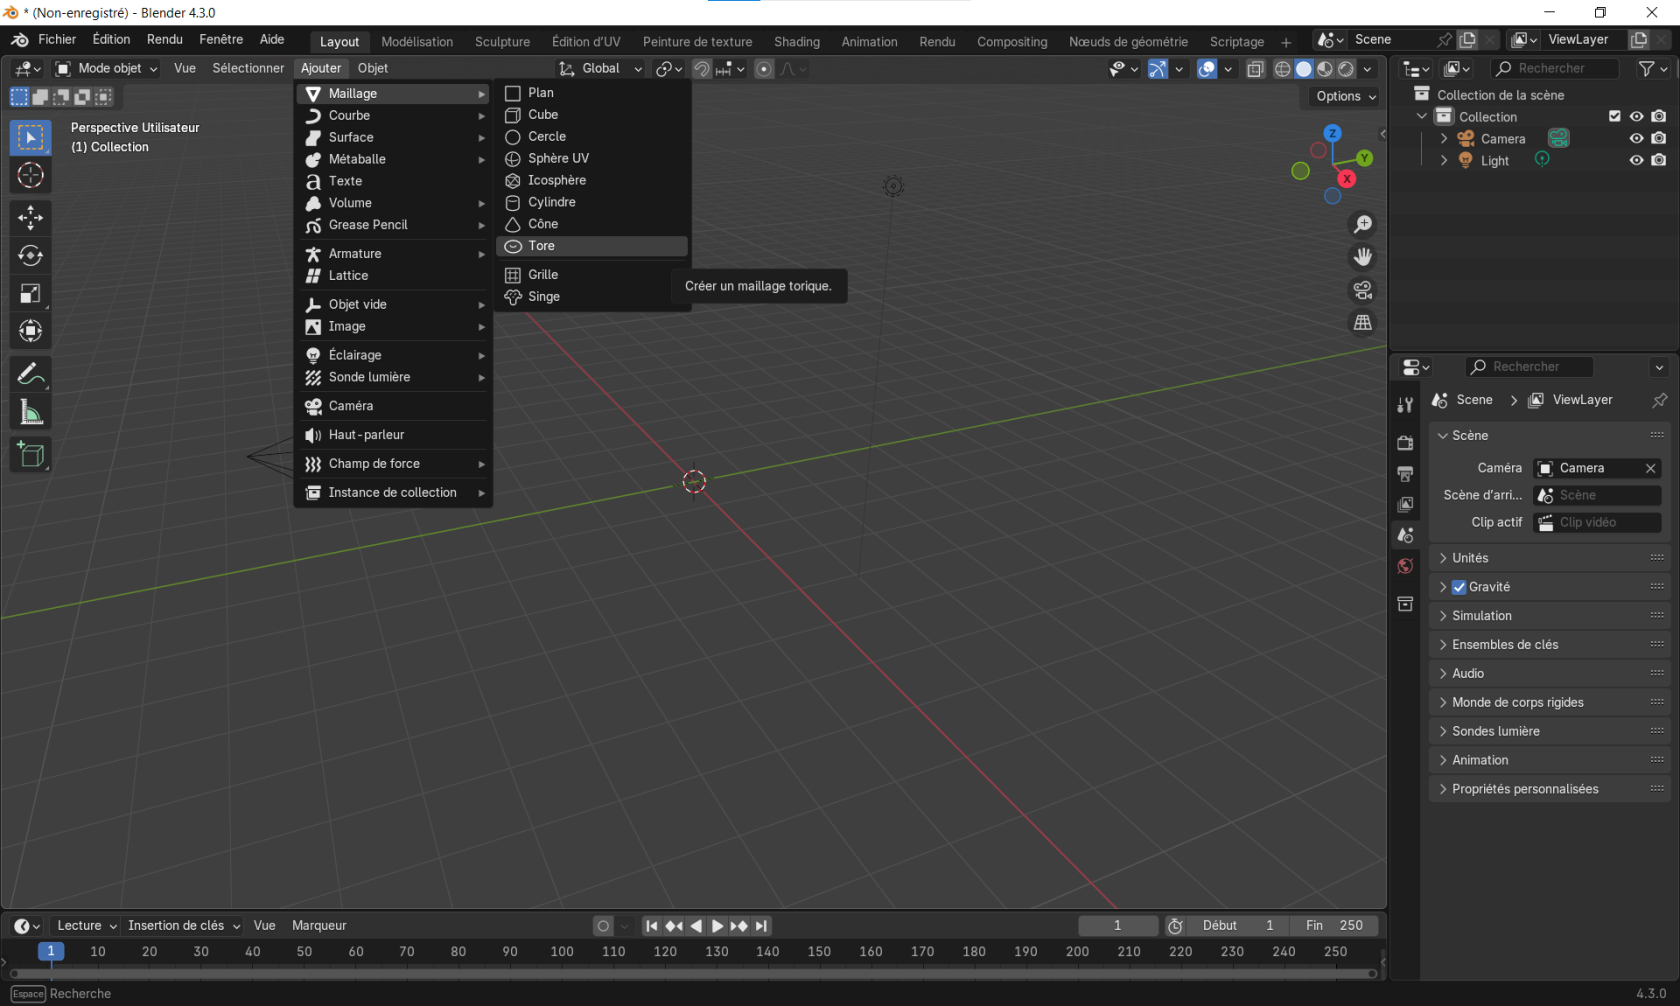](https://innovation.iha.unistra.fr/uploads/images/gallery/2025-02/rkZimage.png)
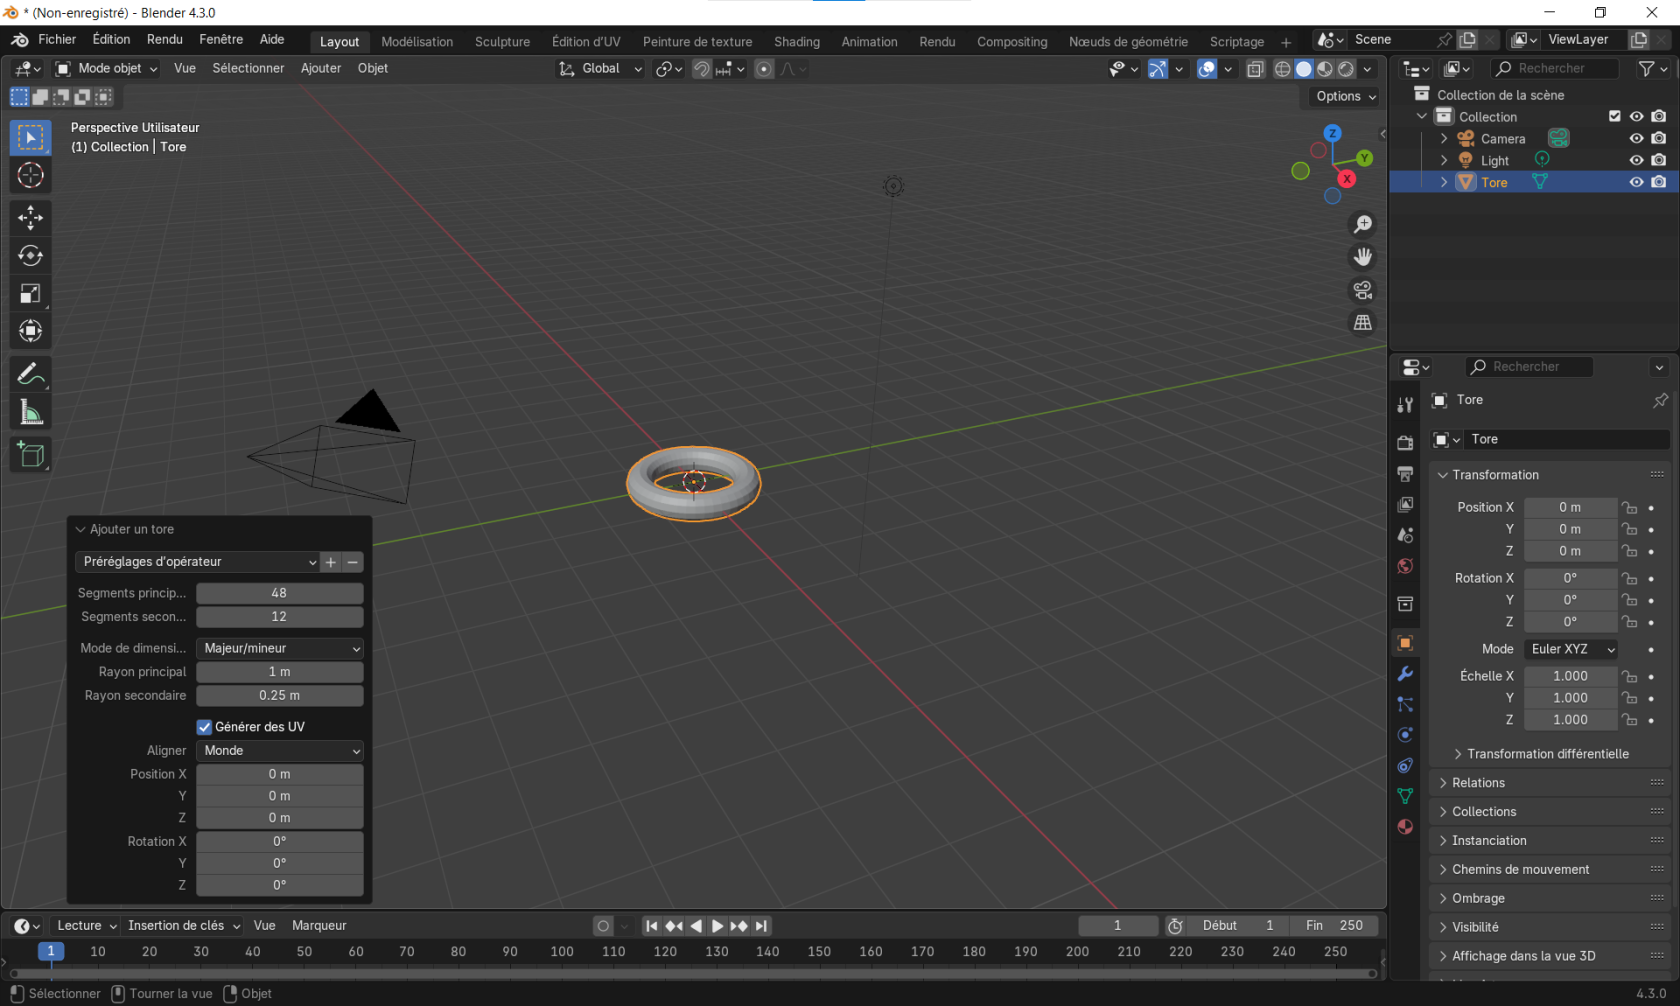
Une fois que l'objet est ajouté, on peut modifier ses paramètres, par exemple pour changer sa taille et son orientation, mais aussi pour commencer avec plus ou moins de détails (avec le nombre de segments).
[](https://innovation.iha.unistra.fr/uploads/images/gallery/2025-02/zfcimage.png)
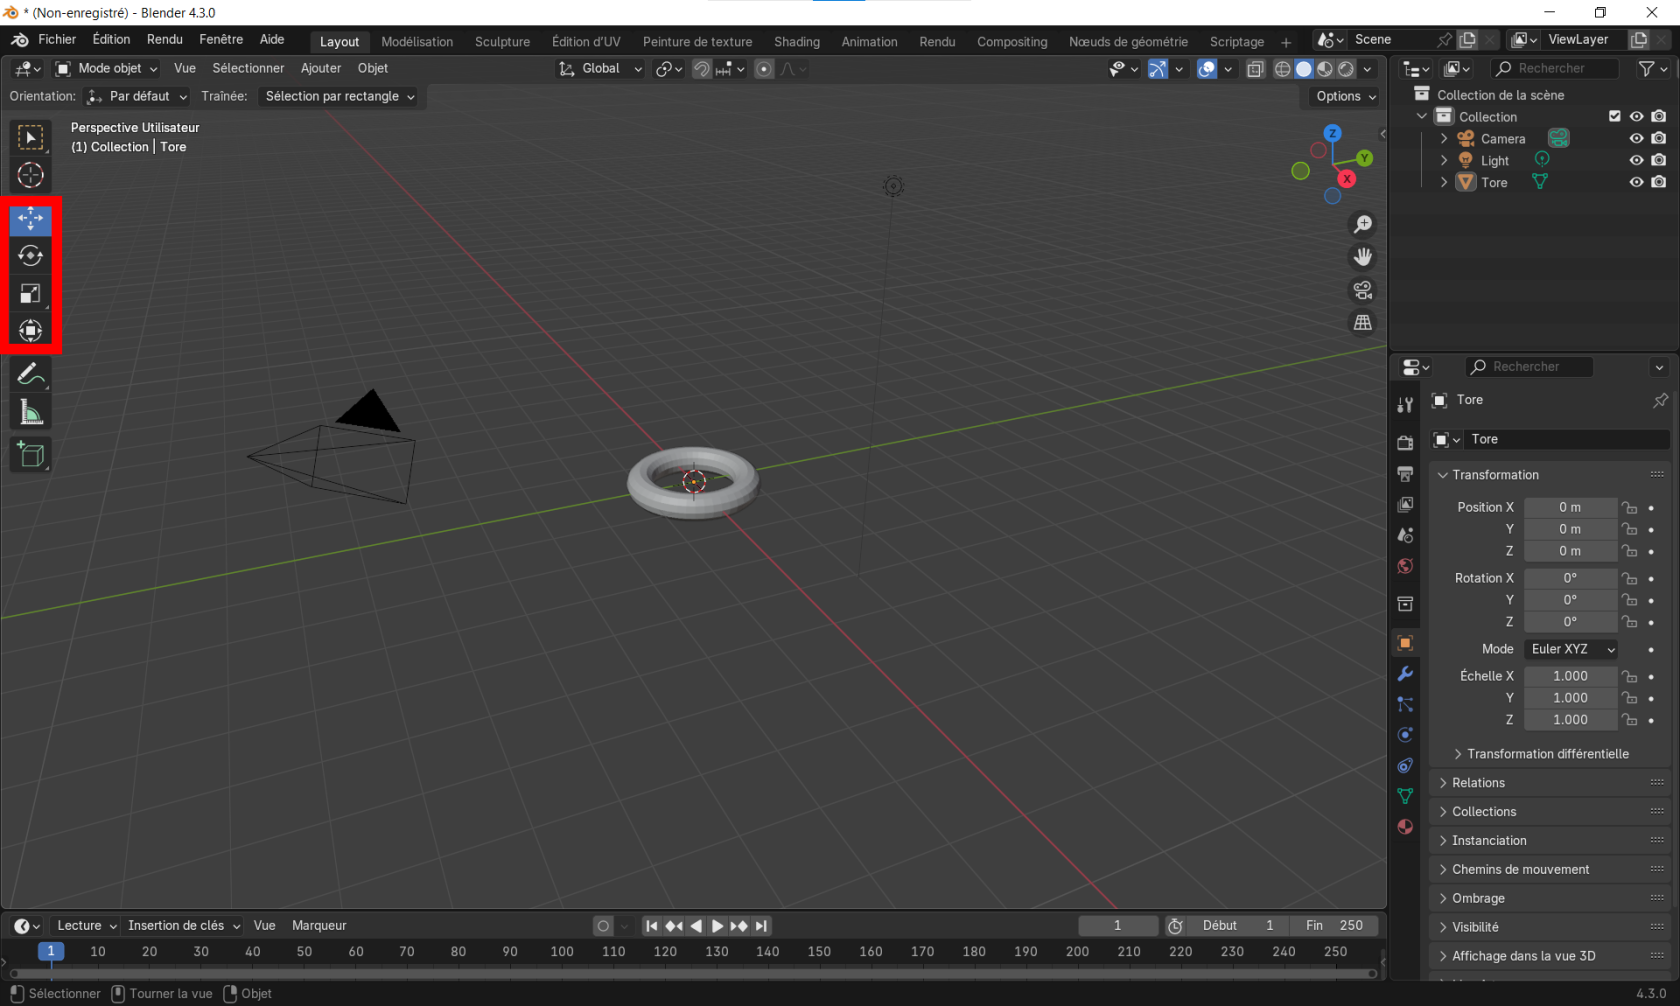
Les objets créés peuvent ensuite être déplacés (avec l'outil ou la touche *G* pour *Grab*), tournés (avec l'outil ou la touche *R* pour *Rotate*) ou redimensionnés (avec l'outil ou la touche *S* pour *Scale*).
[](https://innovation.iha.unistra.fr/uploads/images/gallery/2025-02/lc7image.png)
Il est aussi souvent utile de se déplacer dans la scène 3D pour mieux faire face aux objets que l'on manipule. Pour ça, cliquer avec la molette puis déplacer la souris pour tourner autour de l'objet, ou faire la même chose en maintenant *Shift* pour se déplacer sur le côté. Avec un pad tactile, c'est la même manipulation en appuyant avec deux doigts sur le pad. On peut aussi recentrer la vue sur un objet sélectionné avec le menu *Vue>Voir la sélection* ou en se servant de la touche point du pavé numérique.
#### Modification de la forme
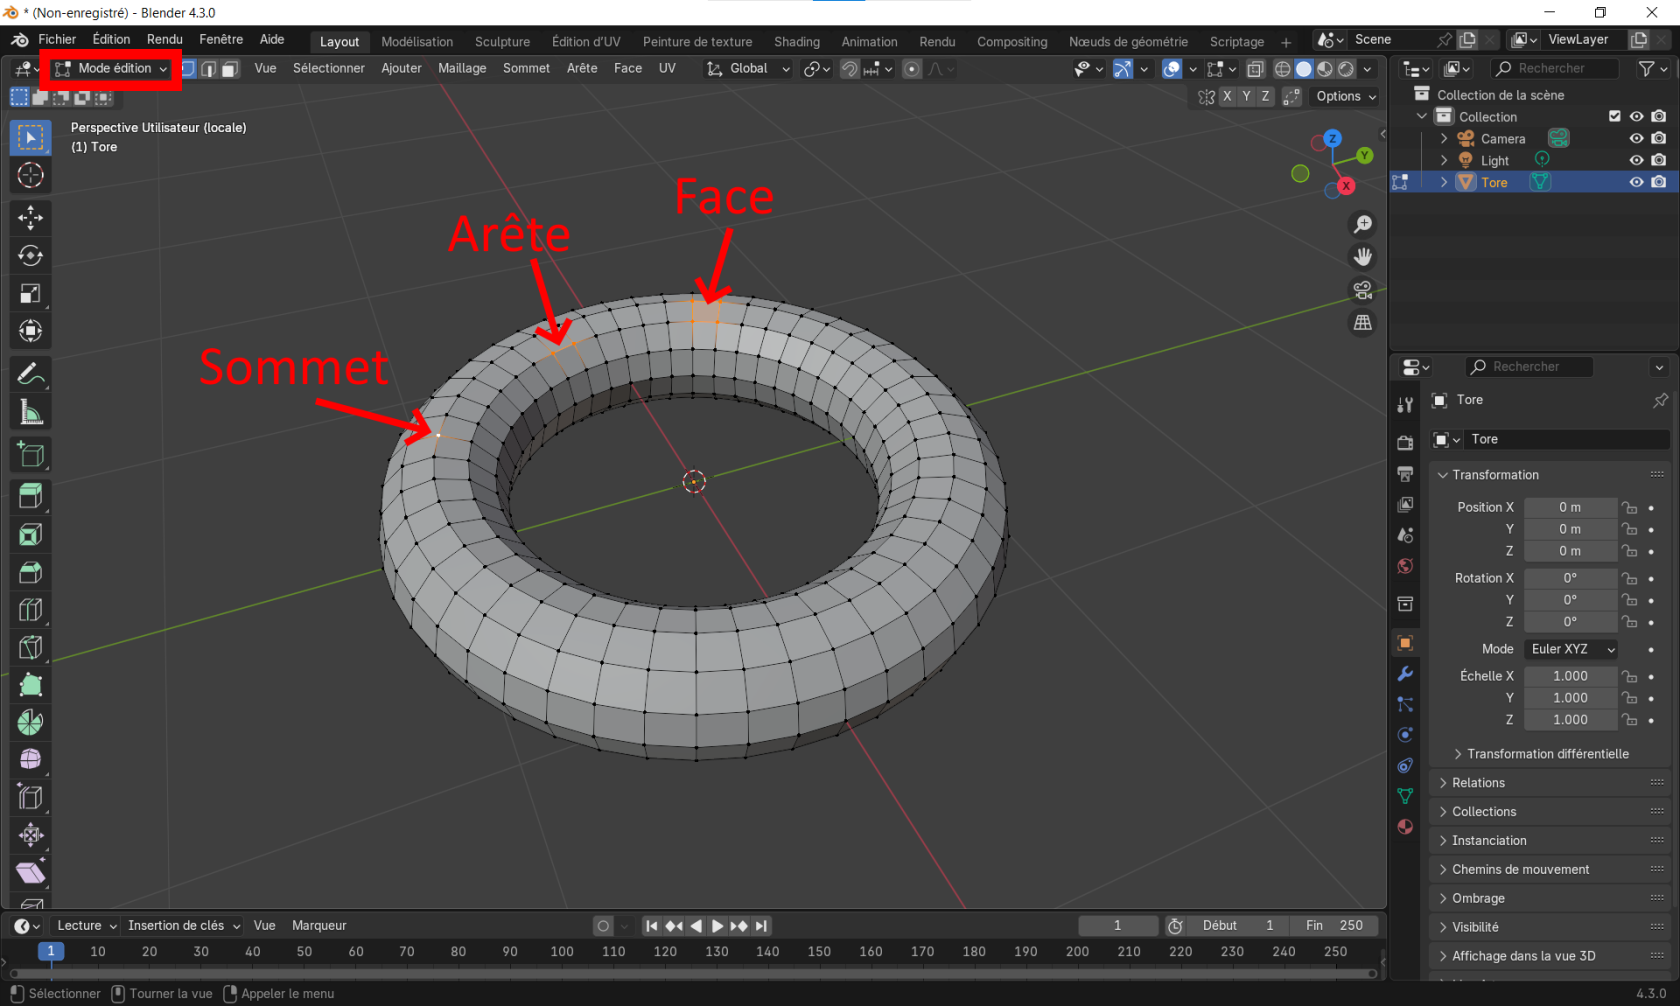
Une fois que l'on a placé notre forme de départ, la modification plus avancée passe par le *Mode édition* (accessible avec *Tab*), qui permet de modifier la géométrie de l'objet. Chaque objet est composé de sommets (les points), d'arêtes (les lignes entre les sommets) et de faces (une forme fermée entourée de sommets), que l'on peut sélectionner avec les trois boutons à droite du mode édition ou avec les touches *1,2 et 3* (au dessus des lettres *A, Z* et *E*) respectivement. Chacun de ces éléments peut aussi être déplacé, tourné et redimensionné pour modifier des parties de l'objet plutôt que l'objet entier.
[](https://innovation.iha.unistra.fr/uploads/images/gallery/2025-02/ynJimage.png)
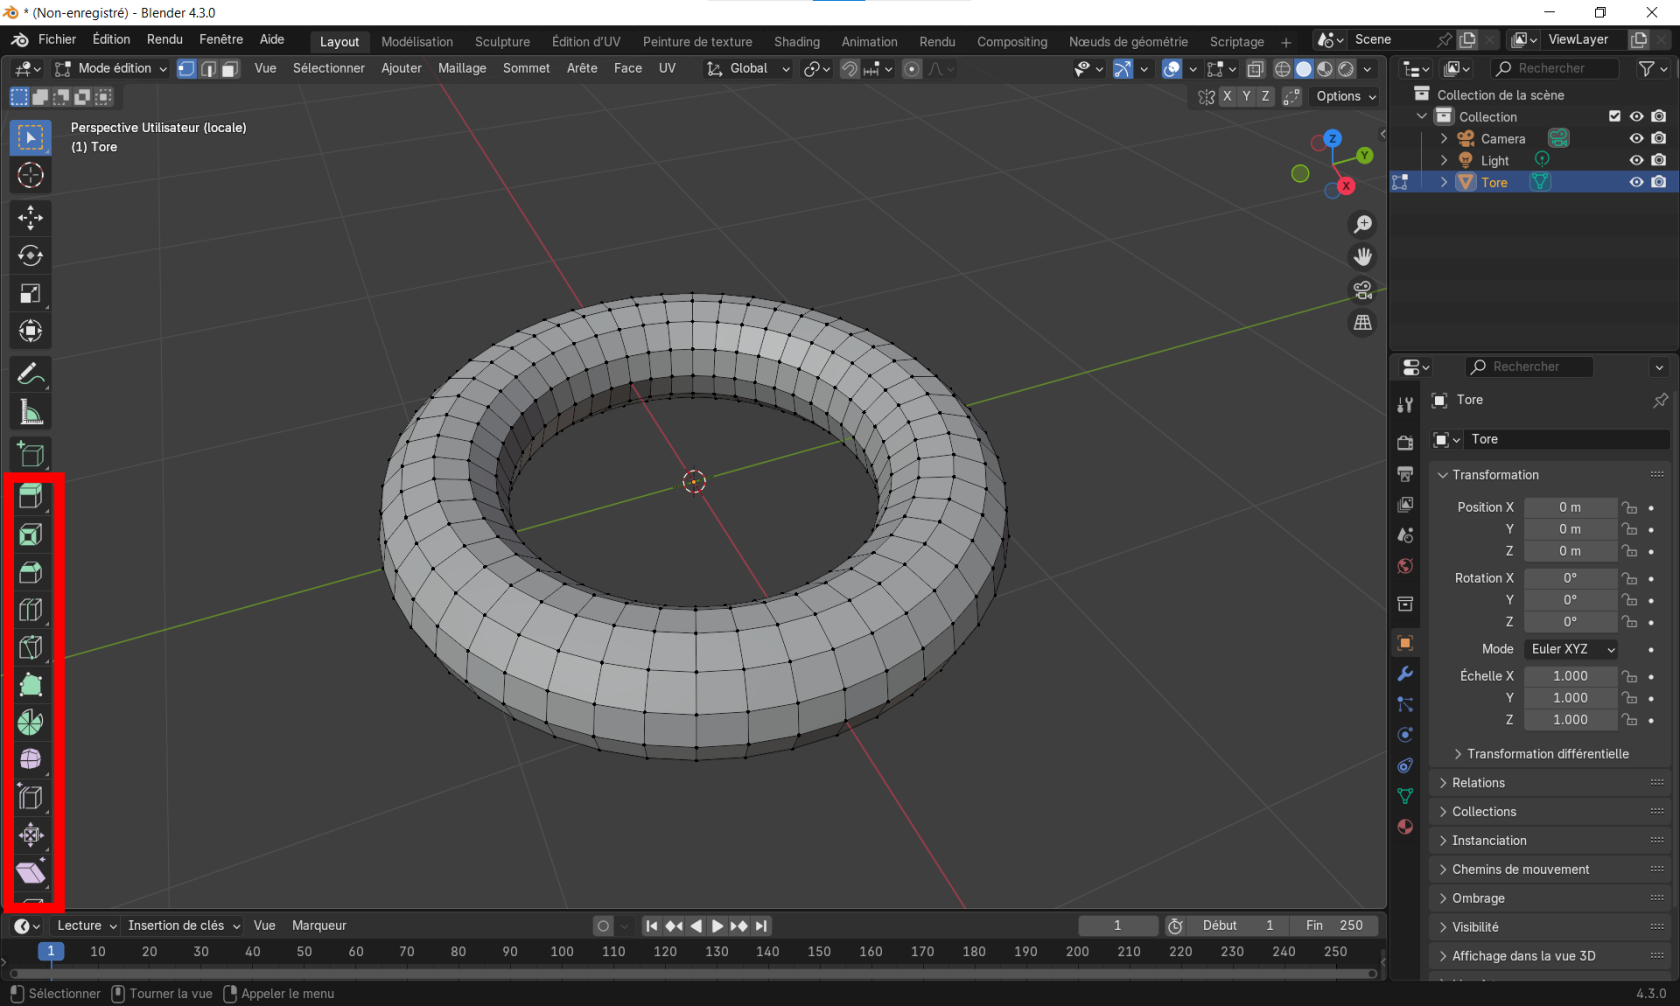
En revanche, l'ajout de détails spécifiques passe par d'autres fonctionnalités, disponibles dans la barre à gauche :
[](https://innovation.iha.unistra.fr/uploads/images/gallery/2025-02/Rz9image.png)
- L'extrusion sur une face (raccourci *E*) permet de faire ressortir une face de l'objet avec une cassure nette vis-à-vis du reste de la surface
- L'insertion dans une face (raccourci *I*) permet de créer une plus petite face à l'intérieur de la face sélectionnée, qui gardera les mêmes proportions
- Le chanfrein sur des arêtes (raccourci *Ctrl+B* pour *Bevel* en anglais) crée un biseau sur les bordures. En tournant la molette, il est possible de faire un biseau plus ou moins arrondi.
- L'outil découper une boucle (raccourci *Ctrl+R* comme *Ring*) coupe en deux un objet le long d'une boucle. En tournant la molette, il est possible de faire plusieurs découpes d'un seul coup
- L'outil couteau (raccourci *K* pour *Knife*) permet de couper un objet de façon plus libre. Lors d'une découpe avec l'outil couteau, on peut utiliser la touche *C* pour couper au travers de l'objet ou seulement sur les faces visibles.
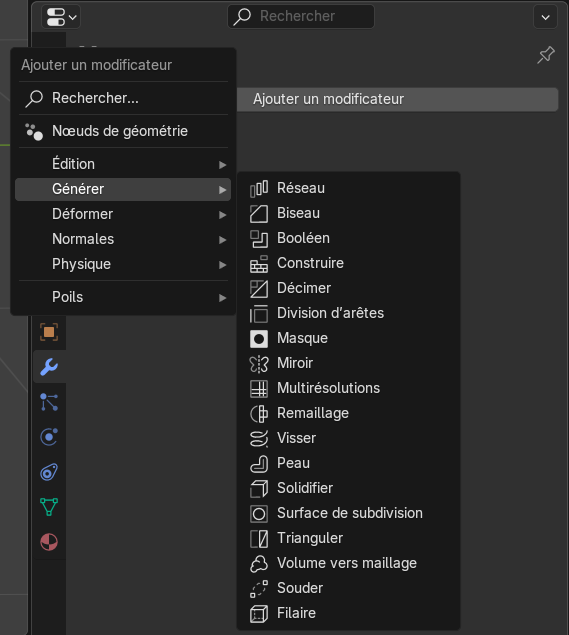
#### Modificateurs
Blender propose également un certain nombre de modificateurs, qui s'appliquent au niveau d'un objet entier et permettent d'automatiser certaines déformations. Les modificateurs sont accessibles depuis le panneau de droite, dans l'onglet représenté par une clé à fourche.
[](https://innovation.iha.unistra.fr/uploads/images/gallery/2025-02/KDsimage.png)
Les modificateurs étant trop nombreux pour tous les présenter, en voici quelques uns parmi les plus utiles :
- *Générer>Biseau* crée un biseau sur toutes les bordures de l'objet
- *Générer>Booléen* permet de faire des opérations entre deux objets, pour combiner deux objets (*Union*), ne garder que la zone de contact *(Intersection*) ou creuser un objet à partir d'un autre *(Difference*)
- *Générer>Décimer* permet de réduire le nombre de sommets de l'objet, ce qui peut être utile quand l'objet devient trop complexe
- *Générer>Miroir* crée une symétrie de l'objet. Pour des objets complexes mais symétriques, on pourra donc modéliser seulement la moitié de l'objet avant de faire une symétrie
- *Générer>Visser* génère un effet d'escalier en colimaçon sur l'objet, en le dupliquant au fur et à mesure
- *Générer>Solidifier* ajoute une épaisseur à la surface de l'objet. Pour des objets plats, cela permet de ne pas avoir une épaisseur nulle
- *Générer>Surface de subdivision* divise toutes les arêtes en deux, et lisse le modèle. Il est possible d'enchaîner les divisions pour fortement lisser l'objet, mais cela implique aussi d'augmenter très fortement le temps de calcul pour l'afficher
- *Déformer>Déformation Simple* et *Déformer>Déplacement* permettent respectivement de déformer l'objet selon des méthodes simples ou en se basant sur des textures plus complexes
- *Déformer>Adoucir* (et ses deux variantes) permet de lisser la surface de l'objet
- *Déformer>Vague* ajoute un effet d'ondulation sur la surface
### Tutoriels de référence
### Raccourcis
Les fonctionnalités de Blender sont dispersées dans de nombreux menus, ce qui peut les rendre difficile d'accès. Pour accélérer l'utilisation de Blender, on peut passer par des raccourcis claviers (très nombreux eux-aussi), qui sont proposés en gris dans les menus.
[](https://innovation.iha.unistra.fr/uploads/images/gallery/2025-02/kR7image.png)
[](https://innovation.iha.unistra.fr/uploads/images/gallery/2025-02/yTZimage.png)
Voici une liste des principaux raccourcis:
- r : rotation ; s : scale ; g : grab
- x, y, z : peuvent être contraints/définis dans l'axe
- Shift+Z : figer le degré de liberté en Z
- Donner la valeur : 90
- Exemple : r+x+90 --> rotation de 90° selon l'axe x
- e : extrude (créer des points dans un plan à partir de son centre)
- a : sélectionner tous les sommets d'un mesh
- f : fill remplir un contour (fermé) pour créer une surface
- Ctrl+A (en mode Edit) : appliquer toutes les transformation
- Ctrl+Z : annuler
- Ctrl+Shift+Z : rétablir après annulation
- Shift : Sélection de plusieurs objets
- Ctrl+Shift+B : Bevel : créer un chanfrein. Déplacer la souris augmente la taille du chanfrein. La molette augmente le nombre de sommets.
- Ctrl+R : "Loop Cut" Créer une coupe dans un volume à partir d'un contour fermé sur une face du volume. La molette augmente le nombre de coupes équidistantes.
- Shift+C ; Ramène le curseur à l'origine World. Le curseur est le repère local où sera importé un nouvel objet
Orientation de la vue sur le pavé numérique :
- 1 : vue
- 2 :
- 3 :
- 4 :
- 5 : vue orthogonale ou perspective
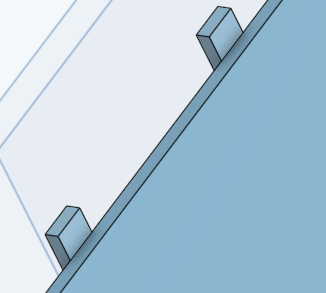
# Trotec Speedy 100 - Entretien des lentilles
#### **Interieur de la découpeuse laser - dévissage de la lentille du bas**
#### [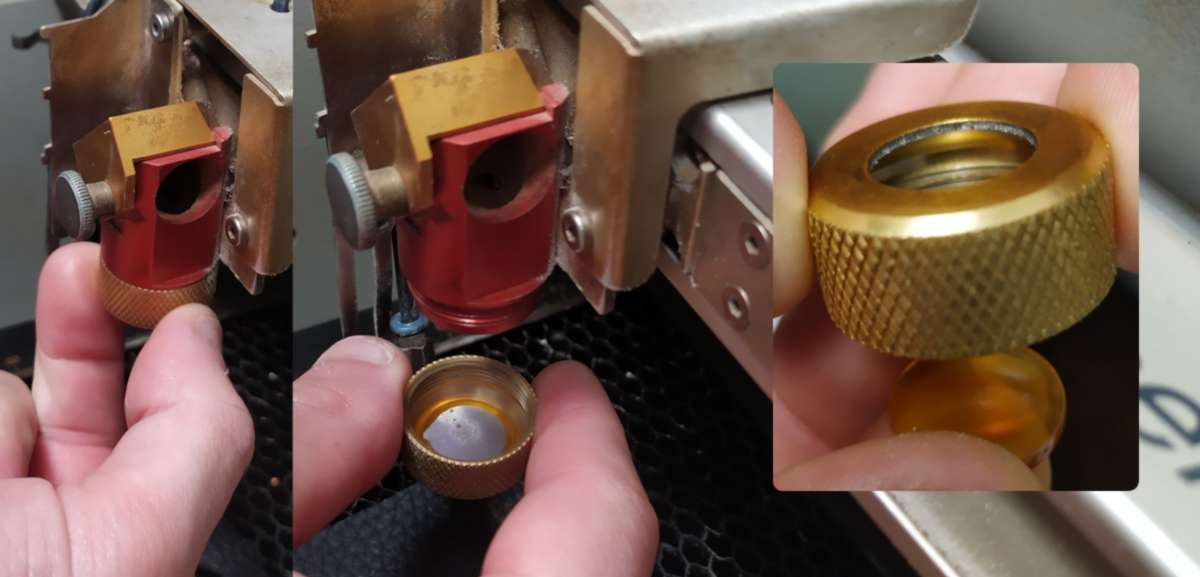](https://innovation.iha.unistra.fr/uploads/images/gallery/2026-01/02.jpg)
#### **Interieur de la découpeuse laser - dévissage de la lentille du haut**
**[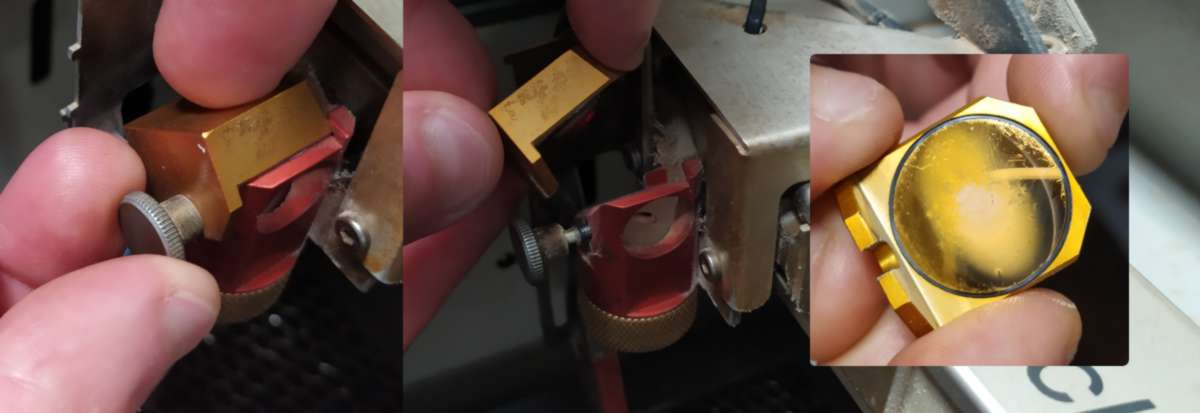](https://innovation.iha.unistra.fr/uploads/images/gallery/2026-01/04.jpg)**
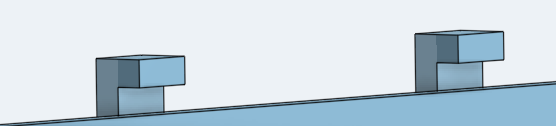
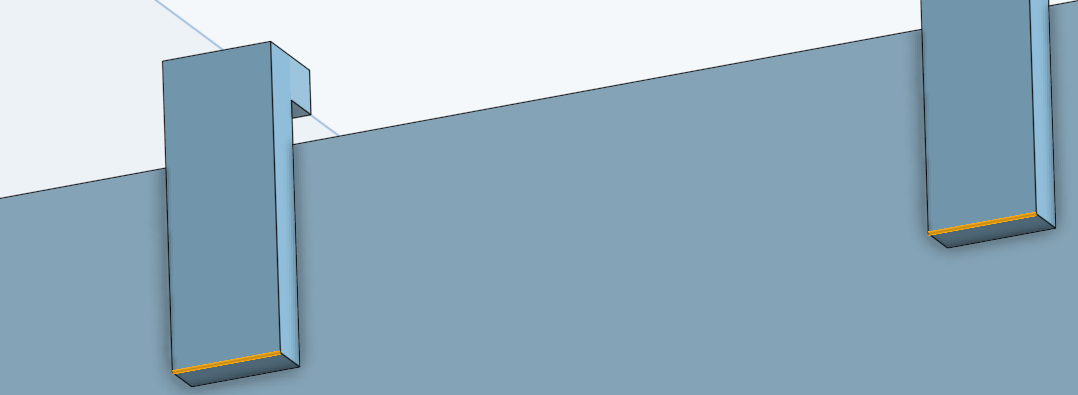
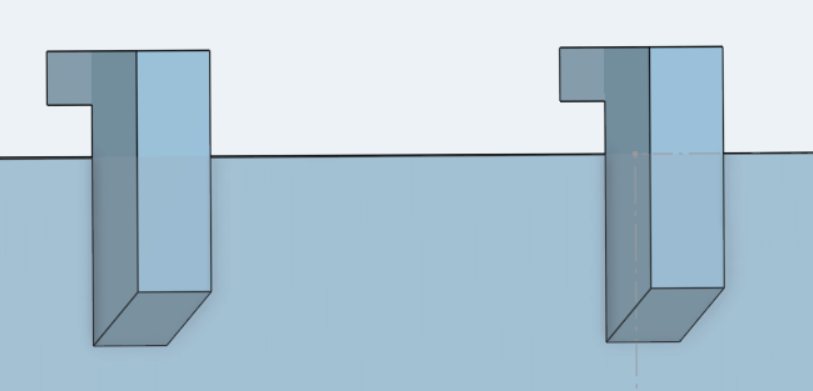
#### **Côté droit (extérieur) - dévissage de la lentille
Dévisser le panneau extérieur droit, à l'aide d'une clé Allen (clé à 6 pans)
#### **[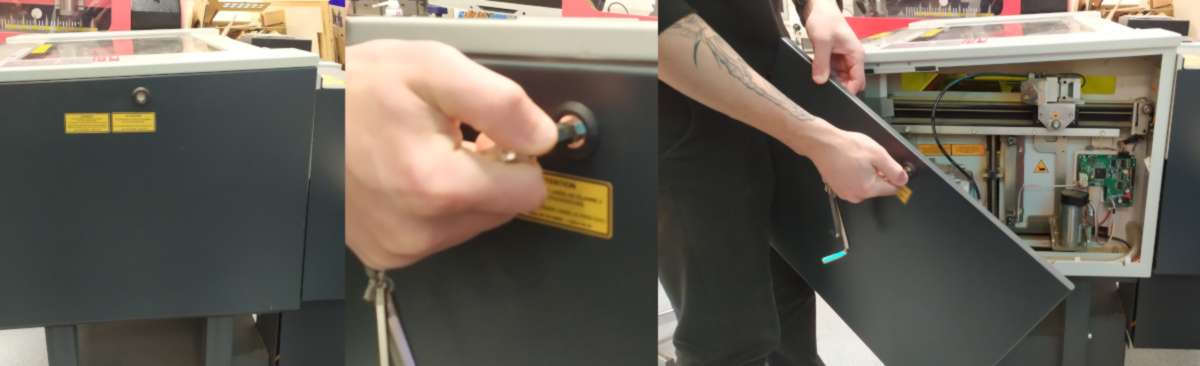](https://innovation.iha.unistra.fr/uploads/images/gallery/2026-01/05.jpg)**
Une fois le panneau démonté, vous pouvez dévisser les deux vis entourées en vert (voir photos ci-dessous).
**Attention (IMPORTANT):** ne pas toucher aux vis entourées en rouge, elles controllent l'orientation des miroirs et nécéssitent l'intervention d'un technicien pour les recalibrer.
#### **[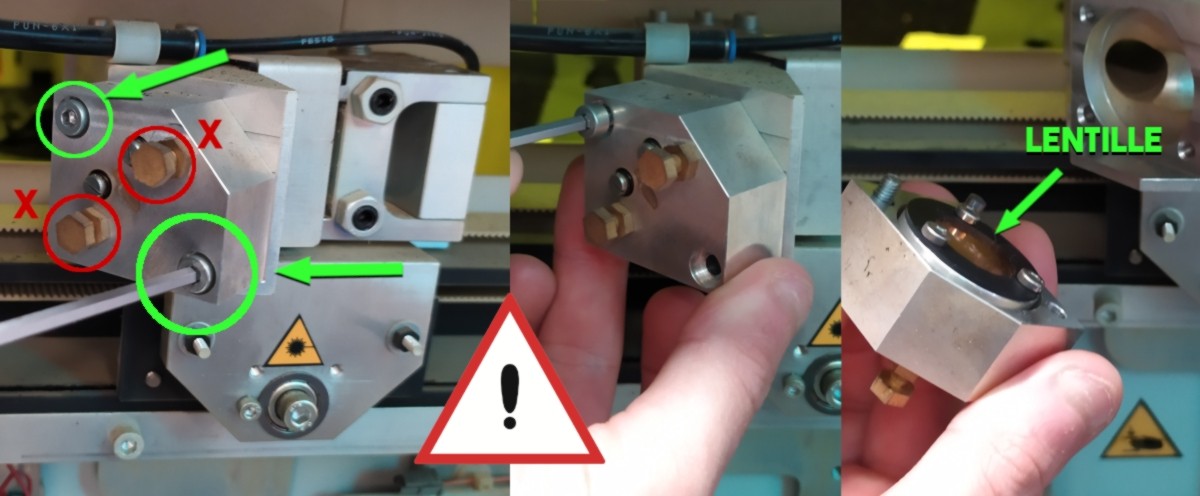](https://innovation.iha.unistra.fr/uploads/images/gallery/2026-01/06.jpg)**
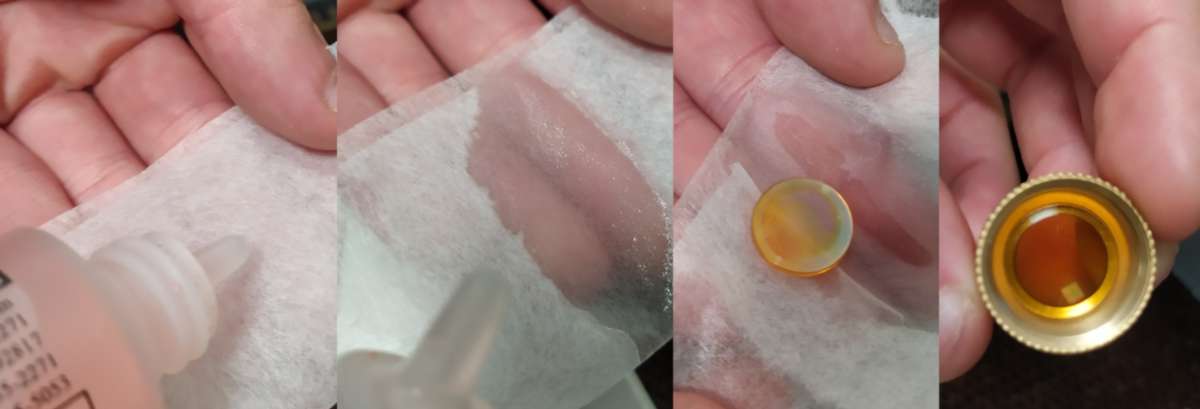
#### **Produits d'entretien**
- découpez une demi feuille de tissu Rosco
- imbibez cette feuille avec le produit de nettoyage de lentille
- frottez doucement les deux faces des lentilles
[![[Untitled].jpg](https://innovation.iha.unistra.fr/uploads/images/gallery/2026-01/scaled-1680-/untitled.jpg)](https://innovation.iha.unistra.fr/uploads/images/gallery/2026-01/untitled.jpg)
[](https://innovation.iha.unistra.fr/uploads/images/gallery/2026-01/03.jpg)
# Formation au logiciel InkScape
# Inkscape : petite intro pour newbies
### Deux ou trois trucs pour commencer sereinement sans cliquer partout comme un gros-bill
##### Attention, l'article qui suit est un travail en cours !Patience et indulgence , please 😜
### C'est quoi **Inkscape**, d'abord ?
**Inkscape** est un logiciel de dessin vectoriel.
Une image vectorielle est une image numérique composée d'objets géométriques auxquels ont peut appliquer différentes déformations. Une image vectorielle se distingue d'une image matricielle (appelée aussi *bitmap* ou *raster image*) qui est, elle, composée de pixels. L'élément de base d'un dessin vectoriel est le nœud (ou point de vecteur). Dans un fichier vectoriel, les nœuds et leurs positions relatives sont enregistrées sous formes de coordonnées mathématiques et d'équations.
**Inkscape** est aussi gratuit, open-source et puissant (pas mal, non ?)
**Pour télécharger la dernière version du logiciel, c'est par ici : [https://inkscape.org/](https://inkscape.org/)**
### **Inkscape**, ça ressemble à quoi ?
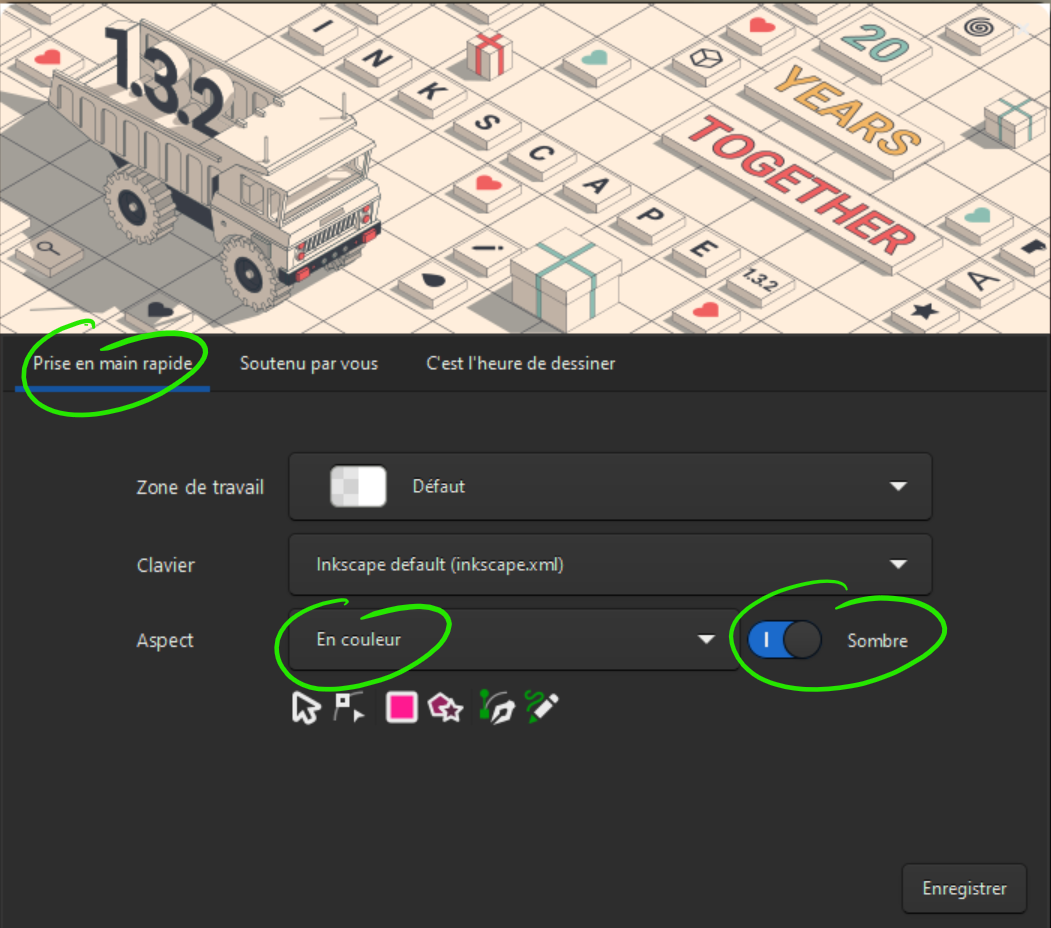
En lançant le logiciel pour la première fois, un écran d'accueil va vous proposer un certain nombre d'options. Vous pouvez les choisir maintenant, ou plus tard, et revenir dessus au besoin. Cet écran contient trois onglets.
\- Voici à quoi ressemble l'onglet de Prise en main rapide :
[](https://innovation.iha.unistra.fr/uploads/images/gallery/2024-03/fenetreaccueilprisepriseenmain.png)
Dans ce tutoriel, nous allons conserver la zone de travail et le clavier par défaut.
Je vous propose toutefois d'opter pour l'aspect "en couleurs" et de choisir le thème "Sombre".
(Et si vous tenez à savoir pourquoi, c'est parce que c'est comme ça que je préfère. Comme c'est moi qui rédige, si vous voulez rester raccord, vous suivez, sinon, vous gérez 😋)
\- L'onglet suivant, intitulé "Soutenu par vous", vous permettra de comprendre d'où vient **Inkscape**, et comment vous pouvez soutenir le projet. Les logiciels gratuits et open-source de qualité fonctionnent grâce à des équipes impliquées de bénévoles passionnés, et reposent sur la générosité de leurs utilisateurs.
\- Le dernier onglet permettra d'ouvrir un espace de travail.
[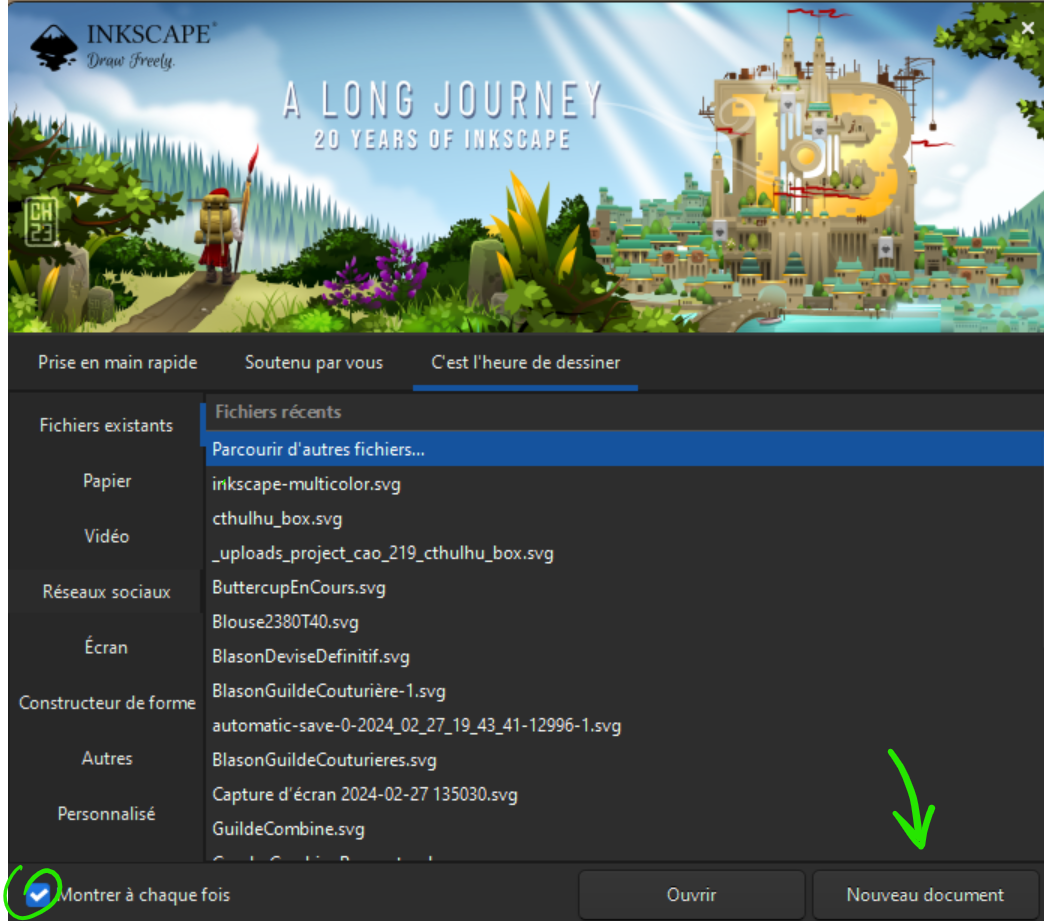](https://innovation.iha.unistra.fr/uploads/images/gallery/2024-03/accueildessiner.png)
Ici, vous pouvez choisir d'ouvrir un fichier existant, de trouver un modèle, ou d'ouvrir un nouveau document.
Dans le coin en bas à gauche de la fenêtre, vous trouverez également une petite coche qui pourra vous éviter de revoir cette fenêtre d'accueil à chaque fois que vous lancerez **Inkscape**. Cette fenêtre peut toutefois avoir ses avantages, à chacun selon ses préférences. Bien sûr, c'est un choix sur lequel vous pourrez toujours revenir.
Pour le moment, contentons nous donc d'ouvrir un nouveau document.
Click.
Nous voilà enfin face à notre nouvel espace de travail 🥳
**Inkscape** ouvre chaque document dans une nouvelle fenêtre. Dans cette fenêtre, plusieurs zones qui s'articulent autour de l'espace de travail principal constituent l'interface.
[](https://innovation.iha.unistra.fr/uploads/images/gallery/2024-03/espacedetavailcolored.png)
L'encadré violetcontient l'espace de travail principal. C'est là que vous allez créer votre dessin.
L'encadré turquoise contient un tableau de bord configurable dans lequel vous pourrez retrouver les paramètres relatifs au document et aux objets qu'il contient.
Tout en haut de l'espace de travail, en bleu, on retrouve une barre de menus classique qui permet d'accéder aux actions principales du logiciel. Toujours en bleu, le dock situé à droite du tableau de bord permet un accès rapide aux actions les plus courantes des menus **Fichier** et **Édition** sous formes d'icônes.
En jaune, à gauche, un dock vertical contient les outils de dessin et de création des objets de base. En pointillés jaunes, au-dessus de l'espace de travail principal, une barre d'outils contextuelle vous permettra de jouer avec les paramètres relatifs à chacun des outils du dock. Ces outils diffèrent d'un outil à l'autre et permettent de créer des objets avec précision.
Enfin, en vert, au bas de la fenêtre principale, une barre d'infos reprend l'ensemble des informations relatives à la sélection en cours : couleur du fond et du contour, épaisseur du trait, calque en cours, nombres d'objets, de chemins, de nœuds, position relative en abscisse et ordonnée, zoom et degré de rotation...
Juste au-dessus de cette barre, on trouve la palette de couleur.
**Inkscape** est éminemment configurable, de manière à permettre à chaque utilisateur d'organiser l'espace de travail qui convient le mieux à sa manière de travailler.
### Préférences
Avant de se lancer dans la création, allons faire un tour dans les préférences globales d'**Inkscape.** Je vous promets que vous ne regretterez pas le détour. Nous les trouverons dans la barre de menus sous **Édition->Préférences [](https://innovation.iha.unistra.fr/uploads/images/gallery/2024-03/preferences.png)**
Les **Préférences** permettent de définir les options de langue, des outils, de l'interface et le comportement global du logiciel. Vous ajusterez ces options en fonction de vos préférences au fur et à mesure de votre utilisation du logiciel.
Par exemple, en sélectionnant **Interface** on peut définir la langue principale du logiciel...
[](https://innovation.iha.unistra.fr/uploads/images/gallery/2024-03/interfacechoixdelangue.png)
... mais aussi le niveau de correction du zoom : vous pouvez vous aider d'une règle que vous rapprocherez de votre écran pour étalonner l'échelle. De cette manière, quand votre zoom sera à 100%, l'image affichée sera à taille réelle.
#### Préférences de sauvegarde et enregistrement automatique
Vous pouvez définir vos préférences de sauvegarde sous **>Entrée/sortie**
**[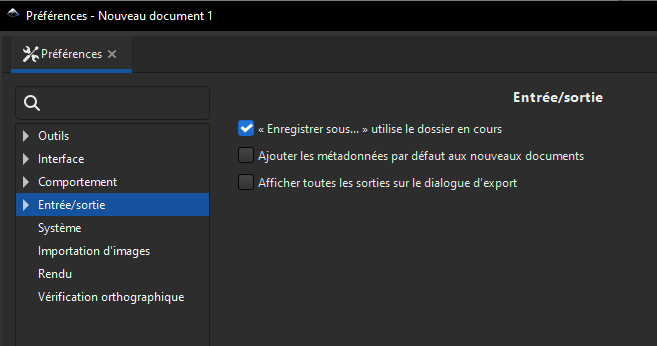](https://innovation.iha.unistra.fr/uploads/images/gallery/2024-03/entreesortie.png)**
... et définir les intervalles et le dossier d'enregistrement automatique. Bien qu'**Inkscape** soit globalement stable, personne n'est jamais à l'abri d'un crash particulièrement inopportun ni de la perte de donnée qui lui est liée. Heureusement, le logiciel vous permet de configurer des enregistrements automatiques.
[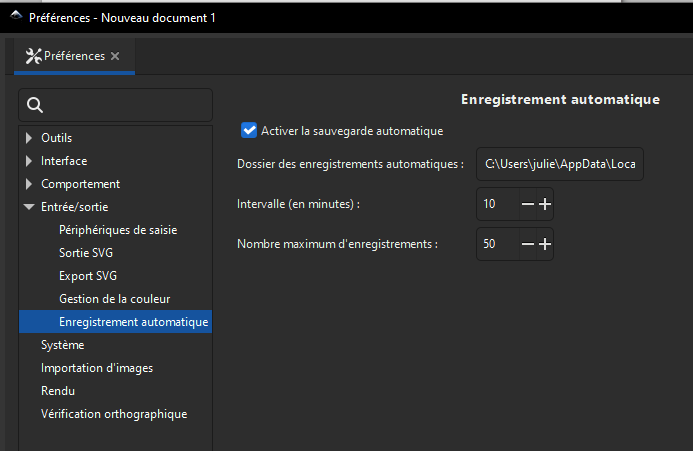](https://innovation.iha.unistra.fr/uploads/images/gallery/2024-03/autosave.png)
**ATTENTION** ! Il s'agit d'enregistrements automatiques, pas de sauvegardes ! En cas de crash, cela permet de retrouver une version stable d'un document en cours de travail, mais ces enregistrements ne sont pas définitifs. À chaque nouvel enregistrement automatique, la version de travail la plus ancienne est effacée. Pensez donc à sauvegarder régulièrement, comme pour tout autre logiciel de création, et pour ne pas vous y perdre, ne mélangez pas votre dossier de sauvegardes avec celui dans lequel seront placés les enregistrements automatiques.
# Utilisation d'Inkscape
Inkscape est un logiciel très complet qui propose de nombreuses fonctionnalités, principalement tournées vers le dessin vectoriel. Nous n'allons pas nous lancer dans un tutoriel exhaustif de toutes ces fonctionnalités et de tous les menus, mais tâcher de vous donner les outils dont vous aurez le plus besoin au Fablab, pour mettre en forme ou créer des designs que vous usinerez sur une machine comme la découpeuse laser ou le plotter vinyle. Nous ne rentrerons donc pas dans les détails qui concernent plus la création de logo, de visuels pour le web ou le print. Et vous verrez que cela fait déjà un certain nombre d'outils !
### L'espace de travail
#### Choisir les unités du document
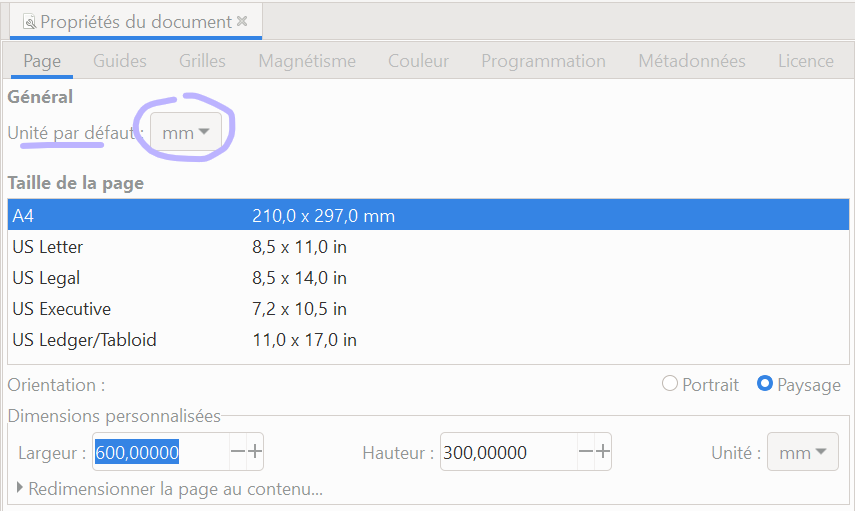
Fichier > Propriétés du document
[](https://wiki.fablab.sorbonne-universite.fr/BookStack/uploads/images/gallery/2022-08/image-1661949723859.png)
#### Choisir les dimensions de la page
Toujours dans Fichier > Propriétés du document
Il peut être pertinent d'adapter la taille du document au contexte d'usinage envisagé. Par exemple pour la découpeuse laser Speedy 100, une page de 600\*300mm - taille du plateau de la découpe laser - permet de se rendre compte de la taille des découpes. Pour la Silhouette Caméo 2, on pourra en revanche choisir une largeur 300mm qui est la largeur max de découpe.
[](https://wiki.fablab.sorbonne-universite.fr/BookStack/uploads/images/gallery/2022-08/image-1661949745354.png)
#### Importer un dessin vectoriel
Fichier > Importer ou glissé-déposé
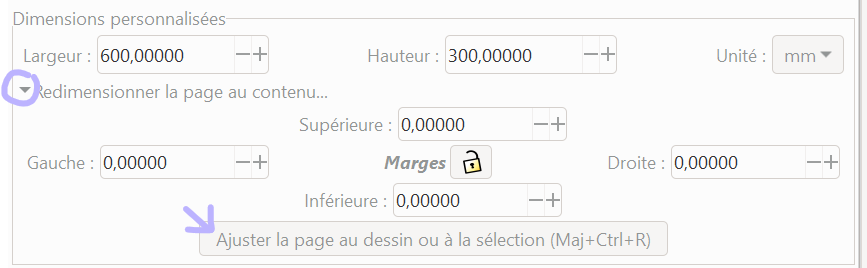
#### Ajuster la taille du document au dessin
Dans Fichier > Propriété du document, on peut cliquer sur "Redimensionner la page au contenu" pour déployer de nouvelles commandes. Une fois l'objet sélectionné sur la page, on peut personnaliser les marges ou les laisser à zéro et cliquer sur "Ajuster la page au dessin ou à la sélection". C'est souvent une bonne idée avant d'envoyer son travail au logiciel qui commande la machine (Job Control, Silhouette etc.)
[](https://wiki.fablab.sorbonne-universite.fr/BookStack/uploads/images/gallery/2022-08/image-1661950257150.png)
#### Afficher la grille
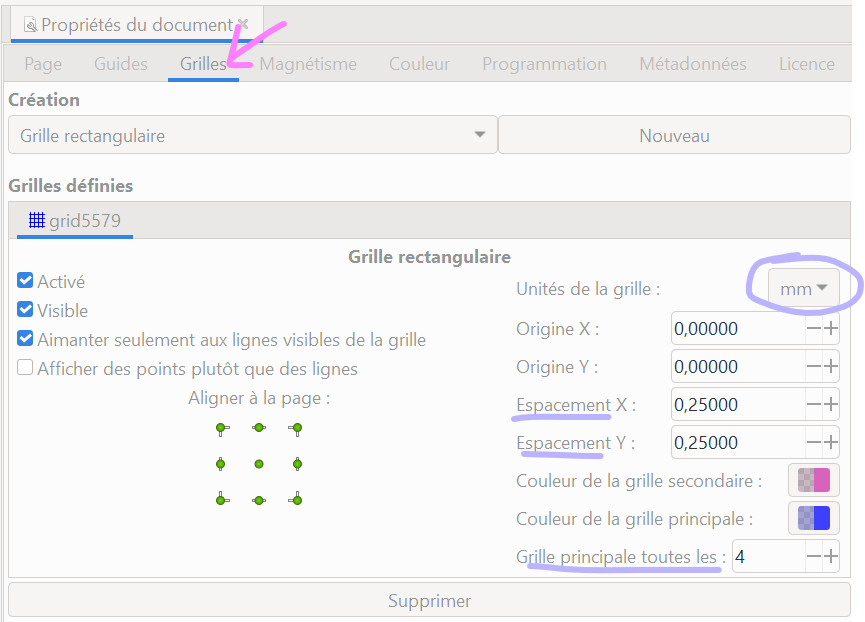
La grille est un quadrillage (en général) qui peut nous aider dans nos tracés. Pour l'afficher on va dans Affichage > Grille et on coche la case.
Pour la personnaliser on peut retourner dans Fichier > Propriétés du document puis aller dans l'onglet Grilles.
Par exemple on peut modifier l'unité de la grille, l'espacement en x et y des lignes de la grille secondaire et le nombre de lignes secondaires entre les lignes de la grille principale.
[](https://wiki.fablab.sorbonne-universite.fr/BookStack/uploads/images/gallery/2022-08/image-1661951231414.png)[ 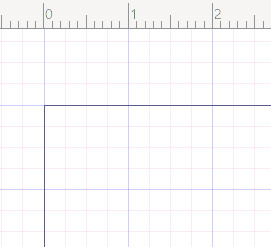](https://wiki.fablab.sorbonne-universite.fr/BookStack/uploads/images/gallery/2022-08/image-1661951244817.png)
#### Activer / Désactiver le magnétisme
- Le magnétisme est une fonctionnalité qui permet d'aligner des objets avec la souris, précisément par rapport :
- à d'autres objets
- aux grilles
- aux guides
- aux bords de la page
- etc.
- Les noeuds d'un vecteur sont attirés par les autres vecteurs, à la manière de deux aimants.
- Le magnétisme peut être activé avec le bouton situé en haut à droite
[](https://innovation.iha.unistra.fr/uploads/images/gallery/2025-02/TnFimage.png)
- En cliquant sur la flèche on peut régler quels types d'objets doivent être magnétiques
[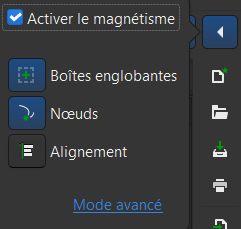](https://innovation.iha.unistra.fr/uploads/images/gallery/2025-02/edgimage.png)
### Créer un objet géométrique ou texte
#### Tracer des formes de base
On peut tracer des formes de base en cliquant sur les icônes suivantes du menu vertical.
[](https://wiki.fablab.sorbonne-universite.fr/BookStack/uploads/images/gallery/2022-08/image-1661959527756.png)
Un menu apparaît alors en haut pour changer quelques paramètres de ces formes. On peut y revenir à tout moment en sélectionnant l'objet puis en recliquant sur l'icône de forme.
[](https://wiki.fablab.sorbonne-universite.fr/BookStack/uploads/images/gallery/2022-08/image-1661959718616.png)
On peut aussi effectuer certaines modifications de ces formes directement avec les poignées qui apparaissent dessus quand on clique dessus puis sur l'icône de forme ou l'icône d'édition de noeuds.
#### Tracer des lignes par leurs points
Pour tracer des lignes on clique sur l'icône de "Tracer des courbes de Béziers et segments de droite" entourée ci-dessous :
[](https://wiki.fablab.sorbonne-universite.fr/BookStack/uploads/images/gallery/2022-08/image-1661959854908.png)
On clique sur la page pour ajouter un point, puis on **double-clique pour indiquer la fin** de la ligne. On peut créer une ligne brisée en cliquant aux plusieurs sommets de la ligne brisée et en terminant par un double-clic. On peut aussi **refermer la forme** en cliquant sur le premier point.
#### Bloquer l'horizontalité / la verticalité dans le tracé de lignes
En appuyant sur la touche `Ctrl` on peut verrouiller le fait que la ligne ne peut aller que dans certaines directions : horizontalement, verticalement, et à quelques angles intermédiaires. Cela peut être utile pour s'assurer qu'on trace bien des lignes horizontales / verticales. Naturellement on peut aussi pour cela utiliser une grille + un magnétisme à la grille.
#### Tracer des courbes de Béziers
Pour tracer des courbes de Béziers on utilise le même outil que pour les lignes, sauf qu'on va garder le **clic prolongé** quand on crée un nouveau nœud pour ajouter et contrôler des **poignées** qui vont adoucir le tracé au niveau du nœud. Les poignées alors créées sont dites **douces**, mais on peut aussi directement les créer **dures** c'est-à-dire que les deux côtés de part et l'autre du noeud vont dans des directions différentes. Pour cela on crée la première direction de poignée (en maintenant enfoncé le clic) puis on appuie sur la touche Maj qu'on maintient également et on peut désormais bouger la deuxième poignée indépendamment de la première. On relâche alors la souris et la touche pour continuer à tracer notre courbe.
Comme pour les lignes brisées, on peut arrêter la courbe à tout moment avec un double-clic et faire une forme fermée en cliquant sur le premier point.
#### Insérer du texte
L'outil texte est aussi dans la barre d'outils par défaut :
[](https://wiki.fablab.sorbonne-universite.fr/BookStack/uploads/images/gallery/2022-08/image-1661960912713.png)
Il ouvre un menu en haut de l'interface pour régler la taille de police, la typo, etc.
[](https://wiki.fablab.sorbonne-universite.fr/BookStack/uploads/images/gallery/2022-08/image-1661961035852.png)
Attention, afin que le texte soit identifié par JobControl / Silhouette et même que la typographie soit respectée au sein d'Inkscape sur un autre ordinateur il faut **la transformer en chemin** ! (voir plus bas)
Si vous voulez pouvoir modifier le texte tout en l'ouvrant depuis un autre ordinateur il faut préalablement vous assurez que la police existe aussi sur l'autre ordinateur, et si ce n'est pas le cas copier le fichier de la font et l'installer sur l'autre ordinateur (ce que vous n'êtes pas autorisés à faire sur les ordinateurs du Fablab).
#### Dupliquer / Copier / Coller
Pour copier, coller ou dupliquer un objet on peut utiliser le menu Edition mais on aura plutôt recours aux sempiternels raccourcis :
- Ctrl + C : Copier
- Ctrl + V : Coller
- Ctrl + D : Dupliquer
Attention, lorsqu'on duplique un objet, la copie se superpose à celui-ci, ce qui peut être bien pratique dans certains cas. Ceci dit il peut vite arriver d'oublier qu'on a deux tracés superposés et de lancer la même découpe deux fois de suite !
### Modifier les paramètres de base d'un objet
#### Déplacer un objet
Touche Raccourci : F1 ou S
On clique d'abord sur la flèche de **S**élection en haut de notre barre d'outils :
[](https://wiki.fablab.sorbonne-universite.fr/BookStack/uploads/images/gallery/2022-08/image-1661951720775.png)
Puis on clique sur l'objet. On peut alors le déplacer sur la page. Simple.
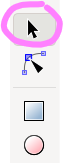
#### Modifier la taille d'un objet
On clique d'abord sur la flèche de sélection puis on clique une fois sur l'objet.
Deux possibilités ensuite pour le redimensionner :
- Lors du clic, des flèches noires apparaissent autour de l'objet : les tirer dans une direction permet de modifier la taille de l'objet dans cette dimension. Pour **conserver la proportionnalité** on peut cliquer simultanément sur la touche Ctrl.
- Les dimensions sont aussi indiquées en haut de l'interface par L (largeur) et H (hauteur), l'unité étant précisée juste à côté (on peut la modifier, dans notre cas on préfère utiliser les mm). Pour **conserver la proportionnalité** on peut cliquer sur le cadenas entourée en rose ci-dessous.
[](https://wiki.fablab.sorbonne-universite.fr/BookStack/uploads/images/gallery/2022-08/image-1661952895759.png)
Attention, les dimensions des objets tiennent compte de l'épaisseur de leurs contours !
#### Appliquer une rotation à un objet
On peut appliquer une rotation à la main en **cliquant deux fois** sur l'objet. Des poignées de rotation apparaissent.[](https://wiki.fablab.sorbonne-universite.fr/BookStack/uploads/images/gallery/2022-09/image-1662048451807.png)
On peut également définir la rotation plus précisément en ouvrant le boîte de dialogue de transformation, via Objet > Transformer (Maj + Ctrl + M), puis en allant dans l'onglet Rotation.
[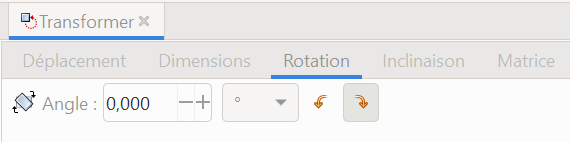](https://wiki.fablab.sorbonne-universite.fr/BookStack/uploads/images/gallery/2022-09/image-1662049335242.png)
#### Mettre un objet en miroir
Cette fonctionnalité peut servir si vous souhaitez floquer un design (plotter vinyle) ou graver les deux faces d'un objet. On sélectionne l'objet puis clique sur une de ces deux icônes, la première pour mettre en miroir horizontalement, la deuxième verticalement.
[](https://wiki.fablab.sorbonne-universite.fr/BookStack/uploads/images/gallery/2022-09/image-1662049480929.png)
#### Régler les paramètres de fond et de contour
Pour régler les paramètres de fond et contour, plusieurs possibilités :
##### 1) Sélectionner l'objet et utiliser la **palette** en bas de l'écran
- **un clic simple** pour modifier la couleur du fond,
- **un clic + Maj** enfoncée pour modifier la couleur du contour
Il est possible de customiser la palette qui s'affiche en bas de l'écran. Néanmoins la palette par défaut d'Inkscape dispose déjà de 4 couleurs pratiques pour préparer un travail à la découpe laser :
[](https://wiki.fablab.sorbonne-universite.fr/BookStack/uploads/images/gallery/2022-08/image-1661957290382.png)
- Vide pour retirer le fond, ou le contour si gravure
- Le noir RVB (0,0,0) pour le fond (gravure)
- Le rouge RVB (255, 0, 0) pour le contour (découpe)
- Le bleu RVB (0, 0, 255) pour le contour (marquage)
- on peut aussi se servir des nuances de gris pour régler différentes profondeurs de gravure
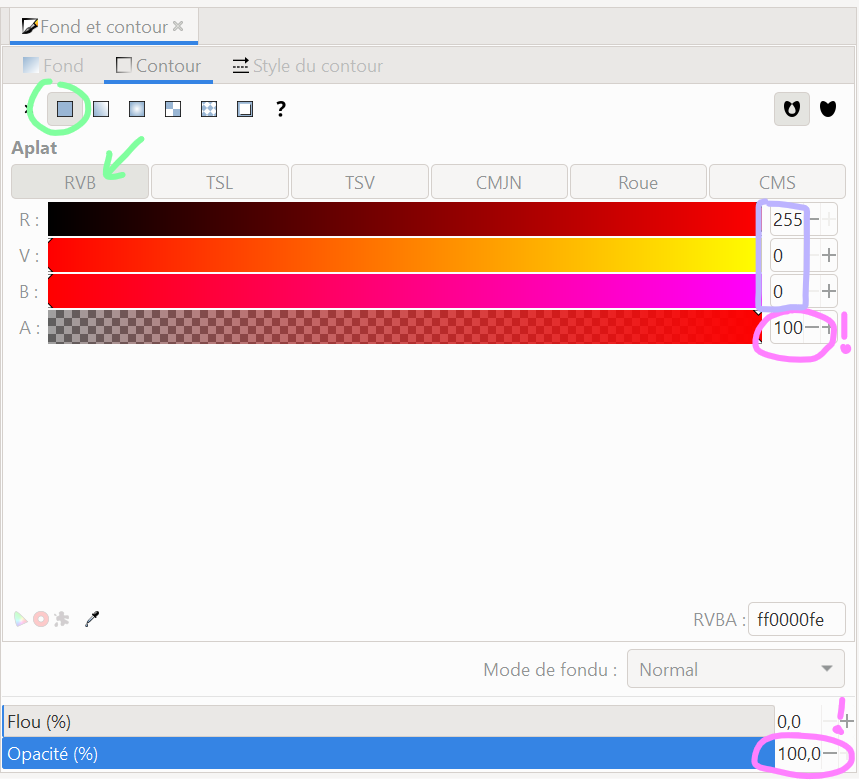
##### 2) par la boîte de dialogue "Fond et contour" :
aller dans **Objet > Fond et contour** (ou raccourci **Maj + Ctrl + F** ou clic sur son icône) pour ouvrir la fenêtre des commandes de fond. Puis sélectionner l'objet et modifier les paramètres de fond et contour depuis cette fenêtre. Cela offre plus de possibilités de réglages qu'avec la palette en bas de l'écran, notamment l'épaisseur du contour
Dans l'**onglet Fond** :
[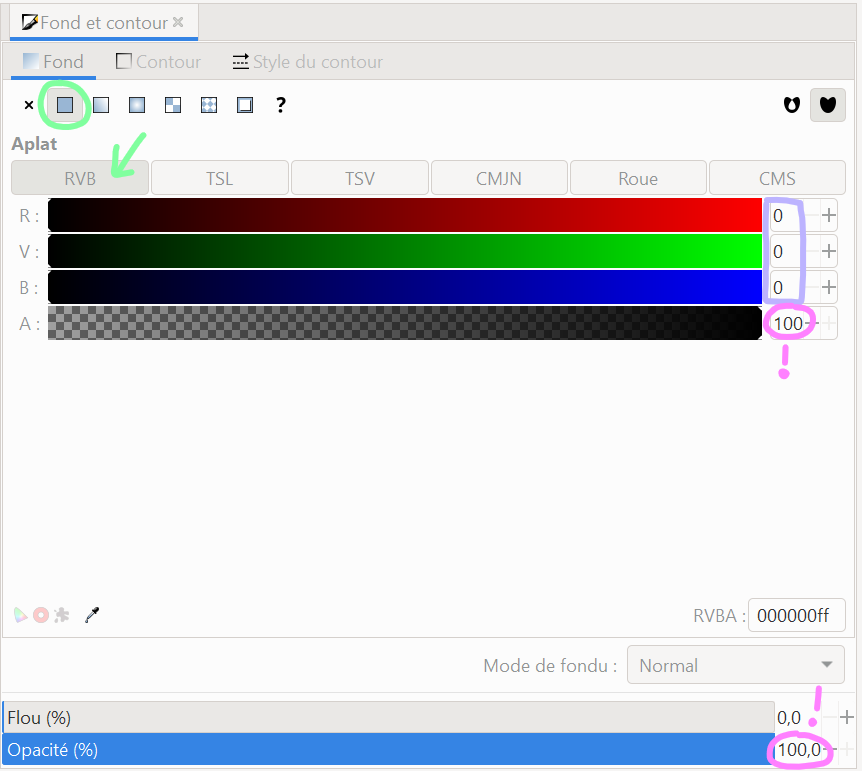](https://wiki.fablab.sorbonne-universite.fr/BookStack/uploads/images/gallery/2022-08/image-1661958093481.png)
Attention à bien sélectionner le mode colorimétrique RVB et vérifier que l'alpha et l'opacité sont à 100 !!
De même dans l'**onglet Contour :**
[](https://wiki.fablab.sorbonne-universite.fr/BookStack/uploads/images/gallery/2022-08/image-1661958773379.png)
Il peut aussi être nécessaire de modifier l'**épaisseur du trait**. Pour cela il faut aller dans la fenêtre Fond et Contour (Ctrl + Maj + F) puis dans l'onglet Style du contour.
[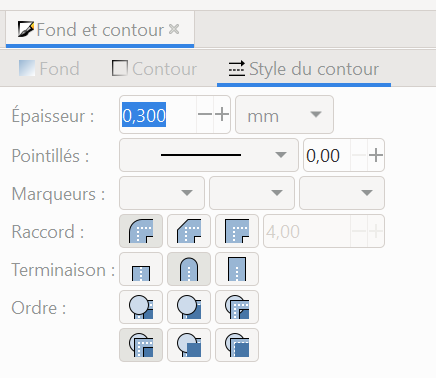](https://wiki.fablab.sorbonne-universite.fr/BookStack/uploads/images/gallery/2022-08/image-1661957639980.png)
Au Fablab on conseille 0,3 mm pour l'épaisseur du trait de découpe pour que le trait soit bien reconnu par le logiciel JobControl. Néanmoins attention l'épaisseur du trait joue sur les dimensions. Il faut penser que le laser va couper au milieu de la ligne - même si naturellement l'épaisseur du trait de découpe de la laser n'est pas nulle.
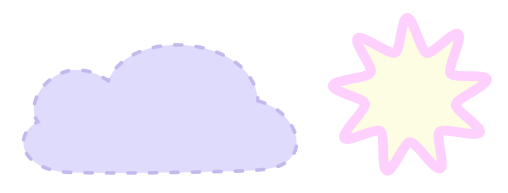
##### Copier un style d'un objet
Une fonctionnalité pas indispensable mais très pratique ! Notamment si vous voulez passer tous vos objets avec un même contour en rouge RVB (255,0,0) d'épaisseur 0,3mm (par exemple).
Voici deux objets de style (fond et contour) différents.
[](https://wiki.fablab.sorbonne-universite.fr/BookStack/uploads/images/gallery/2022-09/image-1662043697030.png)
Pour appliquer le style de l'objet de gauche à celui de droite :
- sélectionner l'objet de gauche
- taper Ctrl + C
- sélectionner l'objet de droite
- taper Ctrl + Maj + V
[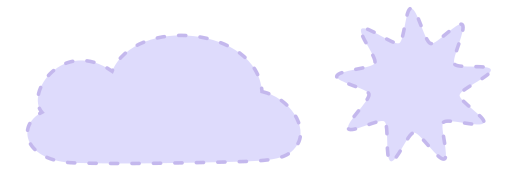](https://wiki.fablab.sorbonne-universite.fr/BookStack/uploads/images/gallery/2022-09/image-1662043810273.png)
### Organiser des objets les uns par rapport aux autres
#### Grouper et dégrouper des objets
Grouper des objets signifie les associer en un même ensemble, ce qui a pour effet qu'on peut alors appliquer le même effet à tous les éléments de l'ensemble en une seule fois. Par exemple, déplacer tous les éléments du groupe en une fois, ou leur appliquer un redimensionnement, une rotation, etc.
Pour grouper des objets, commencer par cliquer sur la flèche de sélection, puis sélectionner tous les éléments à grouper, soit en maintenant le clic appuyé et en tirant la sélection autour des objets, soit en maintenant la touche `Maj` appuyée et en cliquant sur chaque élément à grouper. Puis aller dans Objet > Grouper (ou utiliser le raccourci `Ctrl+G`).
Pour dégrouper les éléments et les désolidariser, cliquer sur le groupe puis aller Objet > Dégrouper (ou utiliser le raccourci `Ctrl+Maj+G)`
Attention à ne pas confondre cette commande avec la commande "Chemin > Séparer" que nous aborderons plus tard...
#### Aligner et distribuer les objets
Les commandes aligner et distribuer permettent d'organiser les objets les uns par rapports aux autres ou par rapport à la page.
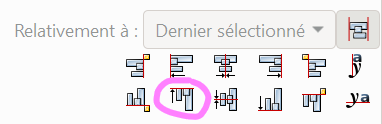
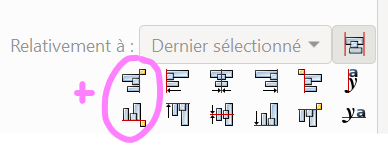
Pour les afficher on va dans **Objet > Aligner et distribuer** (ou raccourci Ctrl + Maj + A). Une fenêtre s'ouvre avec de nombreuses commandes. On peut sélectionner plusieurs objets et choisir de les aligner les uns par rapport aux autres ou un seul élément qu'on aligne à la page ou au dessin. Pour choisir comment sont appliquées les règles d'alignement et distribution, on utilise le menu déroulant "Relativement à : "
[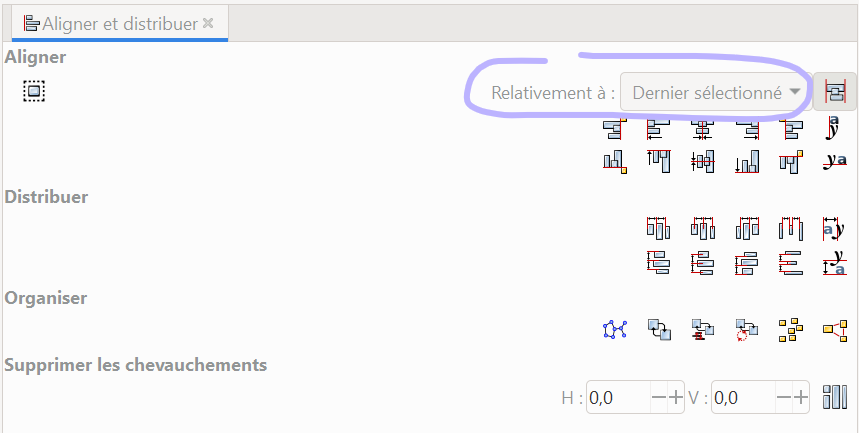](https://wiki.fablab.sorbonne-universite.fr/BookStack/uploads/images/gallery/2022-08/image-1661953929774.png)
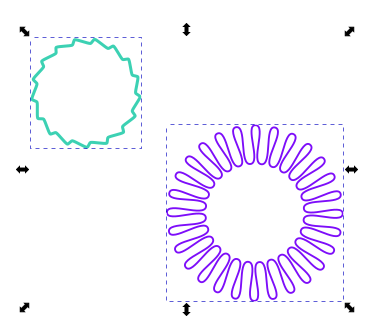
Considérons les deux objets ci-dessous. On les sélectionne.
[](https://wiki.fablab.sorbonne-universite.fr/BookStack/uploads/images/gallery/2022-08/image-1661953967875.png)
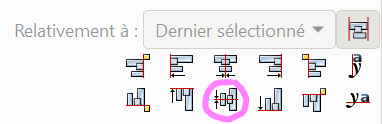
Voici quelques exemples de commandes d'alignement qu'on peut leur appliquer :
[](https://wiki.fablab.sorbonne-universite.fr/BookStack/uploads/images/gallery/2022-08/image-1661954021727.png)[ 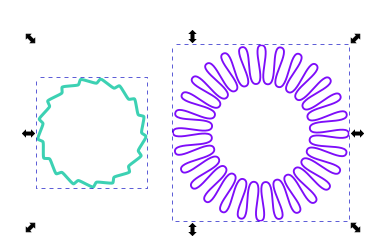](https://wiki.fablab.sorbonne-universite.fr/BookStack/uploads/images/gallery/2022-08/image-1661954021693.png)
[](https://wiki.fablab.sorbonne-universite.fr/BookStack/uploads/images/gallery/2022-08/image-1661954053183.png) 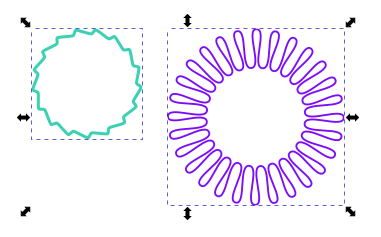
[](https://wiki.fablab.sorbonne-universite.fr/BookStack/uploads/images/gallery/2022-08/image-1661954139975.png)[ 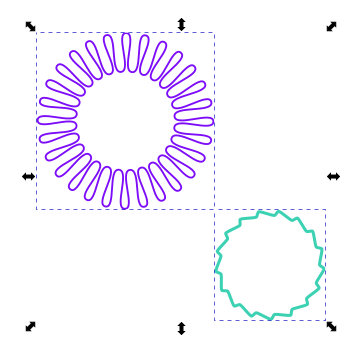](https://wiki.fablab.sorbonne-universite.fr/BookStack/uploads/images/gallery/2022-08/image-1661954053086.png)
#### Déplacer un objet au premier plan / à l'arrière-plan
On peut organiser les objets en profondeur sur le même calque. Pour cela on sélectionne un objet puis on va dans Objet > Monter ou Objet > Monter au premier-plan ou Objet > Descendre ou Objet > Descendre en arrière-plan.
Ci-dessous une situation initiale avec trois objets, puis en déplaçant l'élément vert en arrière. En reprenant la situation initiale et en passant cette-fois l'objet vert en arrière-plan on obtient la troisième situation.
[](https://wiki.fablab.sorbonne-universite.fr/BookStack/uploads/images/gallery/2022-08/image-1661954995986.png)
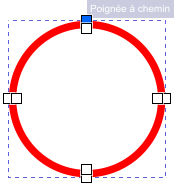
### Principe : Objet, fond, contour et chemin
Le logiciel de dessin vectoriel repose sur des points en 2D (plan X,Y) qui permettent de définir des vecteurs et ces vecteurs peuvent être utilisés pour définir des objets. Tout l'intérêt du dessin vectoriel c'est de travailler au niveau d'un objet plutôt que sur chaque point qui le compose.
#### Objet et Chemin
En deux mots :
- un **objet** est un ensemble de points
- on manipule les propriétés de l'objet pour modifier sa forme, donc certains points supports
- un **chemin** est un ensemble de points
- on manipule les points pour modifier la forme du chemin
Voici une brève description de la structure des éléments dans Inkscape, du plus haut au plus bas niveau :
- **Objet** vectoriel facile à manipuler "comme dans PowerPoint"
- Objet de Forme Géométrique mathématiquement défini et simple
- Objet Texte : un rectangle contenant du texte, Police de caractère
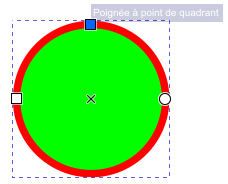
- Exemple un cercle/ellipse
- 4 points supports de la géométrie : centre + 3 quadrants
- centre : coordonnées X,Y
- Poignée à point de quadrant gauche : rayon X de l'ellipse (Rx=10mm)
- Poignée à point de quadrant haut: rayon Y de l'ellipse (Ry=10mm)
- Contour : rouge, épaisseur 1mm qui s'étant symmétriquement sur le fond et à l'extérieur du fond
- Fond : vert
- Dimension : 21mm x 21mm
[ ](https://innovation.iha.unistra.fr/uploads/images/gallery/2025-02/coAimage.png)[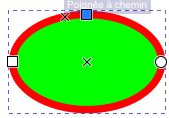](https://innovation.iha.unistra.fr/uploads/images/gallery/2025-02/fCcimage.png)
- Un **Chemin** est l'élément fondamental qu'on manipule en dessin vectoriel
- Forme géométrique quelconque constituée d'un ensemble de points regroupés
- Une fois un objet cercle transformé en chemin, on ne peut plus simplement modifier son rayon
- par contre on peut modifier sa forme librement en déplaçant les point qui le composent
- 4 points supports de la géométrie : 4 quadrants et leur tangente
- Contour : rouge, épaisseur 1mm
- Fond : vert
[](https://innovation.iha.unistra.fr/uploads/images/gallery/2025-02/kTaimage.png)[](https://innovation.iha.unistra.fr/uploads/images/gallery/2025-02/4J4image.png)
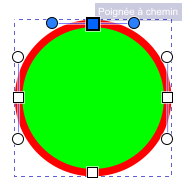
- Contour en chemin
- 8 points supports de la géométrie du cercle
- Plus de contour
- Fond : rouge
[ ](https://innovation.iha.unistra.fr/uploads/images/gallery/2025-02/xHCimage.png)[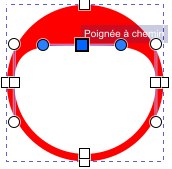](https://innovation.iha.unistra.fr/uploads/images/gallery/2025-02/8Qjimage.png)
- Point
#### Fond et Contour
Les objets et chemins sont caractérisés par les points qui les composent, mais aussi et surtout par :
- le **fond** : couleur du rond vert
- le **contour** : couleur du cercle rouge
- Style de contour
### Manipuler les chemins
Pour manipuler les chemins il faut avant tout cliquer sur l'outil sélection de nœuds
[](https://wiki.fablab.sorbonne-universite.fr/BookStack/uploads/images/gallery/2022-08/image-1661961475070.png)
#### Transformer un texte en chemin
Pour transformer un texte en chemin (ce qui sera nécessaire pour passer sur une autre machine et surtout pour usiner votre fichier), aller dans **Chemin > Objet en chemin** ou faire le raccourci **Ctrl + Maj + C**. On peut vérifier que le texte a bien été transformé en chemin en cliquant sur l'outil Sélection de noeuds puis en cliquant sur le texte.
Texte pas encore transformé en chemin :
[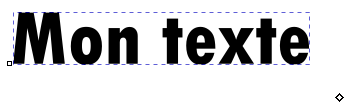](https://wiki.fablab.sorbonne-universite.fr/BookStack/uploads/images/gallery/2022-08/image-1661961648951.png)
Texte transformé en chemin :
[](https://wiki.fablab.sorbonne-universite.fr/BookStack/uploads/images/gallery/2022-08/image-1661961651879.png)
#### Transformer une forme en chemin
Pour éditer les noeuds d'une forme indépendamment les uns des autres il est nécessaire de d'abord la transformer en chemin. Par ailleurs c'est un bon réflexe à avoir lorsqu'on doit découper / marquer ces formes, car cela peut être source de problèmes en passant sur le logiciel qui pilote la machine. Ainsi si on a personnalisé l'arrondi d'un rectangle mais pas transformé cette forme en chemin, il arrive que le logiciel JobControl ne voit pas les arrondis. Enfin, il est nécessaire de partir de chemins pour réaliser des opérations booléennes comme l'intersection, la différence...(cf plus bas). Il est donc **vivement conseillé de toujours transformer une forme en chemin** quand vous devez usiner votre design. (Attention, l'opération inverse n'est pas possible !)
Avant d'être transformé en chemin, le rectangle se contrôle à l'aide des coins et d'une poignée ronde ( + réglages du menu en haut). Une fois transformée en chemin, la forme est traduite en noeuds. Pour transformer la forme en chemin le procédé est identique que pour le texte : on sélectionne la forme puis va dans Chemin > Objet en chemin, ou Ctrl + Maj + C
[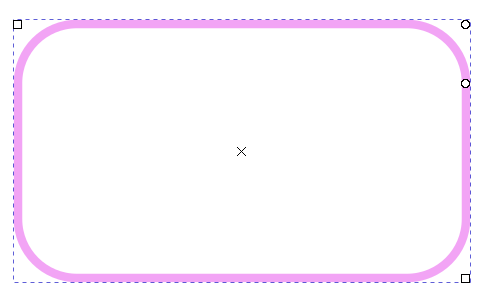](https://wiki.fablab.sorbonne-universite.fr/BookStack/uploads/images/gallery/2022-09/image-1662044782310.png)[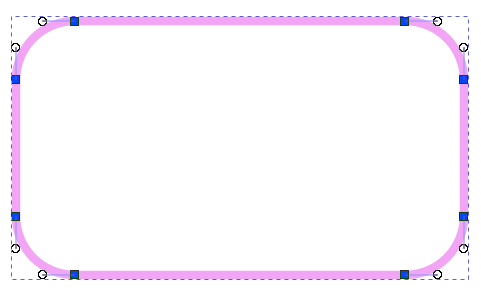](https://wiki.fablab.sorbonne-universite.fr/BookStack/uploads/images/gallery/2022-09/image-1662044869165.png)
#### Transformer un contour en chemin
Il peut être utile de transformer le contour en chemin. Par exemple ici on a épaissi le contour mais comme on peut voir avec l'outil d'édition de noeud le tracé est toujours une ligne, on ne peut pas lui donner de fond.
[](https://wiki.fablab.sorbonne-universite.fr/BookStack/uploads/images/gallery/2022-08/image-1661962109549.png)
En allant dans Chemin > Contour en chemin on obtient :
[](https://wiki.fablab.sorbonne-universite.fr/BookStack/uploads/images/gallery/2022-08/image-1661962194972.png)
De sorte que maintenant si on passe le contour de cette forme en rouge et qu'on supprimer le fond on obtient la forme suivante qu'on pourrait découper :
[](https://wiki.fablab.sorbonne-universite.fr/BookStack/uploads/images/gallery/2022-08/image-1661962253150.png)
Attention, l'opération inverse n'est pas possible !
#### Modifier les poignées et les types de nœuds
Les chemins sont constitués de noeuds, chaque noeud qui se caractérisant (outre par ses coordonnées) par des poignées situées de part et d'autre de ce noeud. Ces poignées donnent une indication de la courbure du chemin entre deux noeuds.
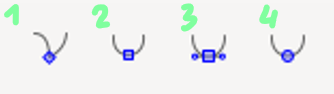
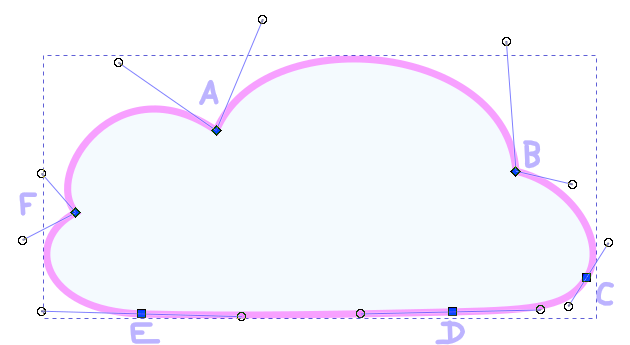
On distingue ainsi différents types de noeuds selon comment sont définies leurs poignées. Ils sont représentés par des formes différentes (cercle, carré, carré incliné) :
[](https://wiki.fablab.sorbonne-universite.fr/BookStack/uploads/images/gallery/2022-09/image-1662027461053.png)
1. **nœud dur** : les deux poignées du noeud sont indépendentes l'une de l'autre
2. **nœud doux** : les poignées sont alignées avec le noeud
3. **nœud symétrique** : le noeud est au centre du segment défini par ses deux poignées
4. **nœud automatique** : les poignées sont alignées avec le noeud. Leur distance au noeud s'adapte selon le tracé du chemin pour créer une courbe "lisse".
On peut modifier le type d'un noeud en cliquant sur l'outil **Sélection de noeuds** puis en cliquant sur le chemin puis en cliquant sur le noeud.
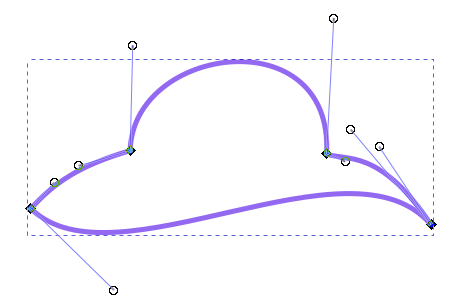
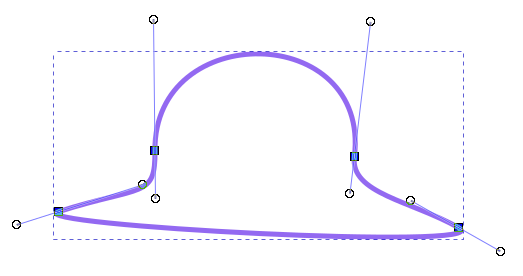
Quelques exemples de formes avec les quatre noeuds positionnés au même endroit mais des poignées différentes et de différents types :
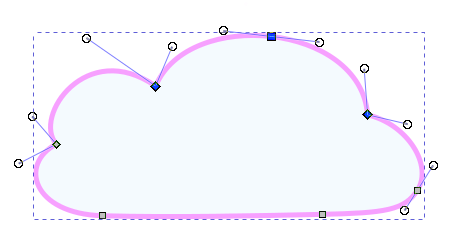
4 nœuds durs :
[ ](https://wiki.fablab.sorbonne-universite.fr/BookStack/uploads/images/gallery/2022-09/image-1662029832988.png)[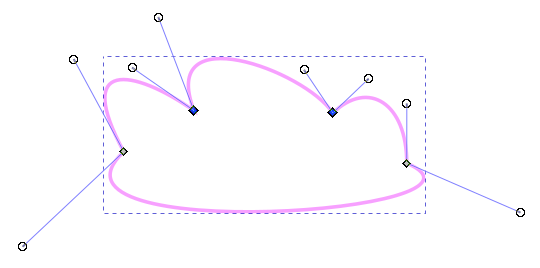](https://wiki.fablab.sorbonne-universite.fr/BookStack/uploads/images/gallery/2022-09/image-1662029964832.png)
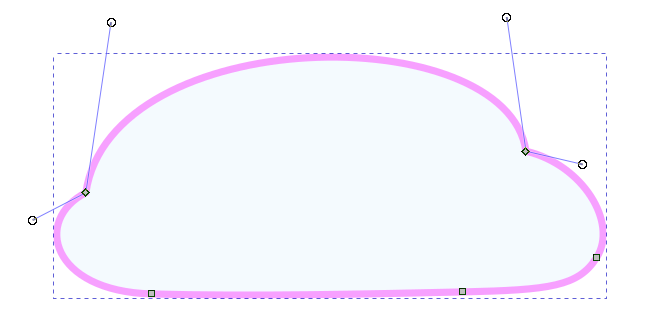
4 nœuds doux :
[](https://wiki.fablab.sorbonne-universite.fr/BookStack/uploads/images/gallery/2022-09/image-1662029833030.png)[](https://wiki.fablab.sorbonne-universite.fr/BookStack/uploads/images/gallery/2022-09/image-1662030029948.png)
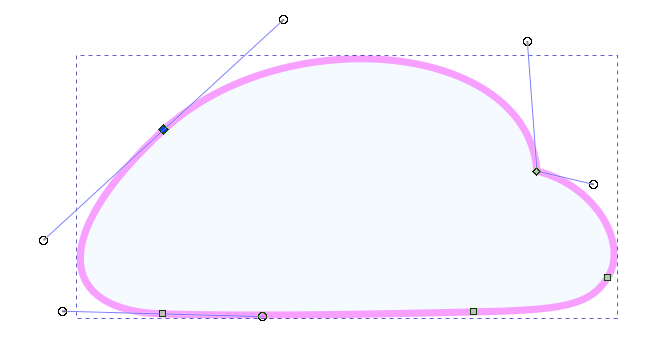
4 nœuds symétriques :
[](https://wiki.fablab.sorbonne-universite.fr/BookStack/uploads/images/gallery/2022-09/image-1662029833069.png)[](https://wiki.fablab.sorbonne-universite.fr/BookStack/uploads/images/gallery/2022-09/image-1662030093840.png)
4 noeuds auto :
[](https://wiki.fablab.sorbonne-universite.fr/BookStack/uploads/images/gallery/2022-09/image-1662030145182.png) [](https://wiki.fablab.sorbonne-universite.fr/BookStack/uploads/images/gallery/2022-09/image-1662030152880.png)
Remarque : Transformer tous les noeuds en noeuds automatiques donne toujours le même résultat pour 4 emplacements de noeuds donnés.
Bien sûr on peut mélanger les types de noeuds au sein d'un même chemin. On peut également faire un noeud sans poignée ou avec une seule poignée.
#### Les opérations sur les nœuds
Pour chacune de ces opérations, on clique avant tout sur l'outil sélection de noeuds. Cela ouvre ce menu en haut de la fenêtre permettant de réaliser les différentes opérations.
[](https://wiki.fablab.sorbonne-universite.fr/BookStack/uploads/images/gallery/2022-09/image-1662035930530.png)
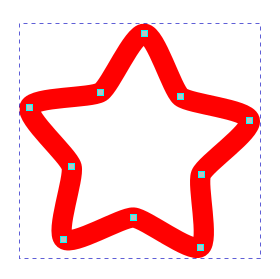
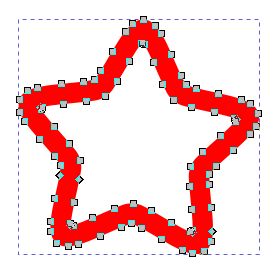
On va utiliser la forme suivante pour illustrer les différentes opérations
[](https://wiki.fablab.sorbonne-universite.fr/BookStack/uploads/images/gallery/2022-09/image-1662036736884.png)
##### Ajouter des nœuds
Pour ajouter un noeud on clique sur l'outil Sélection de noeuds puis sur le chemin auquel on veut ajouter un noeud, puis on double-clique sur le chemin à l'endroit où on veut ajouter un noeud.
On peut aussi utiliser l'icône qui permet d'ajouter un noeud au milieu du segment (plus d'options en développant la flèche) :[](https://wiki.fablab.sorbonne-universite.fr/BookStack/uploads/images/gallery/2022-09/image-1662036176265.png)
[](https://wiki.fablab.sorbonne-universite.fr/BookStack/uploads/images/gallery/2022-09/image-1662036453989.png)
*Ajout d'un noeud entre A et B*
##### Supprimer un nœud
Toujours avec l'outil sélection de noeuds, on clique sur le chemin, clique sur le noeud qu'on veut supprimer et appuie sur la touche backspace (effacer).
On peut aussi utiliser l'icône : [](https://wiki.fablab.sorbonne-universite.fr/BookStack/uploads/images/gallery/2022-09/image-1662036214699.png)
[](https://wiki.fablab.sorbonne-universite.fr/BookStack/uploads/images/gallery/2022-09/image-1662036322299.png)
*Suppression du nœud A*
##### Fusionner des nœuds
[](https://wiki.fablab.sorbonne-universite.fr/BookStack/uploads/images/gallery/2022-09/image-1662036286222.png) Pour fusionner deux nœuds il faut d'abord les sélectionner tous les deux : on clique sur l'un puis en maintenant la touche Maj appuyée clique sur l'autre. Ils passent en surbrillance bleue. On clique ensuite sur l'icône.
[](https://wiki.fablab.sorbonne-universite.fr/BookStack/uploads/images/gallery/2022-09/image-1662036540529.png)
*Fusion des nœuds A et F*
##### Briser un chemin aux nœuds sélectionnés
[](https://wiki.fablab.sorbonne-universite.fr/BookStack/uploads/images/gallery/2022-09/image-1662036914549.png) On sélectionne un nœud puis clique sur l'icône. A première vue il ne se passe rien (ou presque, on peut quand même voir un changement dans les poignées), mais en réalité un nouveau nœud a été créé et superposé. On peut déplacer ce dernier indépendamment.
[](https://wiki.fablab.sorbonne-universite.fr/BookStack/uploads/images/gallery/2022-09/image-1662036959260.png)[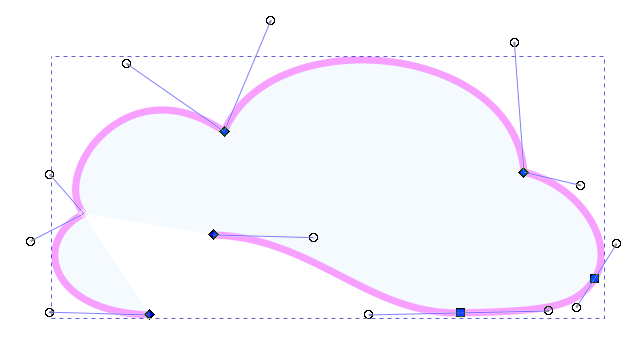](https://wiki.fablab.sorbonne-universite.fr/BookStack/uploads/images/gallery/2022-09/image-1662036959187.png)
*Chemin brisé en E*
##### Créer un segment entre deux nœuds
[ ](https://wiki.fablab.sorbonne-universite.fr/BookStack/uploads/images/gallery/2022-09/image-1662037284391.png)On sélectionne les deux nœuds puis on clique sur l'icône. Cette fois on ne part pas de la situation initiale pour illustrer mais de la situation précédente juste ci-dessus.
[](https://wiki.fablab.sorbonne-universite.fr/BookStack/uploads/images/gallery/2022-09/image-1662037299721.png)
*Segment créé entre E et E'*
##### Supprimer un segment entre deux nœuds
[ ](https://wiki.fablab.sorbonne-universite.fr/BookStack/uploads/images/gallery/2022-09/image-1662037444078.png)On sélectionne les deux nœuds puis on clique sur l'icône. On repart de la situation initiale pour illustrer :
[](https://wiki.fablab.sorbonne-universite.fr/BookStack/uploads/images/gallery/2022-09/image-1662037383890.png)
*Segment supprimé entre E et D*
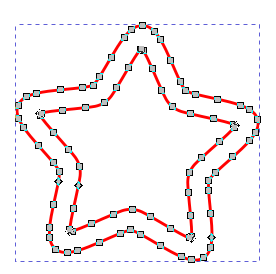
### Opérations sur les chemins
#### Illustration des différentes opérations
On peut appliquer des opérations sur les chemins de plusieurs objets (sauf opération séparer) comme l'union, la différence, etc. Ces opérations créent un nouveau chemin selon certaines règles. Pour appliquer ces opérations, on sélectionne les objets, sans ordre particulier, puis on choisit une des opérations accessible depuis le **menu Chemin.** Comme leur nom l'indique, elles **s'appliquent sur des chemins** : il vous faudra peut-être préalablement **transformer votre forme en chemin** (voir plus haut).
[](https://wiki.fablab.sorbonne-universite.fr/BookStack/uploads/images/gallery/2022-09/image-1662040030949.png)
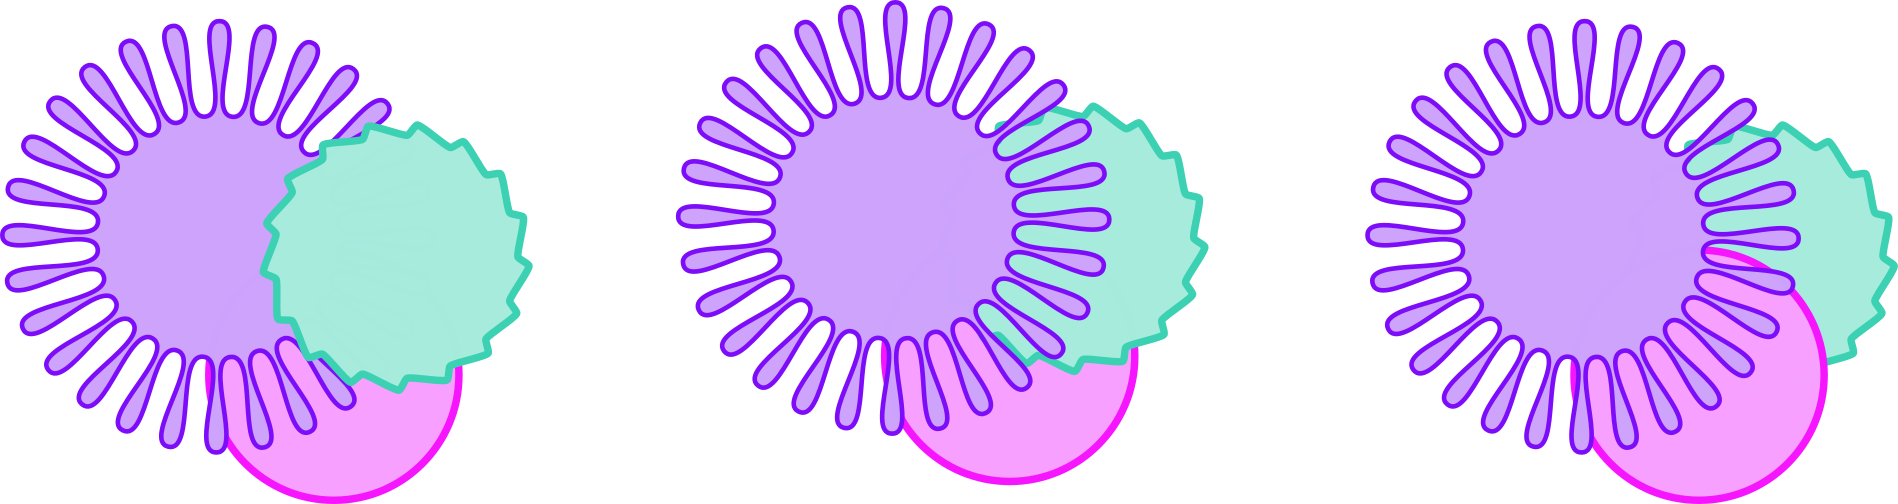
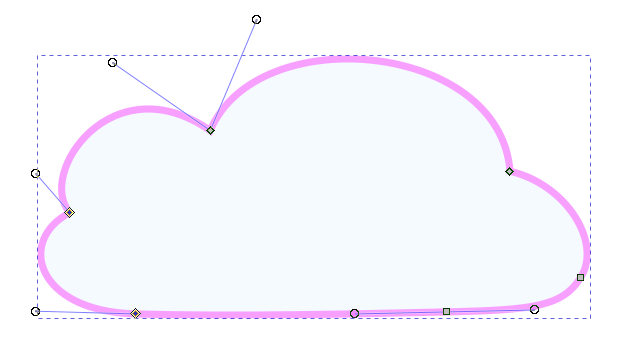
Il est à noter d'une part qu'il est nécessaire **que les objets ne soient pas groupés** ensemble, et d'autre part que le résultat de l'opération n'est pas le même **selon quel objet se situe devant l'autre**. Voici une illustration de ces opérations appliquées aux chemins de deux objets, à gauche dans le cas où l'objet jaune (disque) est devant l'objet bleu (nuage), à droite dans le cas où il est derrière.
[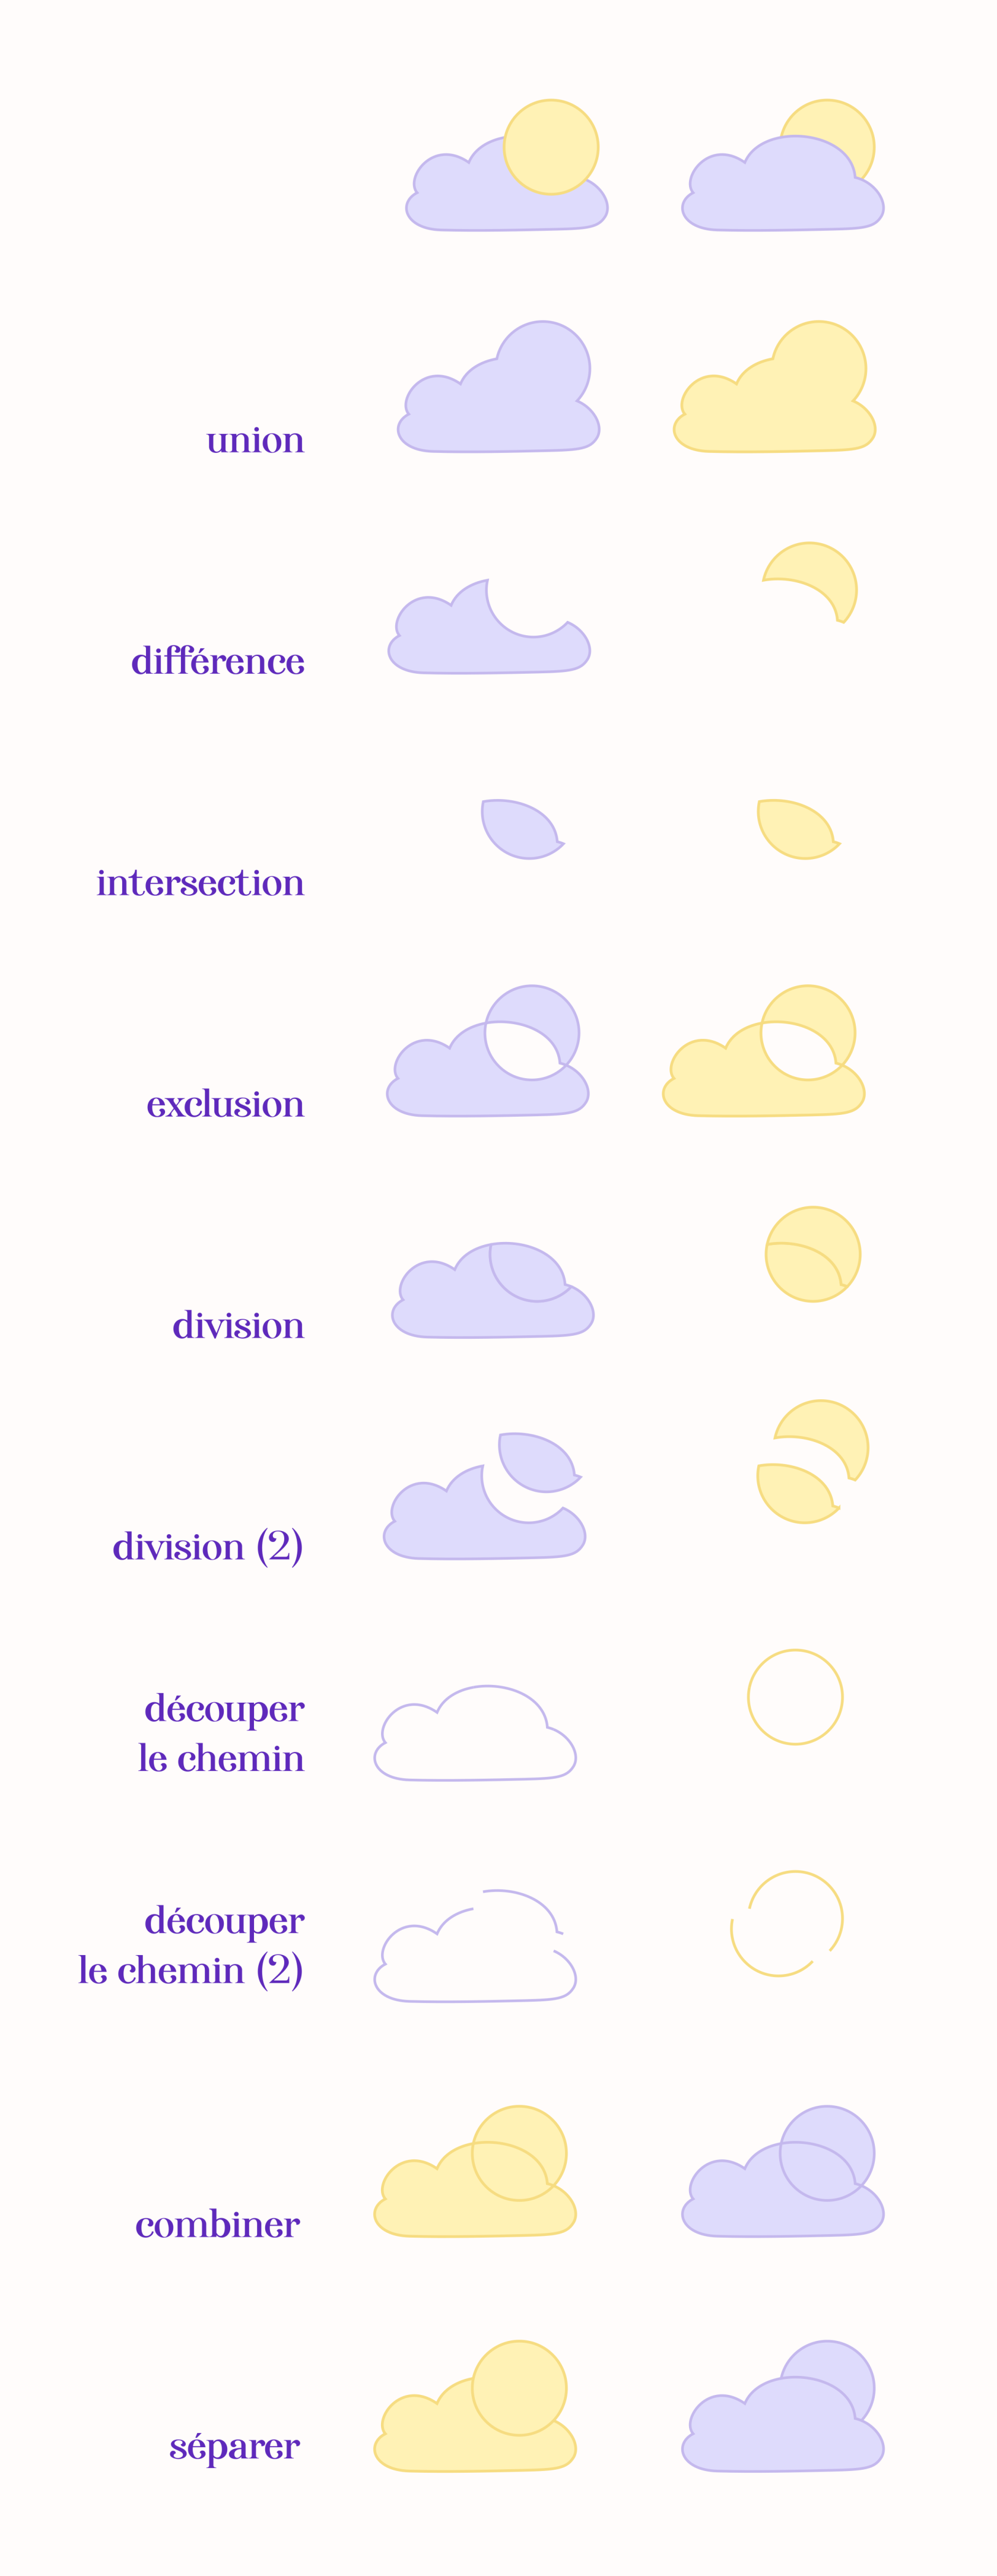](https://wiki.fablab.sorbonne-universite.fr/BookStack/uploads/images/gallery/2022-09/image-1662111252790.png)**Remarque** : toutes les opérations ci-dessus sont appliquées aux objets de la situation initiale tout en haut de l'illustration, à l'exception de la dernière "séparer" qui n'a pas d'effet sur deux objets distincts et a donc été appliqué à l'étape précédente de chemins combinés.
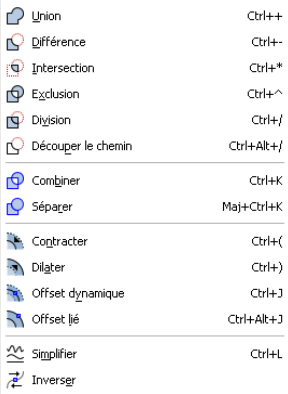
#### Combiner / Séparer
Regardons de plus près ce qui se passe pour ces deux opérations sur les chemins, qui vont nous servir régulièrement quand on va préparer nos designs pour un travail de découpe / gravure.
Ces deux opérations s'appliquent sur les chemins, et c'est notamment en ceci que combiner est bien différent de l'opération grouper, qui s'applique simplement aux objets. En fait combiner est plus spécifique que grouper : il y a une similarité dans le résultat de ces deux opérations, par exemple si l'on déplace le groupe nouvellement formé ou le chemin nouvellement combiné, toutes les "formes" se déplacent bien simultanément. En revanche, il est toujours possible dans un groupe de faire des opérations sur les chemins indépendamment, alors qu'avec la combinaison de chemin tous les sous-chemins perdent leur indépendance.
[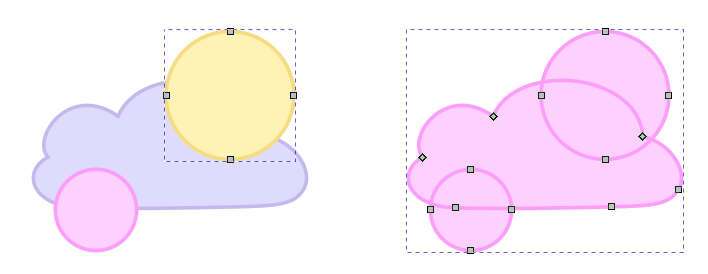](https://wiki.fablab.sorbonne-universite.fr/BookStack/uploads/images/gallery/2022-09/image-1662041926455.png)
A gauche, les éléments sont groupés. On peut sélectionner le disque jaune séparément. En revanche à droite, les chemins sont combinés, on ne peut donc que sélectionner tous les noeuds à la fois.
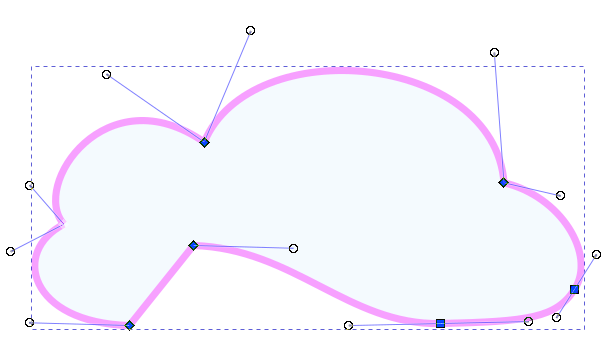
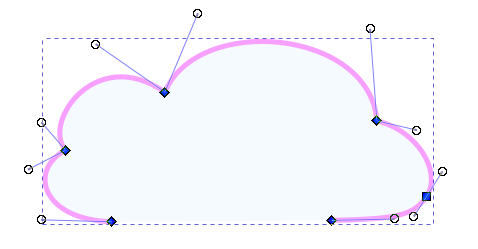
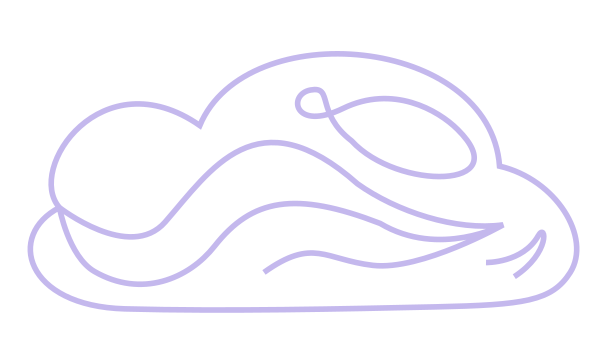
Regardons maintenant l'opération séparer. Celle-ci n'a d'effet que si le chemin a lui-même des sous-chemins. Un sous-chemin est une séquence de noeuds connectés les uns aux autres.
Voici un exemple de chemin qui possède des sous-chemins
[](https://wiki.fablab.sorbonne-universite.fr/BookStack/uploads/images/gallery/2022-09/image-1662042182143.png)[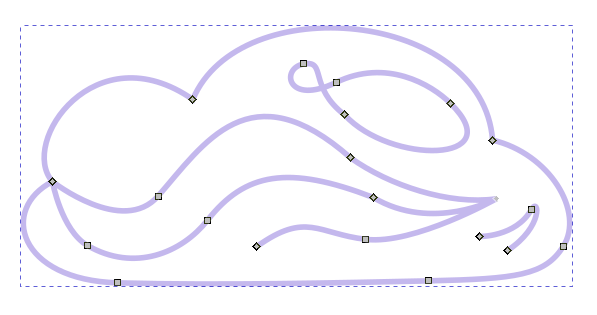](https://wiki.fablab.sorbonne-universite.fr/BookStack/uploads/images/gallery/2022-09/image-1662042182095.png)
Si on applique l'opération Séparer à ce chemin, les sous-chemins vont être détectés et pourront alors être manipulés indépendamment. Ces sous-chemins constituent même de nouveaux objets indépendants. Ainsi dans l'exemple ci-dessous on a changé la couleur du contour des différents sous-chemins qui ont été séparés.
[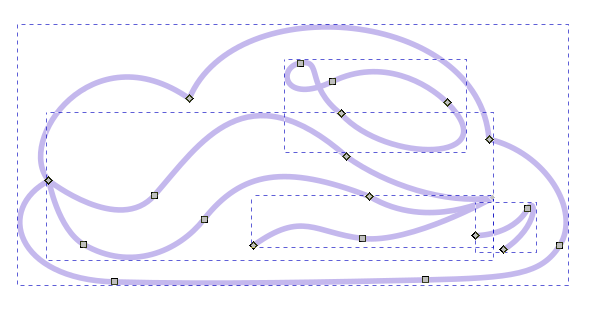](https://wiki.fablab.sorbonne-universite.fr/BookStack/uploads/images/gallery/2022-09/image-1662042182040.png)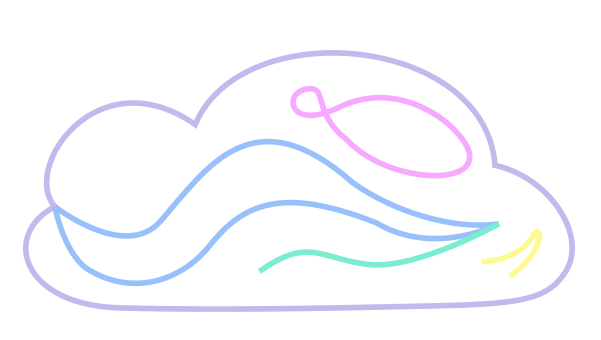
On peut aussi déplacer les objets nouvellement créés.
[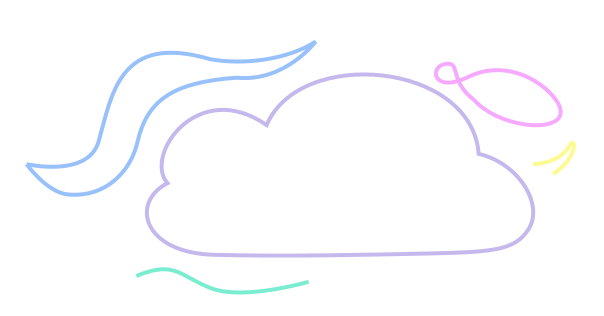](https://wiki.fablab.sorbonne-universite.fr/BookStack/uploads/images/gallery/2022-09/image-1662043203976.png)
Cela peut s'avérer indispensable dans certaines manipulations de designs avant découpe. Par exemple pour séparer le contour externe d'une forme vectorielle des sous-chemins internes.
#### Dilater
Parmi les autre opérations sur les chemins, on peut enfin citer l'opération Dilater qui pourra être utile notamment si l'on souhaite créer de petites formes à la découpeuse laser comme des badges ou des magnets.
Ainsi en partant de la forme ci-dessous à gauche, on la **duplique** (la copie se superpose alors à la forme) puis on va dans **Chemin > Dilater**. Ici on a appliqué deux fois l'opération Dilater. La copie est "élargie" autour du chemin initial. On peut passer le contour du chemin externe en rouge pour la découpe et le contour du chemin interne en bleu par exemple pour du marquage (on pourrait procéder de façon similaire avec de la gravure à l'intérieur).
[](https://wiki.fablab.sorbonne-universite.fr/BookStack/uploads/images/gallery/2022-09/image-1662048165495.png)
-----Auteure: Clara Devanz, sur le [wiki du FabLab de Sorbonne Université](https://wiki.fablab.sorbonne-universite.fr/BookStack/books/machines/page/utilisation-de-la-trotec-speedy-100)[ Attribution-NonCommercial 4.0 International (CC BY-NC 4.0) ](https://creativecommons.org/licenses/by-nc/4.0/)
# Obtenir un tracé vectoriel à partir d'une image sur inkscape
Dans ce tutoriel on se place dans un contexte classique au Fablab où on souhaite partir d'un croquis, un dessin, une image matricielle etc... pour l'usiner avec une machine à commande numérique (comme la découpeuse laser ou le plotter de découpe vinyle).
Plus spécifiquement, notre objectif est d'obtenir **le contour d'un dessin** pour pouvoir le découper. Il nous faut donc :
- **un tracé fermé**
- **pas de double ligne**
Examinons plusieurs cas possibles :
#### En partant d'une image vectorielle...
C'est le cas le plus simple, car il n'y a pas besoin de vectoriser l'image !
On peut chercher une image vectorielle en ajoutant "vector" ou "svg" à sa recherche. Notez que vous avez généralement dans votre moteur de recherche une option pour filtrer les résultats par droits d'usages (par exemple "Licences Creative Commons")
##### ...de silhouette
Dans un cas où on voudrait seulement un contour externe, le plus simple est de chercher directement une image avec un contour fermé simple. Pour cela il peut être pratique d'ajouter le mot-clé "silhouette" à sa recherche.
Une fois qu'on a trouvé une image au format vectoriel (svg pour l'ouvrir simplement depuis Inkscape), on l'importe simplement dans Inkscape, la redimensionne, passe le contour en rouge et retire le fond, et on est prêt pour de la découpe !
[](https://wiki.fablab.sorbonne-universite.fr/BookStack/uploads/images/gallery/2022-08/image-1661854554597.png)
*(super facile, voilà le [lien de l'image](https://publicdomainvectors.org/photos/Tyrannosaurus-Rex-Silhouette.png) si vous voulez essayer vous-même)*
##### ...en aplats
On pourrait aussi avoir envie de partir d'une image vectorielle constituée d'aplats de différentes couleurs. Il est fort à parier que cet objet est lui-même constitué de plusieurs sous-formes vectorielles. Il va donc nous falloir **dégrouper** ces formes. Dans cet exemple, cela nous a permis d'isoler la forme du fond (jaune-orangée) qui fait un parfait contour. On enlève le fond et passe le contour en rouge et on est prêt pour la découpe !
[](https://wiki.fablab.sorbonne-universite.fr/BookStack/uploads/images/gallery/2022-08/image-1661855944669.png)
A partir de cette même image, on pourrait aussi avoir envie de garder les formes internes pour faire de la gravure (dans le cas de la découpe laser). On peut donc laisser notre forme globale (celle qui définit le contour de découpe) **superposée** aux autres éléments. En principe JobControl va bien passer les couleurs en **nuances de gris** puis en gravure, mais on peut aussi le faire nous-même pour bien maîtriser les teintes que l'on souhaite.
[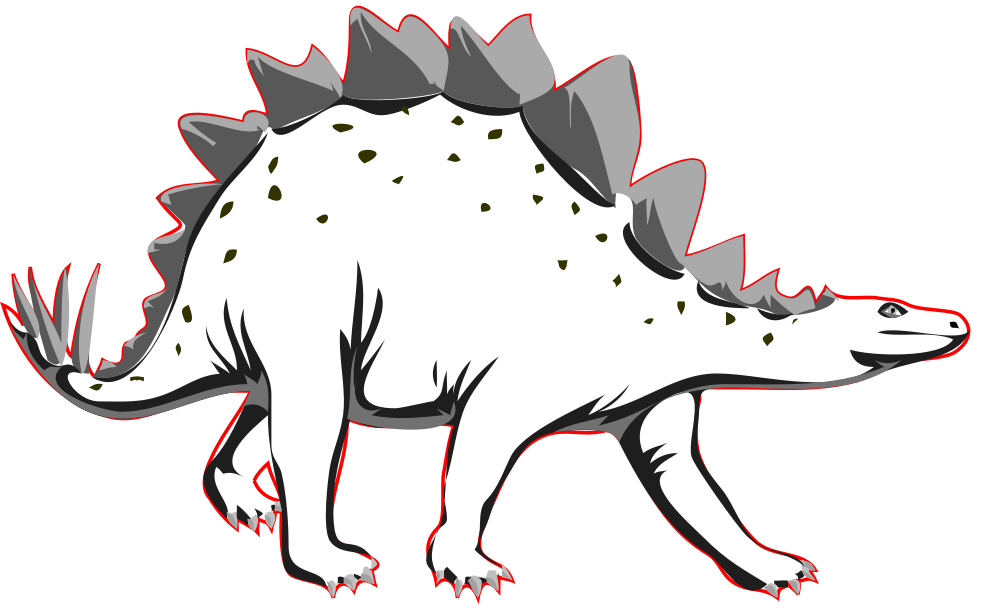](https://wiki.fablab.sorbonne-universite.fr/BookStack/uploads/images/gallery/2022-08/image-1661856125842.png)
*([lien de l'image originale](https://publicdomainvectors.org/en/free-clipart/Vector-drawing-of-orange-reptile/31525.html))*
#### En partant d'une image matricielle
Sur la découpeuse laser, on peut lancer un travail de gravure à partir d'une image matricielle. En revanche pour tout ce qui est découpe ou marquage, il nous faut absolument des tracés vectoriels. Prenons le cas où on part d'une image png trouvée sur internet. Il nous faut alors la vectoriser après l'avoir importée dans Inkscape.
La commande de base à connaître est la suivante :
Sélectionner l'image puis aller dans le menu du haut > **Chemin > Vectoriser un objet matriciel**
A partir de là plusieurs algorithmes de vectorisation nous sont proposés et dont nous pouvons modifier les réglages. Plusieurs stratégies peuvent fonctionner. Regardons-en une première
##### Niveaux de luminosité en plusieurs passes
Dans le volet qui s'ouvre lorsqu'on lance l'opération de vectorisation, on choisit niveaux de luminosité et plusieurs passes. Ici on a demandé 8 passes et coché les cases Adoucir, Empilement et Retirer l'arrière-plan.
[](https://wiki.fablab.sorbonne-universite.fr/BookStack/uploads/images/gallery/2022-08/image-1661861766191.png)
Le résultat se superpose à notre image. Quand on sépare les deux, voilà ce qu'on obtient : (à gauche l'image matricielle, à droite le résultat de la vectorisation)
[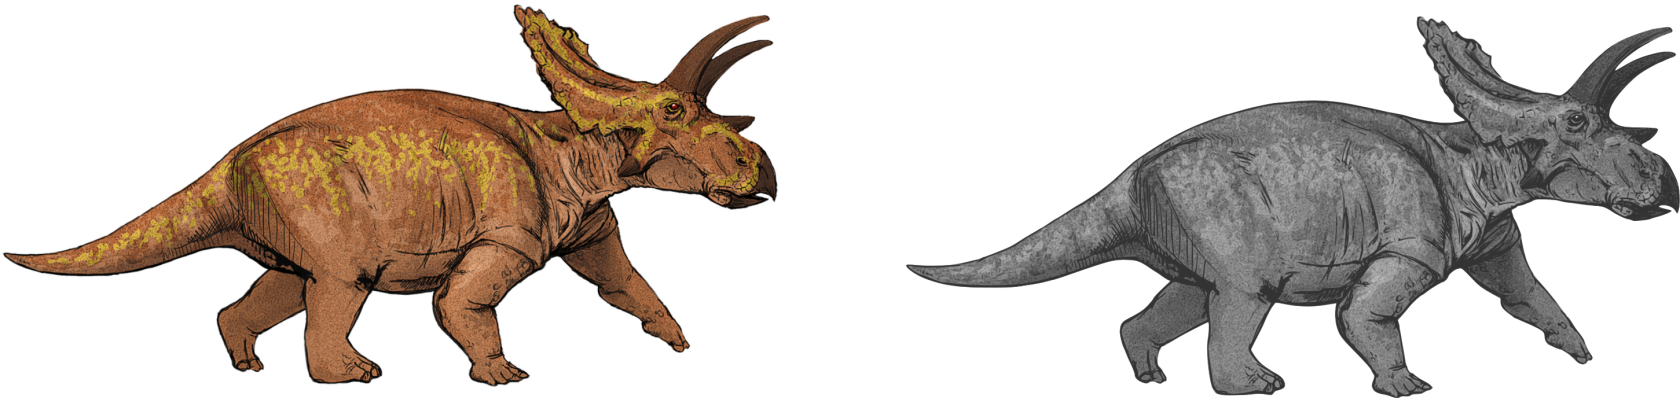](https://wiki.fablab.sorbonne-universite.fr/BookStack/uploads/images/gallery/2022-08/image-1661857072910.png)
Nous avons demandé une vectorisation en 8 passes : ainsi le résultat de la vectorisation est lui-même la superposition de 8 objets correspondant à 8 niveaux de luminosité de l'image originale identifiés par l'algorithme. Pour voir chacun de ces 8 objets séparément, on **dégroupe** le résultat de la vectorisation. Voici les 8 objets qui étaient superposés :
[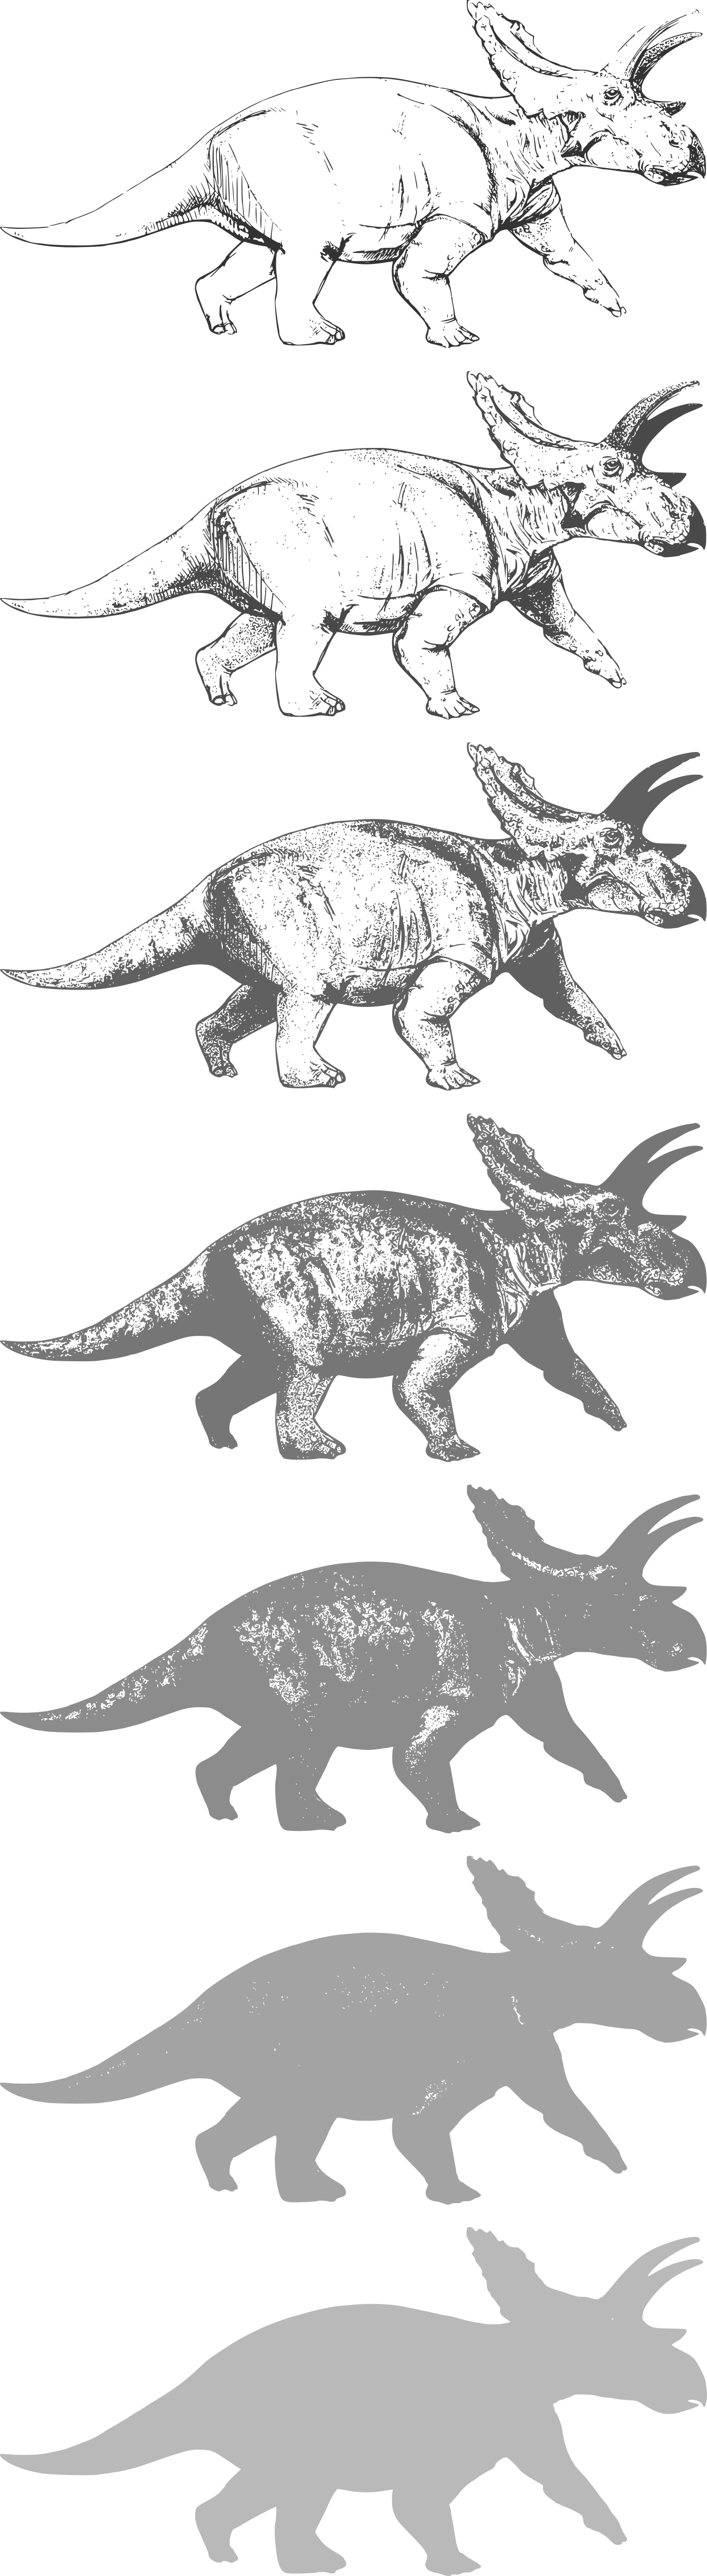](https://wiki.fablab.sorbonne-universite.fr/BookStack/uploads/images/gallery/2022-08/image-1661857092844.png)
Si l'on veut obtenir le contour seul, le dernier objet semble convenir parfaitement : il ne reste plus qu'à supprimer le fond et mettre le contour en rouge.
[](https://wiki.fablab.sorbonne-universite.fr/BookStack/uploads/images/gallery/2022-08/image-1661857116406.png)
Comme vu précédemment, on peut aussi ajouter de la gravure (dans le cas de la découpe laser). On choisit une des couches qui nous plaît et la superpose au contour. Bien sûr on pourrait très bien sélectionner deux couches différentes et passer l'une dans une nuance plus claire pour avoir deux niveaux de gravure.
[](https://wiki.fablab.sorbonne-universite.fr/BookStack/uploads/images/gallery/2022-08/image-1661857125806.png)
Il se trouve qu'on a eu de la chance sur ce dessin car le contour était identique à l'une des 8 formes résultant de la vectorisation. Mais ce n'est pas toujours le cas. Voyons [avec un dessin différent](https://commons.wikimedia.org/wiki/File:LambeosaurusDB.jpg). On commence par appliquer les mêmes étapes : d'abord la vectorisation en 8 passes par niveaux de luminosité.
[](https://wiki.fablab.sorbonne-universite.fr/BookStack/uploads/images/gallery/2022-08/image-1661862226791.png)
Puis on dégroupe les 8 couches.
[](https://wiki.fablab.sorbonne-universite.fr/BookStack/uploads/images/gallery/2022-08/image-1661862288247.png)
La dernière couche semble bien pouvoir nous fournir un contour fermé intéressant, mais on souhaiterait se débarrasser de toutes les formes internes. On passe le contour de cette dernière forme en rouge pour bien visualiser tous les éléments, puis on va dans **Chemin > Séparer**. On peut alors sélectionner le contour externe et le glisser plus loin dans la page. C'est parfait, on a bien notre contour. Encore une fois, on peut choisir une des couches pour ajouter de la gravure.

##### Niveaux de couleurs en plusieurs passes
Un autre algorithme de vectorisation consiste à détecter les niveaux de couleurs et non les niveaux de luminosité. Souvent cela va revenir à peu près à la même chose qu'en détectant la luminosité pour l'objectif qu'on cherche à atteindre ici (détection de contour). Mais parfois il faut tenter les deux pour trouver le plus adapté à notre besoin, notamment lorsqu'on a un dessin peu contrasté.
Sur [cet exemple](https://commons.wikimedia.org/wiki/File:Labocania.jpg), la vectorisation en 8 passes de différentes luminosité donne des résultats plutôt bons :
[](https://wiki.fablab.sorbonne-universite.fr/BookStack/uploads/images/gallery/2022-08/image-1661865760009.png)
Mais si l'on regarde de près on voit qu'il y a un trou dans toutes nos formes :
[](https://wiki.fablab.sorbonne-universite.fr/BookStack/uploads/images/gallery/2022-08/image-1661865849778.png)
On va donc essayer avec la **vectorisation en 8 passes selon les couleurs** :
[](https://wiki.fablab.sorbonne-universite.fr/BookStack/uploads/images/gallery/2022-08/image-1661865864133.png)
En faisant **dégrouper** on peut séparer les objets exactement comme on a fait précédemment avec les niveaux de luminosité. L'un des objets convient à ce qu'on cherche. On passe les contours en rouge et supprime le fond pour mieux s'y retrouver, puis on va dans Chemin > **Séparer**. On obtient bien un contour fermé.
[](https://wiki.fablab.sorbonne-universite.fr/BookStack/uploads/images/gallery/2022-08/image-1661865978016.png)
Pour cette image on aurait d'ailleurs obtenu des résultats similaires avec l'algorithme de détection des **niveaux de gris**.
#### Les tracés doubles
Une erreur qui arrive régulièrement quand on vectorise une image pour une découpe est qu'on a crée des tracés doubles au lieu d'avoir des lignes sans épaisseur.
[Voici une image](https://jenikirbyhistory.getarchive.net/amp/media/stegosaur-dinosaur-f4e439) qui semble simple. On la vectorise en utilisant une seule passe et avec un seuil de luminosité à 0,45.
[](https://wiki.fablab.sorbonne-universite.fr/BookStack/uploads/images/gallery/2022-08/image-1661870343476.png)
On peut bien sûr retirer les points qui ne nous intéressent pas. On va garder le dinosaure de droite. Bien que le tracé ait l'air d'une ligne, on a en fait une forme pleine dont le fond est noir, et non une ligne noire sans fond. Si on supprime le fond et qu'on passe le contour en rouge on voit ce problème de double-ligne qu'il nous faut vraiment éviter pour nos découpes - sans quoi toutes les pièces internes tombent.
[](https://wiki.fablab.sorbonne-universite.fr/BookStack/uploads/images/gallery/2022-08/image-1661870433265.png)
Pour éviter ça on va dupliquer notre forme vectorielle puis faire **séparer** les chemins : on peut ensuite sélectionner la forme correspondant au contour externe, supprimer le fond et mettre le contour en rouge. Enfin on a plus qu'à superposer ce contour avec la forme vectorielle au remplissage noir pour graver ces détails.
[](https://wiki.fablab.sorbonne-universite.fr/BookStack/uploads/images/gallery/2022-08/image-1661870614497.png)
Toutes les images mentionnées ci-dessus sont jointes à cette page dans le menu latéral pour vous permettre de vous entraîner à cet exercice.
Et dans d'autres cas ?
On n'a abordé que quelques exemples avec toujours l'objectif de tracer **le contour extérieur**. Pour ce qui est d'un usage avec la découpe laser, on a ajouté **de la gravure** sous forme d'objets vectoriels - des "aplats" avec un contour fermé (invisible) et un fond en nuances de gris. Mais on ne pourrait pas faire du marquage de la même façon : tous les contours de nos aplats vectoriels gris seraient alors marqués, ce qui ne serait pas très esthétique. Si l'on veut créer des tracés sans épaisseur à l'intérieur de nos formes, il va hélas falloir les tracer en partant de zéro avec l'outil de courbes de Bézier. Bien sûr on peut placer le dessin dans un calque inférieur (ou simplement à l'arrière plan) pour tracer par dessus les lignes qu'on souhaite obtenir, comme ci-dessous :
[](https://wiki.fablab.sorbonne-universite.fr/BookStack/uploads/images/gallery/2022-08/image-1661869676791.png)
*(dessin perso, Clara Devanz)*
Tous les tracés qui doivent être découpés ou marqués (ci-dessous en bleu et en rouge) ont été créés à partir de l'outil courbe de Béziers (et l'outil plume pour les parties qui sont à graver, en noir). L'épaisseur des tracés n'est ici due qu'au réglage de l'épaisseur dans le menu "Fond et Contour". Il s'agît bien de tracés sans épaisseur comme on peut le voir ci-dessous :
[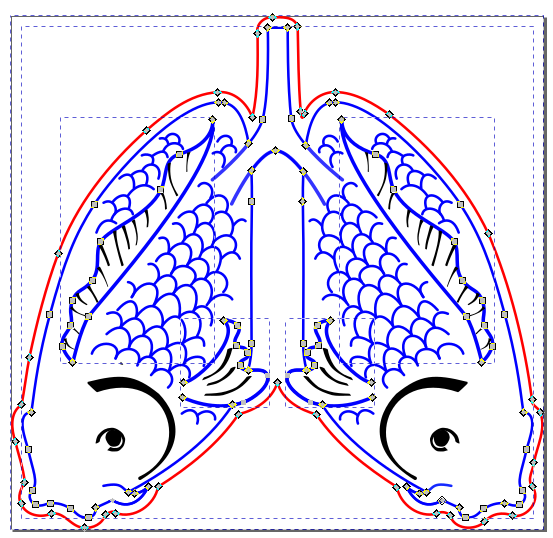](https://wiki.fablab.sorbonne-universite.fr/BookStack/uploads/images/gallery/2022-08/image-1661872863243.png)
Et vous, avez-vous des astuces pour passer d'un dessin à un tracé vectoriel ? Si oui n'hésitez pas à les partager dans l'étagère [Trucs et astuces](https://wiki.fablab.sorbonne-universite.fr/BookStack/shelves/4-trucs-et-astuces) !
Auteure: Clara Devanz, sur le [wiki du FabLab de Sorbonne Université](https://wiki.fablab.sorbonne-universite.fr/BookStack/books/machines/page/utilisation-de-la-trotec-speedy-100)[ Attribution-NonCommercial 4.0 International (CC BY-NC 4.0) ](https://creativecommons.org/licenses/by-nc/4.0/)
# Vectorisation simple pour broderie ou flocage multicolore
### Depuis une image matricielle png, jpg
Ce tutoriel résume la vidéo suivante : [https://www.youtube.com/watch?v=BqTdwQCft1c](https://www.youtube.com/watch?v=BqTdwQCft1c)
- Rechercher sur internet une image qui a des contours sombres bien marqués, dans l'idéal noirs.
Exemple :
[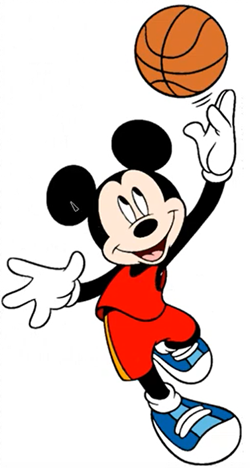](https://innovation.iha.unistra.fr/uploads/images/gallery/2025-02/oe0image.png)
- Importer l'image dans inkscape : glisser-déposer
- Lancer l'outil de `Vectoriser un objet matriciel` en mode `Une seule passe` et `seuil de luminosité`
[](https://innovation.iha.unistra.fr/uploads/images/gallery/2025-02/XPGimage.png)
- Régler le seuil de luminosité pour isoler le contour le mieux possible, exemple avec `seuil de luminosité = 0,310`
[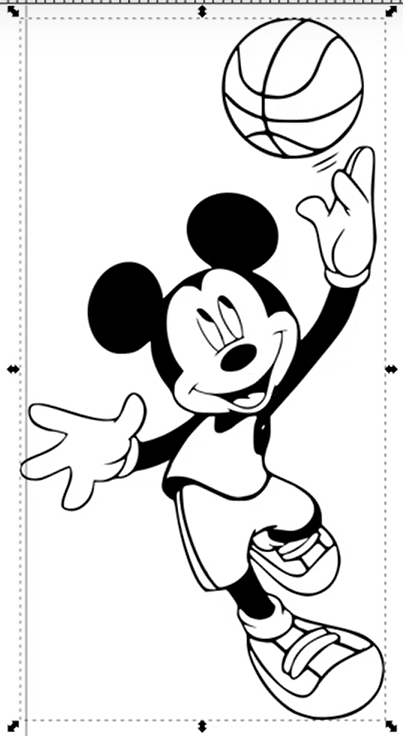](https://innovation.iha.unistra.fr/uploads/images/gallery/2025-02/aHdimage.png)
- Régler l'épaisseur de contour souhaitée
- Utiliser les outils du menu Chemin : Dilater `ctrl+(` et Eroder `ctrl+)`
- Après dilation, on voit que le rendu n'est pas beau :
[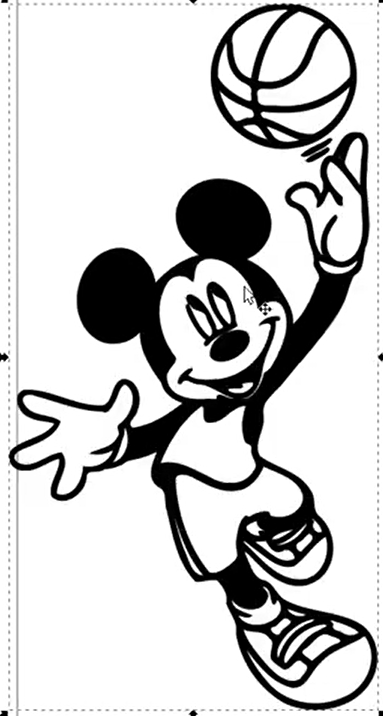](https://innovation.iha.unistra.fr/uploads/images/gallery/2025-02/s76image.png)
- Astuce pour dilater/éroder plus finement
- Agrandir le dessin en faisant attention à garder les proportions (vertical/horizontal)
[](https://innovation.iha.unistra.fr/uploads/images/gallery/2025-02/299image.png)
- utiliser les outils dilater/éroder
- réduire le dessin à la taille initiale
- rendu :
[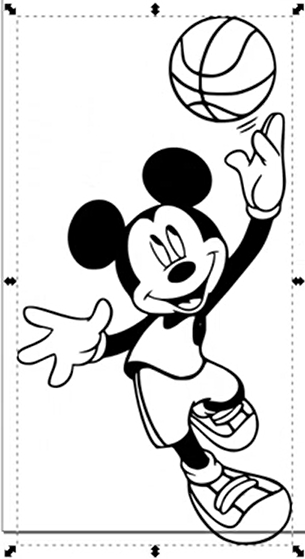](https://innovation.iha.unistra.fr/uploads/images/gallery/2025-02/doLimage.png)
- Supprimer les contours superflus
- Fermer les contours ouverts puis faire une opération booléenne d'union entre les noeuds correspondants
- Séparer les contours puis les grouper pour pouvoir les retravailler plus facilement
- remplir avec des couleurs unies avec les outils pot de peinture et pipette
[](https://innovation.iha.unistra.fr/uploads/images/gallery/2024-12/vtaimage.png)
### Depuis une image vectorielle
Ce n'est pas parce-que vous avez une image vectorielle que celle-ci est prête pour lancer une broderie. En effet celle-ci peut être composée de calques où plusieurs couleurs se superposent. Hors, si vous superposez plusieurs couches de broderie, le rendu peut ne pas être bon.
- Chercher une image vectorielle sur internet
[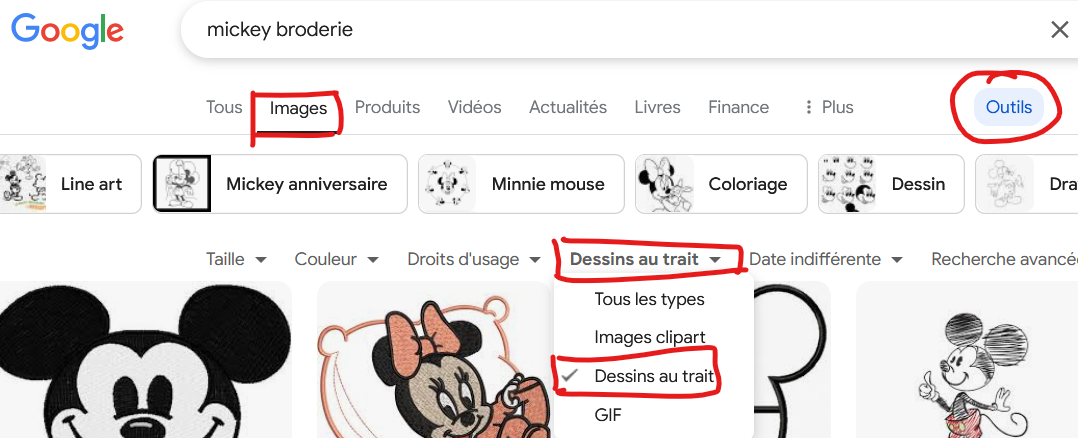](https://innovation.iha.unistra.fr/uploads/images/gallery/2025-02/l5Jimage.png)
- Importer dans inkscape
- Dégrouper
### Sources
- [https://www.youtube.com/watch?v=BqTdwQCft1c](https://www.youtube.com/watch?v=BqTdwQCft1c)
# Découpe Laser Trotec Speedy 100
# Présentation et Sécurité
**NE PAS DÉCOUPER OU GRAVER DES MATÉRIAUX NON APPROUVÉS**
Risque d'émanation toxique ou de réflexion du laser
Voir les [matériaux utilisables et interdits sur la page dédiée](https://innovation.iha.unistra.fr/books/2-fablab-formation-machines-logiciels/page/choix-des-materiaux-et-parametres-de-gravure)
### **Le déroulement de la conception à la réalisation : **
→ dessiner son projet sur le logiciel adapté
→ ouvrir son projet avec Inkscape sur le poste opérateur de la machine
→ lancer une impression via Inkscape pour transférer son dessin vers le logiciel JobControl
→ paramétrer la machine suivant le matériau et les types de gravures
→ mettre en place son matériau et le mettre à distance focale
→ lancer son « job »
[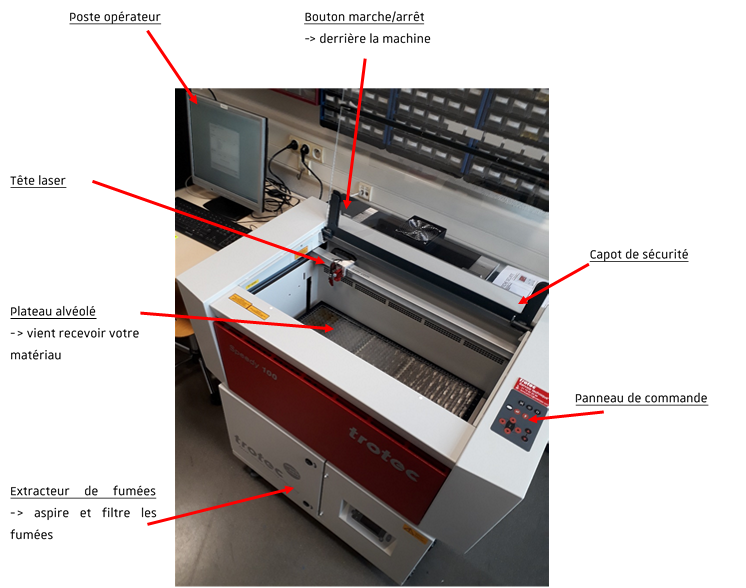](https://innovation.iha.unistra.fr/uploads/images/gallery/2023-03/7vKimage.png)
[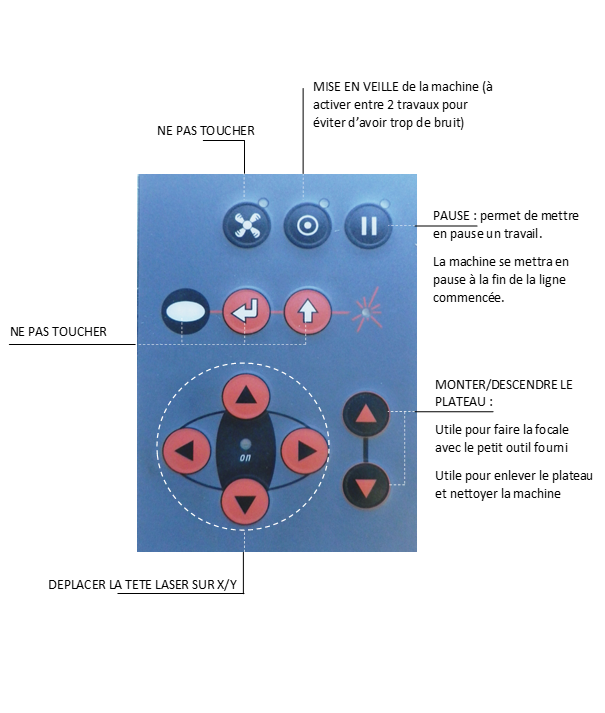](https://innovation.iha.unistra.fr/uploads/images/gallery/2023-05/Pykimage.png)
Lors de la mise sous tension de la machine le plateau se met à niveau, veuillez ne pas ouvrir le capot ni toucher au panneau de contrôle jusqu'à la fin de l'opération (signalée par un “bip” sonore).
### Les règles de sécurité :→ en cas de fatigue, de distraction, d'alcoolémie ou de prise de drogue : pas d'utilisation machines;→ s’il y a un problème sur l'équipement (partie endommagée, pièce manquante) prévenir un FabManager;→ ne pas forcer les équipements ou les outils;→ ne jamais laisser une machine fonctionner sans surveillance;→ s'assurer que la machine est éteinte correctement avant de s'en éloigner.
### Les bons réflexes :→ avertir en cas de dégradation d'un outil ;→ ne pas distraire les autres membres pendant leur usinage;→ en cas de doute dans l'utilisation d'un outil, demander conseil à un FabManager;→ garder toujours sa zone de travail propre et libre;→ ranger les outils et le matériel après utilisation;→ une fois son travail terminé, laisser la zone de travail propre pour les prochains.
### **Le matériel peut facilement prendre feu pendant le fonctionnement de la découpe laser**
Il faut toujours être présent pendant la durée de l'usinage.
Pendant l'usinage, il peut y avoir des flammes, si c'est le cas, 3 mesures s'imposent :
1. il faut appuyer sur pause, ouvrir le capot et éteindre la flamme en soufflant dessus (en appuyant sur pause cela permet de mettre en arrêt votre travail, contrairement à l'ouverture direct du capot qui annule l'usinage)
2. si le feu ne s'arrête pas en soufflant dessus prendre l'extincteur et avertir un fabmanager
3. si le feu ne s'arrête pas avec l'extincteur avertir tout le monde, tirer le système d’incendie et évacuer le bâtiment
# Nouvelle page
# Choix des matériaux et paramètres de gravure
Pour rappel, ne peuvent être usinés que les matériaux **plans**, en respectant les **dimensions maximales de la découpeuse**
Si vous souhaitez effectuer une découpe, vous serez également limité en épaisseur (limite variable selon les matériaux mais globalement épaisseur de découpe **inférieure à 10mm**)
**Il est interdit d'utiliser dans la découpeuse des matériaux dont vous ne connaissez pas la composition et qui pourraient émettre du chlore, du fluor ou autres gaz/vapeurs toxiques.**
Interdiction de graver des **Carte de circuit imprimé**
La fibre de verre, la résine époxy et le cuivre peuvent dégager des fumées nocives
En effet, pour découper les matériaux, les machines émettent un rayon laser permettant d'élever la température d'une zone réduite de matière, jusqu'à vaporisation de celle-ci. Certains matériaux ne peuvent pas être coupés par ce procédé, il peuvent fondre, émettre des gaz dangereux, ou encore nécessiter une puissance supérieure à ce que permettent les machines du Fablab.
> **Si vous apportez votre propre matériau, vous devez impérativement vous assurer auprès d'un·e fabmanager·euse qu'il est possible et sûr de l'usiner avec la découpeuse graveuse laser.**
#### Choix des paramètres
Règles générales :
- Vitesse
- 5-6 max.
- Quand il y a des contours précis, descendre à 3mm
- Fréquence : Plus la fréquence est basse, plus il y a de puissance, car la laser a le temps de recharger entre deux tirs
Le fichier suivant à télécharger permet de tester les paramètres de gravure et de découpe sur un matériau de façon complète :
[Test\_Parametres\_Materiau.svg](https://innovation.iha.unistra.fr/attachments/53)
#### Matériaux qui ne peuvent pas être découpés au laser
- Tous les matériaux contenant du chlore, PVC, vinyl, … **⚠️** Utilisation interdite, risque d’émission de gaz chloré mortel
- Tous les matériaux contenant du fluor : Téflon / Polytétrafluoroéthylène / PTFE… **⚠️** Utilisation interdite, risque d’émission de fluor sous forme de gaz
- Les matériaux réfléchissants (miroir, métaux polis, chrome, …) - **⚠️** L'utilisation de matériaux réfléchissants pourrait endommager la machine
-
Polycarbonate / PC / Lexan / Makrolon : fond et brûle
-
Polystyrène expansé/extrudé (mousse): fond et brûle
-
Polypropylène expansé (mousse) : prend feu et fond
- ABS : émet du cyanure et a tendance à fondre
- HDPE (type bouteille de lait en plastique) : prend feu et fond
- Fibre de verre : émet des fumées
- Fibre de carbone : émet des fumées nocives
- La plupart des métaux
- **Carte de circuit imprimé (Fibre de verre + époxy)**
- Verre
- [Medium](http://carrefour-numerique.cite-sciences.fr/wiki/doku.php?id=materiaux:medium "materiaux:medium") valcromat teinté dans la masse : prend feu
**⚠️** Les matériaux composés et/ou non homogènes sont généralement compliqués à découper proprement au laser.
#### Matériaux découpables au laser
-
Bois
-
Bois brut (faible épaisseurs)
-
**[MDF](http://carrefour-numerique.cite-sciences.fr/wiki/doku.php?id=materiaux:medium "materiaux:medium") / [Medium](http://carrefour-numerique.cite-sciences.fr/wiki/doku.php?id=materiaux:medium "materiaux:medium") (éviter les épaisseur >6mm** qui on un rendu très brûlé et émettent **beaucoup de fumée**) -Ne pas utiliser de [MDF](http://carrefour-numerique.cite-sciences.fr/wiki/doku.php?id=materiaux:medium "materiaux:medium") tinté dans la masse
Carton plume (carton+mousse PU, disponible sous les marques Canson et Kapa) - **Attention** : Le carton mousse classique (carton+Polystyrène expansé) n'est pas autorisé dans la laser, à cause du polystrène (brûle et fond).
-
Caoutchoucs naturel, synthétique (uniquement s'ils ne contient pas de chlore) - Attention génère beaucoup de suie et encrasse énormément les machines.
#### Matériaux "gravables"
-
A priori tout les matériaux découpables : bois, [medium](http://carrefour-numerique.cite-sciences.fr/wiki/doku.php?id=materiaux:medium "materiaux:medium"), [pmma](http://carrefour-numerique.cite-sciences.fr/wiki/doku.php?id=materiaux:pmma "materiaux:pmma"), ….
-
Pierre, Marbre, Ardoise, …
-
Verre
-
Métaux : Aluminium, Acier, Laiton
-
Le mode découpe est utilisable sur les métaux pour les marquer
-
**⚠️** Attention : ne pas essayer de graver/marquer des élément en métal polis (et donc réfléchissants)
### Sources
[Wiki du Carrefour Numérique](http://carrefour-numerique.cite-sciences.fr/wiki/doku.php?id=machines:decoupe_laser:0_utilisation:materiaux)
[Barney Art Labs](https://uploads-ssl.webflow.com/5966377a0071f73ecadba57c/597a008d663622000124464a_Laser%20Cutter%20MSDS.pdf)
Auteure: Clara Devanz, sur le [wiki du FabLab de Sorbonne Université](https://wiki.fablab.sorbonne-universite.fr/BookStack/books/machines/page/liste-des-materiaux-utilisables)
[ Attribution-NonCommercial 4.0 International (CC BY-NC 4.0) ](https://creativecommons.org/licenses/by-nc/4.0/)
# Création de fichier pour la découpe laser avec Ruby
## Réalisation du motif
Rendez-vous sur Ruby et connectez-vous.
1\) Cliquez sur l'icône entourée afin d'aller dans l'onglet de création de fichier
2\) Toutes les icônes présentes dans l'encadré rouge représentent les outils pour réaliser son motif
[](https://innovation.iha.unistra.fr/uploads/images/gallery/2025-09/FKMrubytuto1.png)
[ : ](https://innovation.iha.unistra.fr/uploads/images/gallery/2025-09/hTzimage.png)Outils de **sélection des objets**
[ : Tracer une **ligne**](https://innovation.iha.unistra.fr/uploads/images/gallery/2025-09/jQgimage.png)
[ : Dessiner une **ellipse**](https://innovation.iha.unistra.fr/uploads/images/gallery/2025-09/kWUimage.png)[ : Dessiner un **rectangle**](https://innovation.iha.unistra.fr/uploads/images/gallery/2025-09/2xiimage.png)[ : Dessiner un **polygone** (Vous pouvez indiquer le nombre de](https://innovation.iha.unistra.fr/uploads/images/gallery/2025-09/aF8image.png) sommet que vous souhaiter pour votre polygone)[ : **Fusionner** : Combine plusieurs formes sélectionnées en une seule forme unifiée.](https://innovation.iha.unistra.fr/uploads/images/gallery/2025-09/uoGimage.png)[ : **Intersection** : Crée une nouvelle forme à partir de la zone commune entre les formes sélectionnées.](https://innovation.iha.unistra.fr/uploads/images/gallery/2025-09/ulYimage.png)[ : **Différence** : Soustrait la forme supérieure de la forme inférieure, ne gardant que la partie restante.](https://innovation.iha.unistra.fr/uploads/images/gallery/2025-09/gdsimage.png)[ : **Exclusion** : Supprime la zone de chevauchement entre les formes sélectionnées, ne gardant que les zones non superposées.](https://innovation.iha.unistra.fr/uploads/images/gallery/2025-09/qlZimage.png)[ Cet outil contient deux parties : ](https://innovation.iha.unistra.fr/uploads/images/gallery/2025-09/Lm7image.png)
[- ](https://innovation.iha.unistra.fr/uploads/images/gallery/2025-09/Lm7image.png)**Aligner** : Permet d’aligner plusieurs objets entre eux (par le haut, le bas, le centre, la gauche, la droite ou au milieu) selon un axe horizontal ou vertical.
\- **Répartir** : Espace uniformément plusieurs objets sélectionnés, soit horizontalement, soit verticalement, selon les bords ou les centres.
## Partir d'une image existante
En effet, il est possible de partir d'une image existante pour réaliser son motif de découpe/gravure laser.
Commencez par trouver l'image votre image d'inspiration.
*NB : Il faut choisir des images très simplistes et en noir et blanc de préférence.*
Exemple d'image intéressante :
[](https://innovation.iha.unistra.fr/uploads/images/gallery/2025-09/O8himage.png)
[](https://innovation.iha.unistra.fr/uploads/images/gallery/2025-09/o6himage.png)
Une fois votre image choisi. Importez la dans Ruby en cliquant sur [ puis en la sélectionnant dans votre explorateur de fichier.](https://innovation.iha.unistra.fr/uploads/images/gallery/2025-09/xFsimage.png)
[](https://innovation.iha.unistra.fr/uploads/images/gallery/2025-09/icximage.png)
Cliquez maintenant sûr cet outil [. Cet outil nous permets de vectoriser l'image. ](https://innovation.iha.unistra.fr/uploads/images/gallery/2025-09/mf9image.png)
Une fois vectorisé, nous obtenons quelques choses comme cela :
[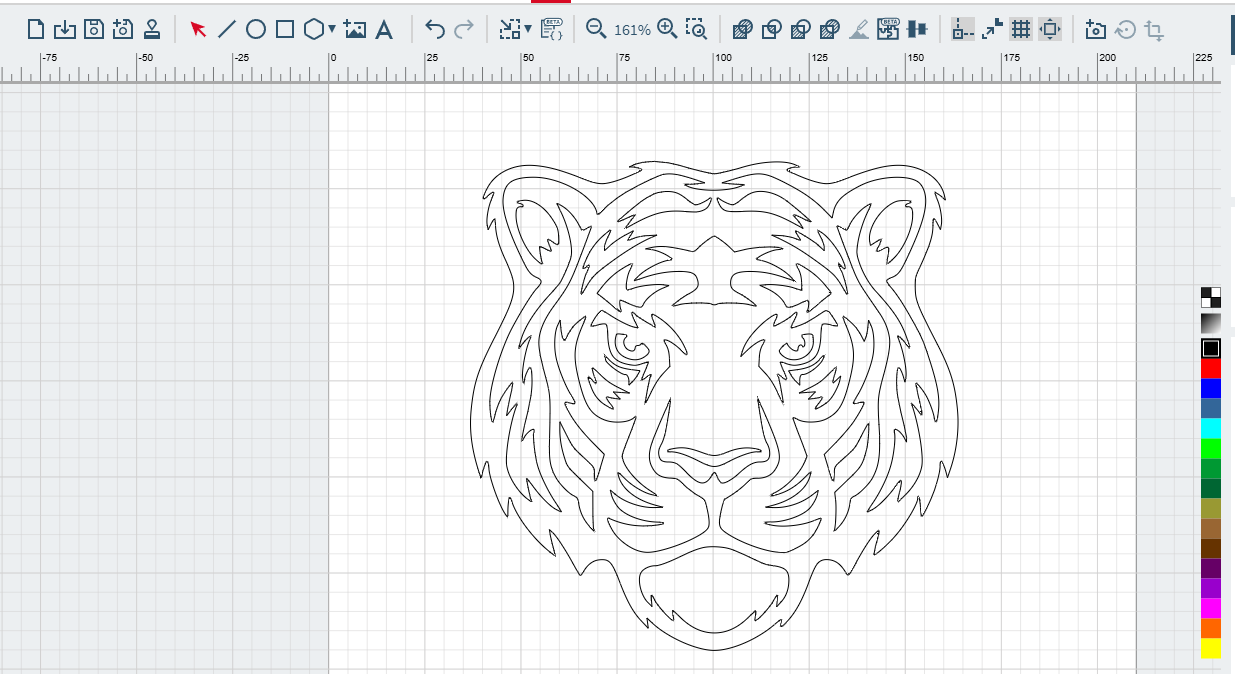](https://innovation.iha.unistra.fr/uploads/images/gallery/2025-09/7Ytimage.png)
En sélectionnant un objet on peut le déplacer ou le changer de couleur.
Si vous souhaitez appliquer un fond à votre motif, vous pouvez cliquer sur l'outil remplissage.
[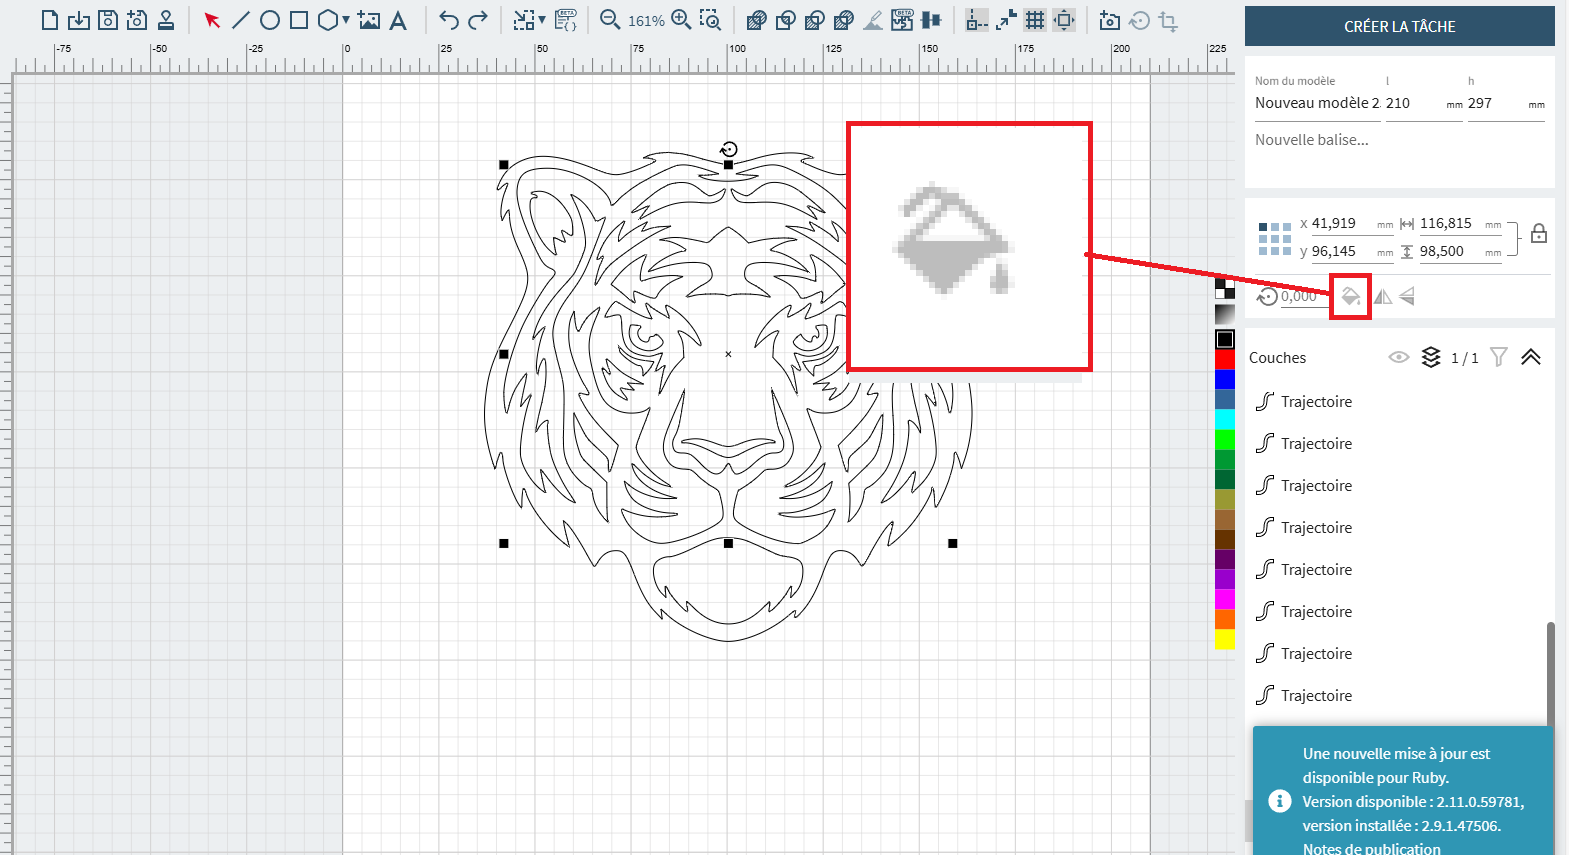](https://innovation.iha.unistra.fr/uploads/images/gallery/2025-09/sfIrubytuto3.png)
## Paramétrage du motif
1 ) Il y a un code **couleur** à respecter. Répartition des couleurs et de leurs fonctionnalité :
\- Découpe : rouge RVB (255,0,0)
\- Gravure : *( Attention, chaque couleur correspond à un niveau de gravure plus ou moins profond que vous pouvez paramétrer individuellement. Pour plus de simplicité, limiter vous à un seul niveau de gravure. Ensuite, si vous voulez allez plus loin, vous pourrez faire plusieurs niveau de gravure)*
- - Noir (Couleur de gravure par défaut) -> RVB (0,0,0)
- Bleu foncé -> RVB (0,0,255)
- Bleu grisé -> RVB (51,102,153)
- Bleu -> RVB (0,255,255)
- Vert -> RVB (0,255,0)
- Vert gazon -> RVB (0,153,51)
- Vert foncé -> RVB (0,0,0)
- etc... (Normalement vous n'aurez pas besoin d'autant de niveau de gravure, un ou deux suffise
Comment sélectionner les couleurs ? Il vous suffit de sélectionner l'objet dont vous souhaitez changer la couleur à l'aide de l'outil sélection dont nous avons parlé un peu plus haut et de cliquer sur la couleur que vous souhaitez lui attribuer.
2\) **Dimensions** : Faites bien attention à mettre votre motif aux dimensions que vous souhaitez. (en mm)
Le cadenas permet de faire en sorte que les valeurs soient modifiées (longueur/largeur) de façon proportionnel lorsqu'il est fermé. Et si le cadenas est ouvert, vous pouvez modifier la longueur/largeur de façon indépendante l'une de l'autre.
[](https://innovation.iha.unistra.fr/uploads/images/gallery/2025-09/meKimage.png)
*NB : Taille maximal d'une planche : 600x300 mm. Pensez à vérifier dans les chutes avant de prendre une nouvelle planche.*
# Lancement d'une découpe/gravure sur la trotec Speedy 100 avec Ruby
- Sur le PC, lancer l’application TROTEC RUBY
[](https://innovation.iha.unistra.fr/uploads/images/gallery/2024-11/iuZimage.png)
- Une page de connexion va s’ouvrir, connectez-vous avec les identifiants qui vous ont été attribués.
[](https://innovation.iha.unistra.fr/uploads/images/gallery/2024-11/BtBimage.png)
- Pour créer votre motif, vous avez plusieurs solutions. Soit vous le réaliser depuis le logiciel Ruby. Soit vous le réaliser sur un logiciel tiers tel que inkscape ou encore adobe illustrator.
\- Pour la création de fichier avec ruby :
\- Pour l'utilisation de inkscape veuillez vous référez au tuto suivant :
[ Utilisation d'Inkscape | Innovation IUT Haguenau](https://innovation.iha.unistra.fr/books/2-fablab-formation-machines-logiciels/page/utilisation-dinkscape)
\- Pour la création de fichier avec Adobe Illustrator veuillez vous référer au tuto suivant :
**! ATTENTION !**
Votre dessin doit respecter la mise en forme suivante :
- Les traits de **découpe** ou les contours des formes à découper doivent être en rouge (R: 255, V: 0, B: 0, A: 100) et sans couleur de fond.
- Les surfaces à **graver** doivent être des tracés fermés, sans contours, avec un fond noir (R: 0, V: 0, B: 0, A: 100).
- On arrive sur la page principale où on peut importer les designs.
[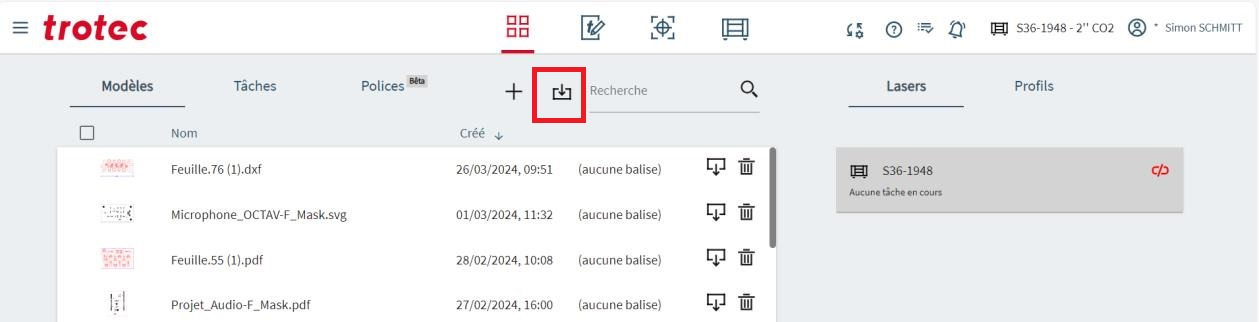](https://innovation.iha.unistra.fr/uploads/images/gallery/2024-11/WD4image.png)
Ce bouton permet d’importer un design (formats à privilègier : PDF, SVG, DXF)
[](https://innovation.iha.unistra.fr/uploads/images/gallery/2024-11/NLVimage.png)
l’import de fichiers DXF produit parfois des erreurs
(Liste complète de formats supportés : .ai, .pdf, .tsf, .png, .bmp, .jpg, .tld, .svg, .zip, .eps, .cdr,
.cmx, .otg, .odg, .dxf, .djvu, .dng, .dib, .emf, .wmf, .emz, .wmz, .svgz)
Ce bouton en haut de l’écran permet de passer à l’étape suivante
[](https://innovation.iha.unistra.fr/uploads/images/gallery/2024-11/gTximage.png)
- On arrive sur la page de préparation de dessin :
[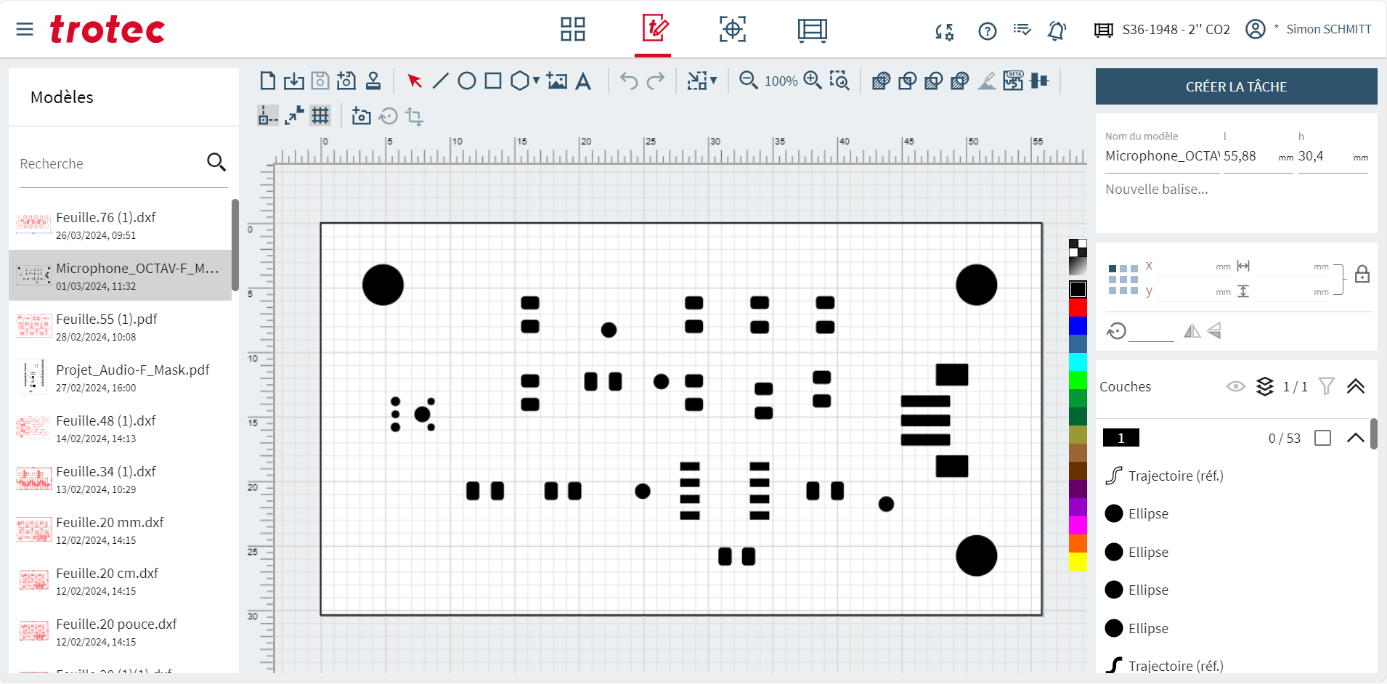](https://innovation.iha.unistra.fr/uploads/images/gallery/2024-11/yHCimage.png)
[](https://innovation.iha.unistra.fr/uploads/images/gallery/2024-11/mGqimage.png)
Sur la gauche de l’écran, on peut choisir sur quel modèle on va travailler. En haut de la liste se situe le modèle importé le plus récemment. Il suffit de cliquer sur le modèle.
[](https://innovation.iha.unistra.fr/uploads/images/gallery/2024-11/Pbjimage.png)
Ce bouton permet de redimensionner la « zone de travail » au plus proche des éléments de dessins présents dans le projet. Il est recommandé de cliquer dessus une fois avant de faire quoi que ce soit.
[](https://innovation.iha.unistra.fr/uploads/images/gallery/2024-11/YI7image.png)
Sur la droite de l’écran, on voit les dimensions du modèle. Il faut IMPERATIVEMENT vérifier que le dessin est à la bonne taille. On peut facilement redimensionner le dessin en entrant à la main les bonnes mesures.
[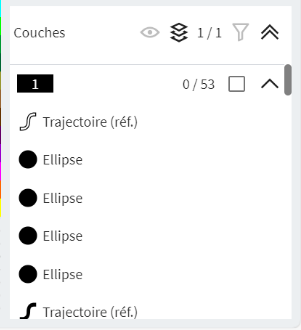](https://innovation.iha.unistra.fr/uploads/images/gallery/2024-11/UoWimage.png)
Sur la droite de l’écran, on a la liste des éléments constitutifs du dessin. On part du principe que les « trajectoires » seront des découpes et les formes (comme les ellipses de l’exemple) seront des gravures.
[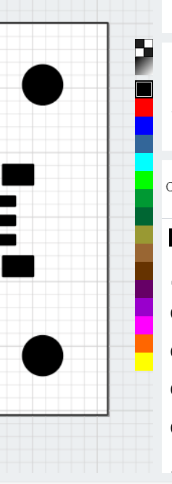](https://innovation.iha.unistra.fr/uploads/images/gallery/2024-11/Pi9image.png)
On peut cliquer sur un élément PUIS sur une des couleurs à droite de la zone de travail pour lui attribuer une couleur. La couleur d’attribution permettra de séparer les éléments à découper et les éléments à graver. On pourra même choisir de faire plusieurs gravures avec chacune des paramètres différents (par ex plus ou moins foncé si le matériau le permet)
[](https://innovation.iha.unistra.fr/uploads/images/gallery/2024-11/nvPimage.png)
Une fois qu’on a terminé nos éventuelles modifications, on peut cliquer sur « créer la tâche »
On arrive sur l’écran de fabrication
[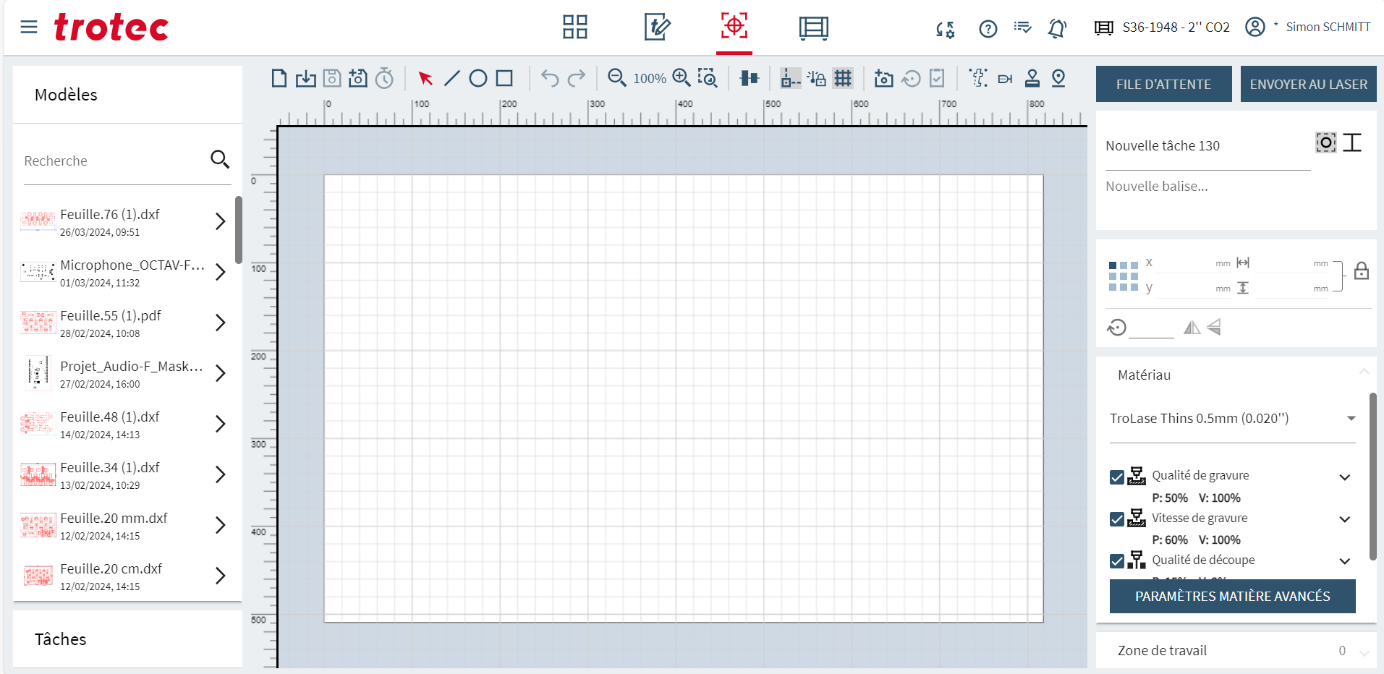](https://innovation.iha.unistra.fr/uploads/images/gallery/2024-11/m5eimage.png)Arriver sur cet écran après avoir cliqué sur « créer la tâche » mettra le modèle sur lequel on vient de travailler sur la table. Cet écran représente la zone de travail du laser.
[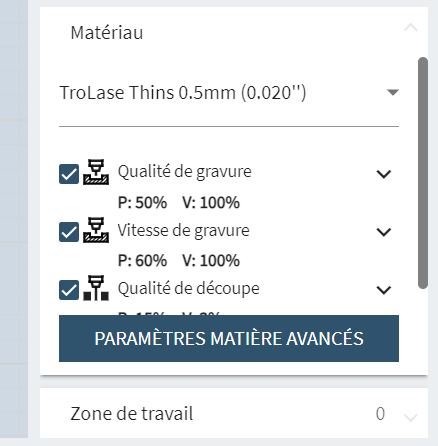](https://innovation.iha.unistra.fr/uploads/images/gallery/2024-11/sY3image.png)
A droite de l’écran, on a les différents processus de gravure et de découpe.
[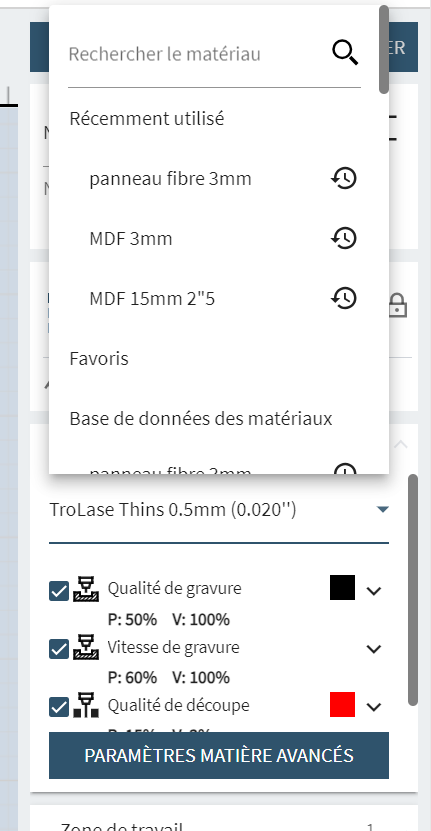](https://innovation.iha.unistra.fr/uploads/images/gallery/2024-11/h1Timage.png)
En cliquant sur le nom du matériau, on accède à la liste des matériaux supportés par la machine avec des profils testés. On peut faire une recherche.
Les matériaux les plus utilisés : *( NB : attention à sélectionner la bonne épaisseur, en général 3mm sauf pour le cuir mais pensez à mesurer vous même pour être sûr)*
- Acrylique -> TROGLASS
- Bois type MDF -> "Wood MDF"
- Bois type contreplaqué ->"Wood Plywood"
- Cuir -> "Leather Leather"
[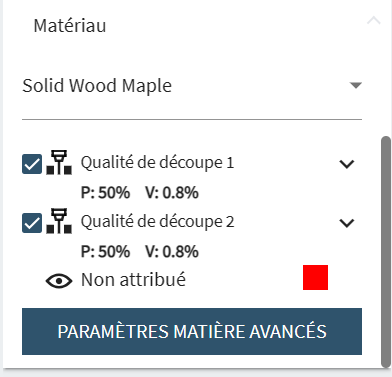](https://innovation.iha.unistra.fr/uploads/images/gallery/2024-11/dPsimage.png)
Une fois le matériau choisis, on va vérifier que les bonnes couleurs sont attribuées aux bons processus.
En cliquant sur un carré de couleur, on ouvre la liste des processus utilisables pour ce matériau. Cliquer sur le processus voulu pour cette couleur.
[](https://innovation.iha.unistra.fr/uploads/images/gallery/2024-11/rygimage.png)
Une fois la préparation terminée, cliquer sur « Envoyer au laser »
[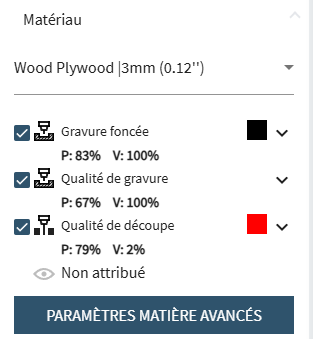](https://innovation.iha.unistra.fr/uploads/images/gallery/2025-09/aAAimage.png)
Si les bonnes couleurs sont attribués aux bonnes fonctions, vous pouvez passer à la suite.
Pour rappel :
Répartition des couleurs et de leurs fonctionnalité :
\- Découpe : rouge RVB (255,0,0)
\- Gravure : *( Attention, chaque couleur correspond à un niveau de gravure plus ou moins profond que vous pouvez paramétrer individuellement. Pour plus de simplicité, limiter vous à un seul niveau de gravure. Ensuite, si vous voulez allez plus loin, vous pourrez faire plusieurs niveau de gravure)*
- - Noir (Couleur de gravure par défaut) -> RVB (0,0,0)
- Bleu foncé -> RVB (0,0,255)
- Bleu grisé -> RVB (51,102,153)
- Bleu -> RVB (0,255,255)
- Vert -> RVB (0,255,0)
- Vert gazon -> RVB (0,153,51)
- Vert foncé -> RVB (0,0,0)
- etc... (Normalement vous n'aurez pas besoin d'autant de niveau de gravure, un ou deux suffisent)
- Vous pouvez réaliser la calibration de la machine. Ouvrez la zone de découpe et placez-y votre plaque (MDF ou PMMA ; pour les autres matériaux vérifier s'ils peuvent passer à la découpeuse laser); celle-ci ne doit pas dépasser de la zone de découpe et être la plus plate possible.
Le contreplaqué inférieur à 4mm d'épaisseur peut parfois gondoler, utilisez du scotch dans les coins pour le fixer au plateau et faire en sorte que la planche soit bien plate.
Faites la focale : pour cela placez le laser au milieu de la zone de travail (de votre plaque) à l'aides des flèches et posez le calepige en équilibre sur la rainure à droite (il faut le tenir par l'écrou rouge). Remontez alors **très lentement** le plateau jusqu'à ce que votre plaque touche le calepige et le fasse tomber. Replacez le calepige dans l'emplacement dédié.
[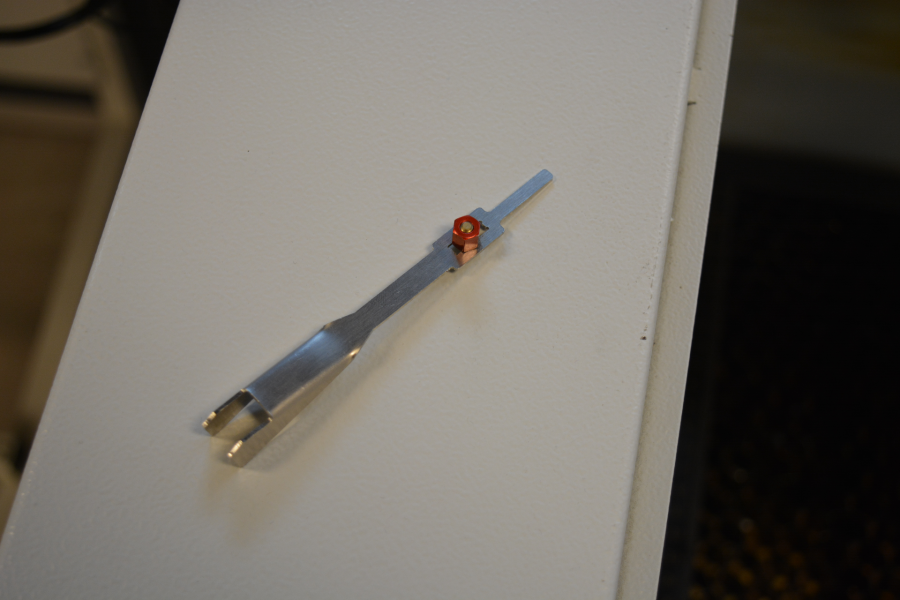](https://innovation.iha.unistra.fr/uploads/images/gallery/2023-07/fr4image.png)
[ ](https://wiki.fablab.sorbonne-universite.fr/wiki/lib/exe/detail.php?id=wiki%3Autilisationmachine%3Aprotcole&media=wiki:niveau.png "wiki:niveau.png")
[](https://innovation.iha.unistra.fr/uploads/images/gallery/2023-07/b7ximage.png)
[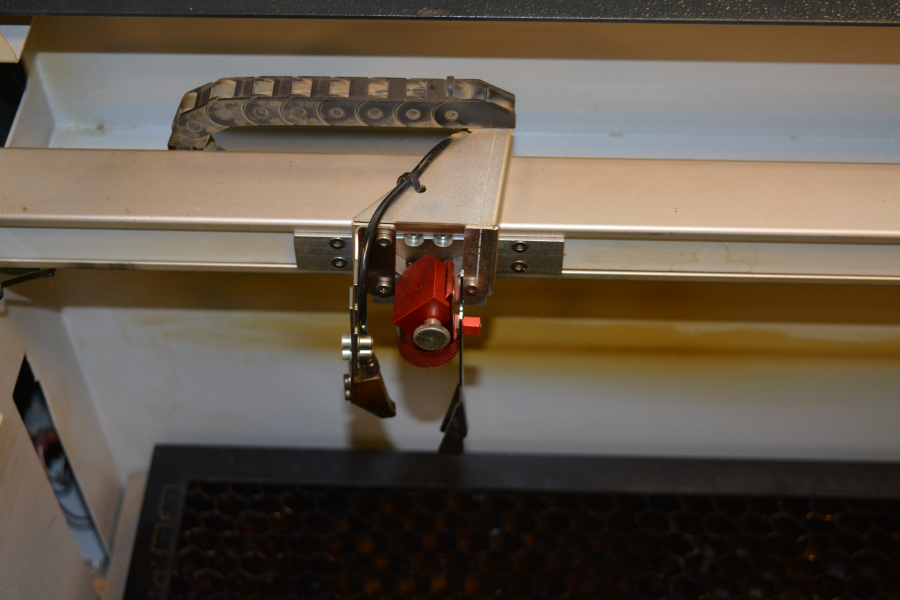](https://innovation.iha.unistra.fr/uploads/images/gallery/2023-07/YuIimage.png)
Il faut faire la focale à chaque fois que l'on met une nouvelle plaque dans la machine, même si c'est le même matériau (des petites variations d'épaisseur peuvent apparaître)
Placez ensuite le laser dans le coin supérieur gauche de votre planche (ou à l'endroit où vous voulez faire la découpe). Si vous ne voyez pas le pointeur rouge du laser (sur le plexi par exemple), utilisez une feuille blanche pour le visualiser. Par convention on placera le travail de sorte à ce que le pointeur laser soit dans son coin gauche.
Essayez toujours de minimiser le gaspillage de matériel lorsque vous positionnez le curseur. N'hésitez pas à prendre une règle pour vérifier que votre travail va bien rentrer dans l'emplacement que vous avez repéré.
- On arrive sur l’écran de file d’attente de production
[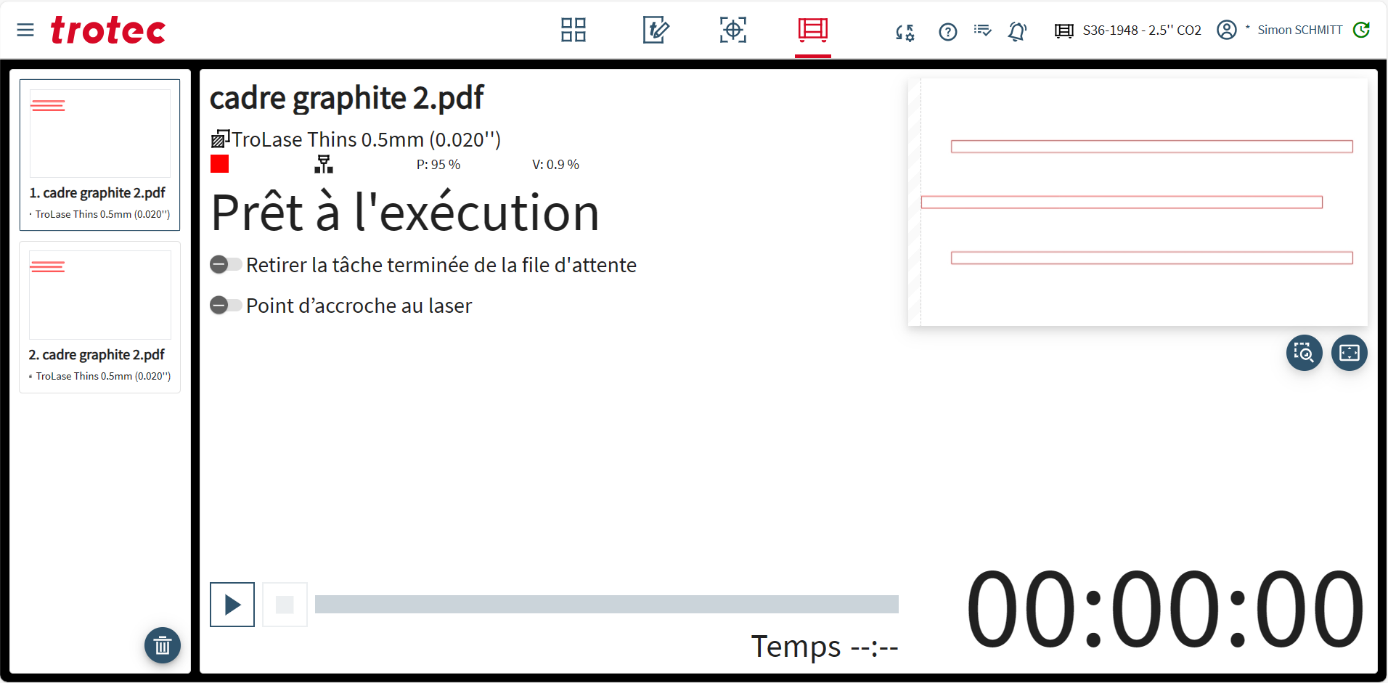](https://innovation.iha.unistra.fr/uploads/images/gallery/2024-11/0nZimage.png)
Le projet qu’on vient de réaliser apparait directement sur l’écran
[](https://innovation.iha.unistra.fr/uploads/images/gallery/2024-11/K7Aimage.png)
Pour lancer la fabrication, cliquer sur le bouton « lecture »
Une fois la production terminée, attendre 20 secondes que le système d’aspiration récupère les fumées qui pourraient rester dans la machine.
# Utilisation du tourne-cylindre
### Installation
- Couper la machine
- Dévisser le et débrancher le souffleur d'air (laisser le tuyau trainer)
Enlever ou soulever le souffleur d'air qui risque sinon de **rentrer en collision** avec les supports de cylindre
[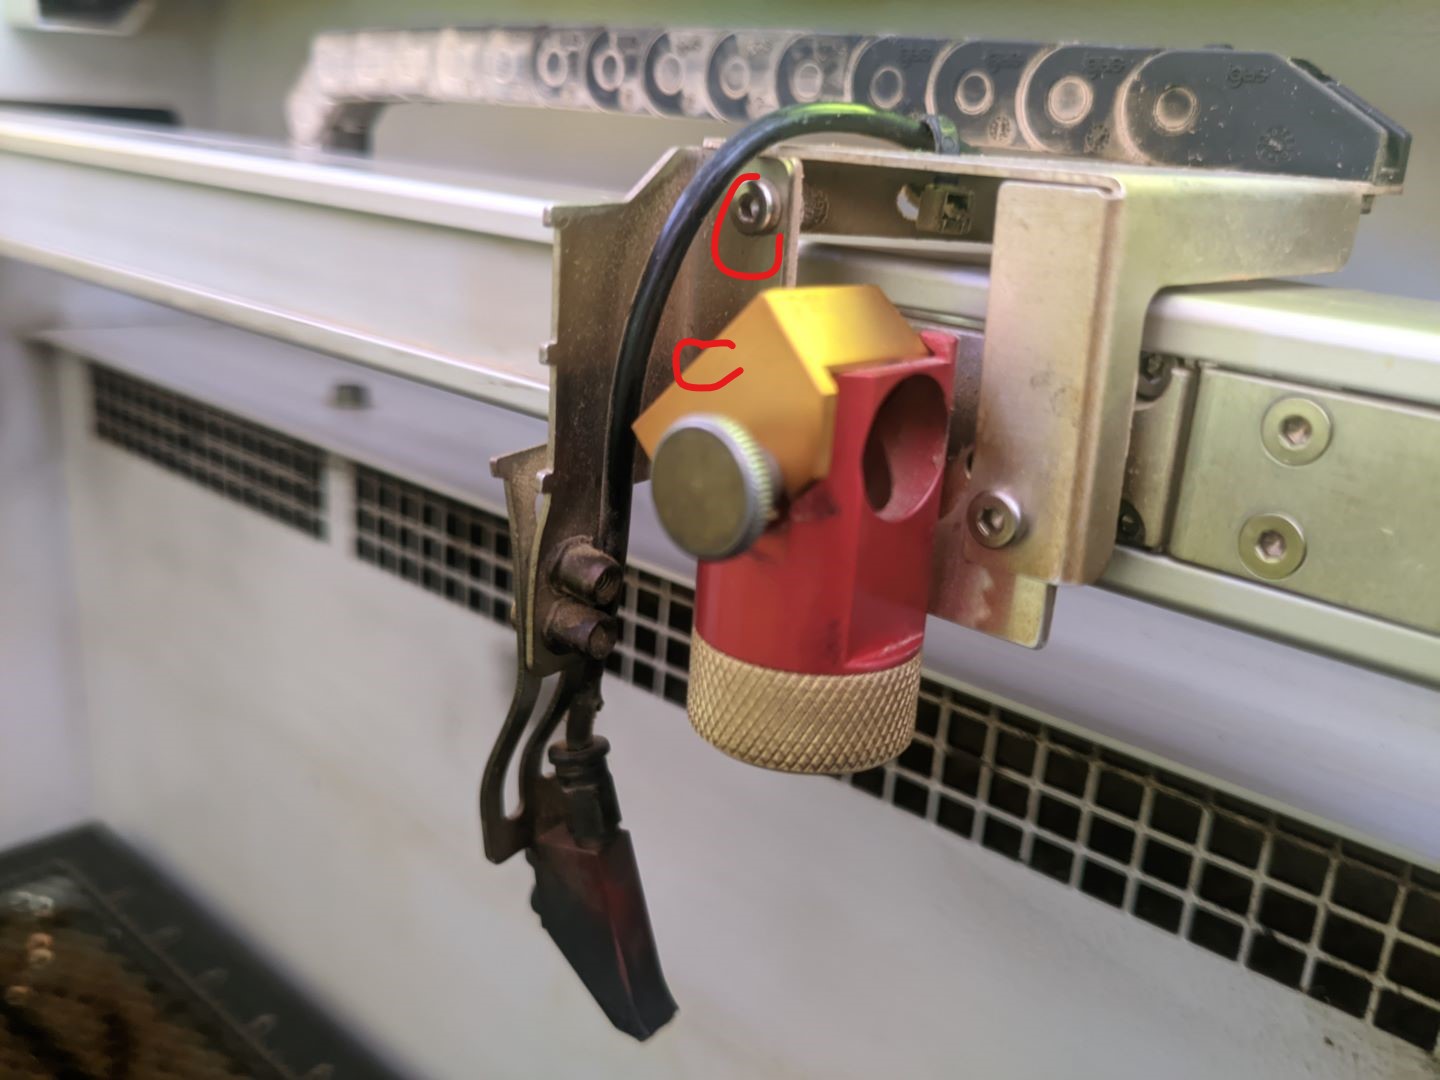](https://innovation.iha.unistra.fr/uploads/images/gallery/2025-03/gsjpxl-20250319-093609505-1080p.jpg)
- Descendre le plateau et enlever le nid d’abeille
- Installer le tourne-cylindre
- Brancher le tourne-cylindre
[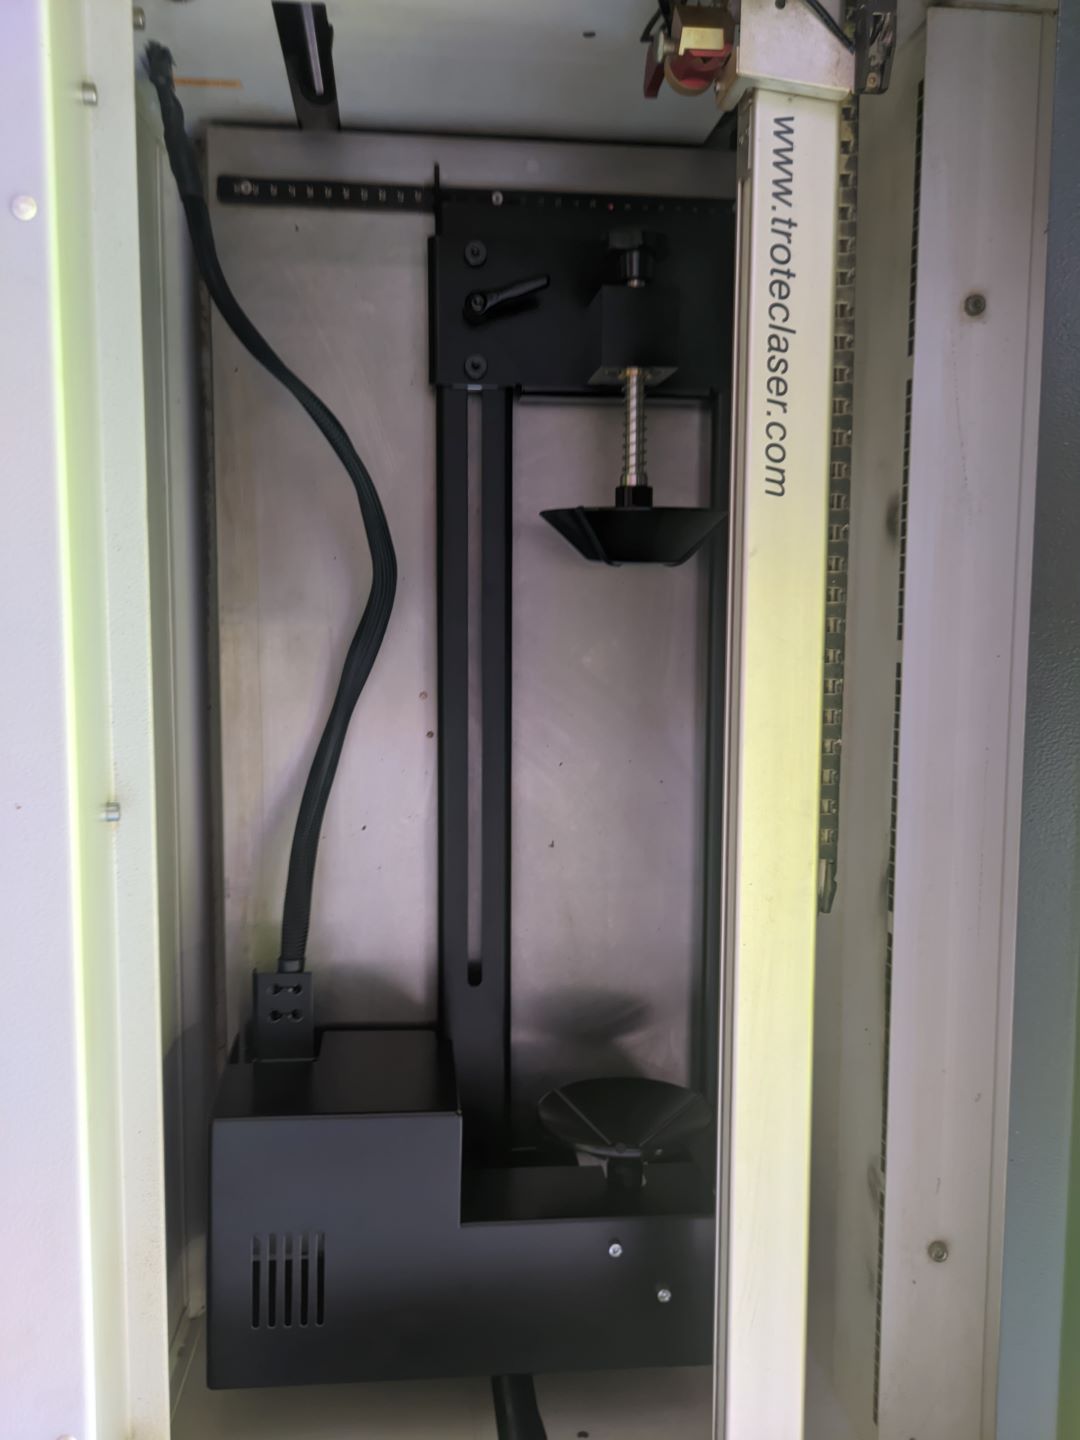](https://innovation.iha.unistra.fr/uploads/images/gallery/2025-03/pxl-20250319-104937084-1080p.jpg)
[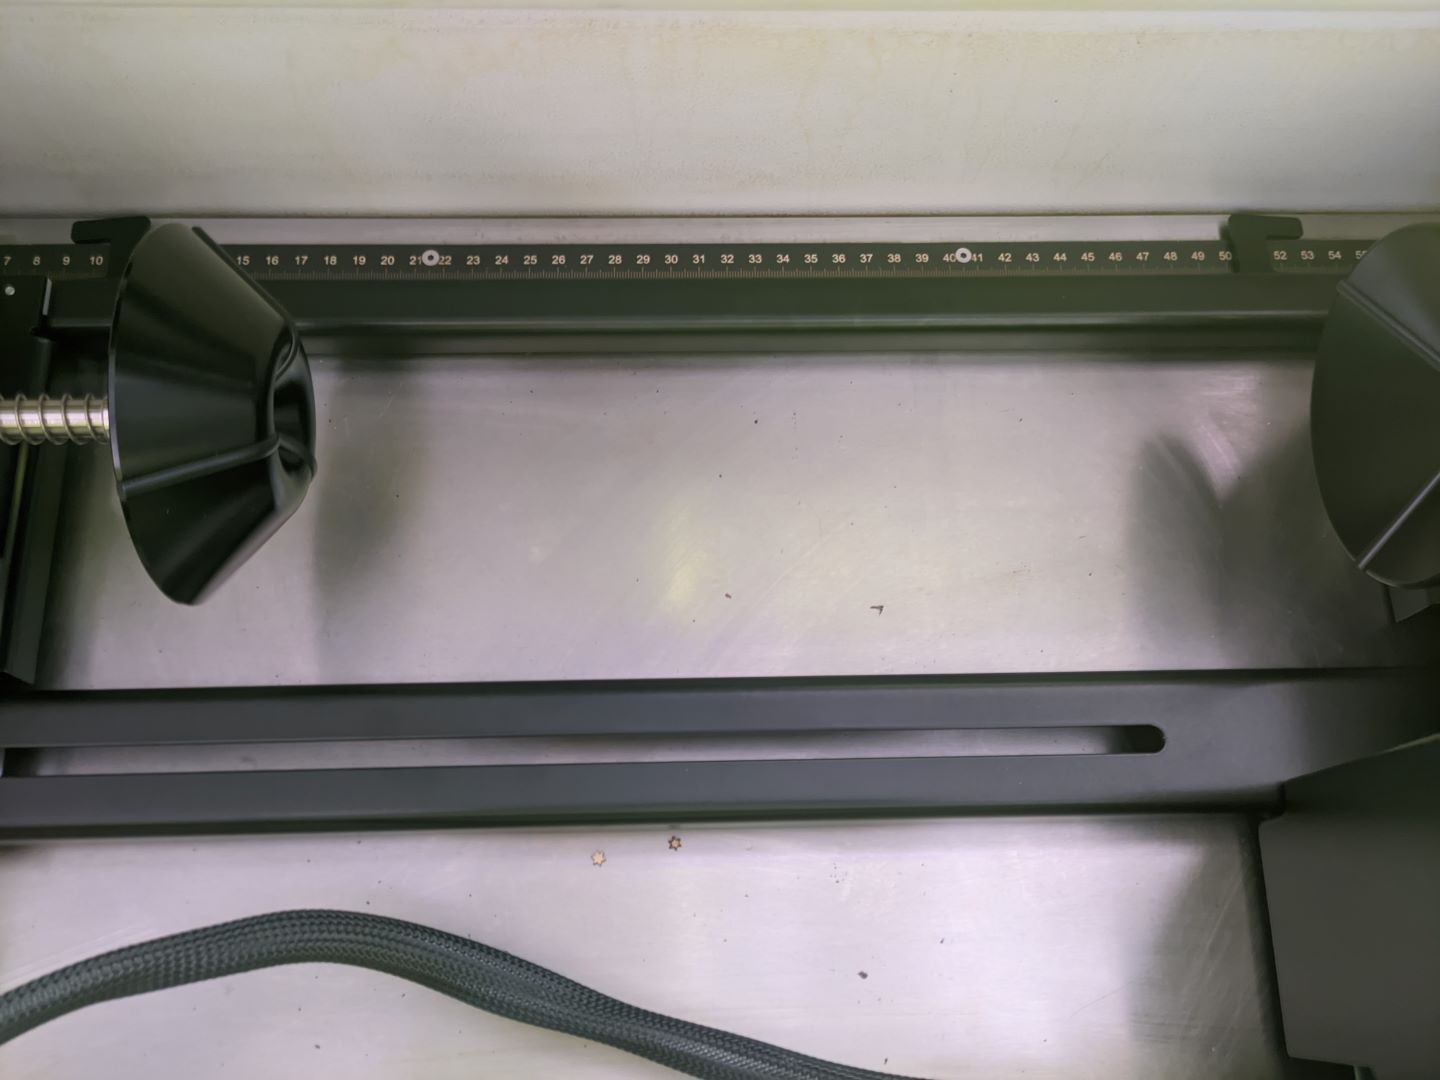](https://innovation.iha.unistra.fr/uploads/images/gallery/2025-03/pxl-20250319-104950708-1080p.jpg)
- Allumer la machine
- Le Y vient se centrer sur l’axe du tourne-cylindre, pas de calibration nécessaire
- Les boutons haut/bas permettent de tourner. Droite/gauche reste droite/gauche
- Vérifier que l’objet est bien centré sur l’axe, vérifier que le laser ne tape pas les supports du tourne-cylindre
# Maintenance et utilisation avancée
### Choix lentilles, réglage focale et soufflage d'air
Chaque lentille a une **distance focale** différente et va donc envoyer un faisceau de rayons laser plus ou moins parallèles ou coniques (convergents). Plus le rayon focal de la lentille est petit, plus le faisceau est conique et plus l'énergie est concentrée en un point focal, permettant de graver de manière précise à une hauteur donnée Z. Plus le rayon est grand, plus les rayons sont parallèles et plus l'énergie est diffusée sur la hauteur Z, permettant de découper un matériau plus épais. Plus le rayon est petit, plus le faisceau convergera en un point focal proche de la lentille (distance focale courte), et plus la calepige sera courte.
Lentilles CO2
Lentille Flex CO2 / fibré
Focale
1.5
2
2.5
2.85 (équivalent 2 CO2)
Couleur calepige
rouge
noir
argenté
doré
Hauteur réglage d'air
index haut
index milieu
index bas
entre milieu et bas
Usage
gravure détaillée
gravure et découpe
découpe
gravure et découpe
Régler la hauteur du souffleur d'air pour qu'il souffle sur le point focal (point rouge sur le matériau).
Appuyer simultanément sur le bouton `ventilo` + `flèche haut blanche` pour **Activer le soufflage d’air** :
[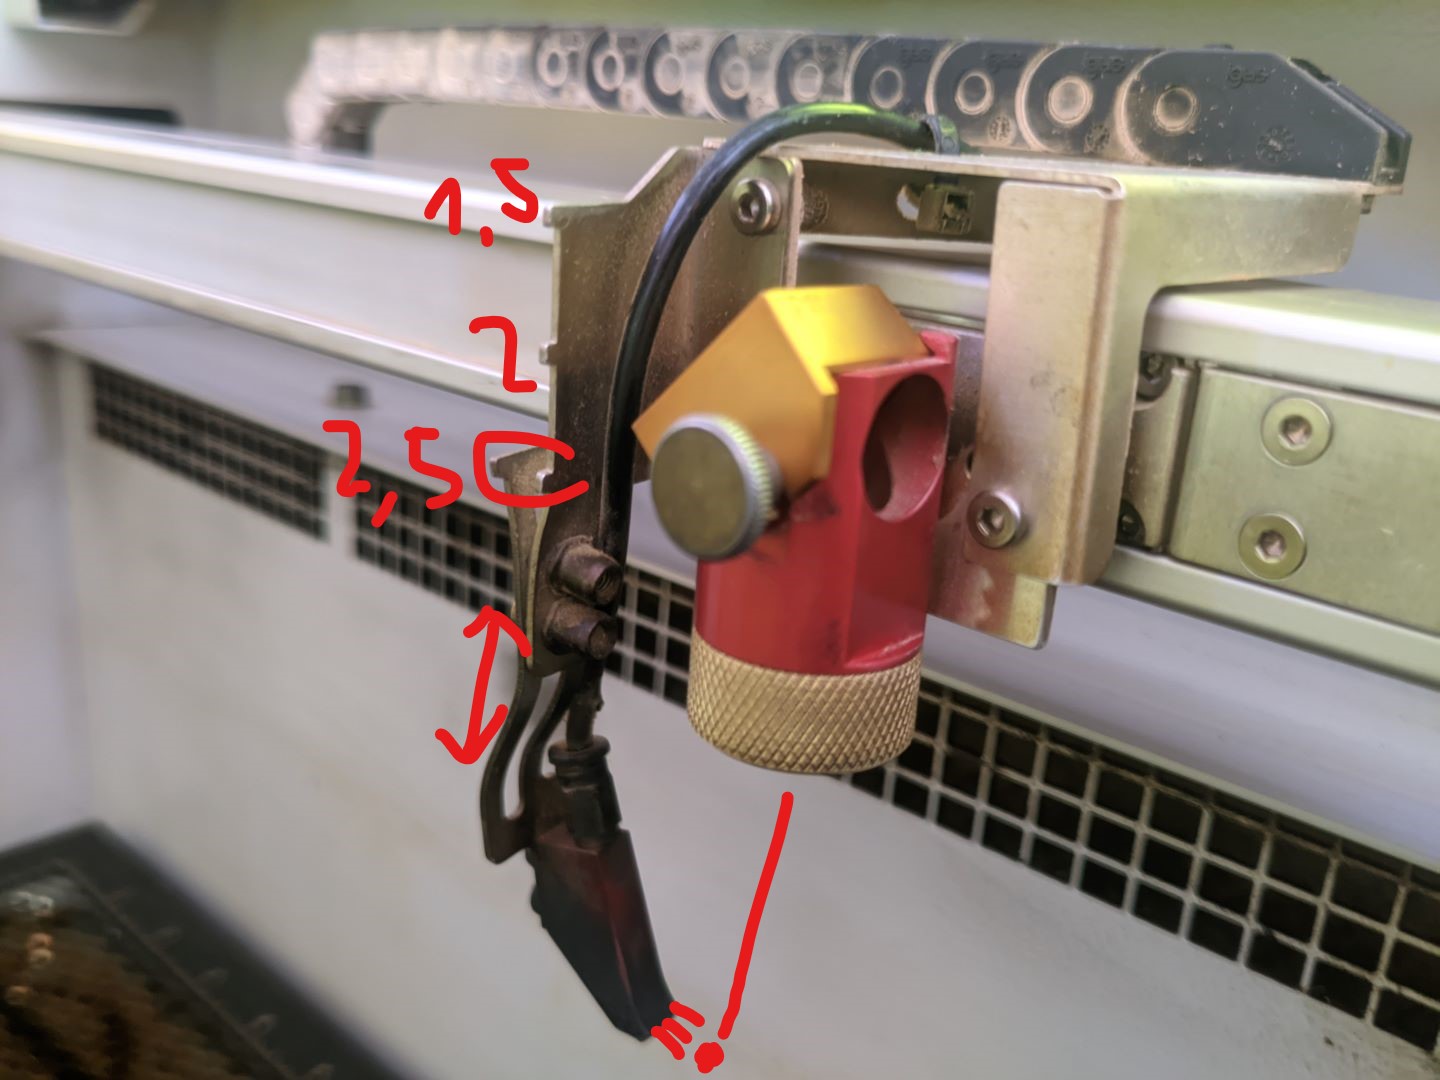](https://innovation.iha.unistra.fr/uploads/images/gallery/2025-03/pxl-20250319-093609505-1080p-soufflage-air.jpg)
Il existe 4 lentilles de focales différentes, dont 3 **uniquement pour le laser CO2** :
- focale 1.5 : gravure détaillée, pige rouge, souffleur sur l'index du haut
- focale 2 : polyvalente (gravure et découpe), pige noire, souffleur sur l'index du milieu
- focale 2.5 : découpe, pige argentée, souffleur sur l'index du bas
Et 1 lentille compatible laser fibré et CO2 (équivalent 2 en CO2) :
- focale 2.85 ("Lentille Flex") : équivalent focale 2 donc polyvalent en CO2, pige dorée
Utiliser impérativement la **lentille flex 2.85 pour le laser fibré**
### Tourne-cylindre
- Si ça couine en tournant, détendre la courroie de transmission.
[](https://innovation.iha.unistra.fr/uploads/images/gallery/2025-03/pxl-20250319-105219336-1080p.jpg)
### Récap maintenance
- Chaque jour d'utilisation intensive ou toutes les semaines
- Nettoyage lentille
- Changement préfiltre de hotte
- Tous les mois
- Nettoyage miroirs
- Nettoyage intérieur au savon de Marseille, dégraissant
- Changement filtre à air quand 100%
- Tous les ans
- Nettoyage circuit d'air
- Nettoyage miroirs à l'arrière à droite de la graveuse (nécessite démontage)
- Tous les 2 ans
- révision par trotec
- nid d'abeille quand trop encrassé (dégagement fumée)
- Tous les 5 ans (2030) :
- Changement Filtre et préfiltre à charbon
- Nettoyage des capteurs et de tous les contacts au spray à contact
Pas de graissage des axes car les fumées et poussières feraient des pâtés
### Maintenance lentille et 2 miroirs
#### Lentille OK / NOK
[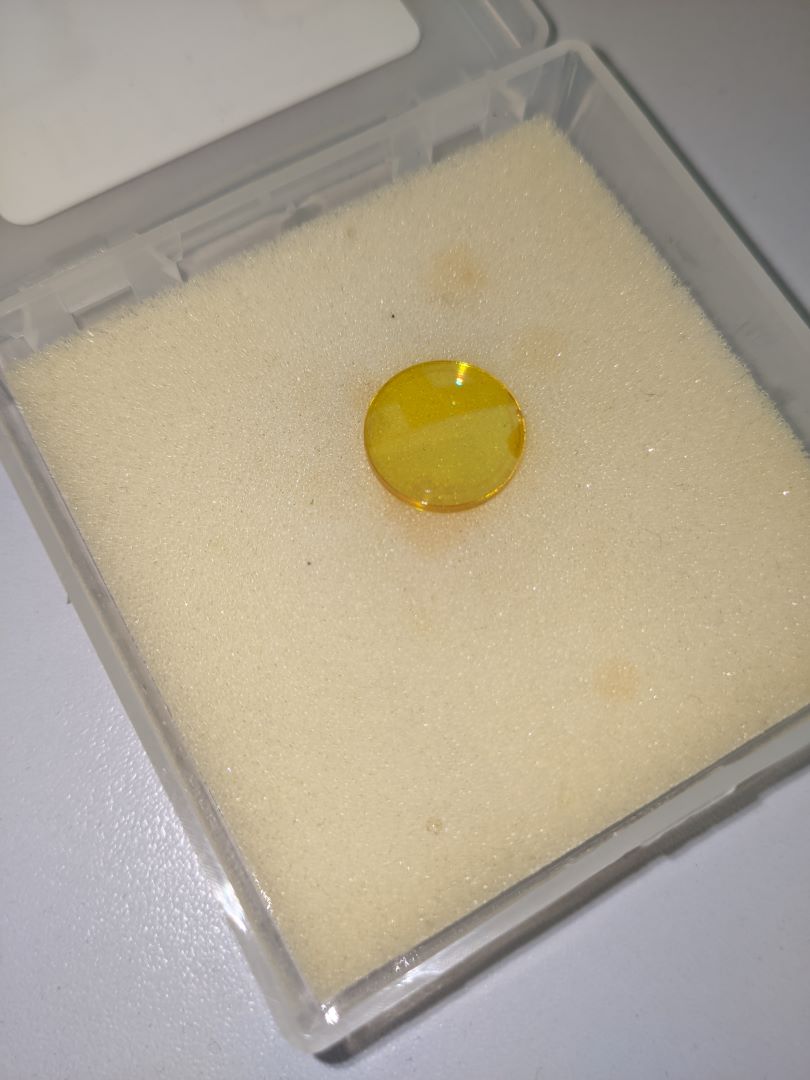](https://innovation.iha.unistra.fr/uploads/images/gallery/2024-08/BbCpxl-20240709-074207035.jpg)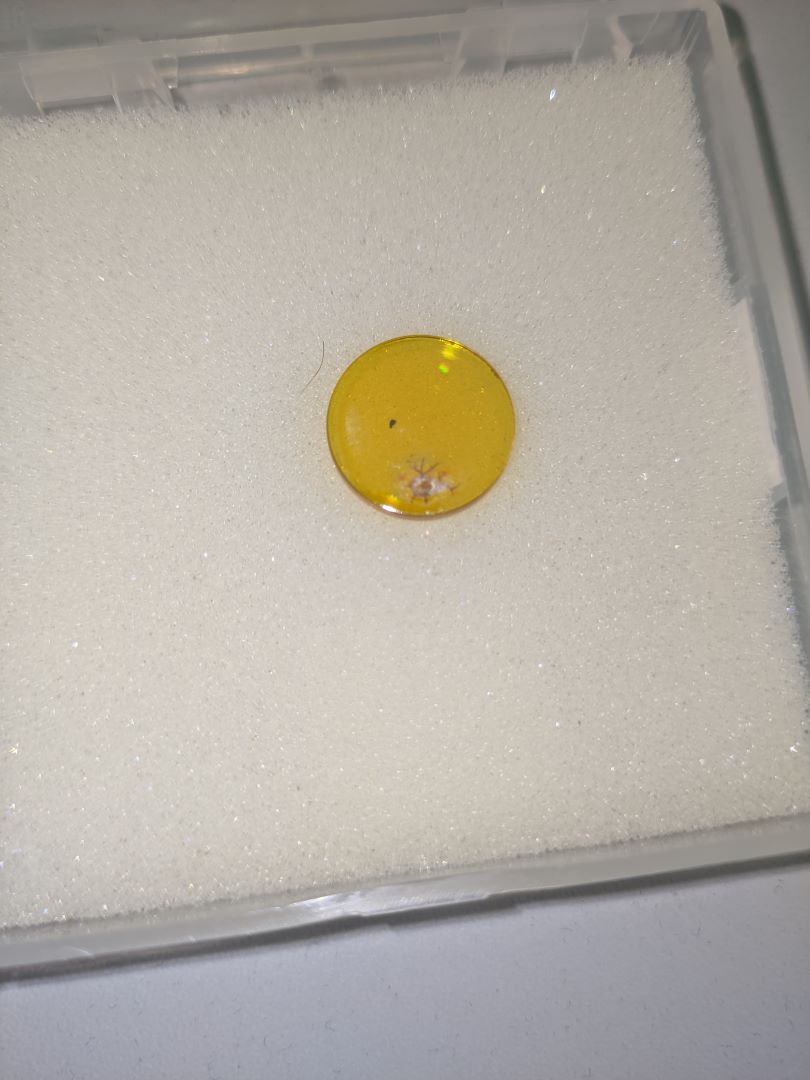
#### Nettoyage
- Chaque jour où elle a été utilisée
- Au moins une fois par semaine
#### Changement
- Quand il reste une marque après nettoyage
- Pour changer de focale pour être plus précis (gravure) ou plus puissant (découpe profonde)
#### Montage / Démontage
- Convexe/bombé en haut
- Plat en-dessous
- On doit se voir à l'endroit quand on regarde dedans
[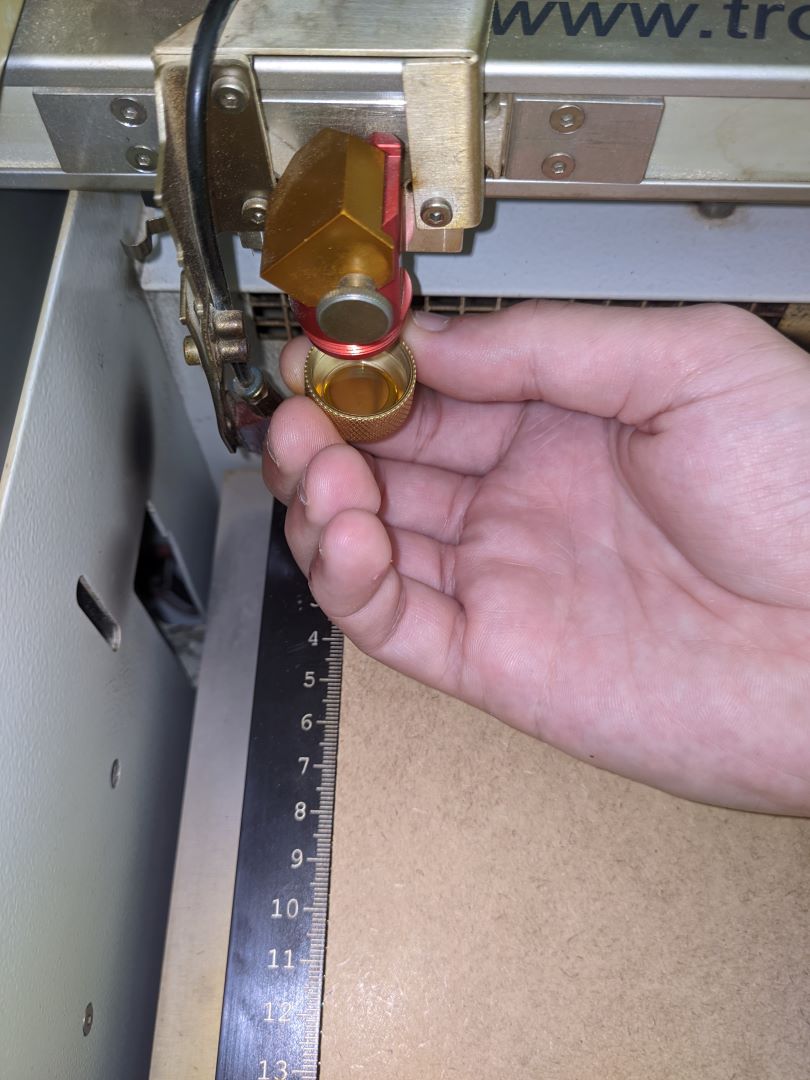](https://innovation.iha.unistra.fr/uploads/images/gallery/2024-08/pxl-20240709-074303899.jpg)
#### Miroirs 1 et 2
- Nettoyage tous les mois
- Miroir 1 au dessus de la lentille
[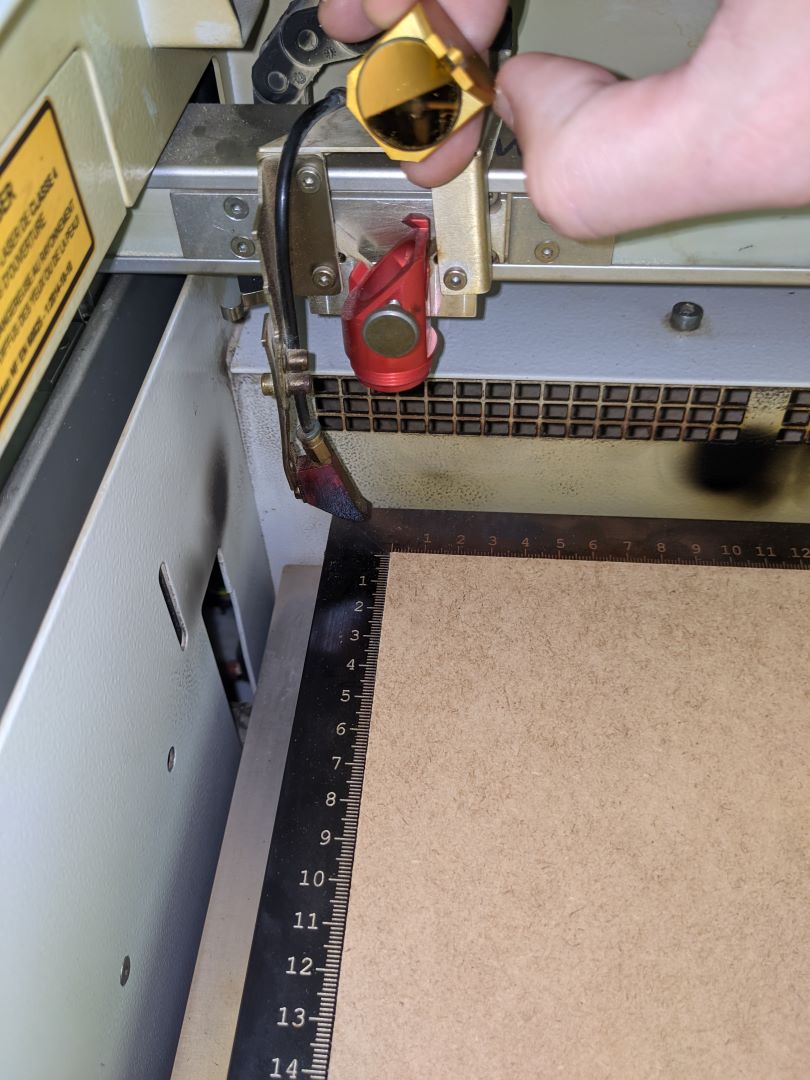](https://innovation.iha.unistra.fr/uploads/images/gallery/2024-08/pxl-20240709-074322040.jpg)
- Miroir 2 dans la trappe sur la droite de la machine
- Dévisser les 2 vis avec une clé alène
Ne surtout **pas toucher aux vis dorées** qui servent à régler l'alignement du miroir
[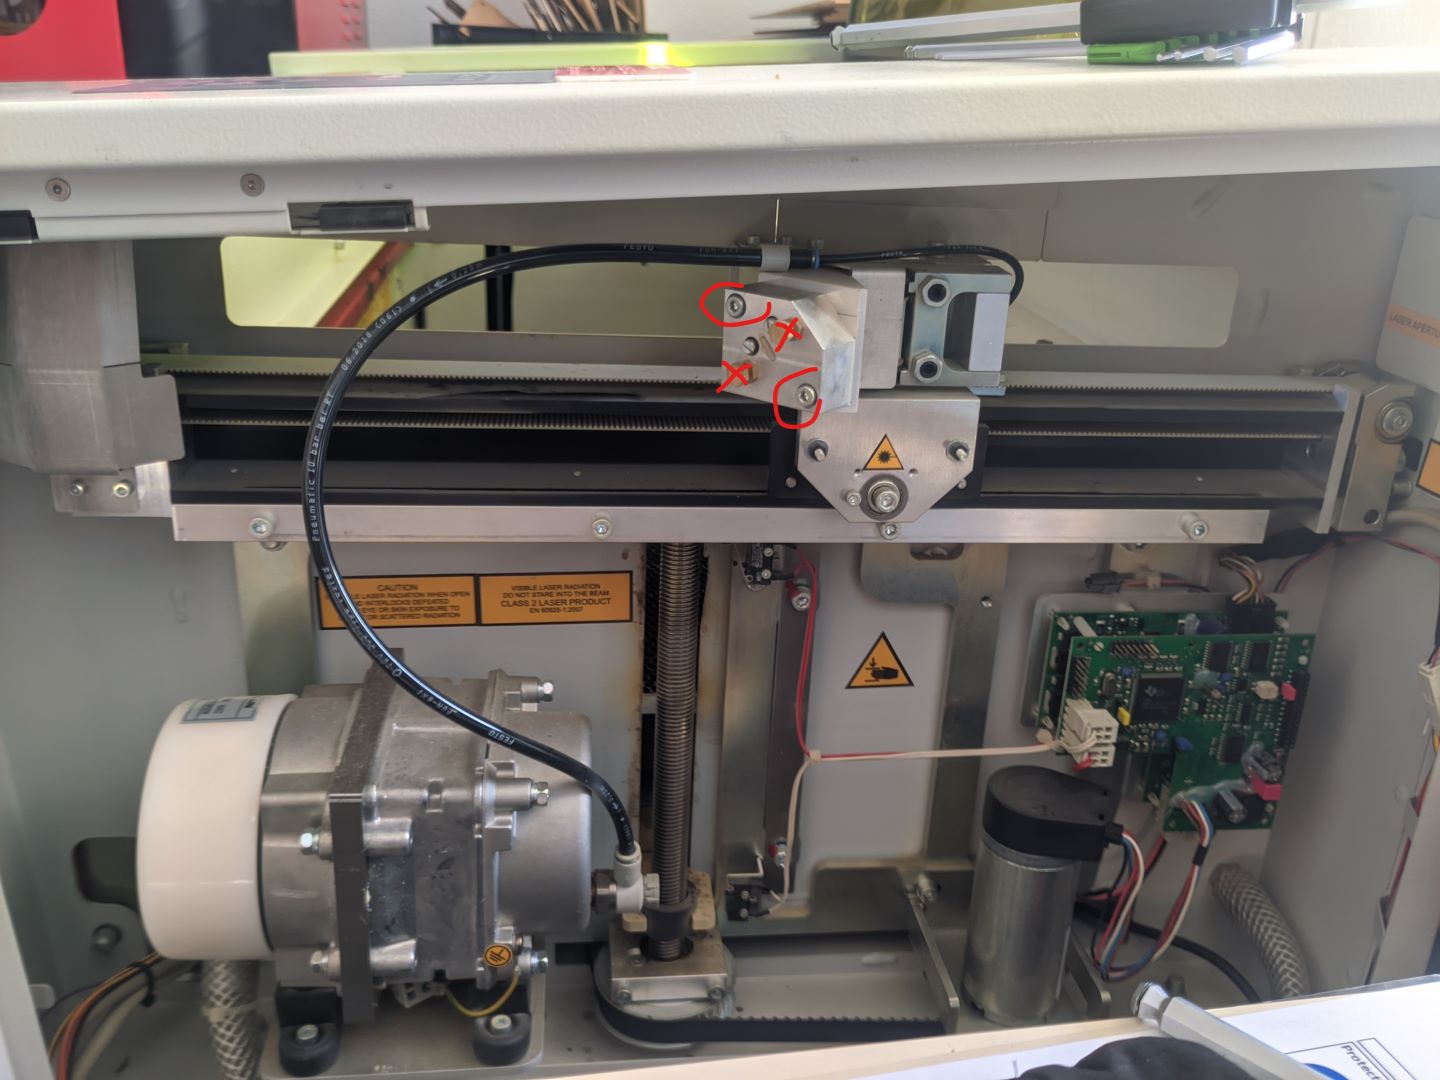](https://innovation.iha.unistra.fr/uploads/images/gallery/2025-03/pxl-20250319-093216943-1080p.jpg)
### Filtres
- Attention se bouche beaucoup plus vite avec le MDF à cause de la colle
- Une bonne combustion sans flamme peut préserver les filtres
[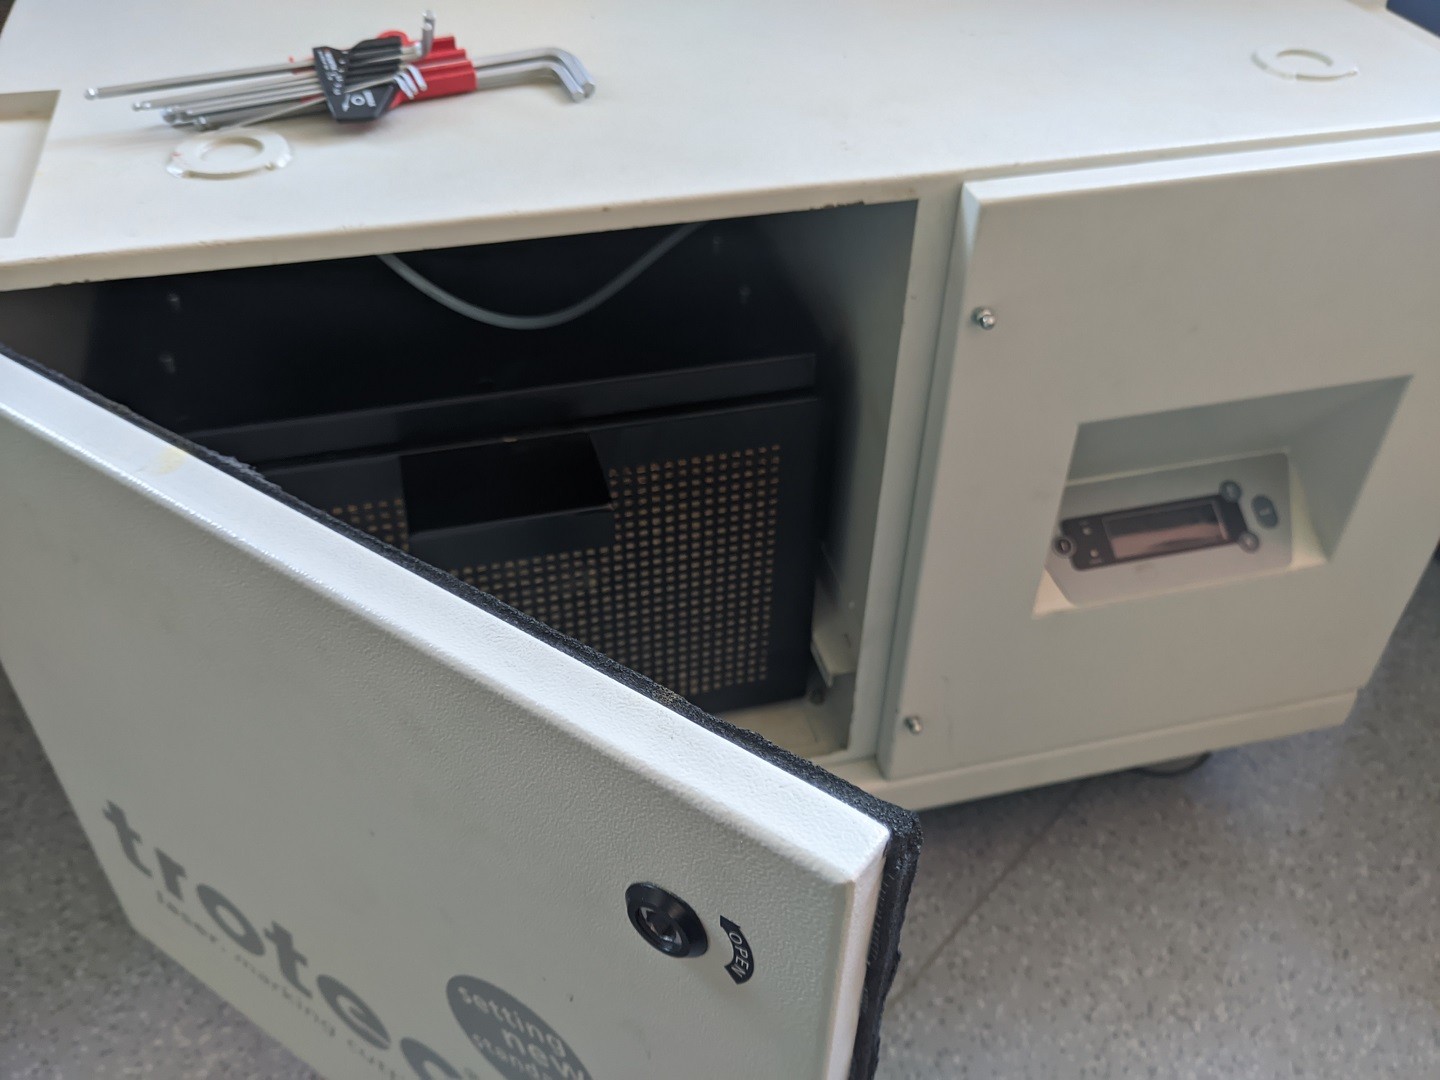](https://innovation.iha.unistra.fr/uploads/images/gallery/2025-04/pxl-20250409-150714801.jpg)
[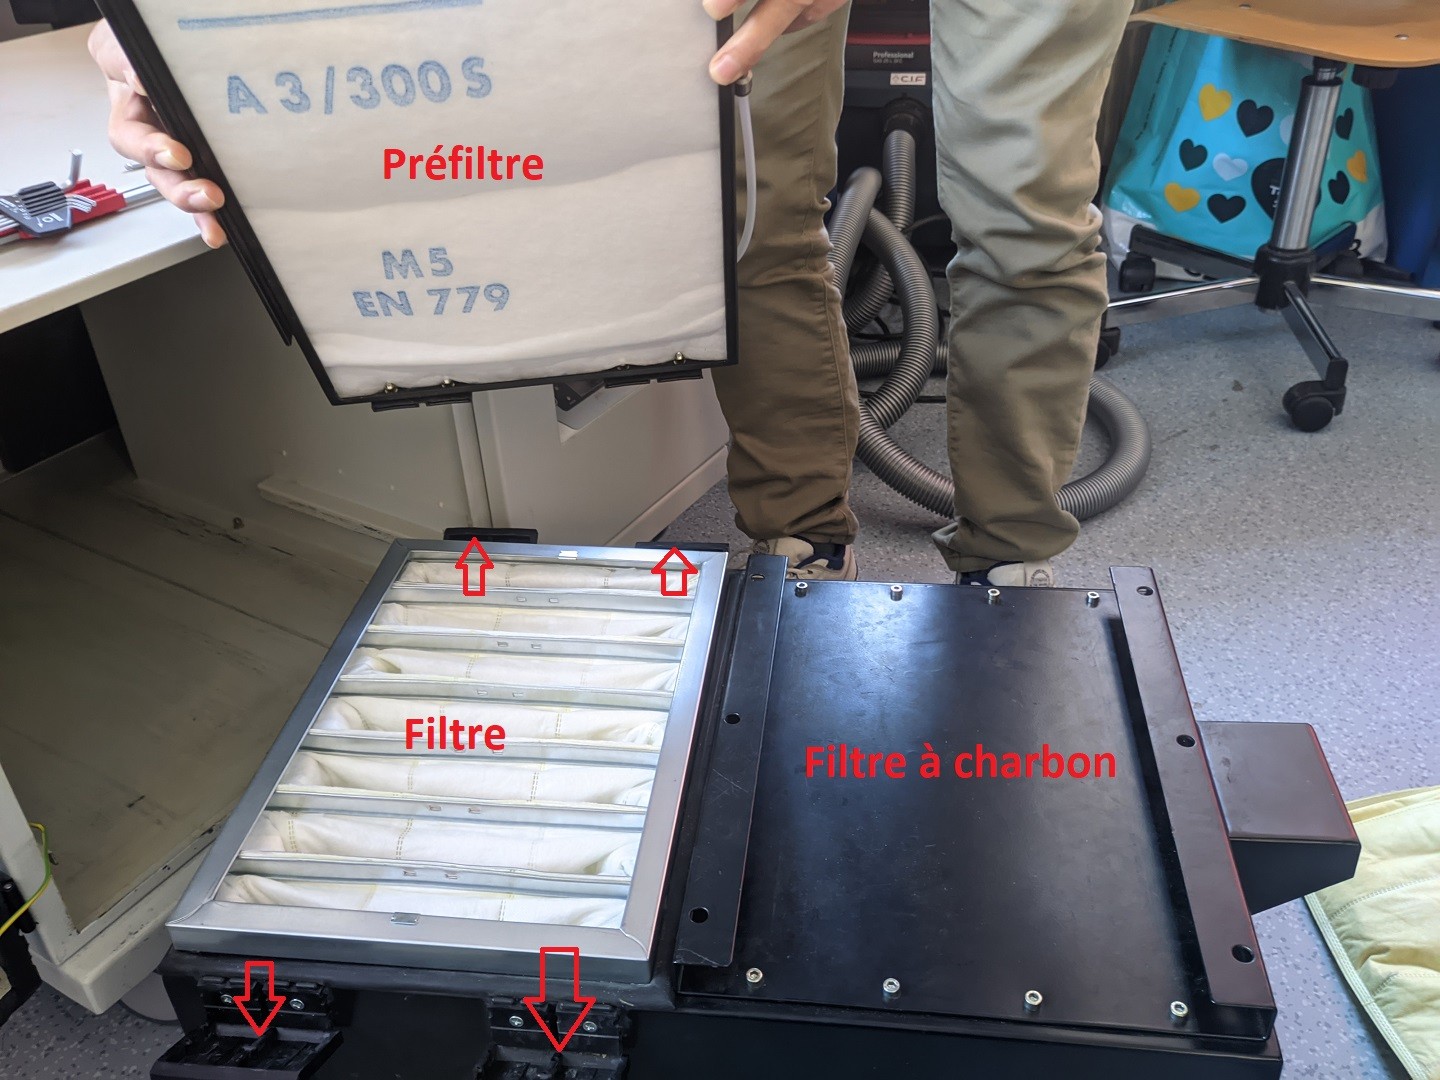](https://innovation.iha.unistra.fr/uploads/images/gallery/2025-04/pxl-20250409-150317778.jpg)
Filtre et préfiltre :
- à changer quand capteur à 100%
- Peut être soufflé et remis en place
Filtre à charbon et les préfiltres dans le compartiment charbon tous les 7 ans :
- ~2030 ?
### Support nid d'abeille
- Nid d'abeille 12.7mm (500€)
- changement quand trop encrassé (dégagement fumée)
### Défaut axe Z
En 2025 on a eu un soucis où le plateau remontait lentement à l'initialisation jusqu'à rentrer en collision avec le haut de la machine
- Les capteurs fin de course de l'axe Z étaient encrassés -> Le capteur était tout le temps enclenché
- A l'initialisation de la machine, le plateau descend jusqu'à enclencher le capteur. Puis il remonte lentement et légèrement jusqu'à ce que le capteur se relâche. La machine continue alors son cycle d'initialisation
- Le plateau remonte lentement et la machine ne s'initialise jamais
- Nettoyage des capteurs de fin de course et de tous les contacts au spray à contact
[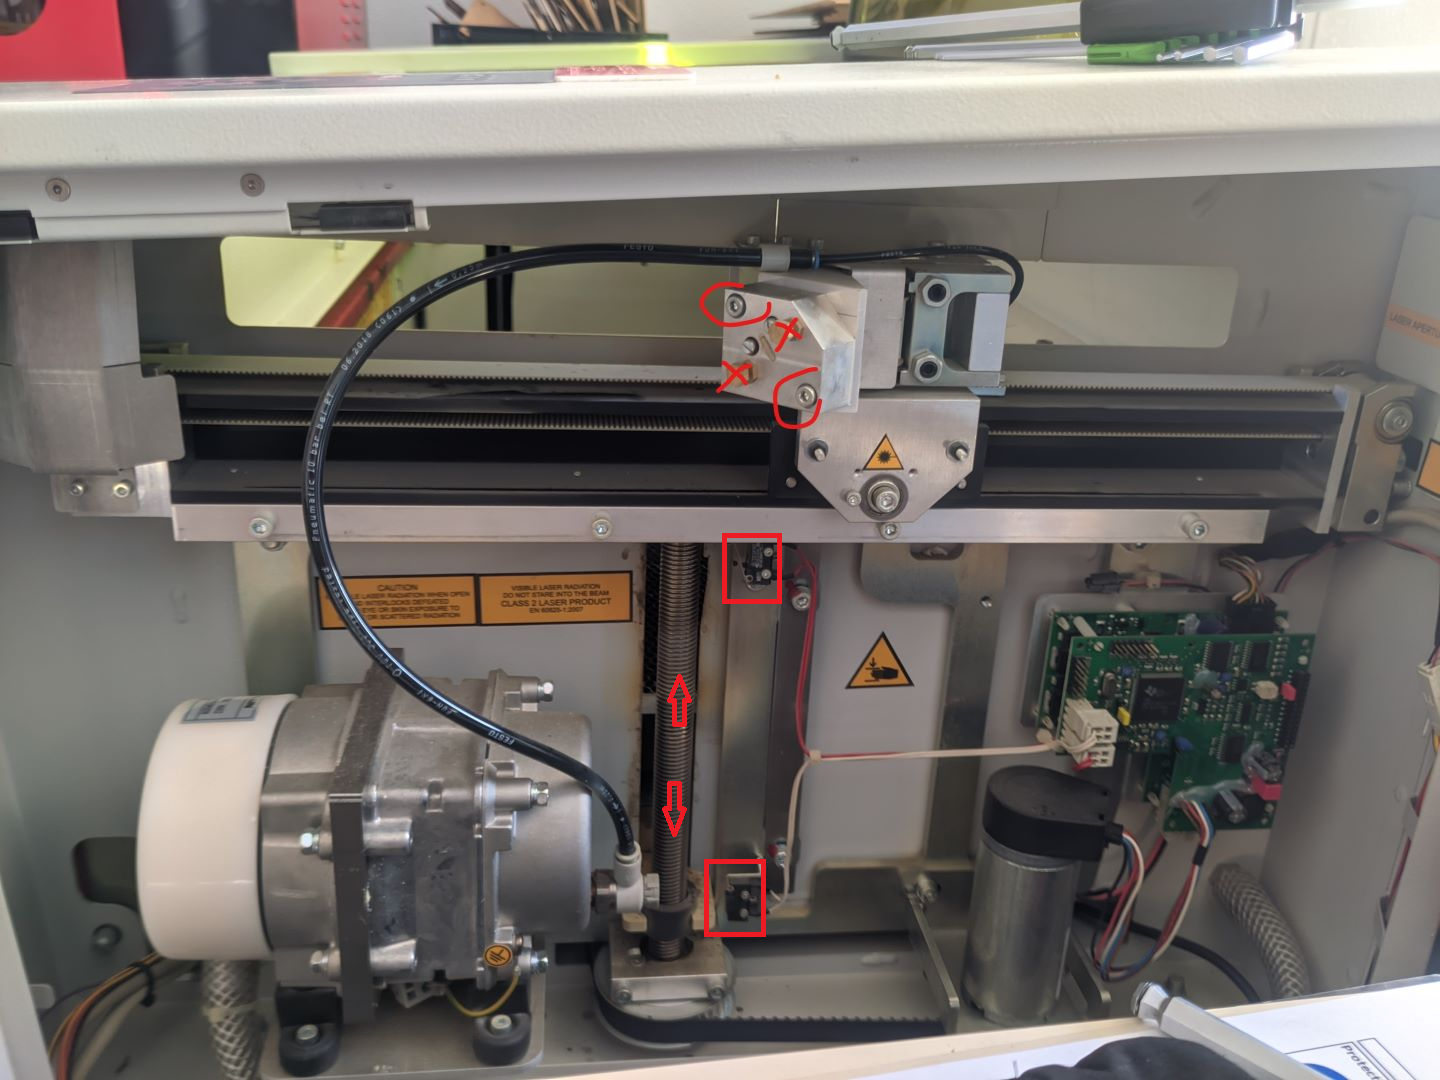](https://innovation.iha.unistra.fr/uploads/images/gallery/2025-04/txpimage.png)
# Lancement de la Speedy 100 avec JobControl
### Informations et précautions
Puissance du laser CO2 : 60W
Puissance du laser Fibré (pour la gravure métal) : 20W
Comme indiqué dans la page [Présentation de la Trotec Speedy 100](https://innovation.iha.unistra.fr/books/2-fablab-formation-machines-logiciels/page/presentation-et-securite), la surface de travail maximale de la machine est de **610 x 300 mm** (en vrai 615 x 307) mais pensez à prévoir des marges autour de votre travail. Attention, il faut à tout prix éviter de découper trop près du bord pour éviter des départs de flammes ! 🔥🔥
Au FAN, nous utilisons un laser fibré ou CO2. L'**épaisseur maximale** conseillée pour la découpe est d'environ 7 mm.
Certaines matières ne peuvent être découpées / gravées à la laser car elles émettent des gaz toxiques voire mortels, elles prennent feu, fondent ou endommagent la machine.
**Moralité :** si vous apportez votre propre matériau, vous devez **impérativement** :
- en connaître la composition
- avoir fait une première recherche pour savoir s'il est [compatible avec la machine ](https://innovation.iha.unistra.fr/books/2-fablab-formation-machines-logiciels/page/choix-des-materiaux-et-parametres-de-gravure "machines:decoupe_laser:0_utilisation:materiaux")
- faire vérifier et valider par un.e fabmanager
Vous devez toujours surveiller la machine toute la durée de l'usinage, et être en particulièrement vigilant.e à l'émission de fumées inhabituelles et de flammes. Si des flammes apparaissent, prévenez immédiatement un.e médiateur.ice.
Le site internet [BOXES.PY](https://boxes.hackerspace-bamberg.de/) permet de créer différentes boites en donnant les cotations que nous désirons. Il nous créera un fichier que l'ont doit modifier avec les bonnes couleurs.
### Préparation du fichier
1. Importez votre dessin (SVG, DXF, EPS) dans le logiciel [Inkscape](https://innovation.iha.unistra.fr/books/2-fablab-formation-machines-logiciels/page/utilisation-dinkscape "wiki:tutoriels:modelisation2d").
Votre dessin doit respecter la mise en forme suivante :
- Les traits de **découpe** ou les contours des formes à découper doivent être en rouge (R: 255, V: 0, B: 0, A: 100) et sans couleur de fond.
[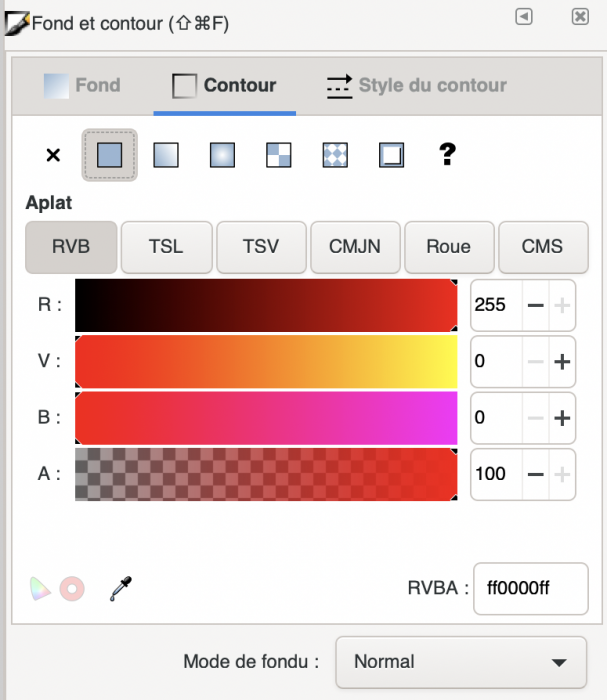](https://innovation.iha.unistra.fr/uploads/images/gallery/2023-07/bsuimage.png)[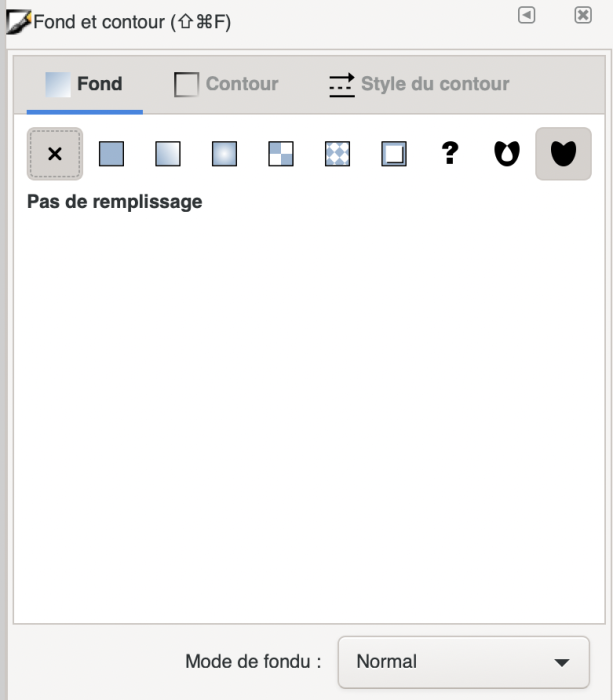](https://innovation.iha.unistra.fr/uploads/images/gallery/2023-07/IlQimage.png)
- Les surfaces à **graver** doivent être des tracés fermés, sans contours, avec un fond noir (R: 0, V: 0, B: 0, A: 100).
[](https://innovation.iha.unistra.fr/uploads/images/gallery/2023-07/h8mimage.png)[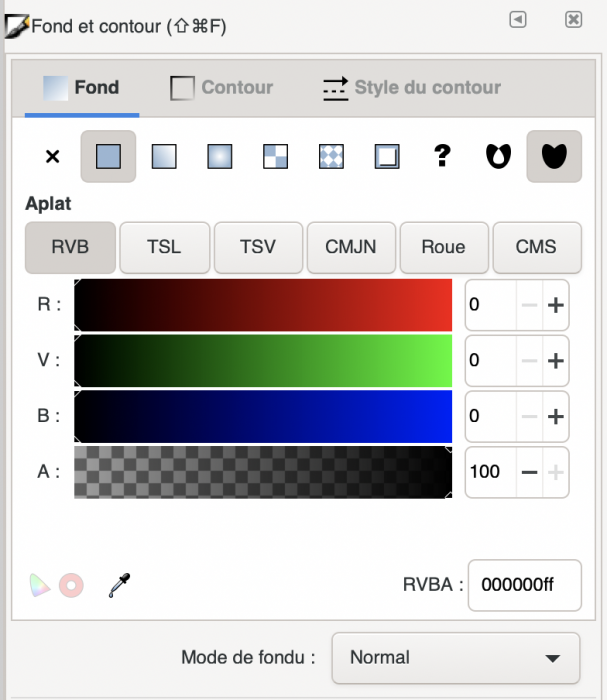](https://innovation.iha.unistra.fr/uploads/images/gallery/2023-07/BY9image.png)
- La convention est d'utiliser des traits de contour bleus pour le **marquage** (R: 0, V: 0, B: 255, A: 100). Le marquage est comme une découpe légère, qui ne passe pas à travers la matière mais la marque simplement.
**Attention** : pour graver du texte il faudra d'abord transformer votre texte en objet vectoriel en utilisant la fonction “Objet en chemin” du menu “Chemin”.
Si vous avez des calques, ne pas faire de couches trop profondes ! Elles risquent de pas être prises en compte par JobControl.
Systématiquement faire un **test** de découpe / gravure / marquage (selon l'opération à effectuer) sur un petit morceau du matériau, a fortiori dans **l'un des cas suivants** : - c'est une matière assez coûteuse (comme le PMMA 6mm) - c'est un travail de dimensions importantes (vous ne voulez pas gâcher toute une plaque) - c'est un matériau qui est rarement usiné au fablab - il y a de la gravure / du marquage à faire
> Un test peut prendre la forme d'un petit dessin vectoriel :
>
>
- découpe externe carrée (contour rouge) dimensions 15mmx15mm (on a dit millimètres, pas cm !) - découpe interne ellipse (contour rouge) - gravure ellipse (fond dégradé gris-noir) - marquage ellipse (contour bleu)
Cela permet de vérifier que la matière est bien découpée dans toute son épaisseur et que le résultat de gravure / marquage nous satisfait esthétiquement. Si le test est concluant, on passe à la suite, sinon on peut modifier les paramètres de découpe / vérifier que la focale est faite correctement / vérifier que le matériau est bien plan... [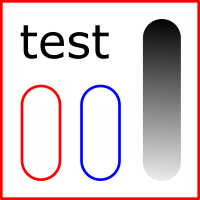](https://innovation.iha.unistra.fr/uploads/images/gallery/2023-07/k0Qtest-decoupe-marquage-gravure.png)
>
> Un test de ce type (15mm\*15mm) est en fichier joint à cette page dans le menu latéral, n'hésitez pas à l'utiliser (et si besoin à supprimer les éléments que vous n'avez pas besoin de tester)
Besoin de vectoriser une image matricielle ? On aborde quelques méthodes bien pratiques dans **[cette page](https://wiki.fablab.sorbonne-universite.fr/BookStack/books/logiciels/page/obtenir-un-trace-vectoriel-a-partir-dune-image)**.
Une fois votre fichier prêt, allez dans “Fichier” puis “Imprimer”. Sélectionnez comme imprimante la “Trotec Engraver v10.3.0” et cliquez sur “Préférences…” pour ouvrir les paramètres de la découpeuse laser.
[](https://innovation.iha.unistra.fr/uploads/images/gallery/2023-07/GdCimage.png)
Vous pourrez ainsi sélectionner :
1. Minimise la taille du job: permet de réduire le fichier de découpe au “dessin” et non à la page.
2. Type de matériaux et épaisseur (les matériaux les plus utilisés se trouvent dans FABLAB.
3. Choix de la résolution
4. Ligne de découpe : permet de rajouter une ligne de découpe autour de votre “dessin”.
5. Bouton JC : permet de valider vos paramètres.
Les autres paramètres ne doivent pas êtres modifié sans l'autorisation d'un responsable.
Une fois vos paramètres sélectionnés, vous pouvez cliquer sur “Ok” cela lancera automatiquement le logiciel JobControl et votre travail ira dans la file d'attente des jobs.
** Vous pouvez maintenant allumer la machine**
### Préparation du matériel de découpe
Ouvrez la zone de découpe et placez-y votre plaque (MDF ou PMMA ; pour les autres matériaux vérifier s'ils peuvent passer à la découpeuse laser); celle-ci ne doit pas dépasser de la zone de découpe et être la plus plate possible.
Le contreplaqué inférieur à 4mm d'épaisseur peut parfois gondoler, utilisez du scotch dans les coins pour le fixer au plateau et faire en sorte que la planche soit bien plate.
Faites la focale : pour cela placez le laser au milieu de la zone de travail (de votre plaque) à l'aides des flèches et posez le calepige en équilibre sur la rainure à droite (il faut le tenir par l'écrou rouge). Remontez alors **très lentement** le plateau jusqu'à ce que votre plaque touche le calepige et le fasse tomber. Replacez le calepige dans l'emplacement dédié.
[](https://innovation.iha.unistra.fr/uploads/images/gallery/2023-07/fr4image.png)
[ ](https://wiki.fablab.sorbonne-universite.fr/wiki/lib/exe/detail.php?id=wiki%3Autilisationmachine%3Aprotcole&media=wiki:niveau.png "wiki:niveau.png")
[](https://innovation.iha.unistra.fr/uploads/images/gallery/2023-07/b7ximage.png)
[](https://innovation.iha.unistra.fr/uploads/images/gallery/2023-07/YuIimage.png)
Il faut faire la focale à chaque fois que l'on met une nouvelle plaque dans la machine, même si c'est le même matériau (des petites variations d'épaisseur peuvent apparaître)
Placez ensuite le laser dans le coin supérieur gauche de votre planche (ou à l'endroit où vous voulez faire la découpe). Si vous ne voyez pas le pointeur rouge du laser (sur le plexi par exemple), utilisez une feuille blanche pour le visualiser. Par convention on placera le travail de sorte à ce que le pointeur laser soit dans son coin gauche.
Essayez toujours de minimiser le gaspillage de matériel lorsque vous positionnez le curseur. N'hésitez pas à prendre une règle pour vérifier que votre travail va bien rentrer dans l'emplacement que vous avez repéré.
### Lancement du travail
Normalement, cette fenêtre devrait s'être ouverte entre temps :
[](https://innovation.iha.unistra.fr/uploads/images/gallery/2023-07/djXimage.png)
1. Cliquez pour établir le lien entre l'ordinateur et le découpeuse laser (**ATTENTION** vous ne devez appuyer sur aucun des boutons de la découpeuse laser pendant l'initialisation). Le curseur représentant le laser apparaît alors dans la fenêtre principale.
2. Glissez-déposez le nom de votre fichier (qui se trouve sur la droite) sur la fenêtre principale jusqu'à ce qu'il touche le curseur du laser.
3. Cliquez sur le dessin pour le sélectionner.
Vous arrivez alors à cette étape :
[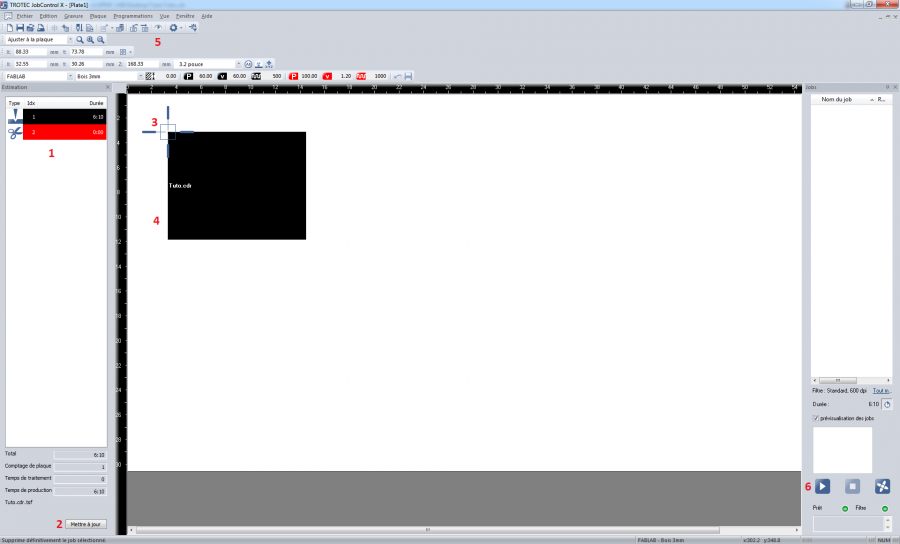](https://innovation.iha.unistra.fr/uploads/images/gallery/2023-07/Gtmimage.png)
1. Temps de travail (rouge découpe, noir gravure).
2. Mettre à jour le temps de travail.
3. Repère du laser, sa position n'importe pas au moment de lancer la découpe.
4. Votre pièce, vous pouvez la déplacer librement sur la zone de travail (sachez qu'elle sera découpée là où vous la placez dans le logiciel).
5. Permet de pré-visualiser votre pièce (facilite le placement).
6. Bouton pour lancer la découpe (**Appelez impérativement un.e médiateur.ice / responsable avant d'appuyer**).
### Phase d'usinage
Pendant toute la durée de l'usinage, ne quittez \*\*JAMAIS\*\* la machine des yeux. Soyez particulièrement vigilant.e à l'émission de fumées inhabituelles et de flammes. Si des flammes apparaissent, prévenez immédiatement un.e médiateur.ice.
Pendant les phases de découpe, le rayon peut être à une forte puissance : préférez regarder si des flammes et de la fumée apparaissent un peu au dessus du tracé plutôt que de regarder le rayon directement.
Au moindre problème arrêtez immédiatement la machine en cliquant sur le “bouton stop” du logiciel JobControl.
Une fois la découpe/gravure finie, **attendez que l'aspiration s’arrête avant de soulever le capot** et de récupérer le fruit de votre travail.
### Pour finir...
Faîtes en sorte qu'il ne reste plus rien sur la grille de la machine en enlevant tous les petits morceaux éventuels créés par la découpe.
Si vous ne souhaitez pas garder le reste de votre plaque (ou si elle vous a été gracieusement mis à disposition par le Fablab), rangez le dans l'emplacement des chutes, selon sa composition et son épaisseur.
Pour éviter le chaos nous vous demandons de ne ranger que les chutes où il reste une place raisonnable pour une future découpe (se reporter à l'échantillon "Chute mini" dans la salle de la laser ou vérifiez qu'il y a plus de 150x100mm de libre).
Il sera très très grandement apprécié que vous retaillez les restes de votre plaque sous forme de rectangle(s), afin de faciliter le stockage des chutes.
Vous pouvez aussi tracer un rectangle autour de votre découpe avant de la lancer (soit en le traçant dans Inkscape soit en cochant l'option Ligne de découpe dans la boîte de dialogue des préférences d'impression (cf capture d'écran de la section 'Préparation du Fichier' point 4)
Auteure: Clara Devanz, sur le [wiki du FabLab de Sorbonne Université](https://wiki.fablab.sorbonne-universite.fr/BookStack/books/machines/page/utilisation-de-la-trotec-speedy-100)
[ Attribution-NonCommercial 4.0 International (CC BY-NC 4.0) ](https://creativecommons.org/licenses/by-nc/4.0/)
# Linogravure et xylogravure
[https://fabmanager.simplon.co/#!/projects/linogravure-a-la-laser](https://fabmanager.simplon.co/#!/projects/linogravure-a-la-laser)
### Fabriquer ses tampons grâce à la linogravure au laser
#### Résultat
Vidéo d'un flocage : [https://seafile.unistra.fr/f/e625f0fdf45444a8be97/](https://seafile.unistra.fr/f/e625f0fdf45444a8be97/)
[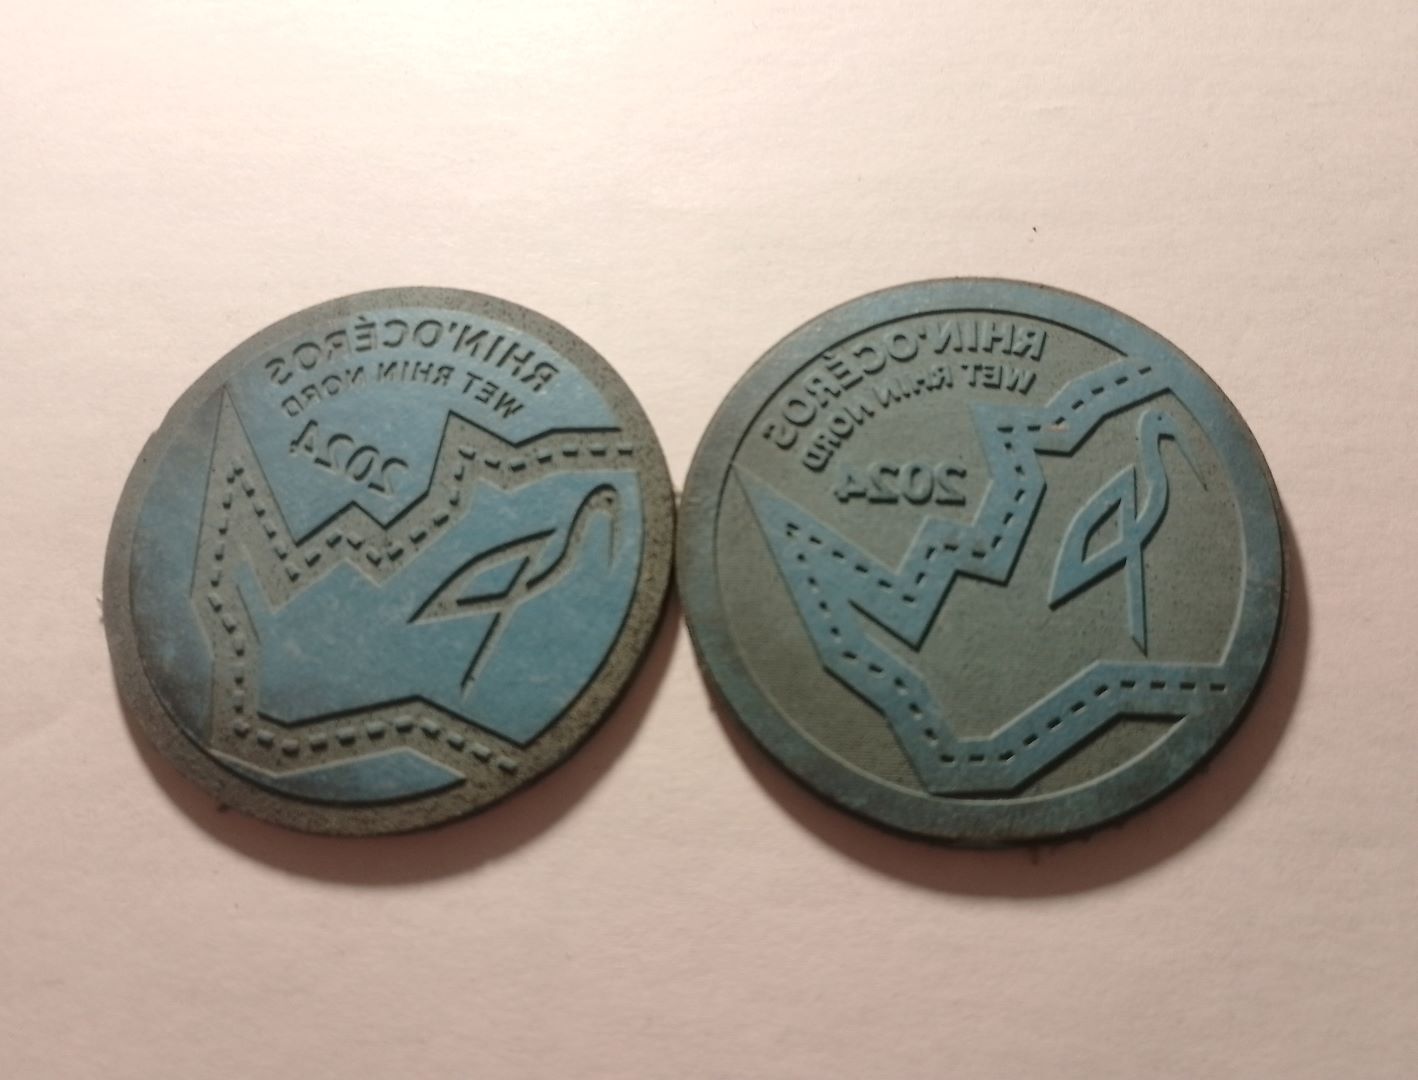](https://innovation.iha.unistra.fr/uploads/images/gallery/2024-10/img-20241015-182532-1080p.jpg)
#### Sources
Fichier SVG pour la gravure laser : [https://seafile.unistra.fr/f/7aeccb6513a94425b963/?dl=1](https://seafile.unistra.fr/f/7aeccb6513a94425b963/?dl=1)
#### Matériau
Le linoléum naturel est utilisé en linogravure. On trouve des plaques dans les magasins de beaux-arts (ex : [https://www.geant-beaux-arts.fr/plaques-de-linogravure-dlw.html](https://www.geant-beaux-arts.fr/plaques-de-linogravure-dlw.html)). C'est aussi un matériau utilisé comme revêtement de sol.
ATTENTION toutefois, certains utilisent abusivement le terme linoléum pour des revêtements de sol à base de PVC, matériau qu'il ne faut surtout pas utiliser pour la gravure laser en raison des gaz très toxiques libérés par le matériau lors de la gravure (dérivés de chlores).
Pour ma part, j'ai utilisé des échantillons d'un produit appelé Marmoléum de la marque Forbo ([https://www.forbo.com/flooring/fr-fr/produits/linoleum-naturel-marmoleum/marmoleum-marbled-compact/b3z3fu#panel\_100](https://www.forbo.com/flooring/fr-fr/produits/linoleum-naturel-marmoleum/marmoleum-marbled-compact/b3z3fu#panel_100)) qui proposait l'envoi d'échantillons gratuits.
#### Paramètres de gravure
Bois 3mm (Plywood)
#### Projet
**Réaliser des semelles de tampons pour permettre aux participants d'imprimer eux-mêmes le logo de l'évènement (un week-end réunissant les scouts de tout le nord du Bas-Rhin) sur du tissu.**
Le logo de l'évènement a été imaginé en anticipant la linogravure : les traits sont larges et il y a peu de détails. Mais les écritures, même assez petites sont quand même bien ressorties à l'impression.
En linogravure, on enlève la matière là où le tampon ne doit pas marquer. Avec la gravure laser, on utilise donc la couleur bleue pour graver les espaces qui ne seront pas imprimés par le tampon et on laisse en blanc les espaces qui seront imprimés.
À noter aussi qu'il faut concevoir son impression en miroir puisqu'il s'agit d'un tampon.
Plusieurs encres ont été testées sur papier et sur tissu. S'il est tout à fait possible d'imprimer avec un simple encreur classique pour tampon de bureau, le résultat n'est pas aussi bon qu'avec des encres spéciales pour linogravure disponibles en magasins de beaux-arts.
L'évènement a rassemblé 750 personnes qui pouvaient réaliser elles-mêmes leur impression sur tissu. On ignore combien d'impressions ont été réalisées avec les 10 tampons qui étaient disponibles sur le site, mais l'animation a plutôt bien fonctionné. A l'expérience, il s'avère qu'un nettoyage régulier à l'eau du tampon facilitait l'impression. L'encre utilisée était une encre pour papier, qui a le défaut de s'estomper au lavage. Des encres pour tissu existent, mais sont plus chères.
### Projet xylogravure Médiathèque Haguenau
Dans le cadre de l'[exposition sur l'histoire de l'imprimerie à Haguenau "Des hommes de caractères" ](https://haguenau.maxi-flash.com/haguenau-exposition-limprimerie-relie-le-passe-au-present/)ayant été présentée en hiver 2024, une collaboration a eu lieu entre le FabLab de l'IUT de Haguenau et la Médiathèque voisine pour la réalisation de linogravure.
#### Travail du fichier source
Après plusieurs test de logiciel, voici un aperçu des plateaux en négatif. Le noir sera la partie gravée, ce qui fait que les parties blanches seront en relief pour l'impression.
[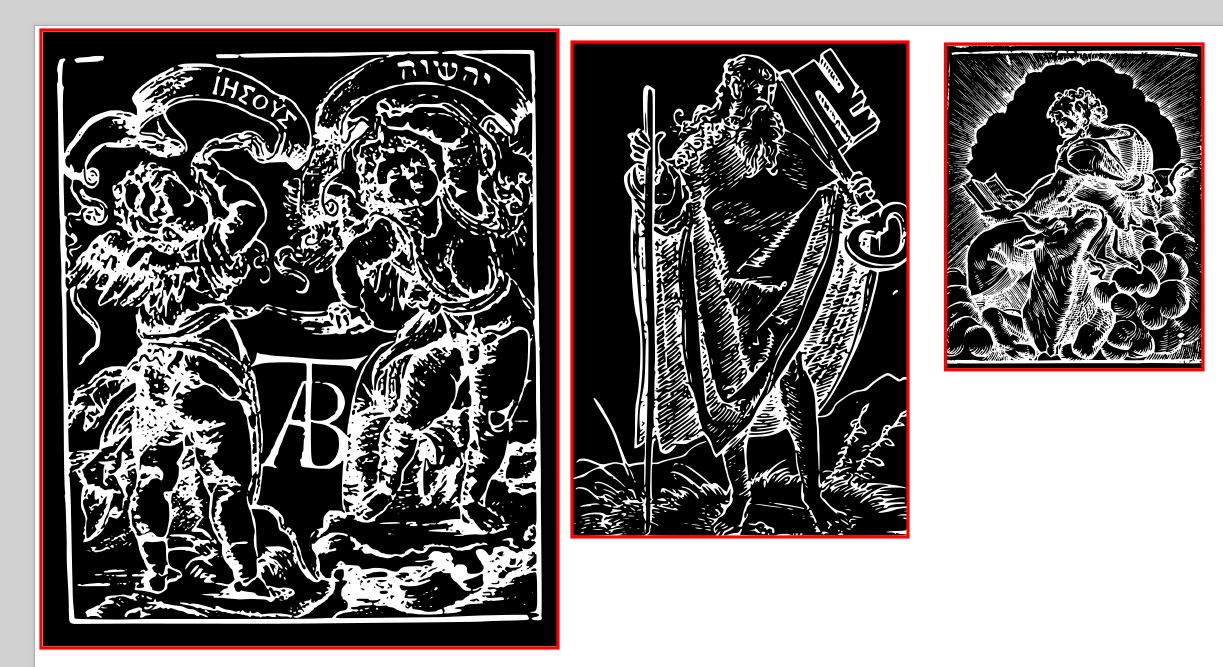](https://innovation.iha.unistra.fr/uploads/images/gallery/2024-10/mediatheque-linogravure-plateaux-negatif.JPG)
#### Impression suite à gravure laser
Des plateaux en bois MDF ont été gravés, puis les équipes de la médiathèque ont procédé à l'impression, dont voici le rendu :
[ ](https://innovation.iha.unistra.fr/uploads/images/gallery/2024-10/mediatheque-linogravure-impression-1080p-4.jpg)[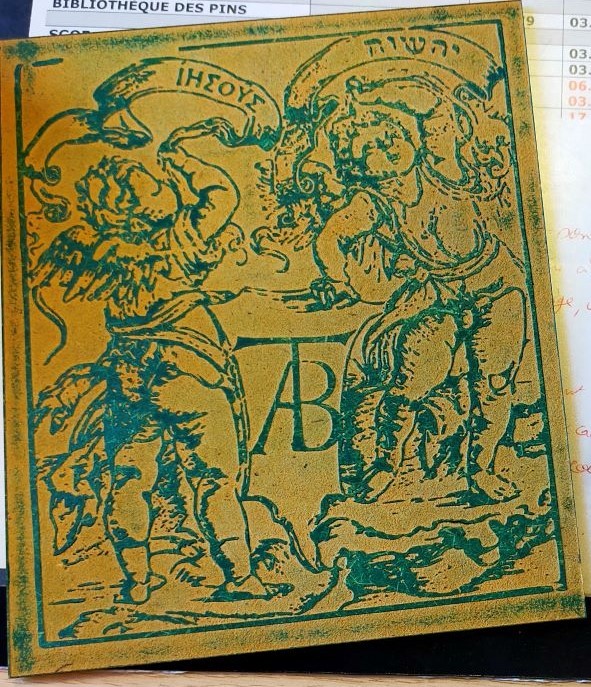](https://innovation.iha.unistra.fr/uploads/images/gallery/2024-10/uqLmediatheque-linogravure-impression-1080p2.jpg)
[](https://innovation.iha.unistra.fr/uploads/images/gallery/2024-10/6Vpmediatheque-linogravure-impression-1080p3.jpg)
[](https://innovation.iha.unistra.fr/uploads/images/gallery/2024-10/mediatheque-linogravure-impression1-1080p1.jpg)
# Paramétrage d'un fichier pour la découpe laser avec Adobe Illustrator
## Paramétrage de votre motif
Utilisez les paramètres suivants dans Adobe Illustrator® :
- La largeur du trait pour les lignes de coupe doit être de 0,001 mm
[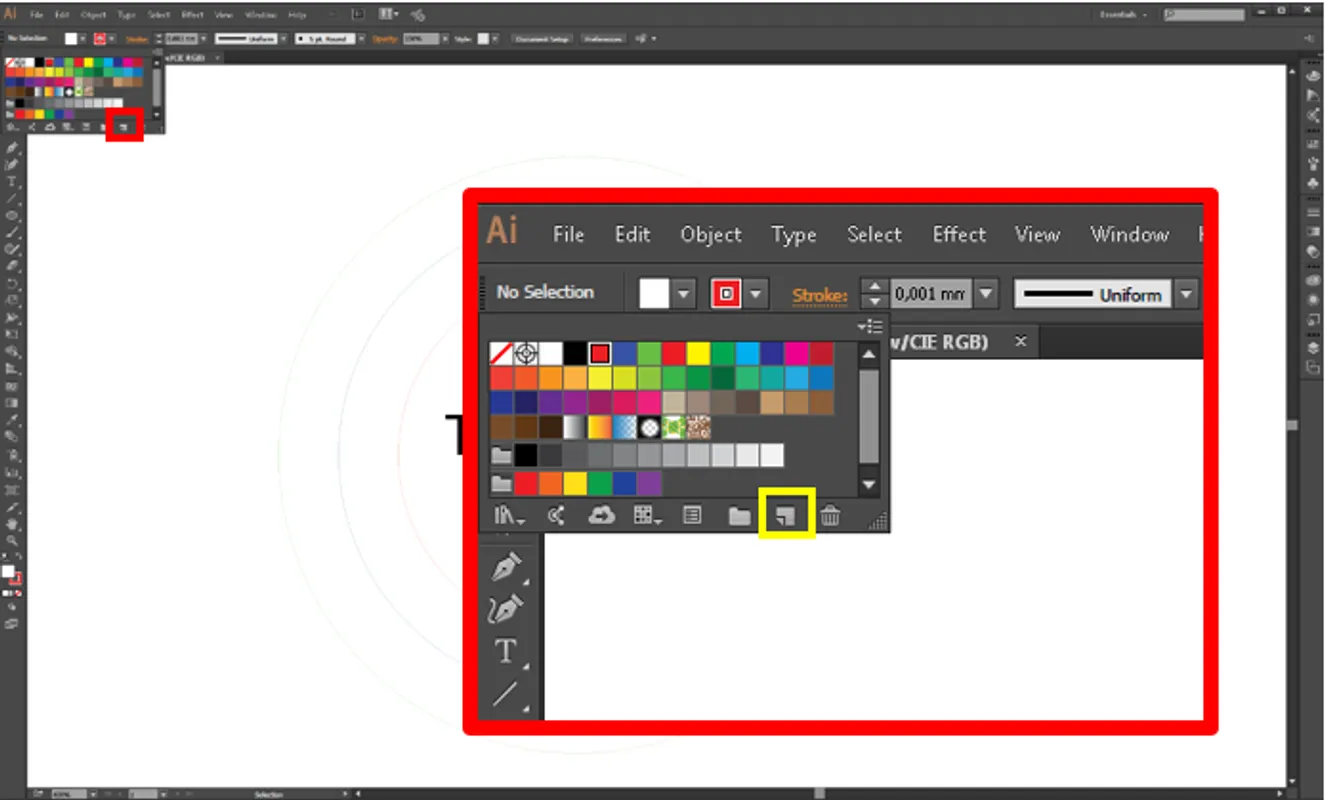](https://innovation.iha.unistra.fr/uploads/images/gallery/2025-09/Ouqimage.png)
[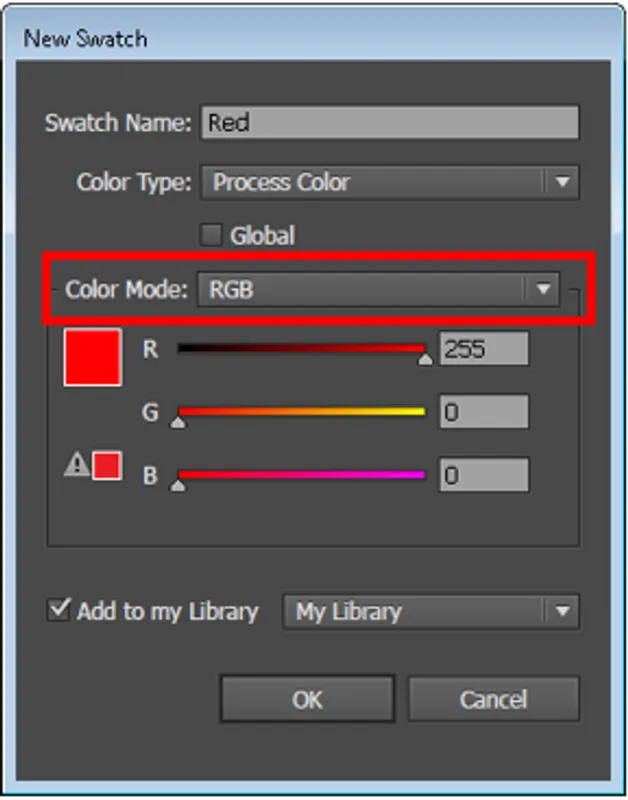](https://innovation.iha.unistra.fr/uploads/images/gallery/2025-09/H0limage.png)
Répartition des couleurs et de leurs fonctionnalité :
\- Découpe : rouge RVB (255,0,0)
\- Gravure : *( Attention, chaque couleur correspond à un niveau de gravure plus ou moins profond que vous pouvez paramétrer individuellement. Pour plus de simplicité, limiter vous à un seul niveau de gravure. Ensuite, si vous voulez allez plus loin, vous pourrez faire plusieurs niveau de gravure)*
- - Noir (Couleur de gravure par défaut) -> RVB (0,0,0)
- Bleu foncé -> RVB (0,0,255)
- Bleu grisé -> RVB (51,102,153)
- Bleu -> RVB (0,255,255)
- Vert -> RVB (0,255,0)
- Vert gazon -> RVB (0,153,51)
- Vert foncé -> RVB (0,0,0)
- etc... (Normalement vous n'aurez pas besoin d'autant de niveau de gravure, un ou deux suffisent)
- Les formes doivent être fermées
- Les textes doivent être vectorisé sinon il se peut qu'ils ne s'affichent pas lors de l'exportation sur Ruby
- Faites attention aux dimensions de votre motif. La surface maximale de découpe/gravure est de 600x300 mm. Adapter donc les dimensions en conséquence. NB : si vous n'êtes pas sûr de vous, réalisez des motifs plus petits avant de faire le motif final.
## Exportation de votre fichier
Votre fichier dois-être exporté au format .SVG
Attention lors de l'importation de votre fichier sur Ruby à ce que rien n'ai changer. En effet, avec l'import/export il se peut que le fichier se soit légèrement modifié, couleurs, dimensions, etc.
# Traceur de découpe
# Cricut Maker 3
Utilisation de la Cricut Maker 3
La Cricut Maker 3 est un traceur de découpe permettant de découper plusieurs types de matériaux. Le plus souvent utilisé pour le flocage de vêtements, voici une liste non exhaustive de matériaux utilisables :
- Vinyle (stickers)
- Thermocollant (flocage de vêtement)
- Papier cartonné
- Carton
- Planche de bois
- Papier
- Plexiglass
- Cuir
- et plein d'autres à découvrir
#### Comment cela fonctionne ?
Tout d'abord, nous avons besoin du logiciel [Cricut Design Space](https://design.cricut.com/#/). Ce logiciel nous permettra de créer, d'éditer et de trouver différents projets possibles avec notre machine.
La Maker 3 est équipée d'une lame qui permet la découpe de matériaux. Selon le matériau à découper, la lame utilisée sera différente.
Celle équipée sur notre machine permet la découpe de vinyle (stickers) et thermocollant (flocage vêtement).
### Cricut Design Space
Si le logiciel est utilisé pour la première fois depuis un nouvel ordinateur :
Vous devrez suivre les étapes indiquées sur le logiciel pour :
- Créer un compte
- Réaliser la configuration de la machine :
1\)
[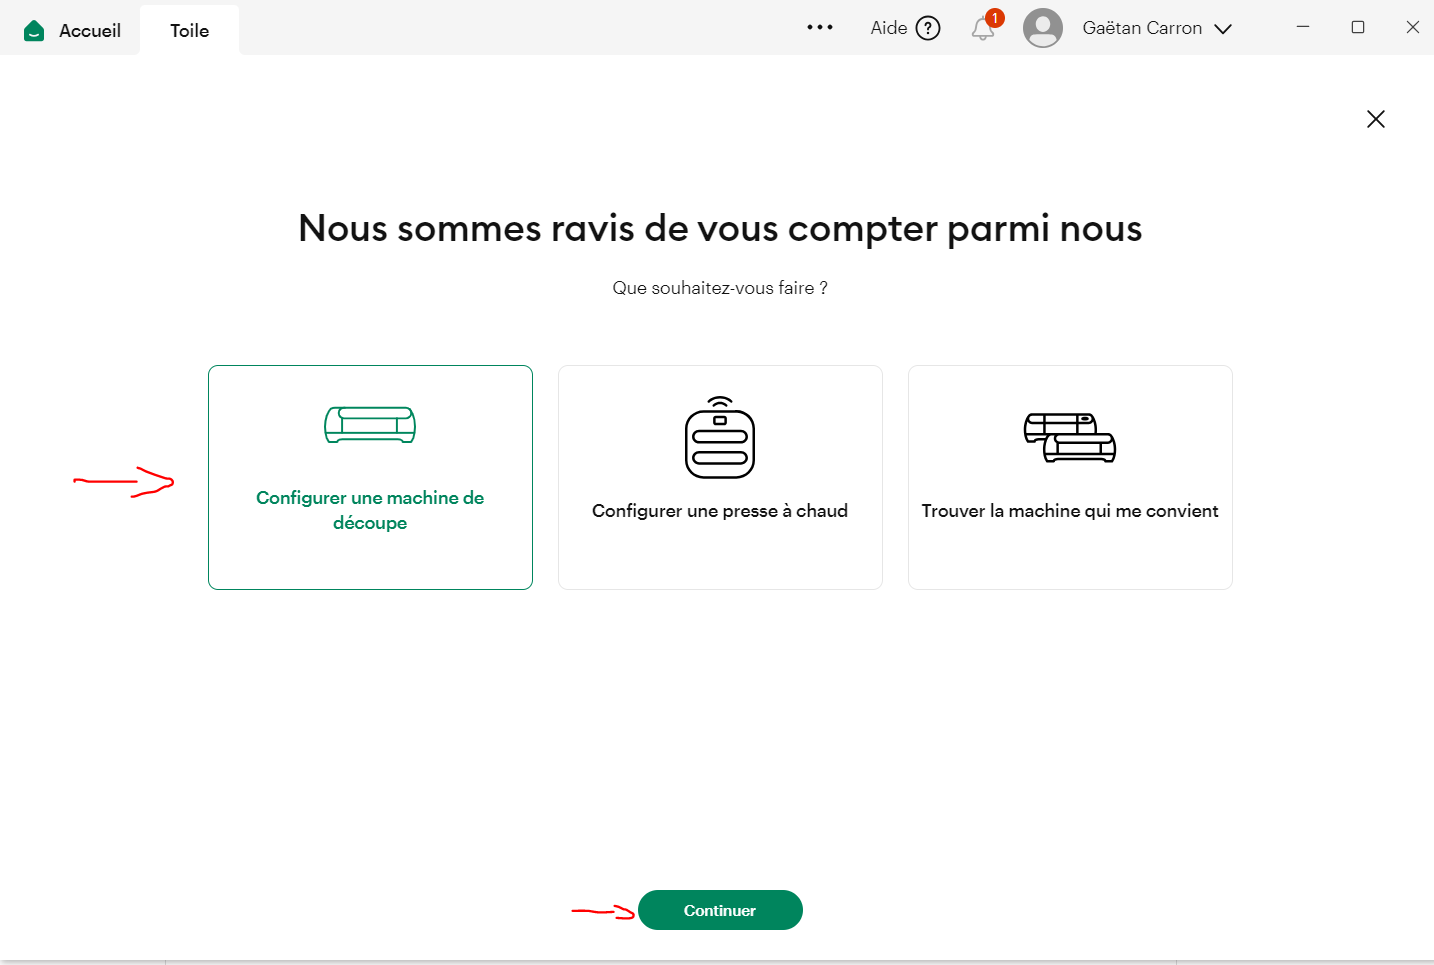](https://innovation.iha.unistra.fr/uploads/images/gallery/2025-09/qcKimage.png)
2\) Sélectionner la "Cricut Maker 3"
[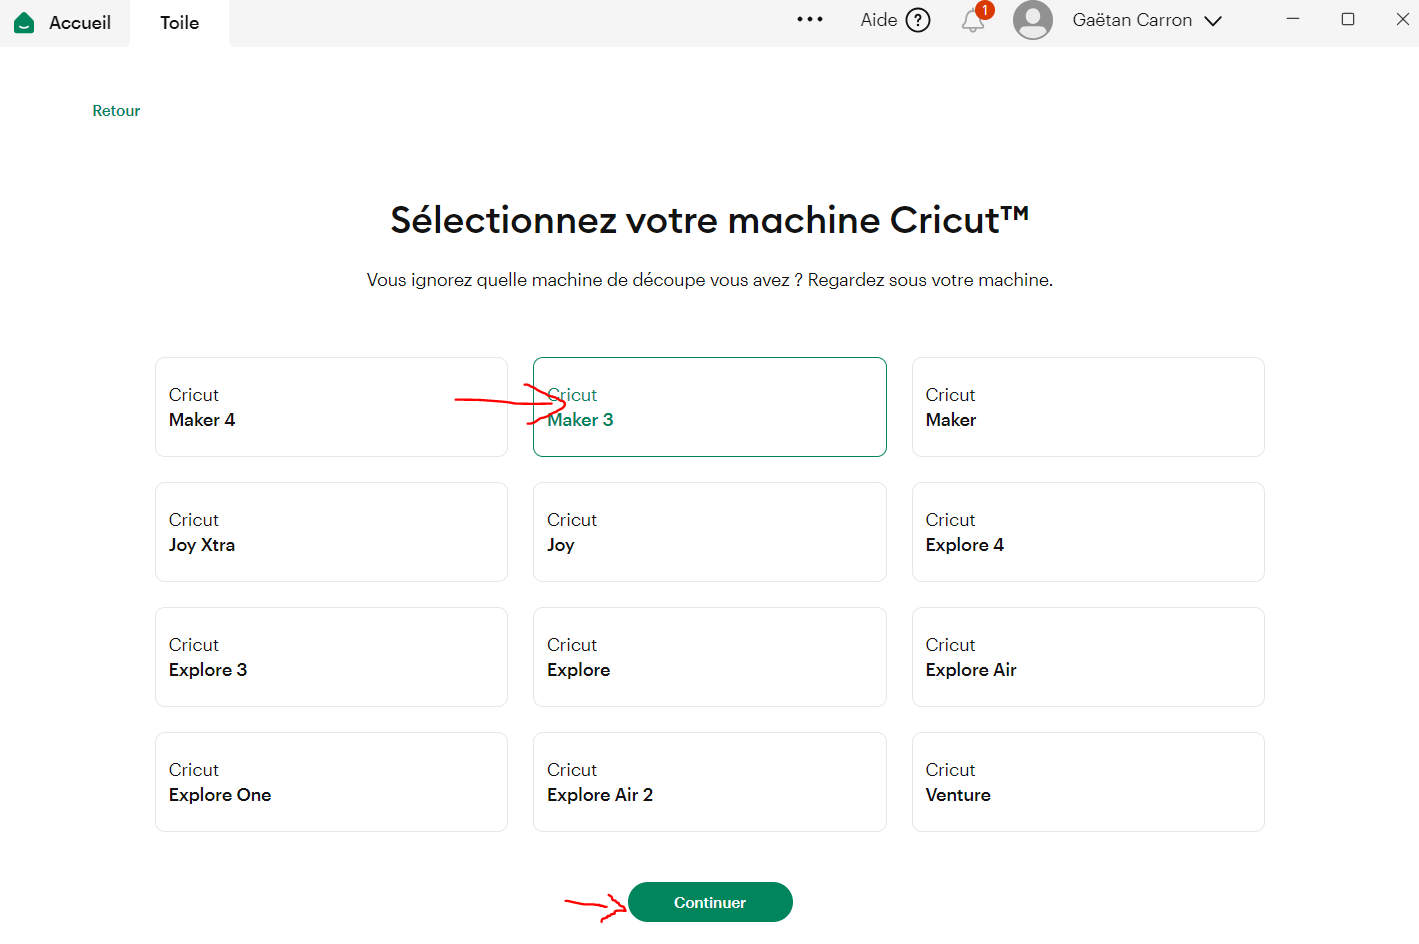](https://innovation.iha.unistra.fr/uploads/images/gallery/2025-09/gxXimage.png)
3\)
[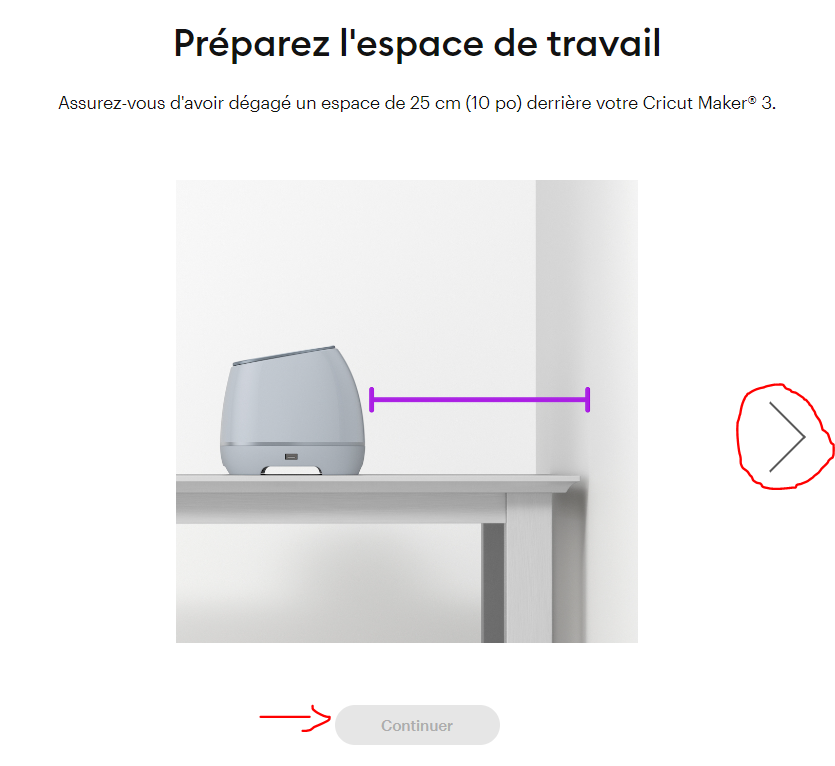](https://innovation.iha.unistra.fr/uploads/images/gallery/2025-09/E40image.png)
4\) Vous pouvez au choix en USB ou par Bluetooth
[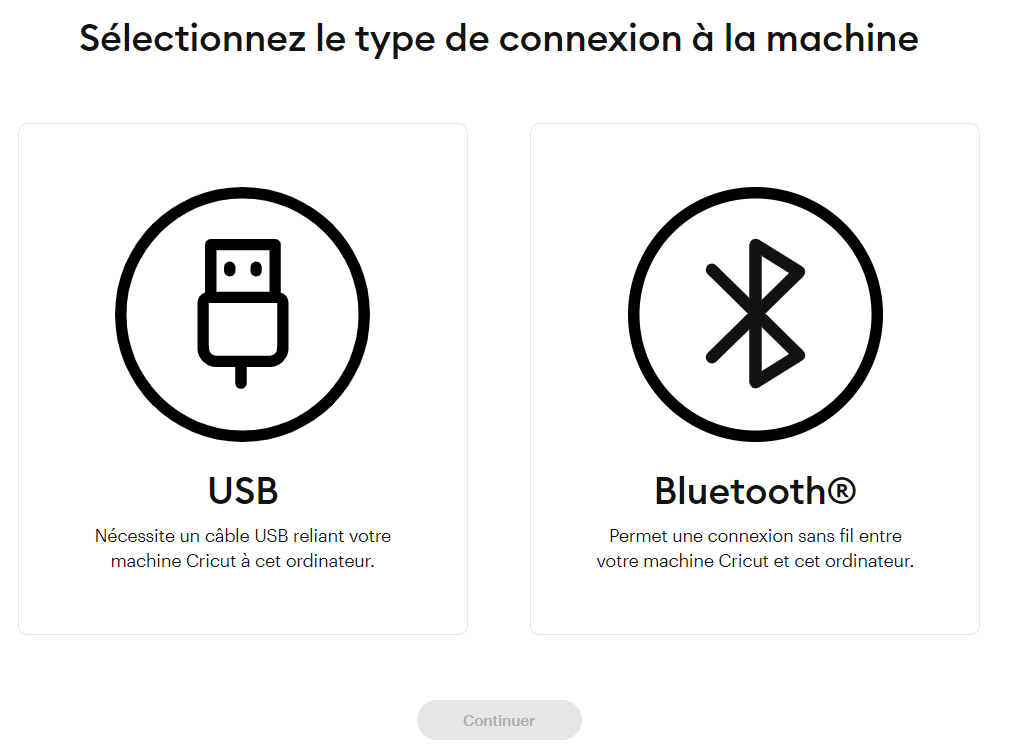](https://innovation.iha.unistra.fr/uploads/images/gallery/2025-09/UzYimage.png)
5\) Cliquez sur "Non merci"
[](https://innovation.iha.unistra.fr/uploads/images/gallery/2025-09/Sv0image.png)
6\) Ignorer le test de la machine
[](https://innovation.iha.unistra.fr/uploads/images/gallery/2025-09/BK2image.png)
Maintenant la machine et le logiciel configurés, nous pouvons poursuivre.
Cliquer sur "+ Nouveau projet"
Le logiciel se présente comme ceci.
Pour créer nos propres projets, cliquer sur " **+ Nouveau projet**".
[](https://innovation.iha.unistra.fr/uploads/images/gallery/2025-09/Ur0image.png)
Nous allons arriver sur cette page :
Ceci est notre plan de travail, nous allons créer, importer, modifier et adapter notre fichier sur cette page.
Vous pouvez créer des motifs simples depuis le logiciel Cricut Design Space.
Ou bien créer vos motifs sur un logiciel tiers de dessin vectoriel, comme Inkscape ou Adobe Illustrator si vous souhaitez faire des motifs plus complexes.
Pour la création de design avec Inkscape, veuillez vous référer aux différents tutoriels via les liens ci-dessous :
[https://innovation.iha.unistra.fr/books/2-fablab-formation-machines-logiciels/chapter/formation-au-logiciel-inkscape](https://innovation.iha.unistra.fr/books/2-fablab-formation-machines-logiciels/chapter/formation-au-logiciel-inkscape)
Il suffira d'exporter vos motifs au format ".svg"
Si vous souhaitez partir d'une image existante ( Motif simple). Il vous faudra vectoriser votre image avec des logiciels comme Inkscape ou Adobe illustrator afin d'obtenir un tracé monochrome.
Veuillez vous référer à ce tutoriel qui vous explique comment vectoriser une image avec le logiciel inkscape:
[https://innovation.iha.unistra.fr/books/2-fablab-formation-machines-logiciels/page/obtenir-un-trace-vectoriel-a-partir-dune-image](https://innovation.iha.unistra.fr/books/2-fablab-formation-machines-logiciels/page/obtenir-un-trace-vectoriel-a-partir-dune-image-sur-inkscape)
Il faudra ensuite exporter votre fichier au format ".svg" et poursuivre le tutoriel.
Sur la partie gauche, nous retrouvons toutes les possibilités d'importation de fichiers.
La catégorie "**Télécharger**" nous permet d'importer nos propres fichiers. Le reste des catégories permet d'importer des fichiers déjà faits par d'autres utilisateurs du logiciel.
Nous allons donc cliquer dessus :
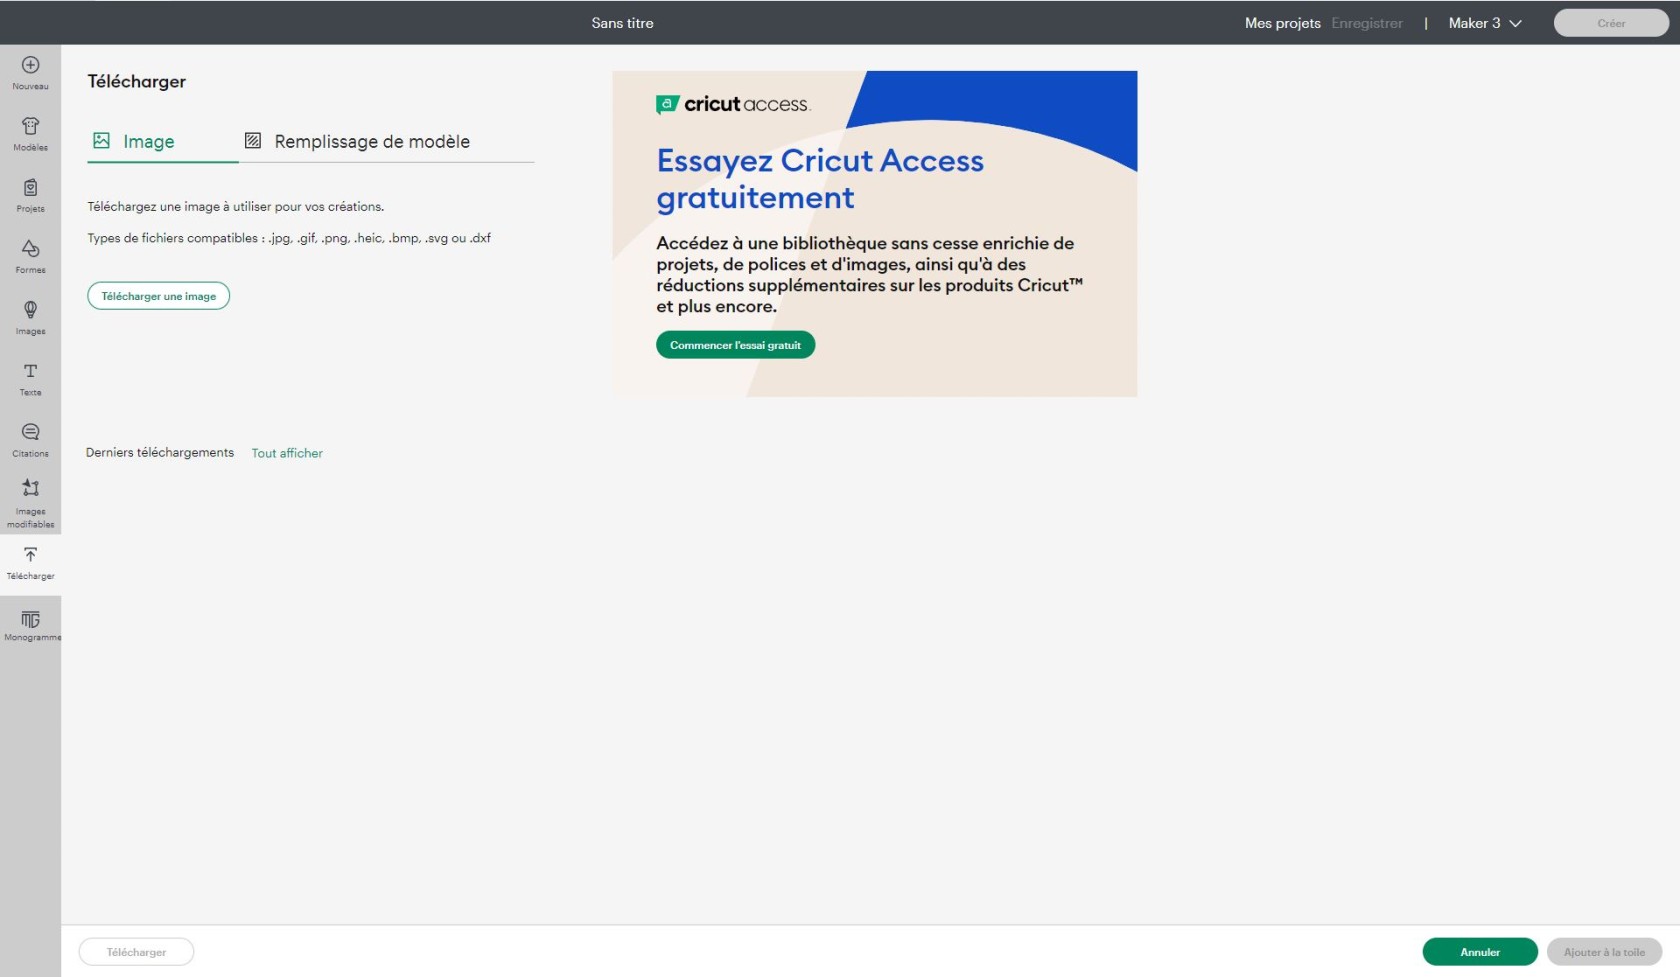
Nous arrivons sur cette page, il nous faut cliquer sur "**Télécharger une image**". Plusieurs formats sont disponibles à l'utilisation : JPG, GIF, PNG, HEIC, BMP, SVG et DXF.
Une fois l'image importée, nous avons 3 possibilités
- Simple (permet d'avoir une image simple en couleur et peu de détails)
- Complexité modérée (permet d'avoir une image plus complexe avec des détails moyens)
- Complexe (permet d'avoir une image très complexe avec beaucoup de détails)
A vous de choisir selon vos besoins.
Une fois sélectionné, vous allez arriver sur la page d'édition de votre fichier.
Par exemple, nous ne voulons pas du fond blanc du fichier, il suffit de cliquer dessus pour le faire disparaître.
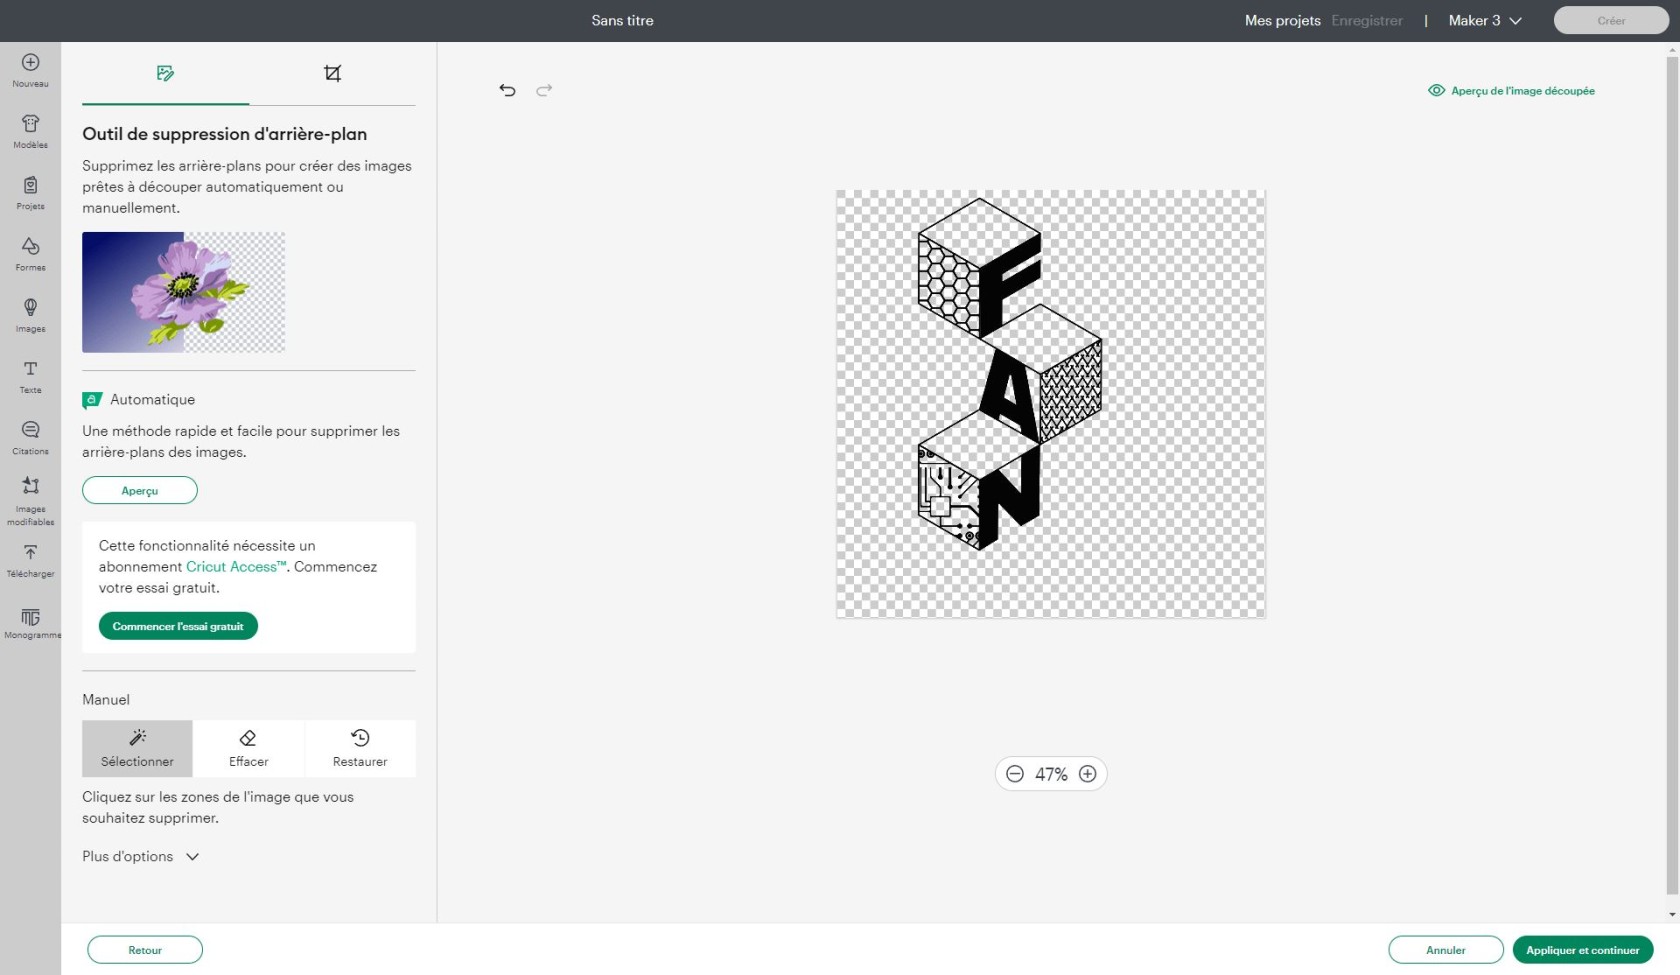
Le choix suivant est très important pour la suite de nos aventures.
Nous devons sélectionner le cadre de gauche "**Découper l'image**".
Puis cliquer sur "**Télécharger**" en bas à droite de notre écran.
Nous devons ensuite sélectionner notre fichier pour l'importer dans notre plan de travail.
Une fois notre fichier sur notre plan de travail, nous pouvons modifier la taille, le translater, faire une rotation...
Après toutes les modifications, nous pouvons cliquer en haut à droite sur "**Créer**".
Nous devrons choisir si nous avons un tapis de découpe ou non.
Si vous utilisez du vinyle de la marque "Cricut", vous pourrez utiliser la machine sans tapis de découpe :
Dans notre cas, cela sera "**Sans tapis**".
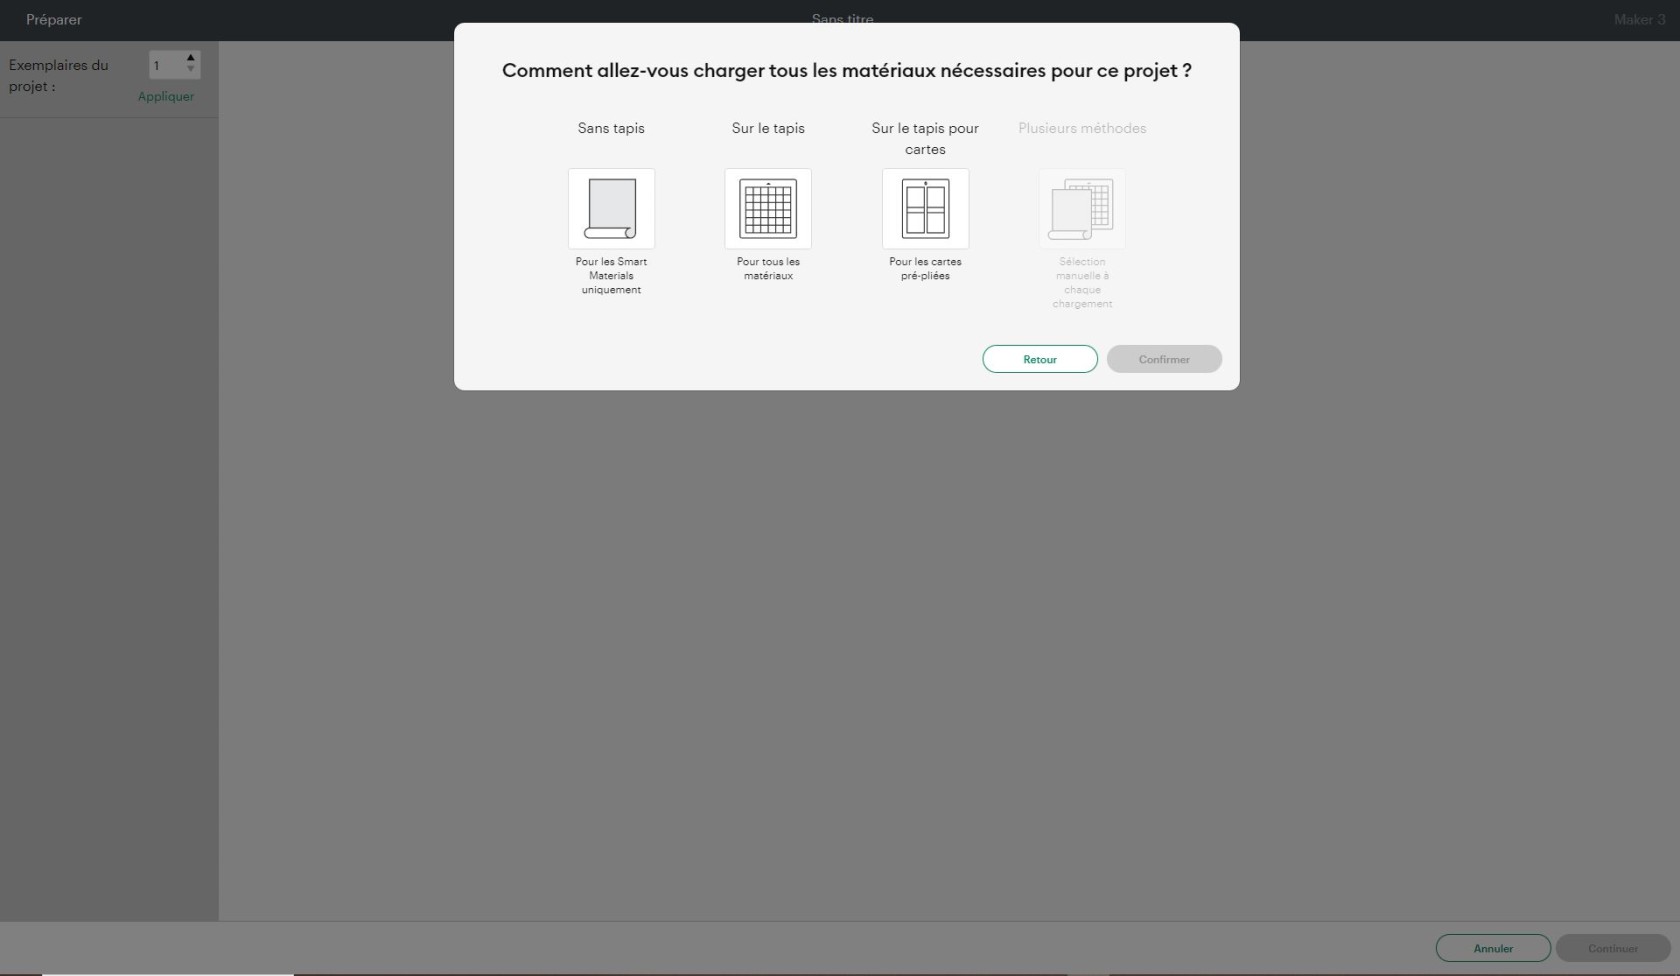
Nous retrouverons ensuite un récapitulatif de notre modèle.
Sa taille, le type de chargement utilisé, si nous devons faire un miroir.
Le type de chargement ne change pas.
Pour cet exemple, nous allons créer un sticker du logo du FabLab. Nous n'aurons donc pas besoin de faire un miroir.
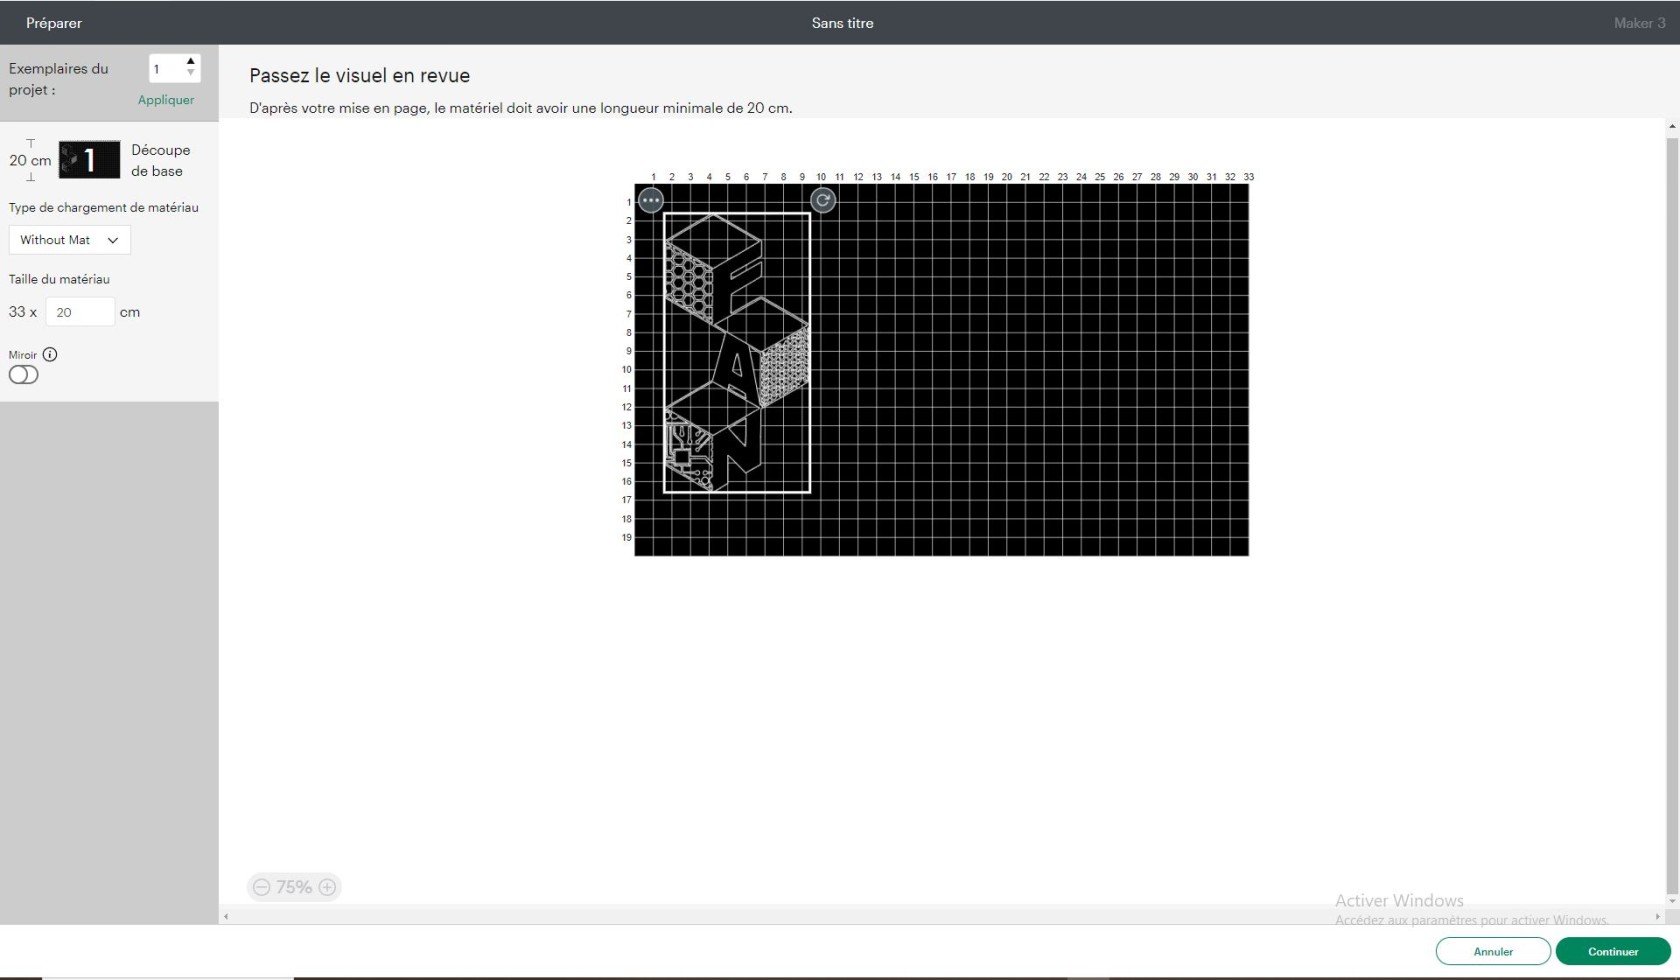
Si vous n'utilisez PAS de vinyle de la marque "Cricut", vous pourrez utiliser la machine avec un tapis de découpe :
Sélectionner "Sur le tapis pour tous les matériaux" et sélectionner une dimension du tapis de "30.5 cm x 61 cm".

Attention, sélectionnez bien le mode "Miroir" pour votre design.
[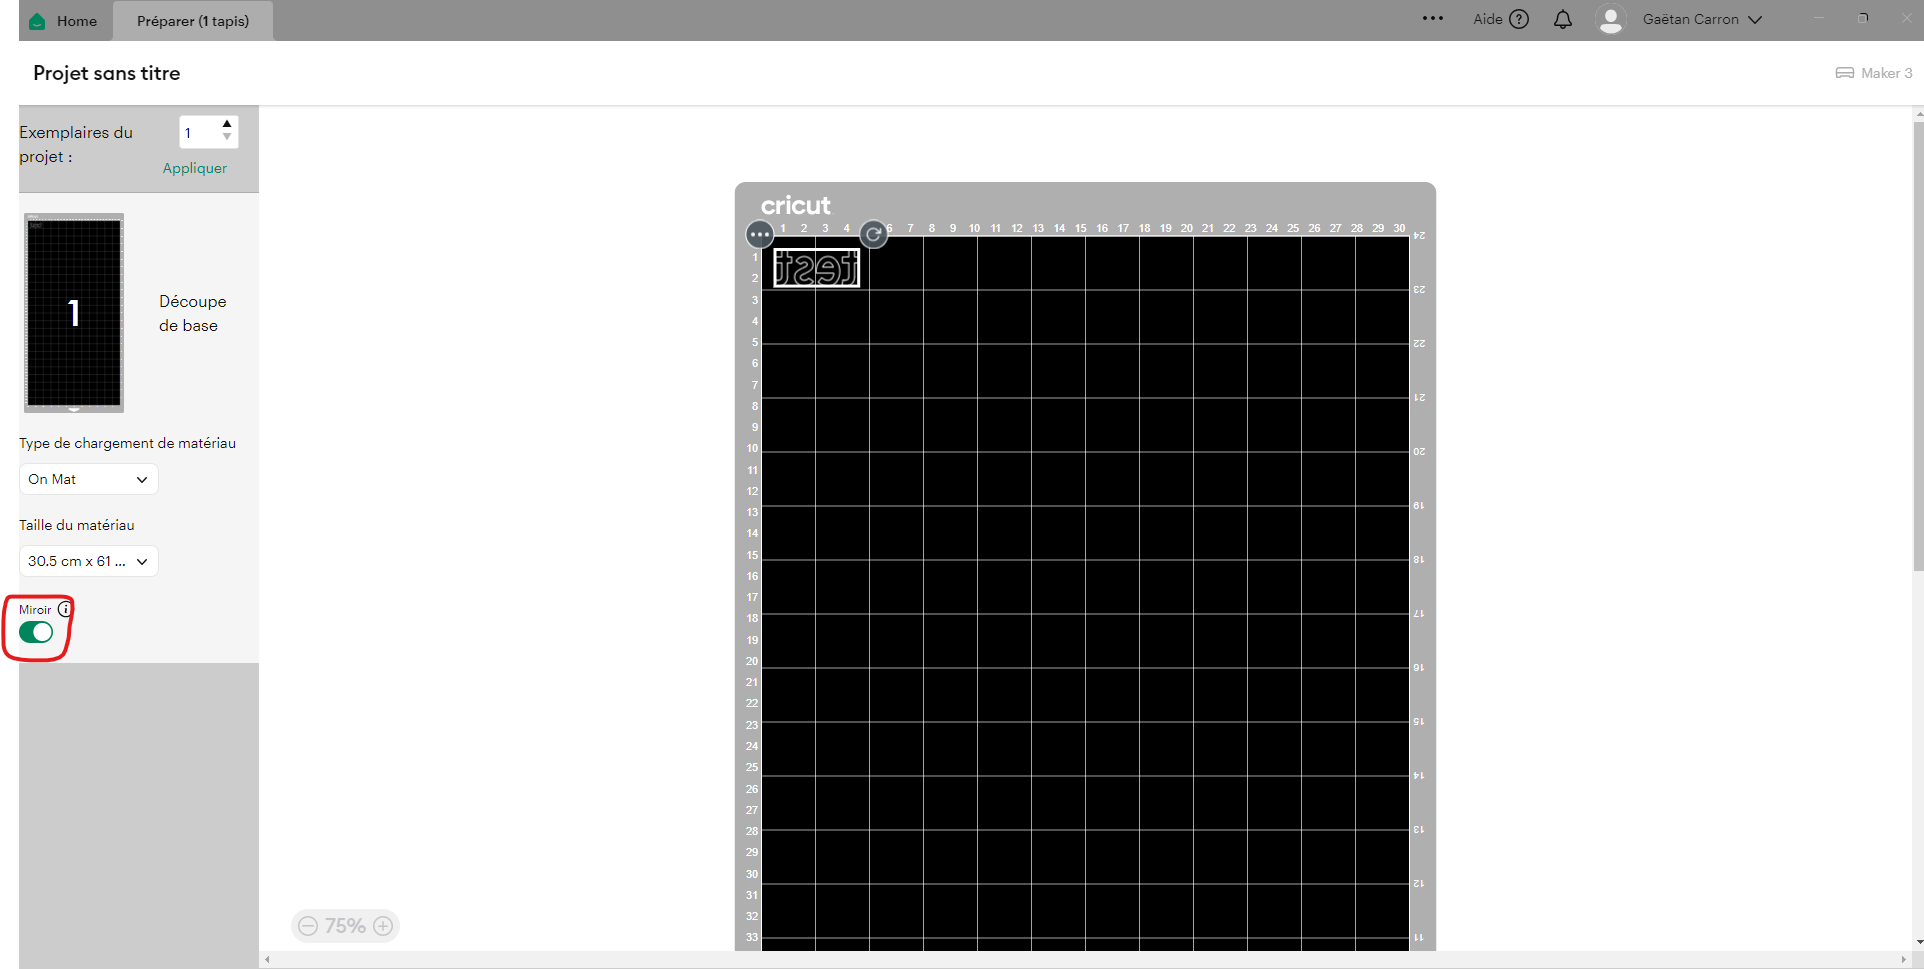](https://innovation.iha.unistra.fr/uploads/images/gallery/2025-09/dkfimage.png)
Prendre un morceau de vinyle et le découper aux bonnes dimensions par rapport au motif que vous souhaitez découper.
Enlever le film de protection du tapis et le poser à l'abri de la poussière.
Maintenant, collez votre vinyle sur le tapis en mettant le côté brillant vers le tapis, et donc le côté mat vers vous.
Attention à bien positionner le morceau de vinyle sur le tapis en fonction d'où vous l'avez placé dans le logiciel.
[ ](https://innovation.iha.unistra.fr/uploads/images/gallery/2025-10/F1Vimage.png)
[](https://innovation.iha.unistra.fr/uploads/images/gallery/2025-10/duSimage.png)
*Exemple de tapis de découpe*
Ici, nous allons choisir le matériau que nous allons découper.
Sélectionner le matériau "Vinyl" dans "Parcourir tous les matériaux".
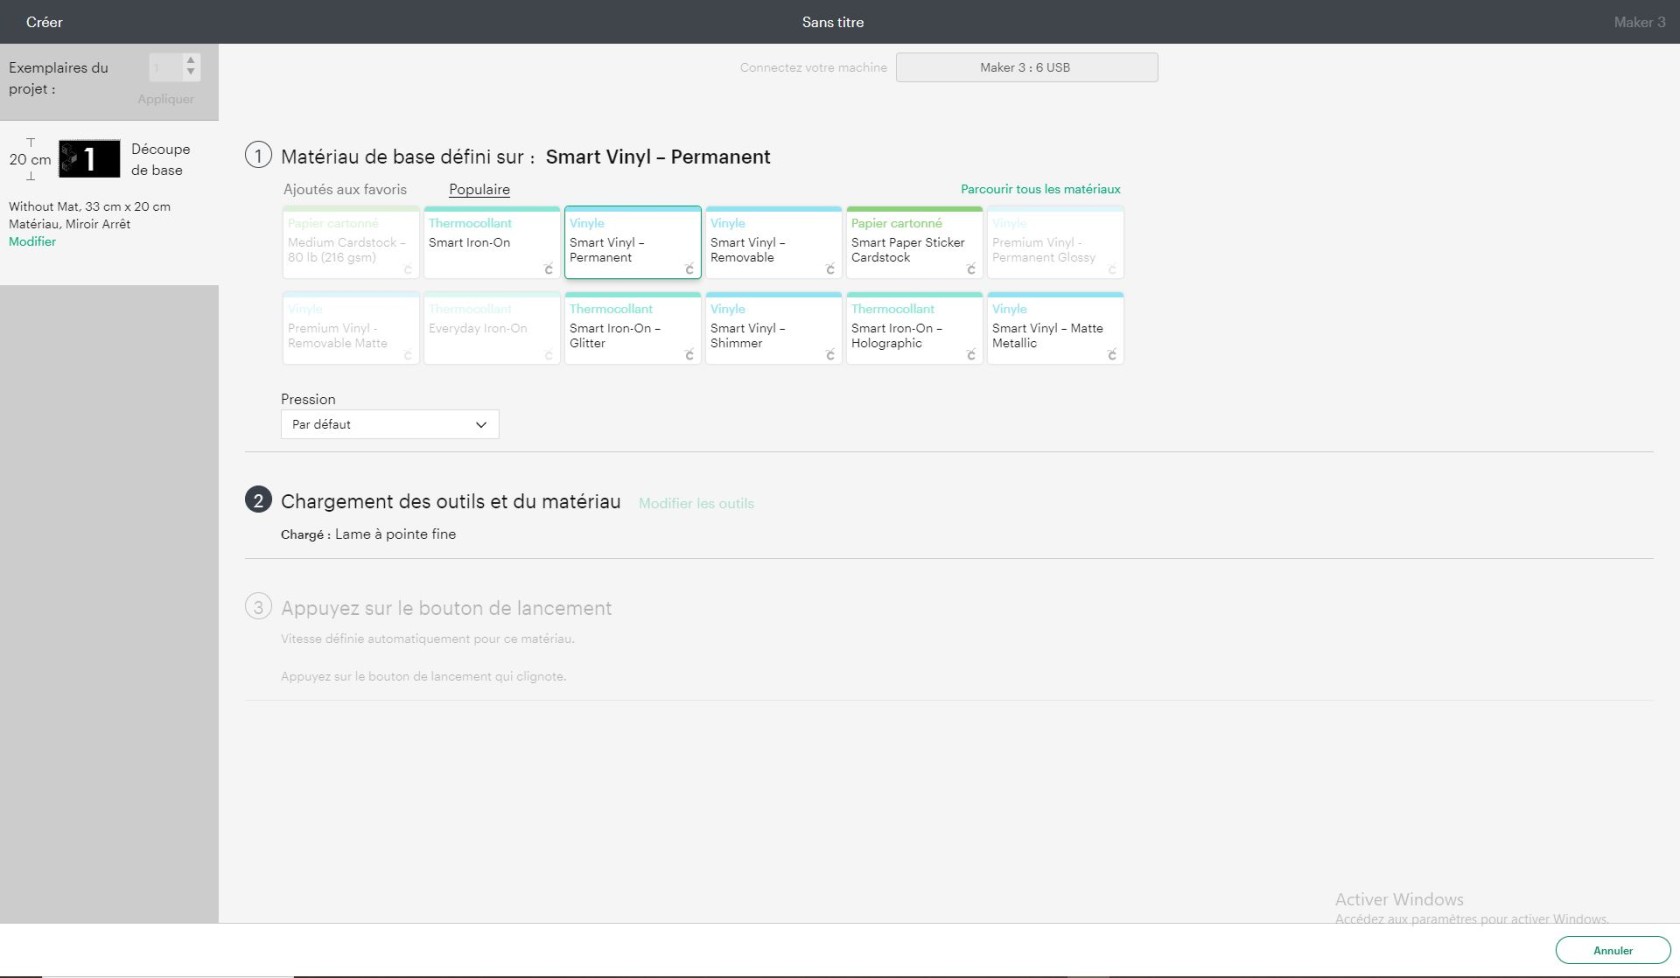
Puis, le logiciel nous indiquera les dernières étapes à suivre pour lancer la découpe.
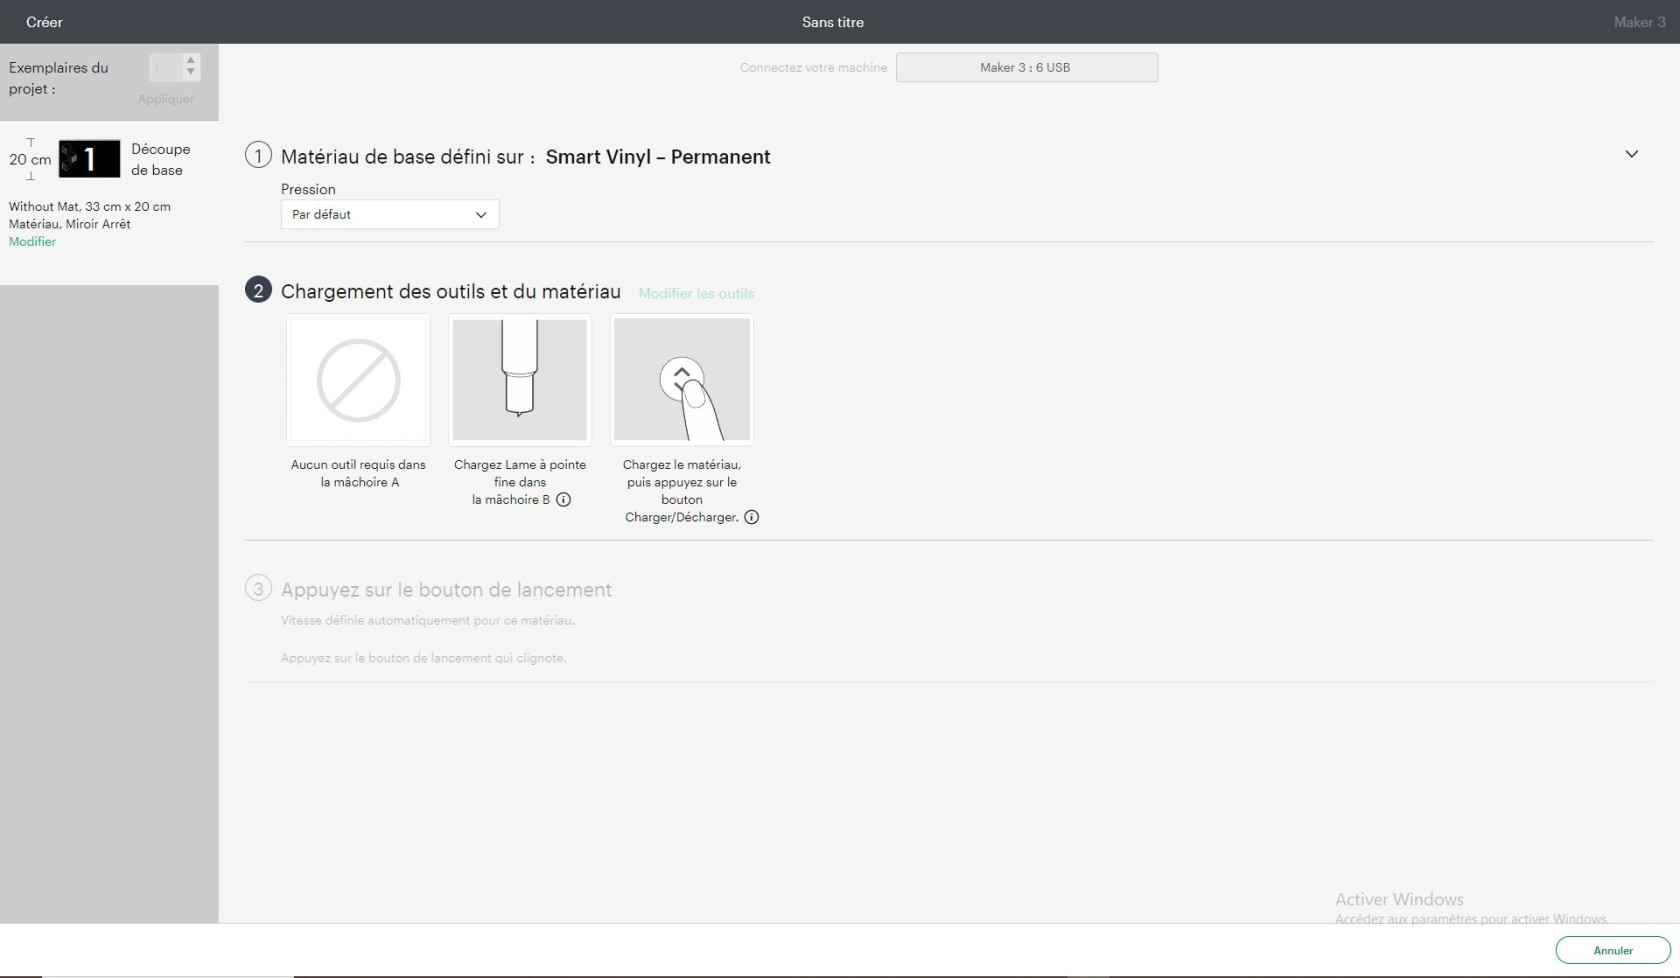
### Réalisation de la découpe
#### Placer le matériau dans le traceur
Pour placer le matériau dans le traceur, nous allons utiliser un système externe.
Si vous utilisez le tapis, il suffit de mettre votre morceau de vinyle (côté brillant collé au tapis et côté mat vers le haut) et d'insérer le tapis dans la machine.
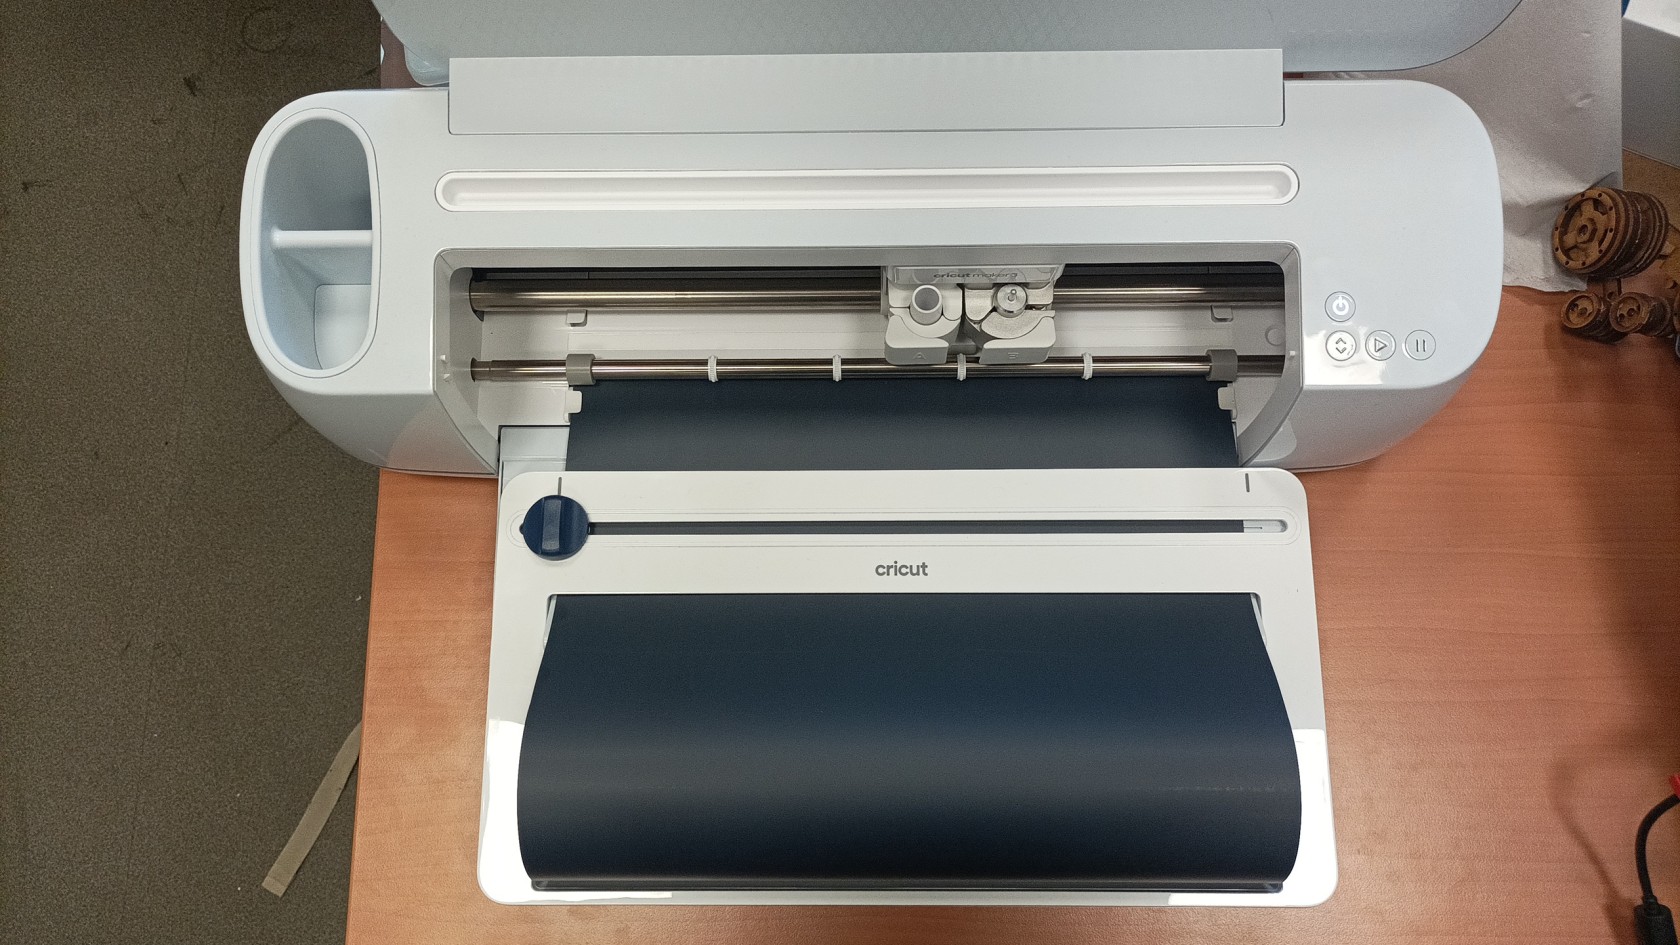
Voici comment le rouleau doit être placé.
Attention à bien le placer dans les encoches de la machine. Idem si vous utilisez un tapis de découpe.
Le système externe nous permet de découper le rouleau une fois la découpe terminée.
#### Retirer le matériau du traceur
Pour ce faire, il vous suffit d'appuyer sur les deux flèches situées sur le bouton de gauche du traceur.
### Traitement du matériau
Une fois le vinyle découpé, il faudra l’**écheniller**, ce qui correspond à enlever la matière non désirée de notre design comme ci-dessous :
[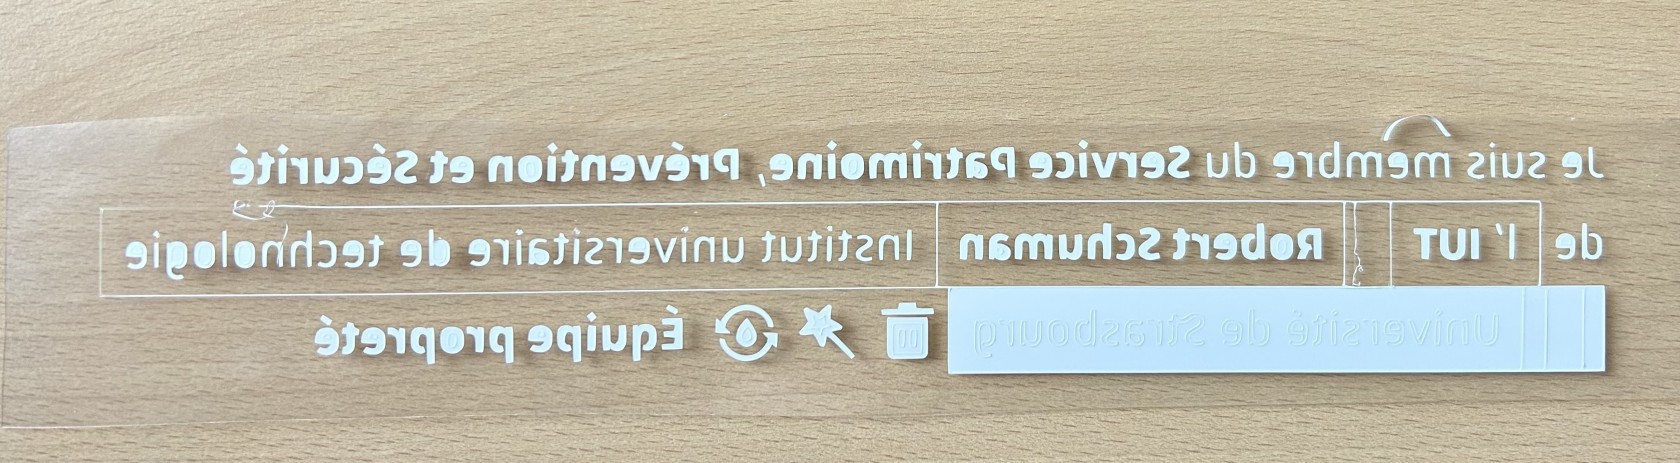](https://innovation.iha.unistra.fr/uploads/images/gallery/2024-08/img-7309.jpg)
Pour ce faire, vous disposez de différents outils dans le tiroir de la machine.
Nous pouvons observer un rectangle blanc, cette partie n'est pas encore échenillée, à contrario du reste de notre design.
Attention à bien enlever TOUTE la matière non désirée. Par exemple, sur notre design ci-dessus, l'intérieur des lettres n'est pas échenillé. Il faut bien penser à les enlever.
Une fois l'échenillage effectué, il nous reste plus qu'à le floquer.
### Flocage
Pour le flocage, nous allons utiliser une presse à chaud :
Cette presse va nous servir à chauffer le vinyle et le floquer sur notre t-shirt.
La machine est composée de plusieurs boutons importants, les voici :
La flèche de gauche nous permet de diminuer la température et le timer

"MODE" nous permet de changer la configuration de la machine, nous y reviendrons après

La flèche de droite nous permet d'augmenter la température et le timer
Le carré est le Timer, il nous permet de lancer une minuterie qui nous indiquera la fon du flocage.
1\. Allumer la machine.
2\. Une fois que notre machine aura atteint sa température de croisière, elle bipera pour nous prévenir qu'elle est à bonne température.
3\. Vérifier que la température est d'environ 290°F. Si ce n'est pas le cas, appelez un responsable pour qu'il paramètre la machine.
***ATTENTION ! Les températures de notre machine sont en fahrenheit !***
4\. Placez votre t-shirt là où vous voulez floquer.
5\. Placez votre design face contre t-shirt.
6\. Placez un morceau de papier sulfurisé sur le t-shirt
7\. Placez la partie mobile rabattable de la machine sur le t-shirt et pressez
8\. Comptez jusqu'à 15 à 20 secondes
9\. Une fois le décompte écoulé, relever le couvercle.
10\. Retirer la protection en plastique du vinyle sur votre t-shirt.
Bravo, vous venez de floquer votre propre t-shirt !
# Pilotage PIXMAX 720 via Inkcut
### Utilisation Inkcut avec PIXMAX 720
#### Configuration du driver
D'après [https://inkcut.org/t/device-pixmax-720-support/59/](https://inkcut.org/t/device-pixmax-720-support/59/)
Deux options à tester :
- Option 1
> I'm using this configuration under the **Configure Device option** and it works fine:
> Name: PixMac 720
> Driver: Inkcut generic driver
> Manufacturer: PixMax
> Model: 720
> Width: 600mm
>
> When plotting I have to adjust the size of the work to be 122,4% of the original file.
- Option 2
> IMHO "PIXMAX 720" is just the same as Refine MH720/721.
> IIRC MH721 is listed within the plotter table and should be supported.
#### Export d'un dessin
[https://www.codelv.com/projects/inkcut/docs/tutorial/](https://www.codelv.com/projects/inkcut/docs/tutorial/)
### Installation Inkcut sur Ubuntu 22.04
- Installer InkCut pour tous les comptes
[https://www.codelv.com/projects/inkcut/docs/installing](https://www.codelv.com/projects/inkcut/docs/installing)
```
sudo apt-get install python3-pip python3-pyqt5 python3-setuptools libcups2-dev python3-pyqt5.qtsvg
sudo -H pip3 install inkcut
```
- Ajouter votre compte au "groupe serial" (pour pouvoir communiquer avec la machine via USB)
```
sudo usermod -a -G dialout "$USER"
```
- Lancer Inkcut depuis un Terminal
```
inkcut
```
- Vérifier le support de la PIXMAX 720, a priori c'est supporté
[https://github.com/inkcut/inkcut/issues/189](https://github.com/inkcut/inkcut/issues/189)
#### Installer l'extension Inkcut pour Inkscape
- Inkcut n'est supporté officiellement que jusqu'à la version 1.0 d'inkscape
- En fait l'extension semble fonctionner avec Inkscape 1.3
- Télécharger et extraire les fichiers du plugin
- [https://github.com/inkcut/inkcut/tree/master/plugins/inkscape](https://github.com/inkcut/inkcut/tree/master/plugins/inkscape)
- les copier dans le dossier des extensions inkscape
- `/usr/share/inkscape/extensions`
- Redémarrer Inkscape
- L'extension est dispo
### Installer Inkcut sur Windows
Dans powershell :
- `python3` // Si pas installé ça ouvre le windows store et juste à cliquer sur install
- // suivi instruction [https://codelv.com/projects/inkcut/download/](https://codelv.com/projects/inkcut/download/)
- `pip3 install pyqt5 `
- `pip3 install inkcut `
- // Lire le warning dans la console qui donne le chemin à ajouter au PATH
- // Création d'un joli racourci avec l'icone de inkcut vers le fichier python executable inkcut.
#### Installer l'extension
Dans le magasin d'extensions intégré à Inkscape, le plugin version 1.0 qui est dans les dépôts n'a pas l'air d'être supporté par la dernière version d'inkscape. On l'ajoute donc manuellement :
- copier simplement les fichiers qui se trouvent là [https://github.com/inkcut/inkcut/tree/master/plugins/inkscape](https://github.com/inkcut/inkcut/tree/master/plugins/inkscape) ou là [https://inkscape.org/gallery/item/12796/](https://inkscape.org/gallery/item/12796/)
- dans le dossier des plugins : `C:\Users\user\AppData\Roaming\inkscape\extensions\inkcut`
- redémarrer inkscape
- le plugin devrait apparaître dans le menu
# Impression 3D FDM
Vous trouverez ici, une formation afin d'apprendre à utiliser une imprimante 3D FDM (fused deposition modeling)
# Nouvelle page
# Tutoriel complet – Imprimantes 3D Bambu Lab (A1 mini, A1, X1 Carbon)
## 1. Introduction à l’impression 3D FDML’impression 3D FDM (Fused Deposition Modeling) fonctionne par dépôt de filament fondu couche par couche. L’imprimante chauffe le filament, le fait passer à travers une buse (nozzle) et le dépose sur un plateau pour créer un objet 3D. 2. Présentation des imprimantes du FabLab
Modèle
Taille max (mm)
Buse
Particularités
Bambu Lab A1 mini
180 × 180 × 180
0.4 mm
Compacte, silencieuse, idéale pour les petites pièces
Bambu Lab A1
256 × 256 × 256
0.4 mm
Fiable et rapide
Bambu Lab X1 Carbon
256 × 256 × 256
0.4 mm
Multimatériaux/ Multi Couleurs(AMS), Capteurs LIDAR, Meilleur précision
****
## 3. Choisir son modèle 3DPour utiliser les imprimantes 3D, vous avez le choix de créer votre propre modèle ou bien de prendre des modèles déjà faits par d’autres utilisateurs sur internetCréer son propre modèle 3D : Utiliser des logiciels de CAO comme Onshape, Blender, Fusion 360 ou bien encore Solidworks. Lien du tutoriel pour l’utilisation de Onshape :
[https://innovation.iha.unistra.fr/books/2-fablab-formation-machines-logiciels/page/modelisation-3d-onshape](https://innovation.iha.unistra.fr/books/2-fablab-formation-machines-logiciels/page/modelisation-3d-onshape)
Exportez votre modèle au format “.stl”.Trouver un modèle 3D existant :Il existe différents sites :
- https://www.thingiverse.com/
- https://www.printables.com/
- [https://makerworld.com/fr](https://makerworld.com/fr)
Télécharger votre modèle au format ”.stl”
## 4. Paramétrage du modèle 3D avec Bambu StudioBambu Studio est le logiciel utilisé pour préparer vos impressions 3D avant de les lancer sur les imprimantes du FabLab.Il permet de convertir un modèle 3D (.stl) en un fichier compréhensible par l’imprimante 3D (G-code).Grâce à ce logiciel, vous pouvez choisir votre machine, ajuster la qualité d’impression, ajouter des supports, définir le type de filament et vérifier la durée ou le coût estimé de la pièce.Bambu Studio est spécialement conçu pour les imprimantes Bambu Lab (A1 mini, A1, X1 Carbon) et permet un envoi direct vers les machines connectées au réseau du FabLab.1. Installation et configurationLien pour télécharger le logiciel :
[https://bambulab.com/fr-fr/download/studio](https://bambulab.com/fr-fr/download/studio)
Ouvrez le logiciel : 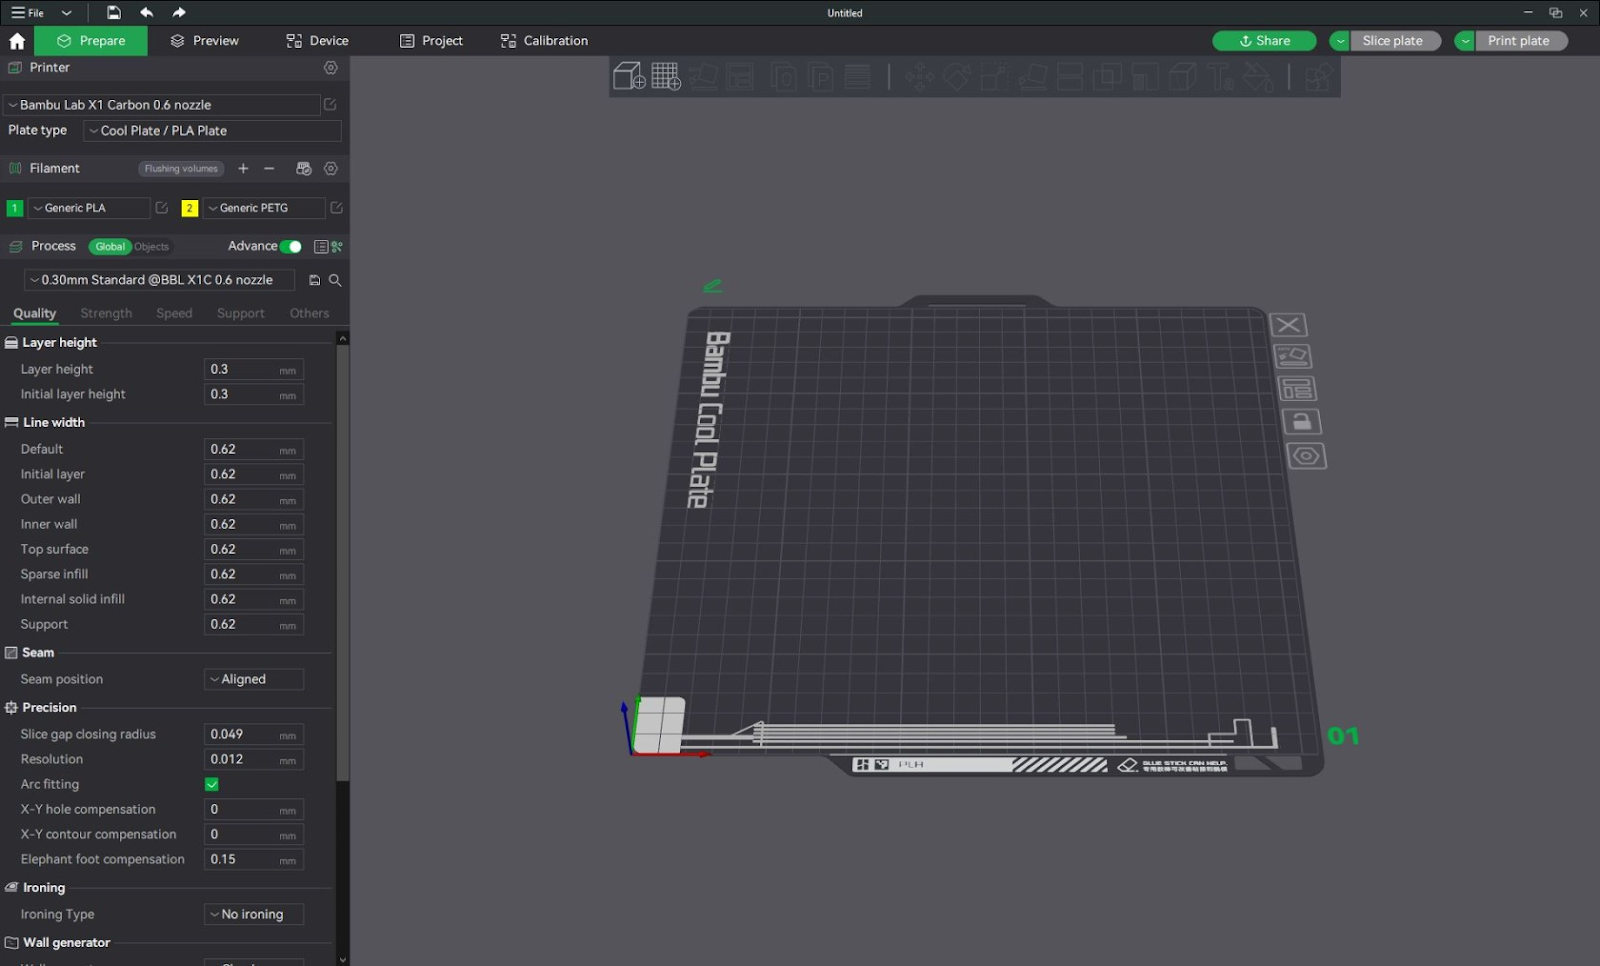Configuration du logiciel (Nécessaire suite à l’installation du logiciel) : NB : Si le logiciel est déjà installé et configuré ou que vous utilisez l’ordinateur du Fablab, vous pouvez passer cette étape.Sélectionner les imprimantes disponibles au Fablab :
- Bambu Lab A1 Mini
- Bambu Lab A1
- Bambu Lab X1 CarbonCliquez sur “Confirmer” Sélectionner les différents filaments que vous allez utiliser :
- Generic PLA
- Generic PETGCliquez sur “Confirmer”2 Importer le modèle (.stl) en le glissant dans le logiciel depuis l’explorateur de fichier ou en allant dans Fichier > Importer > Importer des 3MF/STL/…3. Sélectionner l’imprimante que vous voulez utiliser4. Choisir le type de plaque que vous souhaitez utiliser. Par défaut, pour du PLA et PETG, vous prendrez la “Bambu Lab Textured PEI Plate”.5. Positionner votre modèle sur le plateau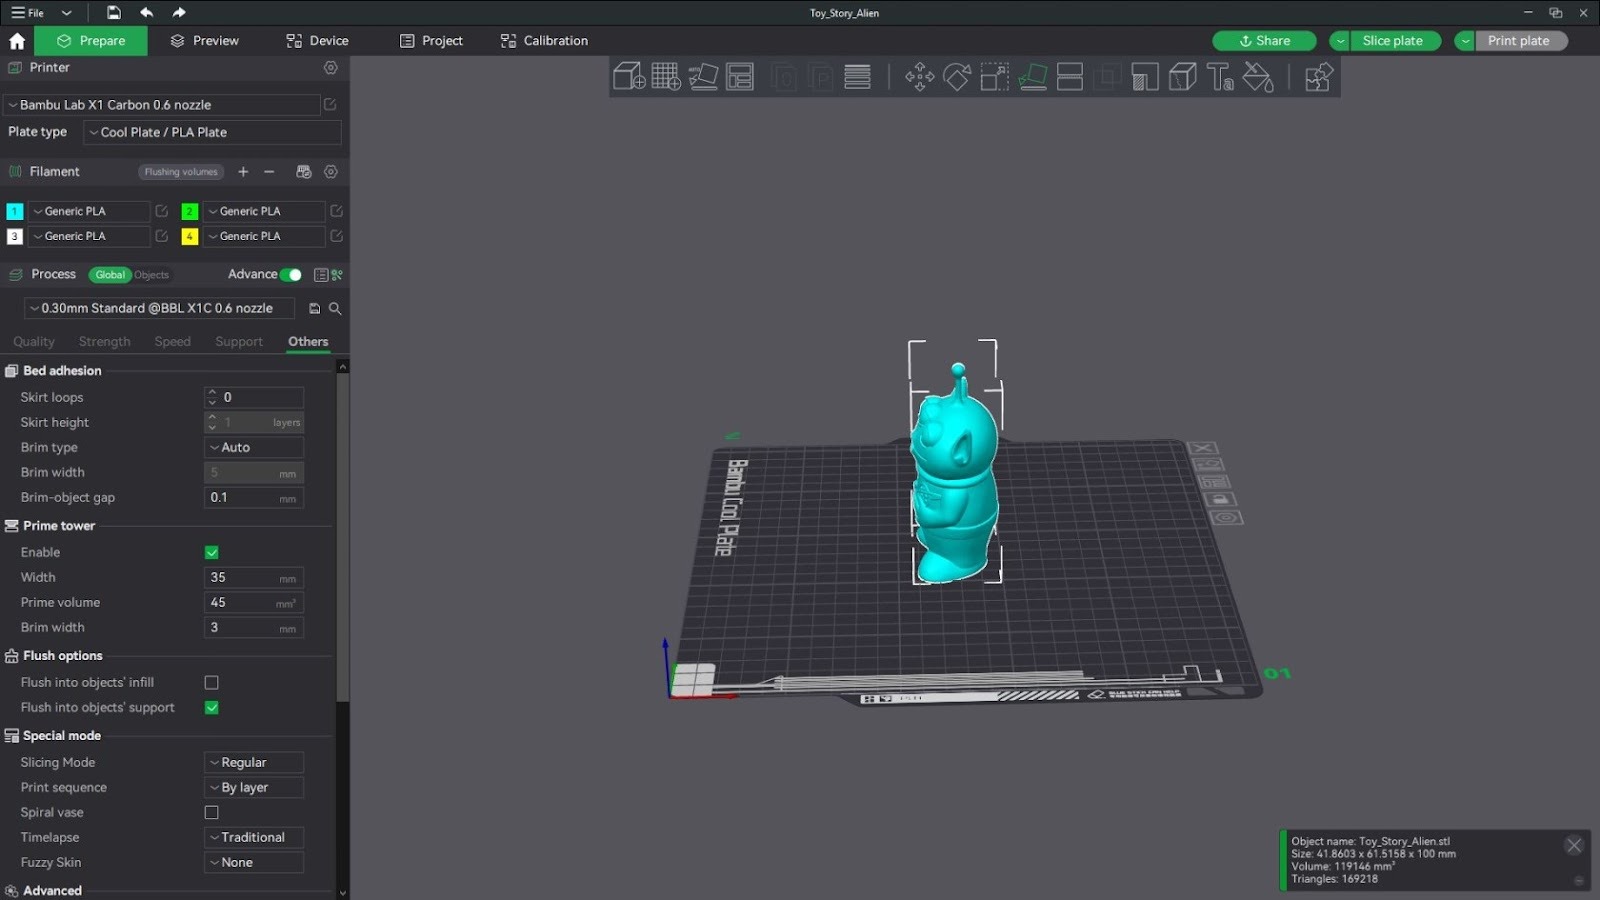En bas à droite il y a plusieurs informations sur notre pièce telles que la taille en mm, le volume de votre pièce ainsi que le nombre de triangles que possède votre modèle 3D.Sur la partie haute du logiciel, vous aurez des outils de paramétrages :  : Permet d’importer un fichier 3D (.stl, .obj, etc.) dans le plateau de travail. : Ajoute un nouveau plateau virtuel pour préparer plusieurs impressions en une seule session. : Oriente automatiquement la pièce pour optimiser l’adhérence au plateau et réduire les supports. : Replace automatiquement toutes les pièces sur le plateau pour gagner de la place et éviter les chevauchements. : Permet d’ajuster l’épaisseur des couches selon les zones du modèle (plus fines pour les détails, plus épaisses pour les parties simples). Déplace la pièce sur les axes X, Y et Z pour changer sa position sur le plateau. : Pivote le modèle pour l’orienter comme vous le voulez : Redimensionne la pièce en pourcentage ou en millimètres. : Aligne automatiquement une face du modèle contre le plateau, pour une meilleure stabilité. : Couper le modèle en plusieurs parties (utile pour les grandes pièces à imprimer séparément). : Crée directement du texte en 3D sur le plateau. : Sert à colorier des zones du modèle pour les imprimer avec plusieurs couleurs ou matériaux (jusqu’à 4 avec AMS).6. Sélectionner le filament utilisé.Comment choisir son filament ?PLA (Acide Polylactique)Le PLA est le filament le plus courant et le plus simple à imprimer. D’origine biodégradable (à base d’amidon de maïs ou de canne à sucre), il offre une excellente qualité visuelle et une grande précision dimensionnelle.Température d’extrusion : 190 à 230 °CTempérature du plateau : 20 à 60 °CTempérature de ramollissement : ~60 °CNB : Ce sont des températures moyennes, il faut bien se référer à la notice du fabricant
### Avantages :
- Facile à imprimer, peu de warping (décollement)
- Compatible avec presque toutes les imprimantes
- Surface lisse et brillante
- Biodégradable et peu odorant
- Convient bien pour le prototypage, la décoration et les pièces esthétiques
### Inconvénients :
- Fragile et cassant (faible résistance mécanique et thermique)
- Déformation possible au-delà de 60 °C
- Moins adapté aux pièces fonctionnelles
### ApplicationsObjets décoratifs, prototypes, figurines, pièces visuelles non soumises à contrainte, etc.
### PETG (Polyéthylène Téréphtalate Glycol)Le PETG est un filament hybride combinant la facilité d’impression du PLA avec la résistance mécanique de l’ABS. Il est légèrement flexible, résistant à l’humidité et offre une excellente durabilité.Température d’extrusion : 220 à 250 °CTempérature du plateau : 60 à 80 °CTempérature de ramollissement : ~80 °CNB : Ce sont des températures moyennes, il faut bien se référer à la notice du fabricantAvantages
- Bonne résistance mécanique et chimique
- Peu de warping et bonne adhérence intercouche
- Surface brillante et possibilité de transparence
- Bon compromis entre solidité et facilité d’impression
- Légèrement flexible, donc moins cassant que le PLAInconvénients
- Tendance au stringing (formation de fils entre les pièces)
- Adhérence parfois excessive au plateauApplicationsPièces techniques, contenants, supports, objets fonctionnels soumis à des efforts modérés, etc.
### ABS (Acrylonitrile Butadiène Styrène)L’ABS est un filament technique solide, résistant à la chaleur et adapté aux pièces fonctionnelles. Il demande cependant une bonne maîtrise de l’impression et un environnement ventilé.Température d’extrusion : 230 à 270 °C Température du plateau : 90 à 110 °CTempérature de ramollissement : ~100 °CNB : Ce sont des températures moyennes, il faut bien se référer à la notice du fabricantAvantages
- Excellente résistance mécanique et thermique
- Bonne résistance aux chocs
- Peut être poncé, percé ou collé facilement
- Soluble dans l’acétone pour lissage ou assemblage
- Idéal pour les prototypes fonctionnelsInconvénients
- Fort warping et retrait à l’impression
- Dégage des COV (impression en enceinte fermée recommandée)
- Plus difficile à imprimer que le PLA ou PETGApplicationsPièces mécaniques, boîtiers, prototypes techniques, maquettes industrielles, éléments de structure.
### TPU (Thermoplastique Polyuréthane)Le TPU est un filament flexible et résistant, idéal pour les pièces souples ou amortissantes. Il se distingue par son élasticité et sa bonne résistance à l’usure.Température d’extrusion : 210 à 240 °CTempérature du plateau : 20 à 60 °CTempérature de ramollissement : ~70 °CNB : Ce sont des températures moyennes, il faut bien se référer à la notice du fabricantAvantages
- Très flexible et élastique
- Excellente résistance à l’abrasion et aux chocs
- Bonne adhérence intercouche
- Résistance chimique et peu odorantInconvénients
- Impression lente (risque de bouchage dans les extrudeurs)
- Détails fins difficiles à obtenir
- Nécessite un bon réglage du flux et de la vitesse d’impressionApplications Joints, semelles, poignées, coques amortissantes, pièces antivibrations, accessoires souples.
### ASA (Acrylonitrile Styrène Acrylate)L’ASA est un filament proche de l’ABS mais plus résistant aux UV et aux intempéries. Il est idéal pour les pièces destinées à un usage extérieur.Température d’extrusion : 240 à 260 °CTempérature du plateau : 90 à 110 °CTempérature de ramollissement : ~100 °CNB : Ce sont des températures moyennes, il faut bien se référer à la notice du fabricantAvantages
- Excellente résistance aux UV et aux intempéries
- Bonne stabilité dimensionnelle
- Résistance mécanique proche de l’ABS
- Finition mate et homogèneInconvénients
- Warping possible sans enceinte chauffée
- Odeur légère à l’impression
- Prix supérieur au PLA ou PETGApplications Pièces extérieures, signalétique, pièces automobiles, composants techniques exposés à la chaleur ou au soleil.Attention : au Fablab, nous utilisons principalement du PLA et du PETG. Pour une utilisation de tout autre filament, merci de contacter un responsable.7. Éditer les réglages du filament : 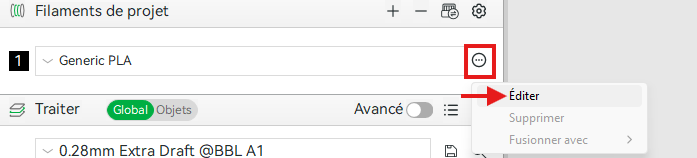NB : Toutes les températures d’utilisation sont indiquées sur la bobine du filament. 7. A. Dans “Rang de T°C recommandé“, indiquez les valeurs inscrites sur la bobine dans “Print temp” ou “PT”Exemple :
[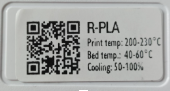](https://innovation.iha.unistra.fr/uploads/images/gallery/2025-10/Ijkimage.png)
Print temp : 200-230°C donc dans “Rang de T°C recommandé“ :
- Minimum : 200
- Maximum : 2307. B. Dans “Buse” , indiquer une valeur comprise dans la plage de valeur indiquée dans “Rang de T°C recommandé”.NB : S'il fait plutôt chaud, l’on mettra une valeur plus proche du minimum et inversement.Exemple : Une valeur entre 200 et 230 pour une température ambiante moyenne -> 2157. C. Dans “Textured PEI Plate” (Plateau de l’imprimante 3D pour du PLA, PETG et ABS), indiquez la valeur maximum inscrite sur la bobine dans “Bed temp” ou “BT”.Exemple :
[](https://innovation.iha.unistra.fr/uploads/images/gallery/2025-10/Ijkimage.png)
“Bed temp : 40-60°C” -> Je choisis donc une température de 60 °C7. D. Sauvegarder vos modifications de réglages en cliquant sur la disquette en haut à droite8. Régler la qualité d’impressionSélectionner l’épaisseur des couches de votre pièce. NB : Plus l’épaisseur est élevée, moins cela prendra de temps mais plus l’on verra les différentes épaisseurs entre chaque couche. Et inversement, moins l’épaisseur est élevée, moins l’on verra les épaisseurs de couche mais plus cela prendra de temps à imprimer. Prendre du 0,20mm pour un bon compromis.Choisissez bien vos paramètres en fonction de votre projet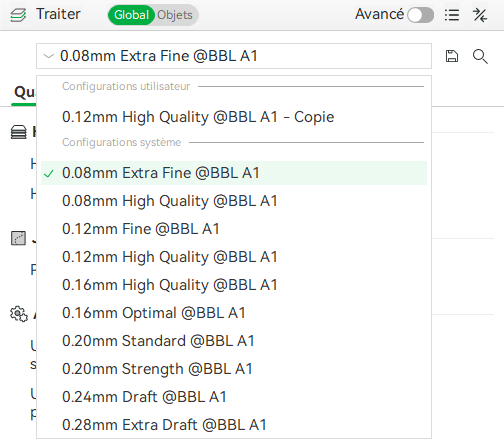9. Paramétrer le remplissage de la pièceAllez dans l’onglet “Résistance” et descendre tout en bas de l'onglet dans “Remplissage”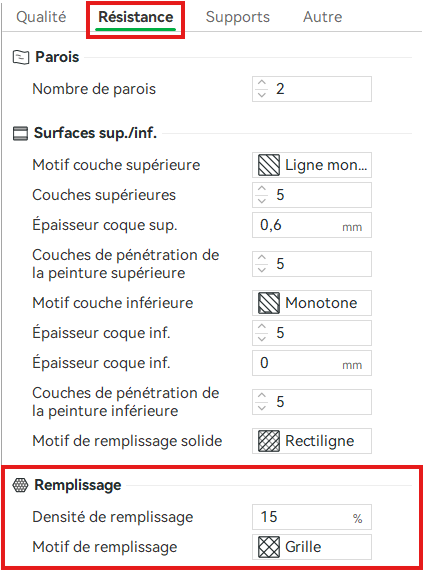Densité de remplissage : définit le niveau de remplissage intérieur de notre pièce. Plus le pourcentage est grand, plus la pièce sera résistante mais plus elle consomme de filament et sera plus longue à l'impression.NB : En moyenne entre 15 % et 30 % selon la résistance souhaitée. En cas de doute, veuillez vous référer à un responsable.Motif de remplissage : définit le schéma intérieur de la pièce que la machine va réaliser pour remplir l’intérieur de la pièce imprimée en 3D, influençant à la fois sa solidité, son poids et son temps d’impression.Voici un tableau récapitulatif pour vous aider à choisir le motif à utiliser en fonction de votre projet (liste non exhaustive) :
Motif de remplissage
Solidité
Temps d’impression
Description
Gyroide
Très élevée
Moyen
Excellente résistance dans toutes les directions, fluide et homogène. Idéal pour les pièces fonctionnelles.
Cubique / Cubique Adaptatif
Haute
Moyen à long
Structure 3D régulière très solide, bon compromis entre rigidité et légèreté.
Grille
Moyenne à haute
Moyen
Facile et rapide à imprimer, offre une bonne rigidité dans les deux axes principaux.
Triangle / Tri-hexagone
Moyenne
Long
Très rigide horizontalement, mais plus lent à imprimer.
Rectiligne
Moyenne
Rapide
Simple et efficace, bon pour les prototypes ou pièces non fonctionnelles.
Lightning
Faible
Très rapide
Conçu pour réduire le temps et le filament, parfait pour les maquettes ou tests visuels.
10. Paramétrer les supports de la pièceLes supports servent à soutenir les parties d’une pièce imprimée dans le vide, afin d’éviter qu’elles ne s’affaissent pendant l’impression.Allez dans l’onglet “Support” puis dans la catégorie “Support”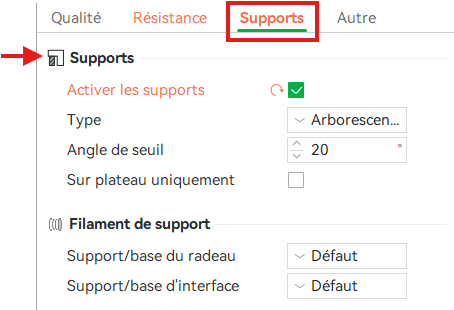Activer les supports : permet d'activer ou non les supportsType : Permet de choisir le type de support souhaité. Choisir entre “Classiques ( auto )” ou “Arborescents ( auto )”NB : On utilise les supports normaux pour les surfaces planes ou linéaires, et les supports arborescents pour les formes avec des courbes ou complexes, car ils se retirent plus facilement et consomment moins de matière.Comment savoir s’il faut activer ou non les supports ?Laissez les supports désactivés et cliquez sur "Trancher plateau". Un message d’erreur en orange s'affiche (voir image ci-dessous). Vous pourrez soit réorienter la pièce en utilisant l’outil “Orientation automatique” et réessayer, soit activer les supports s'il n’y a pas d’autres solutions.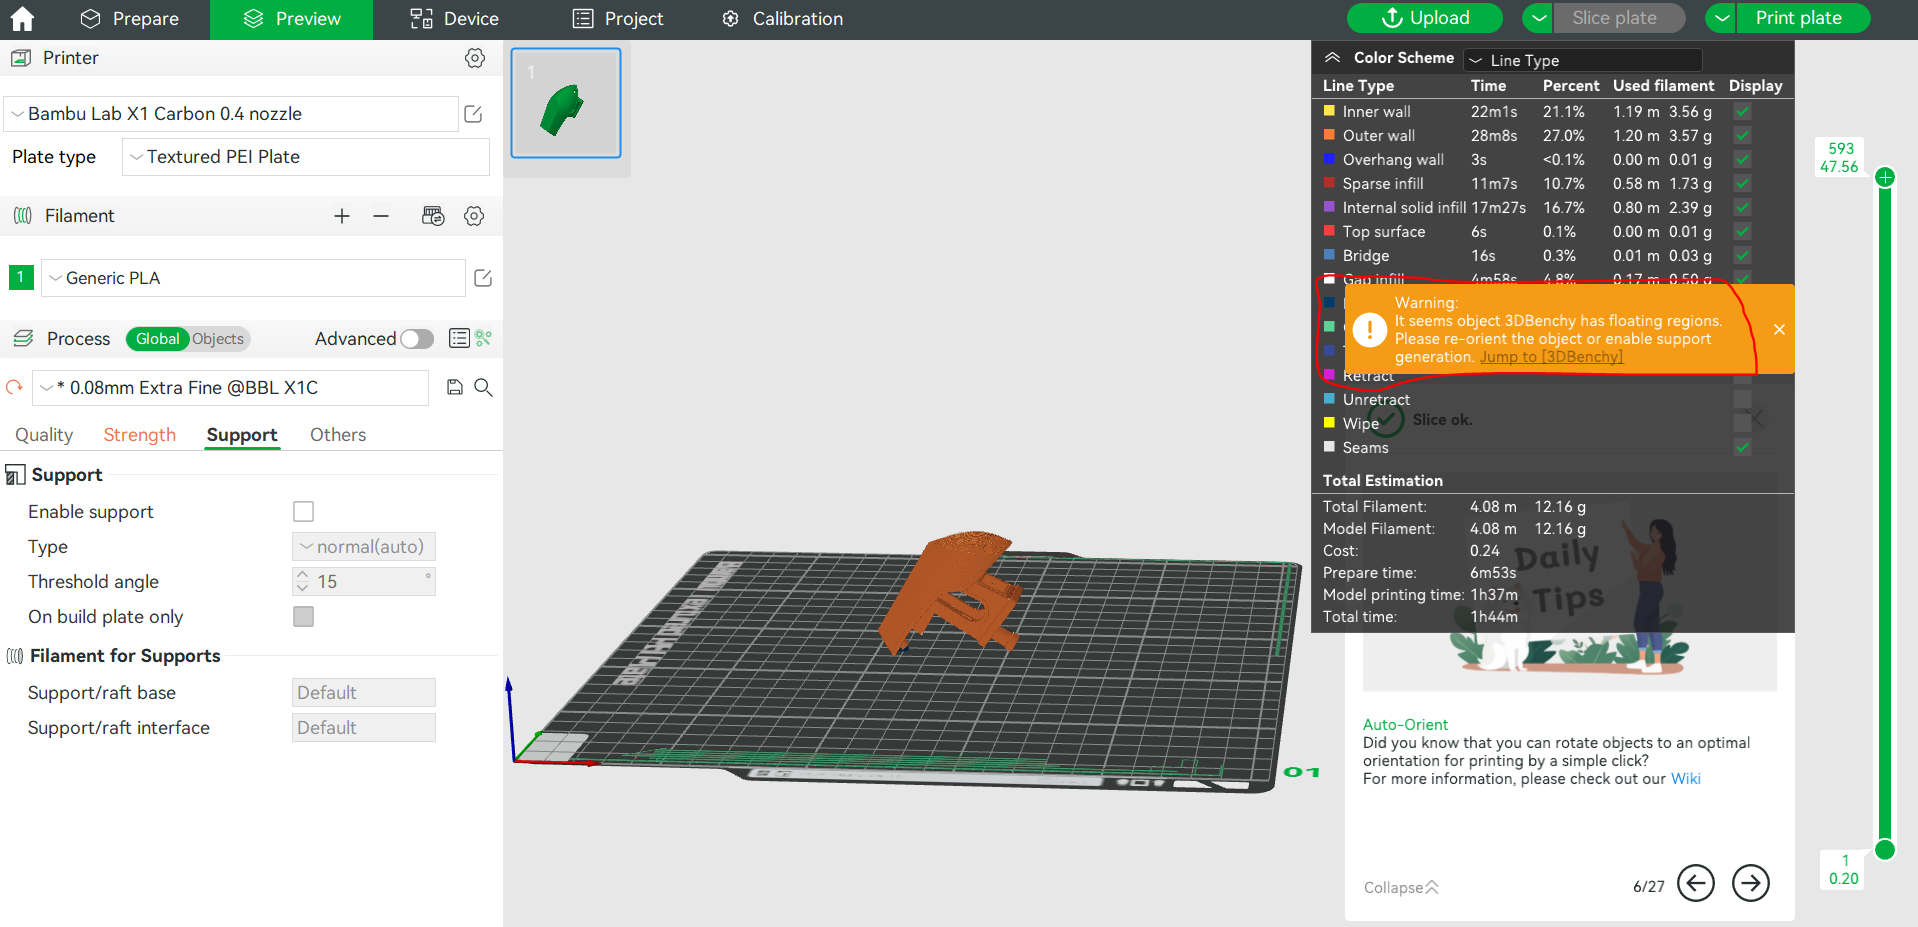11. Trancher la pièce (Slice)Cliquez sur le bouton “Trancher le plateau” : 
12. Analyser le temps, le poids et le coût estimé avant l’envoi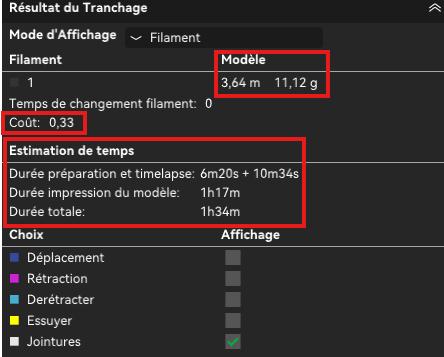Modèle : Indique la quantité de filament consommée.NB : La longueur d’une bobine de 1 kg dépend du diamètre du filament et de sa densité (le matériau). Voici les valeurs moyennes les plus courantes :
Matériau
Diamètre
Densité (g/cm³)
Longueur pour 1 kg
PLA
1.75 mm
1.24
≈ 335 m
PETG
1.75 mm
1.27
≈ 325 m
ABS
1.75 mm
1.04
≈ 395 m
TPU
1.75 mm
1.21
≈ 340 m
Coût : Indique le coût en filament du modèleEstimation de temps : Indique le temps que prendra le modèle à s’imprimer13. Transfert du fichier vers l’imprimante• Depuis chez soi : exporter le fichier G-code sur une clé USB et aller sur l’ordinateur du Fablab.• Depuis le FabLab : laisser le logiciel pour le moment et continuer le tutoriel
## 5. Changer de filamentPour les Bambu Lab A1 et A1 mini1. Aller dans le menu Filament sur l’écran de la machine.2. Sélectionner Décharger (Unload) et attendre que la buse chauffe.3. Suivez les étapes indiquées sur l’écran de la machine et retirez le filament manuellement quand c’est demandé.4. Insérer le nouveau filament (que vous avez choisi de prendre lors du paramétrage de votre pièce) jusqu’à arriver en butée.5. Cliquez sur Charger et pousser le filament quand c’est indiqué à l’écran6. Dans le menu filament, cliquez sur “Modifier” puis indiquez le type et la couleur du filament choisi. NB : Pour le type de filament, choisir “Generic” pour la marque puis le type de filament utilisé (PLA, PETG, etc…)Pour la Bambulab X1 Carbon : 1. Allez dans le menu “Filament” sur l’écran de la machine. (deuxième onglet du menu latéral gauche puis onglet "Filament" du menu horizontal)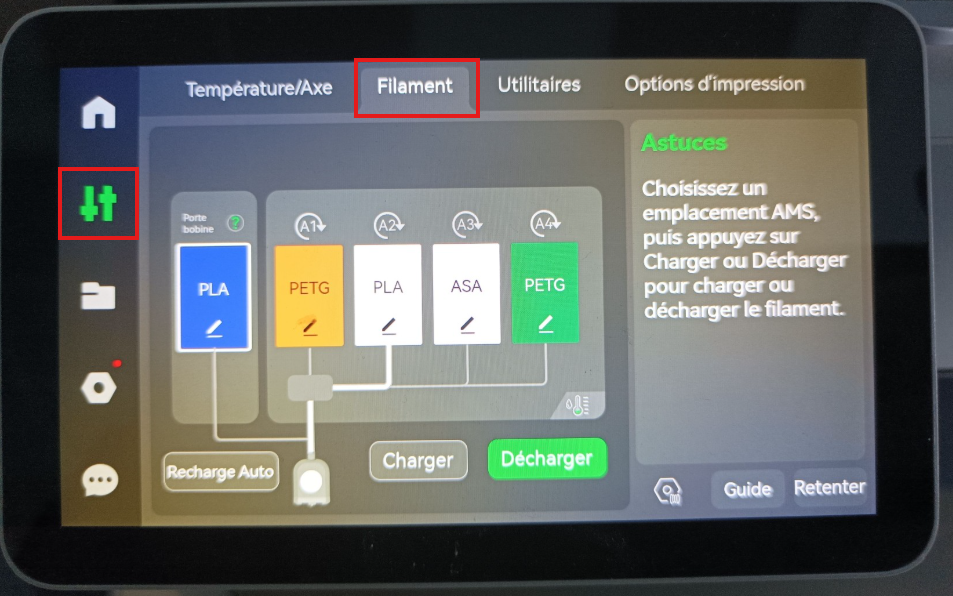2. Sélectionner la bobine que vous souhaitez changer et cliquez sur "Décharger" en bas à droite. Si la bobine est déjà déchargée, il suffit de la retirer manuellement de l’appareil.3. Suivez les étapes indiquées sur l’écran de la machine et retirez le filament manuellement quand c’est demandé.4. Insérer le nouveau filament (que vous avez choisi de prendre lors du paramétrage de votre pièce). Le filament sera inséré automatiquement par l’AMS)5. Dans le menu filament, cliquez sur l'icône : , puis indiquez, la marque, le type et la couleur du filament choisi. NB : Pour la marque de filament, choisir “Generic” puis le type de filament utilisé (PLA, PETG, etc…). Pour la couleur, il vous suffit de regarder votre bobine.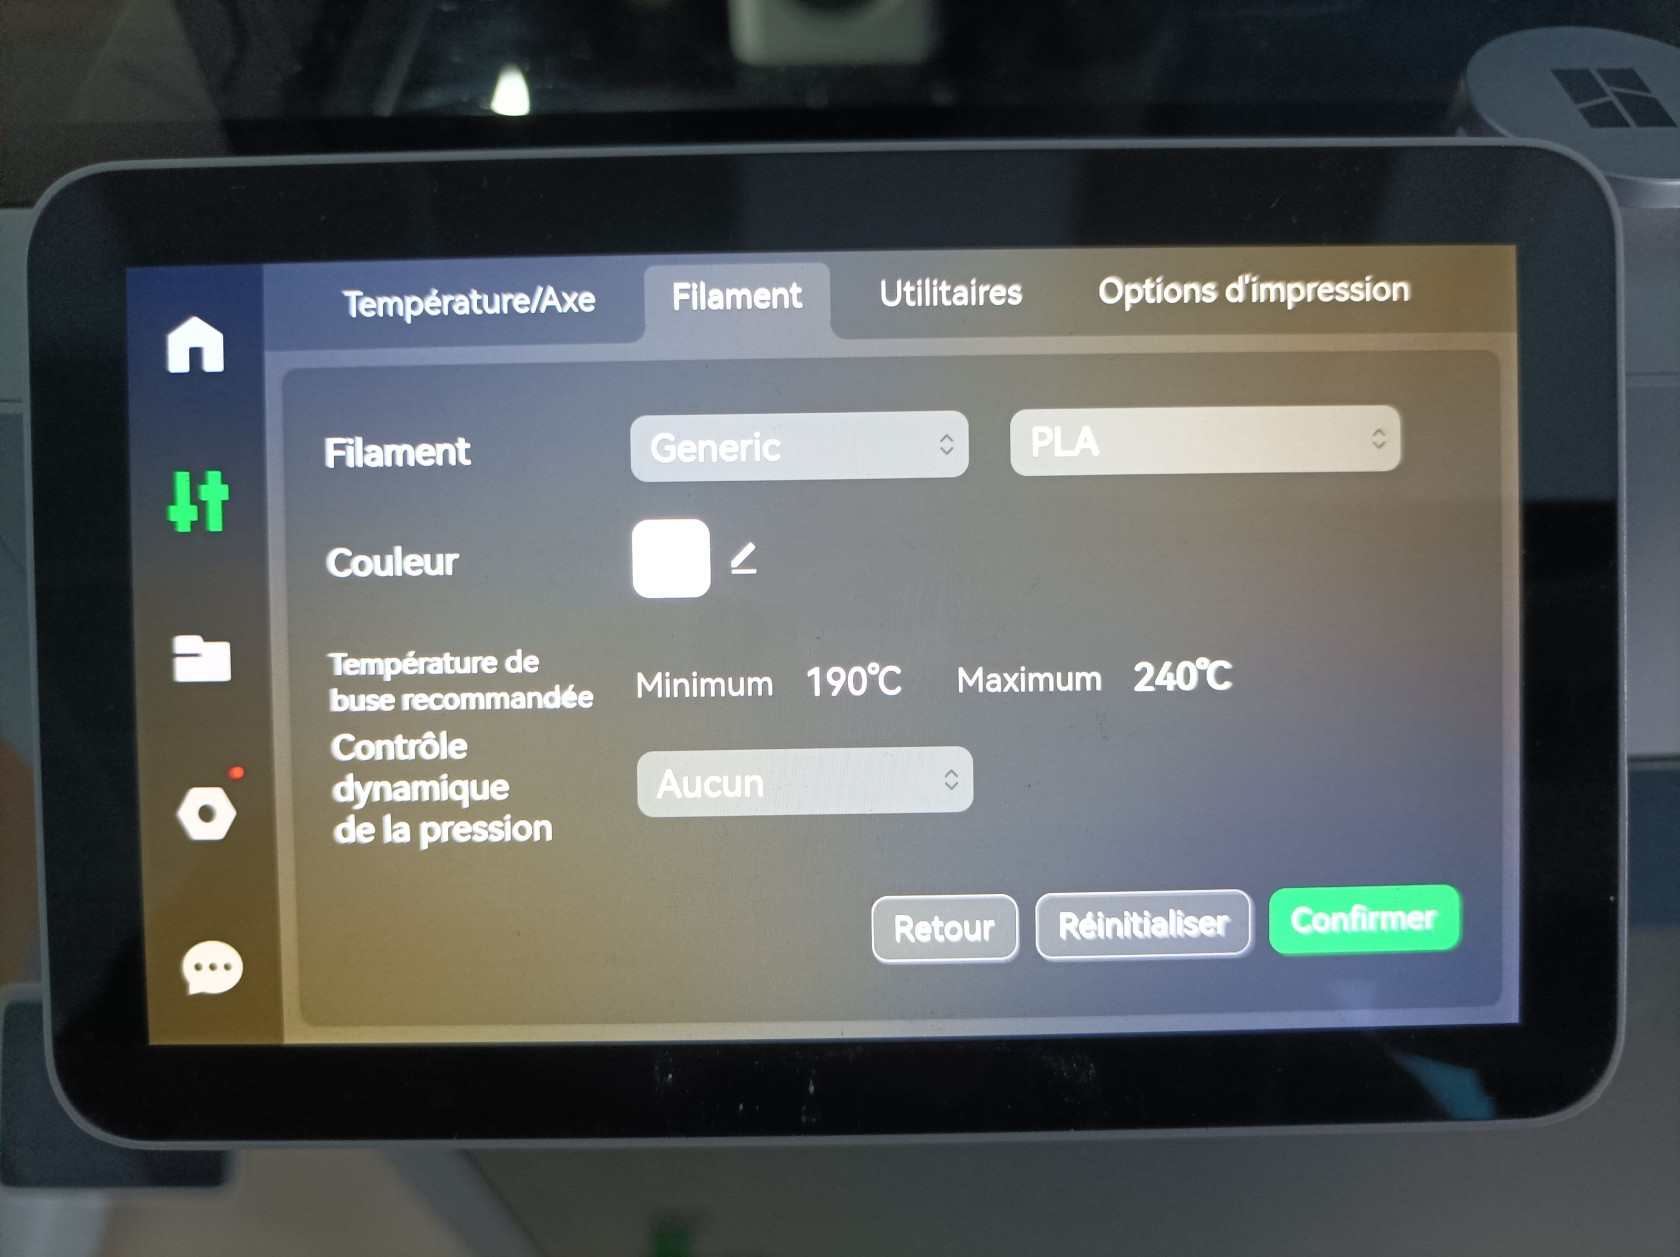6. Cliquez sur confirmer## 6. Lancer une impression 1. Retournez sur le logiciel et cliquez sur “Imprimer plateau” (Print plate)2. Dans “Imprimante”, sélectionner la bonne imprimante : - 3DP-00M-955 → Bambu Lab X1 Carbon - 3DP-039-291 → Bambu Lab A1 (droite) - 3DP-039-234 → Bambu Lab A1 (gauche) - 3DP-030-806 → Bambu Lab A1 mini2. Activer ou désactiver les options suivantes comme vous souhaitez : Bed leveling, Flow Dynamics Calibration, Enable AMS (X1C), Timelapse.Bed Leveling :Vérifie automatiquement que le plateau est bien plat pour assurer une bonne adhérence de la première couche. À activer si la machine n’a pas été calibrée récemment.Flow Dynamics Calibration :Ajuste le débit du filament pour éviter les sur- ou sous-extrusions. À activer lors de l’utilisation d’un nouveau filament.Enable AMS (X1C uniquement) :Active le système multi-bobines pour imprimer en plusieurs couleurs ou matériaux.Timelapse :Créer une vidéo accélérée de l’impression à partir de la caméra intégrée.3. Cliquez sur “Envoyer” (Send).4. Confirmer sur l’écran de l’imprimante pour démarrer l’impression.
## 7. Bonnes pratiques et entretien- Nettoyer/Enlever les impuretés de la plaque après chaque impression.- Ranger les bobines.- Vérifier la calibration régulièrement.- Ne pas forcer le filament dans la buse.- En cas de problème, prévenir un responsable
# L'impression FDM : principe et types de machines
La grande technologie par **extrusion de matériau** est appelée **FDM**, pour ***Fused Deposition Modelling***, autrement dit dépôt de filament fondu.
Le principe de fabrication est le suivant : une fois les instructions générées grâce au **slicer** et généralement exportées au format **.gcode**, l'objet est créé à partir de filament de matière disponible sous forme de bobine. Une tête d'extrusion s'assure ensuite de pousser le filament dans un élément chauffant pour le faire fondre. Le filament fondu passe enfin à travers une buse qui se déplace au-dessus du plateau pour déposer le filament fondu couche par couche, tandis que le filament fondu se solidifie en refroidissant.
Cela impose des limitations techniques, car le filament ne peut être déposé dans le vide. Pour pallier à cela, on a très souvent recours à des **supports** : ce sont des parties qui vont être imprimées en même temps que le corps de l'objet lui-même, mais conçue de façon à être facile à retirer une fois l'impression terminée.
[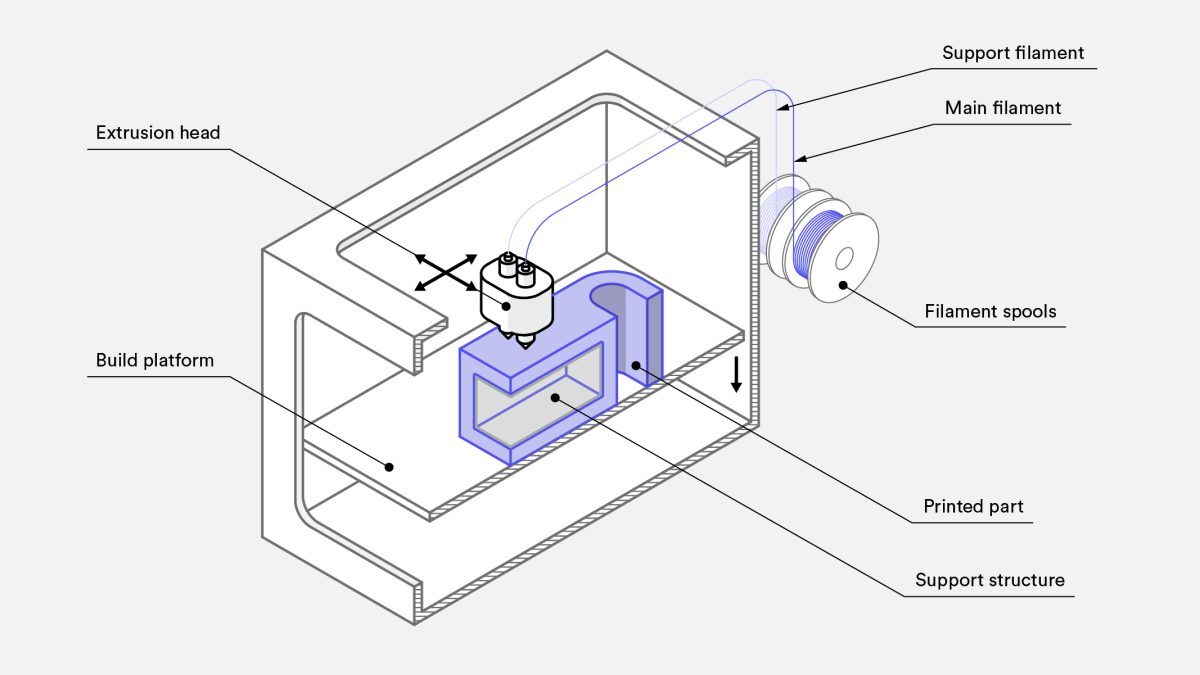](https://wiki.fablab.sorbonne-universite.fr/BookStack/uploads/images/gallery/2022-08/image-1661177127243.jpg)
*Schéma d'un type de machine d'impression FDM qu'on trouve couramment. Les Raise 3D Pro2 du Fablab suivent ce principe général.*
Plusieurs variantes existent sur ce principe.
### Quelques variantes d'imprimantes FDM
#### Systèmes d'extrusion
##### Extrusion directe
Les machines dites à extrusion directe (direct drive) rassemblent dans une même pièce la partie qui attrape et pousse le filament solide (un moteur pas à pas) et l'élément chauffant qui le fait fondre . Une conséquence est que cette partie mobile - qui est donc celle qui dépose le filament fondu sur le plateau - est alourdie et donc ralentie par la présence du moteur. Mais cela peut présenter d'autres avantages comme un meilleur écoulement pour certains types de filament, en particulier flexibles.
##### Extrusion bowden
Les machines à extrusion bowden (ou "à moteur déporté") ont un moteur d'extrusion fixe sur le châssis : ainsi, une fois agrippé et tiré de la bobine, le filament passe dans un tube flexible qui l'achemine jusqu'à la partie mobile, où il est fondu par l'élément chauffant et déposé à travers la buse. La partie mobile est donc plus légère et le temps d'impression s'en retrouve diminué. Mais ce mécanisme peut être moins performant, notamment pour des filaments souples.
##### [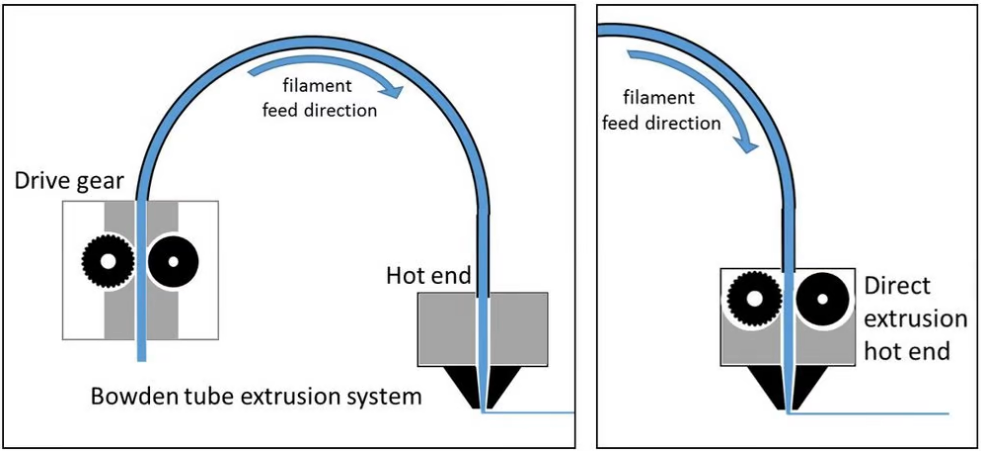](https://wiki.fablab.sorbonne-universite.fr/BookStack/uploads/images/gallery/2022-08/direct-bowden.png)
*Schéma montrant la différence entre un système à extrustion directe et un système à extrusion bowden. Source : forefrontfilament.co.uk via [all3DP](https://all3dp.com/1/3d-printer-extruder-nozzle-guide/#:~:text=A%20direct%20extruder%20is%20distinctive,3D%20printing%20of%20flexible%20filaments.)*
##### Double extrusion
Par ailleurs, certaines machines permettent d'extruder deux filaments différents au cours d'une même impression sans changer de bobine en cours de route, grâce à la présence de deux systèmes "extrusion + élément chauffant + buse". Cela offre notamment la possibilité d'imprimer les supports d'impression avec un filament différent de celui utilisé pour l'objet final, par exemple avec du filament soluble dans l'eau comme le PVA. C'est le cas des Raise 3D Pro2 que nous avons au Fablab. Attention néanmoins, cet usage est occasionnel au Fablab et nécessite donc une recalibration des deux buses avant toute impression. Rapprochez-vous d'un.e fabmanager si cette possibilité vous intéresse !
Pour tout savoir sur les extrudeurs, un peu de lecture sur --> [all3DP](https://all3dp.com/1/3d-printer-extruder-nozzle-guide/#:~:text=A%20direct%20extruder%20is%20distinctive,3D%20printing%20of%20flexible%20filaments.)<--
#### Système assurant les mouvements
Plusieurs types de systèmes peuvent permettre d'assurer les mouvements des pièces (tête d'impression et plateau). Ainsi, si la majorité des imprimantes gèrent les déplacements à partir des coordonnées cartésiennes x,y,z, d'autres le font avec les coordonnées polaires.
Par ailleurs, dans le paradigme cartésien, on trouve encore beaucoup de variantes : les systèmes rectilignes sont les plus communs, puis viennent ensuite les systèmes delta, et encore bien plus rare les systèmes SCARA.
[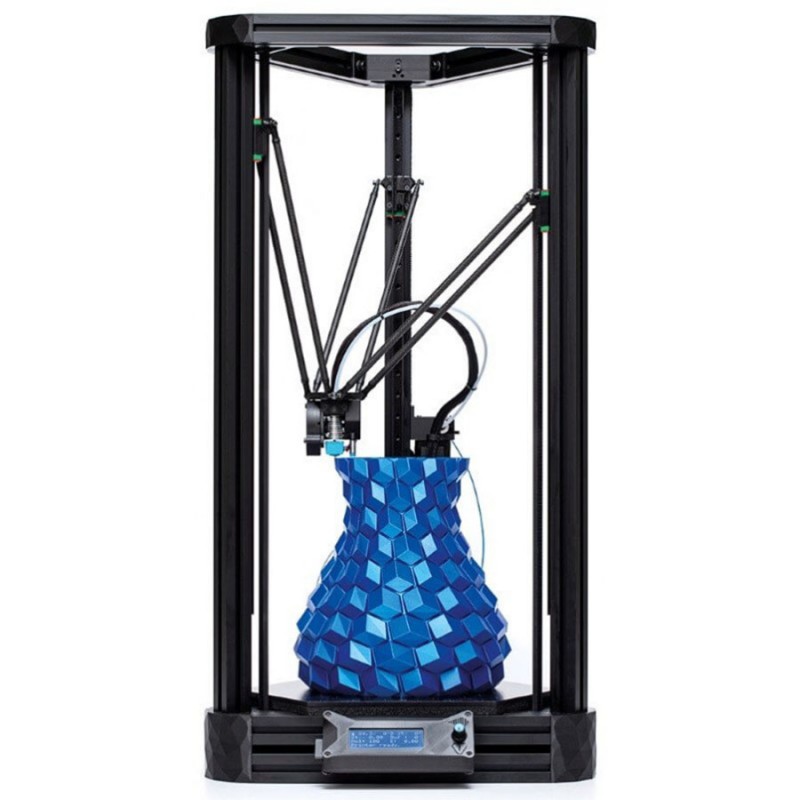](https://wiki.fablab.sorbonne-universite.fr/BookStack/uploads/images/gallery/2022-08/image-1661264597894.jpg)
*imprimante TRILAB DeltiQ, système delta (source : [filament2print](https://filament2print.com/fr/filament-fdm/965-trilab-deltiq-imprimante-3d-fdm.html))*
Et naturellement il y a encore des nuances dans les systèmes rectilignes, entre les XZ-Head, XY-Head ou encore Crossed.
[ ](https://wiki.fablab.sorbonne-universite.fr/BookStack/uploads/images/gallery/2022-08/image-1661263670179.png)[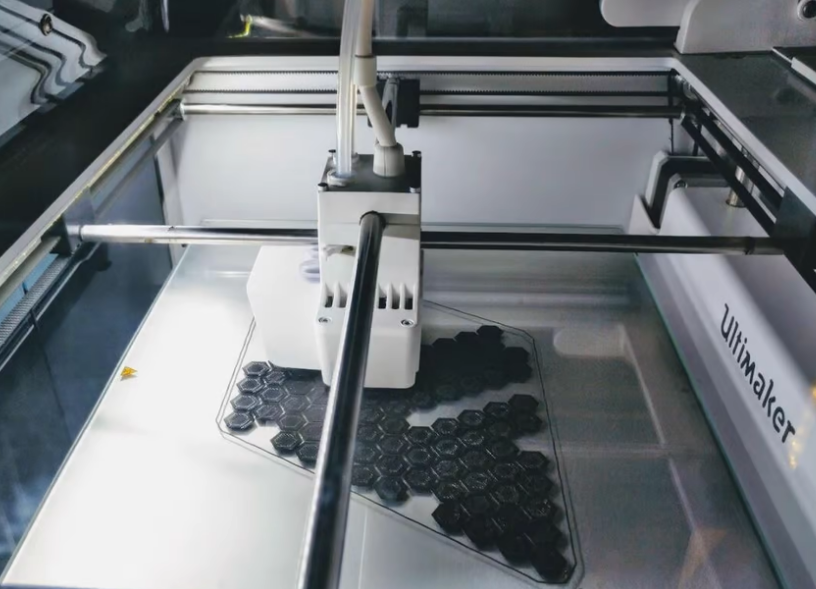](https://wiki.fablab.sorbonne-universite.fr/BookStack/uploads/images/gallery/2022-08/image-1661264141679.png)
*à gauche : imprimante Ender 3 V2, système XZ-Head (source : [all3DP](https://all3dp.com/2/3d-printer-gantry-simply-explained/))
à droite : imprimante Ultimaker S5, système crossed (source : [nt3kk via Reddit](https://www.reddit.com/r/3Dprinting/comments/odt5c1/think_im_hooked_larger_larger/))*
Et encore bien d'autres variantes !
[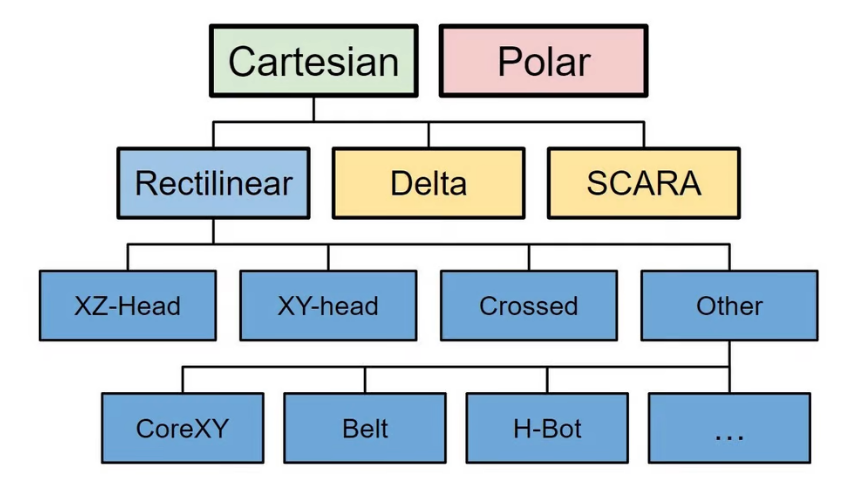](https://wiki.fablab.sorbonne-universite.fr/BookStack/uploads/images/gallery/2022-08/types-gantry-3dprint.png)
*Une classification des systèmes selon les coordonnées et le fonctionnement mécanique (Source : [all3DP](https://all3dp.com/2/3d-printer-axis-the-basics-simply-explained/))*
On ne va pas rentrer dans les détails alors voici encore un peu de lecture [ici](https://all3dp.com/2/3d-printer-gantry-simply-explained/) et [là](https://all3dp.com/2/3d-printer-axis-the-basics-simply-explained/).
Auteure: Clara Devanz, sur le [wiki du FabLab de Sorbonne Université](https://wiki.fablab.sorbonne-universite.fr/BookStack/books/techniques-de-base/page/limpression-fdm-principe-et-types-de-machines)
[ Attribution-NonCommercial 4.0 International (CC BY-NC 4.0) ](https://creativecommons.org/licenses/by-nc/4.0/)
# L'impression FDM : paramètres à prendre en compte
Essayons de faire un petit tour des principaux paramètres à prendre en compte.
#### Les paramètres de votre matériel
**Le matériau du filament**
C'est la toute première chose dont vont découler la grande majorité des réglages de votre impression. En effet, pour ne parler que des thermoplastiques, ils ont tous des propriétés différentes, en particulier leur réaction à la température. On ne règlera pas à la même température un extrudeur pour du PLA de l'ABS ou du PETG, de même qu'il faudra parfois mettre beaucoup de ventilation, chauffer le plateau ou non, fermer l'enceinte de l'imprimante, réduire les vitesses d'impression, etc.
Heureusement les fabricants de filament fournissent des valeurs typiques pour tous ces réglages. Au Fablab vous verrez que nous avons des bibliothèques de matériau avec des préréglages, il ne vous reste plus qu'à sélectionner le bon filament dans le slicer.
**Le diamètre du filament**
Il existe deux diamètres standards, 1.75mm et 2.85mm. Référez-vous à la documentation de l'imprimante pour connaître le diamètre qui conviendra. \[spoiler : c'est 1.75mm pour les Raise3D Pro2\]
**Le diamètre de la buse**
La buse *(nozzle)* est l'élément par lequel passe le filament fondu avant d'être déposé sur le plateau. Son diamètre influe donc sur la largeur de la couche déposée. Le diamètre standard des buses est de 0,4mm. En changeant la buse pour une buse avec un diamètre plus petit, on peut potentiellement obtenir des impressions avec une meilleure résolution et par exemple des coins moins arrondis, tandis qu'avec des buses plus larges on peut réduire drastiquement le temps d'impression.
**La matière de la buse**
Pour les usages et filaments standards on utilise des buses en laiton, mais parfois il leur est préféré des buses dans d'autres matières comme l'acier inoxydable ou durci.
**L'enceinte de l'imprimante**
Au Fablab on imprime essentiellement deux types de filament : le PLA et l'ABS. L'ABS est très sensible aux variations de température et aux courants d'air, et les vapeurs qu'il dégage sont relativement néfastes, c'est pourquoi on imprimera ce matériau uniquement dans une imprimante complètement fermée.
**Le type de plateau**
Différents plateaux d'impression peuvent s'avérer optimaux selon les usages. On trouve couramment des plateaux en verre, des buildtak, ou encore des plateaux perforés.
Au Fablab, on utilise des buses en laiton de diamètre 0,4mm, et le filament requis pour les Raise3D Pro 2 doit être de diamètre 1,75mm, vous n'avez donc pas à les modifier
#### Les paramètres incontournables du slicer
Passons maintenant aux paramètres qu'on est le plus souvent amené à ajuster dans le slicer.
**La hauteur de couche**
C'est elle qui détermine la résolution de votre objet pour une imprimante et une buse donnée. Plus petite sera la hauteur de couche, plus les détails de l'objet seront reproduits finement. Typiquement, on définit la hauteur de couche autour de 0,2mm à 0,3mm. Vous pouvez descendre à 0,1mm si vous avez besoin d'une très bonne définition et monter jusqu'à 0,4mm si la définition n'a pas d'importance. Naturellement, plus l'épaisseur de couche est faible, plus longue est l'impression.
**Le taux de remplissage** *(infill)*
Un objet imprimé avec la technologie FDM n'est pas plein en son centre : cela prendrait énormément de temps à imprimer. Il est en fait constitué d'une coque externe et d'une ou plusieurs coques internes, et d'un maillage plus ou moins dense. C'est à la densité de ce maillage que renvoie la notion de taux de remplissage.
***Quel taux de remplissage choisir ?*** Cela dépend de la solidité et de la densité que l'on cherche à obtenir, typiquement 10% pour un objet décoratif, 20 à 30% pour une pièce qui va subir des contraintes mécaniques, 50 à 60% en cas de très fortes contraintes. Bien sûr, plus le remplissage est important, plus la durée de l'impression et la quantité de matière augmentent. Pour les filaments flexibles, le remplissage influe aussi sur la flexibilité de la pièce.
**Le motif de remplissage**
On choisit généralement un motif de remplissage de type "lignes" ou "grille" - un quadrillage. Mais selon les besoins, typiquement pour des questions mécaniques, il est possible de se tourner vers d'autres motifs de remplissages. Les plus classiques sont :
- lignes : un quadrillage alternant une couche sur deux dans une direction. Ce remplissage consomme peu de matière et est adapté pour les impressions rapides. Il améliore la résistance dans deux directions
- grille : un quadrillage imprimant dans les deux directions à chaque couche. Consomme un peu plus de matière, améliore la résistance dans deux directions.
- nid d'abeilles : maillage hexagonal ressemblant à des alvéoles de ruche. Bon compromis pour les pièces nécessitant une certaine solidité.
- concentrique : tracé concentrique relativement au périmètre de l'objet. Rapide et adapté aux éléments flexibles
- triangle : tracé triangulaire, renforce également la solidité en deux dimensions
- cubique : empilement de cubes inclinés de 45°, renforce la solidité dans les trois dimensions
- gyroïde : compromis entre la solidité 3D et la consommation de matière et de temps
- dans ideamaker vous trouverez également le remplissage "rectiligne" qui est une variante du remplissage "lignes" connectant les extrémités des lignes entre elles
**Le nombre de coques** *(shells)*
Les coques sont les enveloppes extérieures de l'objet. Dans un slicer, on peut définir leur nombre. Pour une couche donnée, disons que le périmètre externe représente la première coque, alors si on indique au slicer qu'on souhaite deux coques, cela signifie que l'imprimante va réaliser deux lignes concentriques de périmètre. Plus on augmente ce nombre, et plus l'enveloppe de notre objet va être épaisse.
Le paramètre par défaut est généralement à deux coques, une coque externe et une coque interne. Si l'on souhaite augmenter ce nombre, par exemple pour améliorer la solidité de l'objet, il faudra néanmoins garder en tête que cela peut affecter le design de l'objet dans certains cas. Visualisez les différentes couches dans le slicer pour vérifier que votre design n'est pas altéré. Naturellement, un plus grand nombre de coques influe aussi sur la durée d'impression et la quantité de matière consommée.
**L'aide à l'adhérence**
Le slicer donne la possibilité de générer trois types d'aides à l'adhérence, qui vont être imprimés en amont du modèle lui-même.
- **La jupe**, ou** *skirt***
Elle est souvent catégorisée dans les aides à l'adhérence, bien qu'elle ne joue pas à proprement parler sur l'adhérence du modèle avec le plateau. Une jupe est **un périmètre qui entoure la pièce** mais sans la toucher, et qui n'a qu'**une seule couche d'épaisseur**. Par défaut elle n'a qu'une ligne de largeur, mais il est possible d'augmenter ce nombre de passage pour avoir une jupe plus large. On peut également régler la distance de la jupe à la pièce.
Imprimer une jupe consomme très peu de matière et de temps comparé aux autres catégories d'aides à l'adhérence, mais se révèle très utile pour identifier dès le début de l'impression s'il y a un problème d'horizontalité du plateau ou de qualité de l'extrusion du filament. Par ailleurs, cela donne une bonne idée des dimensions de la pièce. Elle est donc recommandée pour toute pièce ne présentant a priori pas de difficultés d'adhérence.
[](https://wiki.fablab.sorbonne-universite.fr/BookStack/uploads/images/gallery/2022-08/image-1661421908121.png)
*Jupe en violet, capture d'écran ideaMaker*
- **La bordure**, ou ***brim***
La bordure est aussi en une seule couche d'épaisseur, mais en revanche elle est **en contact avec la pièce**. Elle est aussi **plus large** en général que la bordure, typiquement autour de 5 lignes (mais ce paramètre est réglable dans le slicer). En augmentant la surface de contact entre la pièce et le plateau, elle renforce donc son adhérence, tout en utilisant relativement peu de matière puisqu'elle est en une seule couche. C'est pourquoi elle est recommandée lorsqu'une pièce peut présenter des difficultés à adhérer, par exemple des pièces avec très peu de surface de contact, ou encore des pièces qui présentent des risques de warping (cf plus bas).
Néanmoins, bien qu'elle soit relativement simple à retirer une fois la pièce imprimée, il faudra probablement utiliser un cutter pour retirer tous les restes de bordure et avoir des finitions satisfaisantes. Elle n'est ainsi pas recommandée si les dimensions du bas de la pièce doivent être très précises. Comme la jupe, elle aide aussi à voir rapidement. les problèmes d'extrusion et de niveau du plateau.
[](https://wiki.fablab.sorbonne-universite.fr/BookStack/uploads/images/gallery/2022-08/image-1661421941208.png)
*Bordure en violet, capture d'écran ideaMaker*
- **Le radeau**, ou ***raft***
C'est la méthode qui offre la plus grande adhérence mais aussi qui consomme le plus de matière et de temps. En effet, un radeau est constitué de plusieurs couches d'épaisseur, sur lesquelles est imprimé le modèle. Comme pour la bordure, le radeau est plus large que le modèle afin d'offrir une meilleure adhérence.
Comme cette méthode génère beaucoup de gaspillage, on la réserve à des cas où le risque de décollement est très élevé, par exemple avec une pièce en ABS rectangulaire qui aurait de grandes chances de subir un warping. Le radeau présente un autre avantage par rapport à la bordure, qui est qu'il se retire très facilement, sans nécessiter du cutter pour les finitions. Cependant, il laisse une surface du dessous moins propre qu'avec une bordure.
[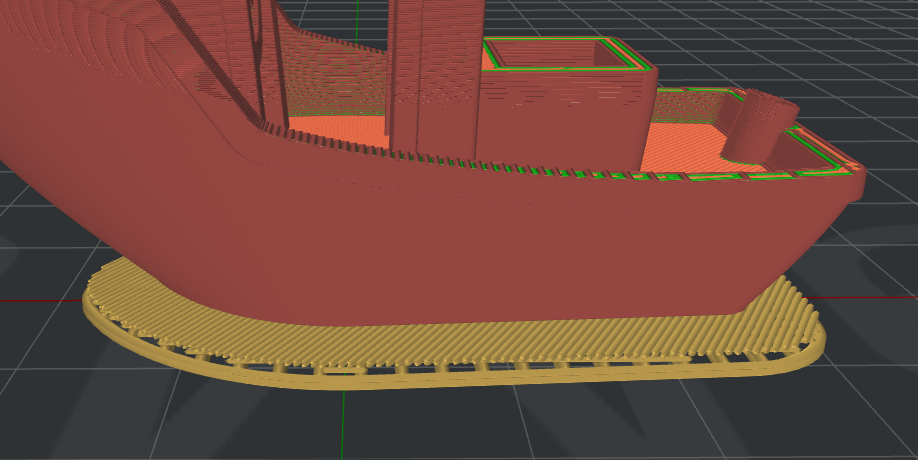](https://wiki.fablab.sorbonne-universite.fr/BookStack/uploads/images/gallery/2022-08/image-1661422014542.png)
*Radeau en jaune, capture d'écran ideaMaker*
**La présence de supports**
La notion de supports qui a été introduite dans la [page précédente](https://wiki.fablab.sorbonne-universite.fr/BookStack/books/techniques-de-base/page/limpression-fdm-principe-et-types-de-machines) est un sujet capital en impression FDM. Pour rappel, une des difficultés est qu'il n'est pas possible d'imprimer du filament dans le vide, il doit toujours reposer sur une couche inférieure (ou directement sur le plateau en ce qui concerne la toute première couche). C'est pourquoi on a souvent besoin de générer des supports, qui vont servir de structures temporaires pour imprimer les couches qui ne peuvent reposer entièrement sur les couches précédentes. Une fois l'impression terminée, on les retirera à la main ou avec de petites pinces, avec plus ou moins de difficulté ! D'où la volonté d'éviter autant que faire se peut d'avoir à générer des supports, tout simplement en orientant intelligemment sa pièce, ou en anticipant ce problème dans le design.
Heureusement pour nous, le slicer peut générer automatiquement de tels supports. Un paramètre important qu'on peut modifier pour jouer sur ces supports automatiques est l'angle de surplomb maximum. Cela désigne le fait que le slicer ne va générer des supports que pour les parties qui ont une inclinaison supérieure à cet angle limite. Par défaut il est à 45°, car c'est globalement là où les ennuis commencent.
Le slicer vous donne aussi la possibilité de choisir entre générer des supports pour toute inclinaison supérieure à cet angle (en bleu sur l'image de gauche ci-dessous), ou seulement celles qui concernent des zones directement en surplomb au dessus du plateau (image de droite).
[ ](https://wiki.fablab.sorbonne-universite.fr/BookStack/uploads/images/gallery/2022-08/image-1661421606228.png)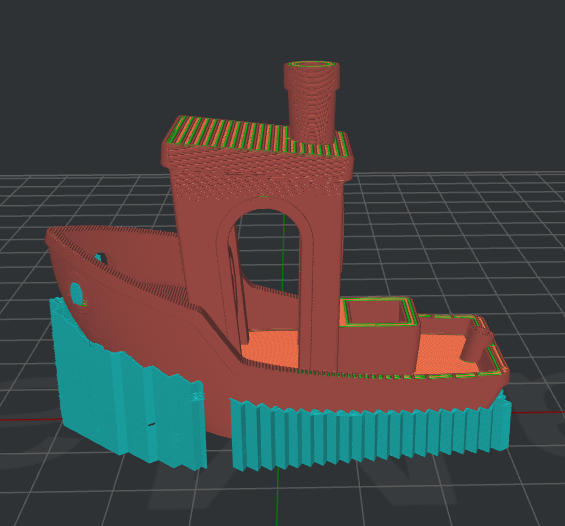
Les slicers donnent également la possibilité d'ajouter des supports manuels et de modifier la largeur des colonnes.
#### Les réglages plus fins
Enfin, comme dit précédemment, d'autres paramètres sont réglés par défaut selon le matériau à imprimer, vous n'aurez en général pas besoin de les modifier. Toutefois il est toujours bon de connaître ce qui rentre en jeu. Vous pourriez également avoir à les ajuster si vous utilisez des filaments un peu moins utilisés au Fablab ou plus capricieux.
**La température de l'extrudeur**
Elle est à ajuster selon le matériau à imprimer, puisque tous n'ont pas la même température de transition vitreuse. Le fabricant fournit pour cela des fourchettes de température.
**La température du plateau**
De façon similaire, tous les matériaux ne nécessitent pas de chauffer le plateau à la même température, certains peuvent même s'imprimer sur des plateaux non-chauffants. Pour certains filaments comme l'ABS, il est indispensable de chauffer le plateau pour éviter que le filament se refroidisse trop vite et que la pièce subisse du warping (cf plus bas).
**Les paramètres de rétraction**
La rétraction est le fait que le filament soit tiré dans l'extrudeur aux moments où il n'est pas en train d'imprimer. Si la rétraction est désactivée, le filament peut continuer à couler à des moments non souhaités et causer du "stringing". C'est pourquoi elle est activée de façon générale, sauf pour certaines matières comme le TPU. On peut en régler des paramètres comme la longueur de filament rétractée, la vitesse de rétraction, ou encore la distance minimale entre deux rétractions.
**La ventilation**
La tête d'impression est parfois équipée de ventilateurs, dont la puissance peut être ajustée. Ces ventilateurs peuvent jouer un rôle multiple, qui est à la fois de refroidir certaines parties de l'extrudeur (la partie haute) et de refroidir la pièce en train d'être imprimée. Encore une fois, ce refroidissement est tantôt crucial (pour le PLA) tantôt à proscrire (ABS).
**La vitesse d'impression**
Parmi les dizaines d'autres réglages possibles, citons enfin la vitesse d'impression. Si vous utilisez les préréglages, vous constaterez probablement que les aides à l'adhérence ou les premières couches de la pièce s'impriment plus lentement que les couches supérieures. Cela va globalement aider à assurer une bonne adhérence et des premières couches fiables. C'est un paramètre qui peut s'ajuster, comme le nombre de couches concernées par cette faible vitesse d'impression. Encore une fois, certains matériaux ont besoin d'être imprimés particulièrement lentement, comme le TPU.
#### Derniers conseils avant d'exporter votre gcode
**Tenir compte du rétrécissement**
Les pièces imprimées avec cette technologie ne reproduisent pas avec une fidélité absolue ce que vous avez pu observer dans le slicer, en particulier elles sont sujettes à un léger rétrécissement (*shrinkage*). Cela peut par exemple être problématique quand vous avez des trous dans votre pièce pour insérer des vis ou emboîter d'autres pièces : leurs dimensions ont tendance à être plus faibles.
Cela est dû aux variations de température : lorsque le plastique fondu refroidit, il se rétracte. C'est donc un phénomène qui est plus marqué sur les plastiques qui sont portés à une plus haute température. Ainsi les pièces imprimées en ABS rétrécissent en moyenne plus que les pièces imprimées en PLA.
Il faut donc anticiper ce rétrécissement et prévoir une certaine tolérance au niveau des assemblages. D'où l'importance d'imprimer d'abord une ou deux pièces pour voir si tout fonctionne avant de lancer dans 10 pièces en même temps !
Voir aussi le chapitre suivant: [L'impression FDM: Calibration](https://wiki.fablab.sorbonne-universite.fr/BookStack/books/techniques-de-base/page/limpression-fdm-calibration "L'impression FDM: Calibration")
**Se méfier du warping**
Un autre effet des variations de températures est le warping : lorsque les couches inférieures commencent à refroidir, elles se rétractent jusqu'à parfois se décoller du plateau. Comme le rétrécissement abordé précédemment, les plastiques qui doivent être amenés à plus haute température sont plus sensibles au warping, comme l'ABS.
Par ailleurs le warping est plus susceptible d'advenir si la couche inférieure est très étendue. Plusieurs astuces permettent de réduire les chances de warping (augmentation de la température du plateau, réduction du refroidissement par les ventilateurs, ajout d'une bordure pour renforcer l'adhérence, positionnement de petits disques "oreilles de souris" aux coins de la pièce...). Malheureusement, le warping peut tout à fait survenir vers la fin de l'impression alors que tout s'est bien déroulé sur les premières couches...
**Un bon réflexe peut être d'ajouter une jupe à votre impression**
Cette sorte de périmètre externe en une seule couche vous permet à la fois de mieux vous rendre compte des dimensions de votre impression et de voir dès le début s'il y a des problèmes d'horizontalité du plateau et d'extrusion du filament.
#### Ultimes conseils au lancement d'une impression
Vérifiez les dimensions, plusieurs fois
Vérifiez qu'il y a assez de filament dans la bobine
Vérifiez que la durée et la quantité de matière indiquées par le slicer sont cohérentes avec celles qui s'affichent sur l'écran de l'imprimante
Vérifiez que le plateau est propre
Surveillez toujours les premières couches
Conseil classique mais incontournable : toujours surveiller les premières couches. Beaucoup de problèmes peuvent en effet être identifiés dès ce moment là (par exemple les problèmes de calibration du niveau du plateau, les soucis d'extrusion...). Prévoyez-donc ce temps-là quand vous venez au Fablab pour une impression !
#### Et pour finir...
Remplissez le [journal des impressions](https://wiki.fablab.sorbonne-universite.fr/BookStack/books/petits-projets/page/journal-des-impressions) pour assurer une continuité dans la maintenance et le diagnostique des machines
Soyez délicats avec les spatules quand vous retirez votre impression : ne pas orienter le tranchant vers le revêtement !
Laissez le plateau propre quand vous avez fini d'utiliser la machine
Auteure: Clara Devanz, sur le [wiki du FabLab de Sorbonne Université](https://wiki.fablab.sorbonne-universite.fr/BookStack/books/techniques-de-base/page/limpression-fdm-parametres-a-prendre-en-compte)
[ Attribution-NonCommercial 4.0 International (CC BY-NC 4.0) ](https://creativecommons.org/licenses/by-nc/4.0/)
# L'impression FDM: Calibration des imprimantes 3d
Pour évaluer la précision des imprimantes 3d, des éprouvettes ont été imprimées, puis les dimensions mesurées et comparées à celle du modèle. Cela a été fait avec 2 matériaux: PLA et ABS, avec et sans radeau.Deux éprouvettes ont été utilisées: une apellée *eprouvette*, permettant des mesures dans les 3 dimensions:
[](https://wiki.fablab.sorbonne-universite.fr/wiki/lib/exe/fetch.php?media=wiki:tutoriels:eprouvette.png "wiki:tutoriels:eprouvette.png")
et une apellée *eprouvette-ronde*, pour éliminer de potentiels effets locaux aux angles:
[](https://wiki.fablab.sorbonne-universite.fr/wiki/lib/exe/fetch.php?media=wiki:tutoriels:eprouvette-ronde.png "wiki:tutoriels:eprouvette-ronde.png")
## Paramètres affectant les dimensions
On suppose que les differences de dimensions entre l'objet imprimé et le modèle sont liées à 2 phénomènes:
-
une différence entre l'épaisseur théorique du filament déposé (0,4mm en x-y), et son épaisseur réelle. Nous apellerons cette différence **Exy** et **Ez** (ce n'est pas la même horizontalement et verticalement). Elle est indépendante de la taille, et affecte chaque bord dans le plan horizontal (elle augmente ou diminue une dimension selon que l'on mesure l'extérieur ou l'intérieur d'une pièce) [](https://wiki.fablab.sorbonne-universite.fr/BookStack/uploads/images/gallery/2022-12/eprouvette-exy.svg "eprouvette-exy.svg")
-
On suppose que verticalement elle n'affecte que la première couche.
-
La contraction (ou retrait) du matériau lors de son refroidissement. Elle est proportionelle à la taille, nous apellerons **R** le facteur de retrait (qui est le même dans les 3 dimensions).[](https://wiki.fablab.sorbonne-universite.fr/BookStack/uploads/images/gallery/2022-12/eprouvette-r.svg "eprouvette-r.svg")
Dans le plan horizontal Une dimension extérieure réelle sera donc: L\*R+2\*Exy, une dimension intérieure l\*R-2\*Exy. Si on apelle Lm et lm les dimensions mesurées sur l'éprouvette, on a:
Lm = L\*R+2\*Exy et lm = l\*R-2\*Exy
Ce qui donne: R = (lm + Lm) / (l+L)
Exy = (Lm - L\*R) / 2 ou Exy = (l\*R - lm) / 2
Pour tenir compte des erreurs de mesure nous utiliserons (moyenne des deux Exy précédents): Exy = (Lm - lm + (l - L)\*R) / 4
Sur l'axe Z nous n'avons pas de mesures intérieures, mais 2 mesures extérieures. Nous avons donc Hm1 = H1 \* R + Ez et Hm2 = H2 \* R + Ez; ce qui donne, en théorie
R = (Hm2 - Hm1) / (H2 - H1), et Ez = (Hm1 + Hm2 - (H1 + H2) \* R) / 2
Mais pour les calculs, nous utiliseront uniquement Ez = (Hm1 + Hm2 - (H1 + H2) \* R) / 2, avec le R calculé dans le plan horizontal qui semble plus précis.
## Résultats
L'ensemble des fichiers (modèles openscad et STL, paramètres d'impression, gcode, dessins et feuilles de calcul) sont ici: [https://gitlabsu.sorbonne-universite.fr/fablabsu/projets-fablab-publiques/eprouvettes-imprimantes-3d](https://gitlabsu.sorbonne-universite.fr/fablabsu/projets-fablab-publiques/eprouvettes-imprimantes-3d "https://gitlabsu.sorbonne-universite.fr/fablabsu/projets-fablab-publiques/eprouvettes-imprimantes-3d")
Après une série d'impression les éprouvettes rondes se sont avérées difficile à mesurer, et ne montrent pas de résultats différents par rapport au modèle rectangulaire.
Une deuxième séries d'impression ont été faites pour les modèles rectangulaires sur les mêmes imprimantes, et une troisième série en PLA sur une imprimante différente, pour étudier la variabilité des tolérences. L'ensemble des mesures et calculs sont dans le fichier calculs.ods de l'archive. Le tableau mesure donne les valeurs min/max mesurées pour chaque impression, ainsi que les calculs de moyenne et d'écart. Pour les mesures dans le plan horizontal, deux séries de mesures ont été réalisées, en bas (au plus près du plateau) et en haut.
[ mesures et calculs](https://wiki.fablab.sorbonne-universite.fr/BookStack/attachments/61 "calculs.pdf (18 KB)")
### impression PLA
Les dimensions mesurées sur les éprouvettes en PLA. Les dimensions du modèle sont en vert, la moyenne des mesures en orange avec l'écart.
#### avec radeau:
Cela done un R de 0,999 et Exy d'environ 0,1, et un Ez de 0. Les mesures de l'éprouvette ronde semblent fausse, en particulier les mesures intérieures.
### impression ABS
Les dimensions mesurées sur les éprouvettes en ABS. Les dimensions du modèle sont en vert, la moyenne des mesures en orange avec l'écart.
#### avec radeau:
Cela done un R autour de 0,995 et Exy autour de 0,2, nettement plus important en bas; et un Ez inférieur à 0,1.Les mesures de l'éprouvette ronde semblent fausse, en particulier la plus grande mesure extérieure.
## Conclusion
Comme attendu le facteur de retrait de l'ABS est plus important que pour le PLA (5% vs 1%). Dans ideamaker on peut prendre cela en compte avec la fonction scale, en indiquant un coefficient 1/R (donc par exemple 100,5% pour l'ABS).
Le Exy doit pouvoir être pris en compte dans ideamaker dans les paramètres du matériaux, onglet «Layer», «Dimensional Compensation». Cela reste à tester.
La présence du radeau agmente significativement la précision de l'impression dans le plan horizontal, surtout pour l'ABS ou les écarts entre haut et bas sont de l'ordre de 0,5mm. Dans le plan vertical le radeau permet également d'atténuer fortement les écarts entre différentes parties de la pièce (probablement dues à des défauts de planéité du plateau).
Source : [wiki du FabLab de Sorbonne SU](https://wiki.fablab.sorbonne-universite.fr/BookStack/books/techniques-de-base/page/limpression-fdm-calibration)
Licence ?
# Imprimante 3D Résine
Vous trouverez ici, une formation afin d'apprendre à utiliser une imprimante 3D Résine
# Impression résine Zortrax
### Caractéristiques
- [https://zortrax.com/3d-printers/inkspire/](https://zortrax.com/3d-printers/inkspire/)
[](https://innovation.iha.unistra.fr/uploads/images/gallery/2024-06/PXWimage.png)
- Poids 10.35kg
- Dimensions machine : 31.5 x 31.2 x 53.0 cm
- Volume imprimable : 132 x 74 x 175 mm
- Formats supportés : .cws, .zcodex, .sl1, .zip
- Formats supportés par le slicer Z-Suite : .stl, .obj, .dxf, .3mf, .ply
- Technologie : LCD UV (~200H de durée de vie de l'écran)
- Taille de pixel : 0.05 mm
- Épaisseur de couche : 0.01, 0.05, 0.1mm
- Résine 405nm
- Prix : à partir de 1899€
### Principe de fonctionnement
[](https://innovation.iha.unistra.fr/uploads/images/gallery/2024-06/78jimage.png)
### Comment lancer une impression résine
### **Phase 1 : Choisir ou modéliser un fichier 3D**
1. **Rechercher un modèle sur Thingiverse**
- Rendez-vous sur [Thingiverse](https://www.thingiverse.com/).
- Utilisez la barre de recherche pour trouver un modèle qui vous intéresse.
- Téléchargez le fichier 3D (à généralement au format `.STL` ou `.OBJ`).
2. **Modéliser un fichier sur un logiciel de CAO (Exemple : Onshape, Tinkercad, Solidworks)**
- Exportez votre création au format `.STL` une fois terminé.
---
### **Phase 2 : Importer le fichier dans Z-Suite**
1. **Ouvrir Z-Suite**
- Lancez Z-Suite sur votre ordinateur.
- Assurez-vous que le logiciel est configuré pour votre imprimante (Zortrax Inkspire).
2. **Importer le fichier**
- Cliquez sur « Ajouter un fichier » ou glissez directement votre fichier `.STL` dans le logiciel ici une chaussure.
- Vérifiez que votre modèle est correctement chargé dans l’espace de travail.
- [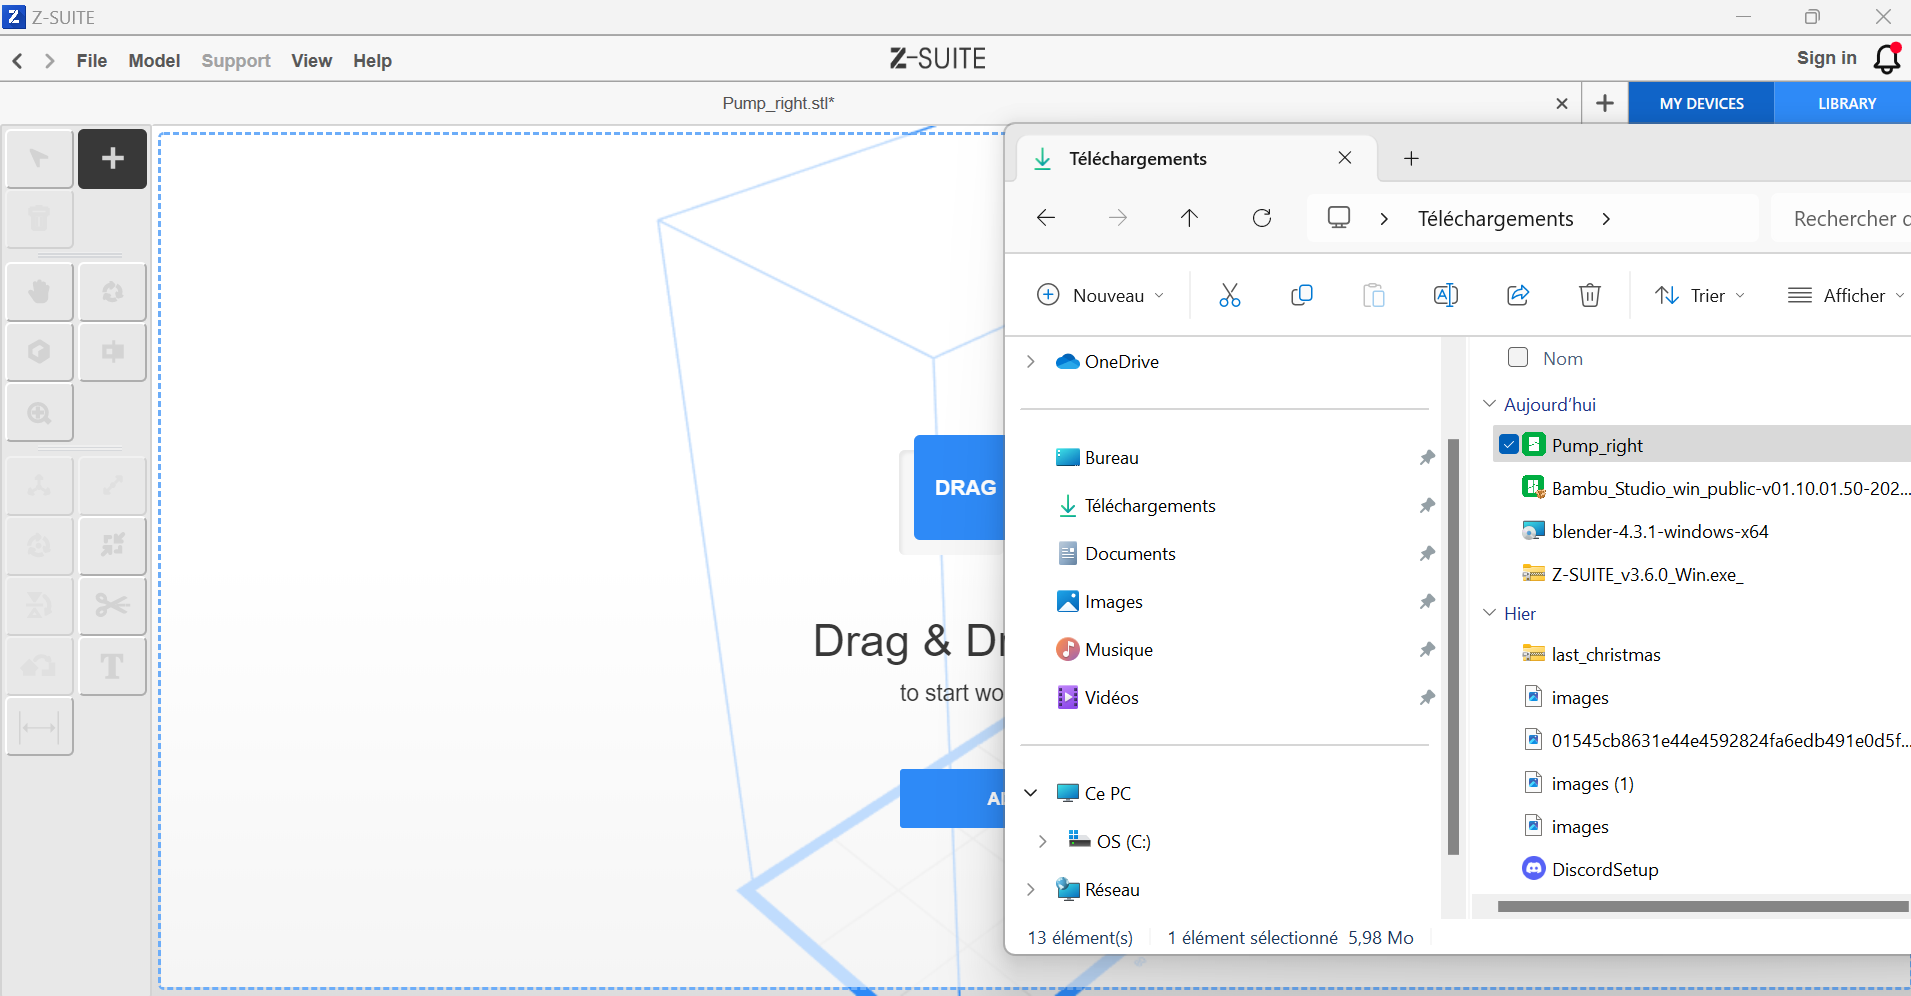](https://innovation.iha.unistra.fr/uploads/images/gallery/2024-12/7s0image.png)
- Pour éditer votre objet sur le logiciel vous avez une barre d'outil sur la gauche du logiciel.
- [](https://innovation.iha.unistra.fr/uploads/images/gallery/2024-12/6Geimage.png)
---
### **Phase 3 : Bien paramétrer le modèle**
1. **Orientation du modèle**
- Orientez votre modèle pour réduire la surface de contact avec le plateau (utile pour minimiser les supports).
- Privilégiez une légère inclinaison pour éviter les défauts d’impression (par ex. : 30°).
- [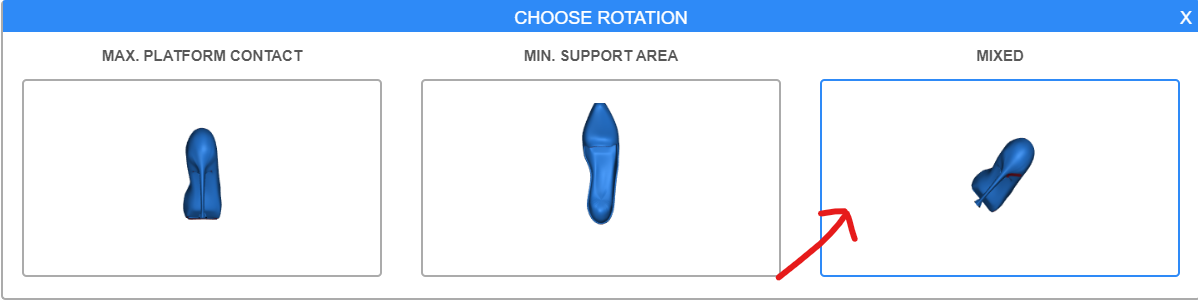](https://innovation.iha.unistra.fr/uploads/images/gallery/2024-12/Et4image.png)
2. **Réglages de résine**
- Consultez les recommandations du fabricant de votre résine (durée d’exposition, épaisseur de couche, etc.).
- Paramétrez ces valeurs dans Z-Suite :
- **Épaisseur de couche**.
- **Temps d’exposition** (par couche et pour la base).
- [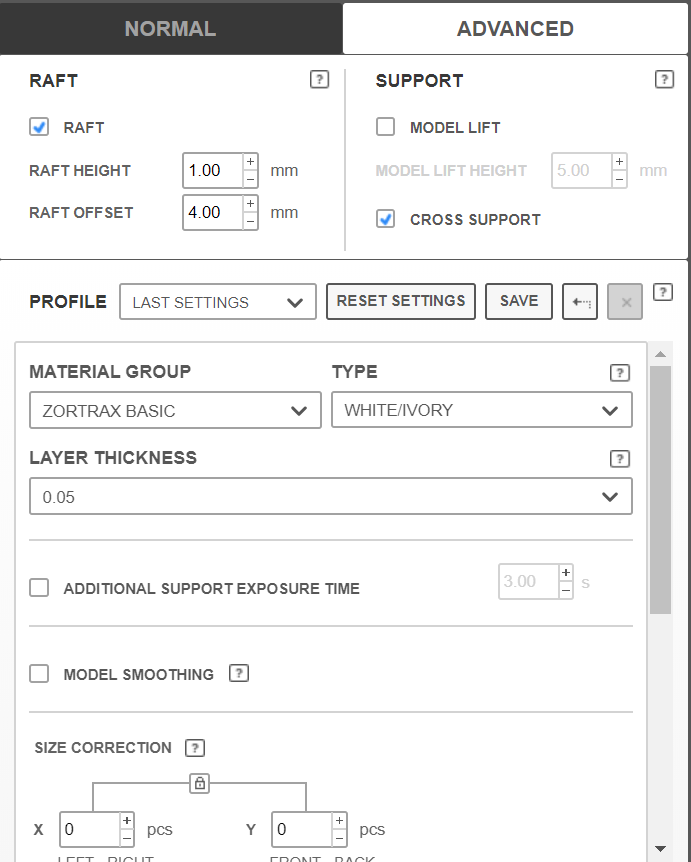](https://innovation.iha.unistra.fr/uploads/images/gallery/2024-12/dBximage.png)
3. **Génération des supports**
- Activez l’option de génération automatique des supports.
- Ajustez les supports si nécessaire pour bien maintenir les parties suspendues du modèle.
- [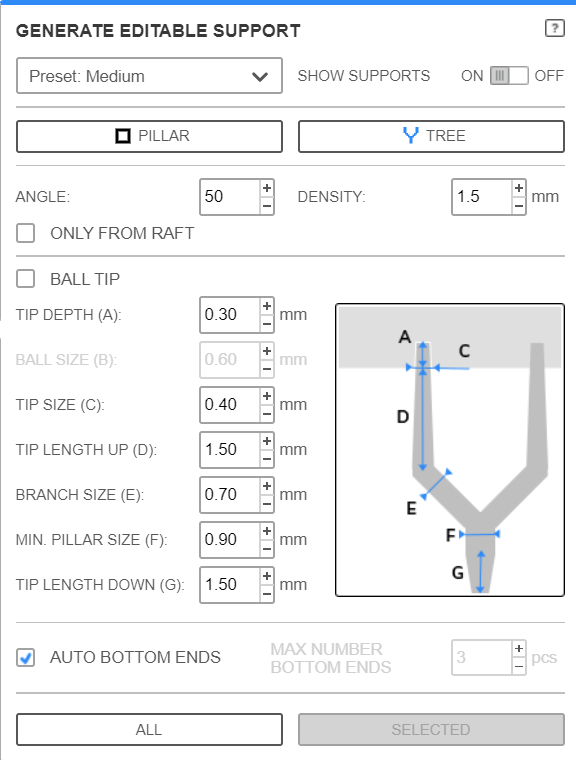](https://innovation.iha.unistra.fr/uploads/images/gallery/2024-12/iXVimage.png)
- Appuyer sur le bouton "All" pour les activer.
4. **Vérifications finales**
- Utilisez l’aperçu pour vérifier chaque couche de votre modèle.
- [](https://innovation.iha.unistra.fr/uploads/images/gallery/2024-12/C56image.png)
- Sauvegardez le fichier en format compatible avec votre imprimante sur la clé.
- [](https://innovation.iha.unistra.fr/uploads/images/gallery/2024-12/TMFimage.png)
---
### **Phase 4 : Lancer l’impression sur l’imprimante**
1. **Préparer l’imprimante**
- Nettoyez le plateau d’impression pour assurer une bonne adhésion.
- Remplissez le bac de résine avec votre produit et bien secouer le bidon.
2. **Transférer le fichier**
- Chargez le fichier sur l’imprimante via une clé USB.
3. **Lancer l’impression**
- Accédez au menu de l’imprimante et sélectionnez votre fichier.
- Vérifiez les paramètres affichés, puis démarrez l’impression.
4. **Suivi et fin d’impression**
- Surveillez les premières minutes pour vous assurer que la base adhère correctement au plateau.
- Une fois l’impression terminée, retirez le modèle avec soin.
---
### **Après l’impression : Post-traitement**
1. **Nettoyage**
- Dégagez les supports avec précaution.
- Nettoyez le modèle avec de l’alcool isopropylique pour éliminer les résidus de résine.
2. **Durcissement**
- Placez le modèle sous une lampe UV ou dans une machine de post-curing pour finaliser le durcissement.
### Nettoyage du bain
- Mettre des gants
- Ouvrir le capot
- Dévisser le plateau en tirant vers soi
- mettre la pièce et le plateau dans le bain d'alcool par ex. 300s
- Retirer la pièce avec une spatule
Attention à ne pas abimer la surface du plateau, évitez les objets métalliques
- si besoin remettre le plateau et les pièces dans le bain, ex. 300s supplémentaires
- Dévisser le bac et verser le surplus dans le bidon à travers le filtre (entonnoir et grille en métal)
- nettoyer le bac à l'Alcool isopropylique + papier
### Maintenance et actions de nettoyage
[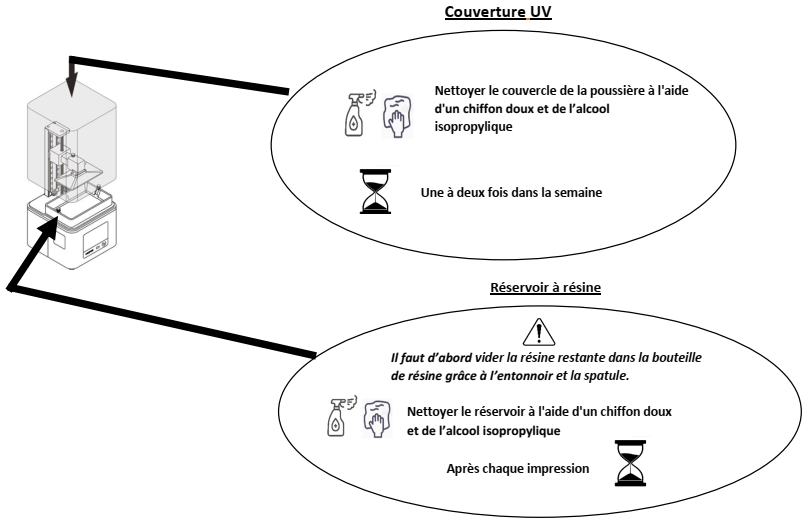](https://innovation.iha.unistra.fr/uploads/images/gallery/2024-06/3HZimage.png)
[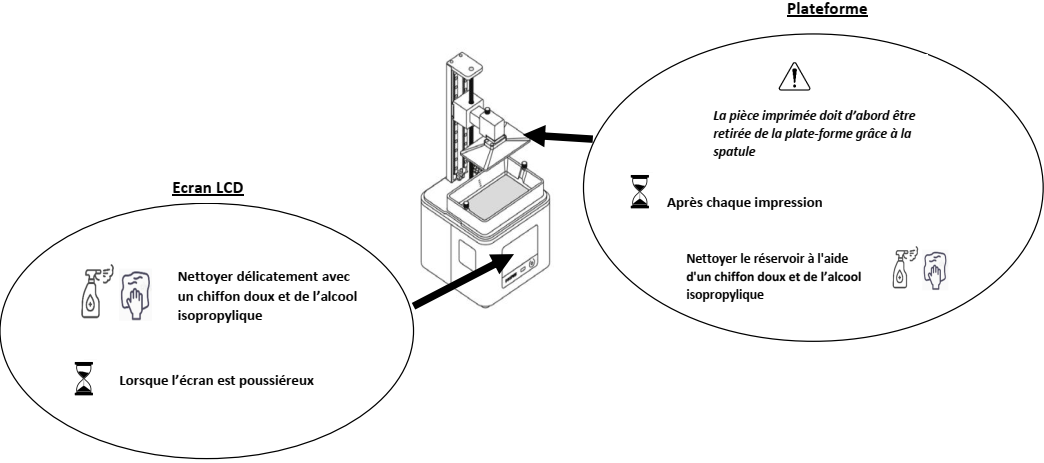](https://innovation.iha.unistra.fr/uploads/images/gallery/2024-06/image.png)
### Matériel inclus
[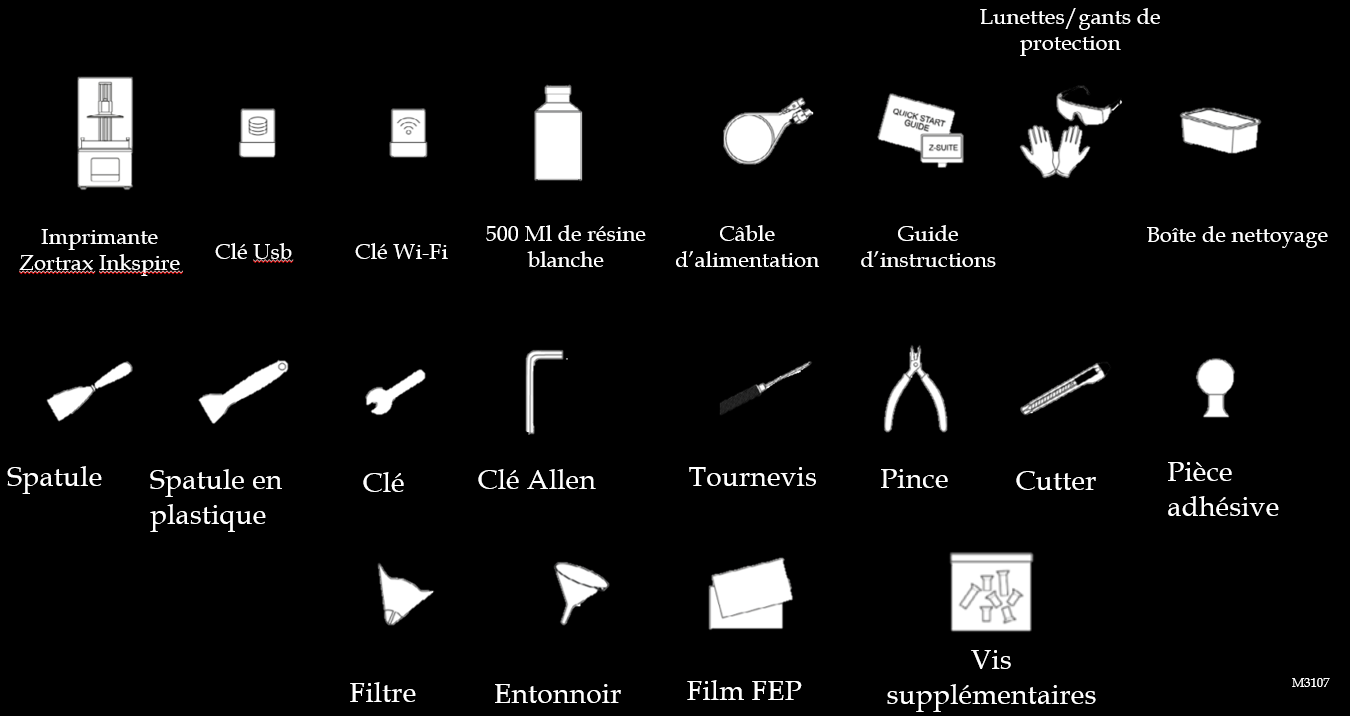](https://innovation.iha.unistra.fr/uploads/images/gallery/2024-06/jVoimage.png)
### Arbre des défaillances
- Si l'impression est transparente et/ou peu rigide --> Vous avez probablement oublié de mélanger la résine et imprimé avec principalement du solvant --> bien secouer le bidon de résine avant usage
- Si l'impression est peu rigide --> exposer la pièce 24H aux UV du soleil en la retournant pour que toutes les faces soient exposées
# Tutoriel – Impression 3D Résine (Photon Mono X / Mars 2 / Mars 2 Pro)
## 1. Introduction à l’impression 3D RésineL’impression 3D résine fonctionne par photopolymérisation : une source lumineuse UV durcit la résine liquide couche par couche à travers un écran LCD. Le plateau se soulève progressivement, formant l’objet. Ce procédé permet d’obtenir des pièces très précises et fines, idéales pour la bijouterie, les figurines ou les prototypes.2. Présentation des imprimantes du FabLab
Modèle
Taille max (mm)
Particularités
Anycubic Photon Mono X
192 × 120 × 245
Grand format, rapide, haute résolution 4K
Elegoo Mars 2
129 × 80 × 150
Compacte, fiable, écran monochrome 2K
Elegoo Mars 2 Pro
129 × 80 × 160
Version améliorée avec meilleure filtration et châssis métal
## 3. Choisir son modèle 3DPour utiliser les imprimantes 3D, vous avez le choix de créer votre propre modèle ou bien de prendre des modèles déjà faits par d’autres utilisateurs sur internetCréer son propre modèle 3D : Utiliser des logiciels de CAO comme Onshape, Blender, Fusion 360 ou bien encore Solidworks. Lien du tutoriel pour l’utilisation de Onshape :
[https://innovation.iha.unistra.fr/books/2-fablab-formation-machines-logiciels/page/modelisation-3d-onshape](https://innovation.iha.unistra.fr/books/2-fablab-formation-machines-logiciels/page/modelisation-3d-onshape)
Exportez votre modèle au format “.stl”.Trouver un modèle 3D existant :Il existe différents sites :
- https://www.thingiverse.com/
- https://www.printables.com/
- [https://makerworld.com/fr](https://makerworld.com/fr)
- [https://www.myminifactory.com/](https://www.myminifactory.com/) (contient des éléments payants)Télécharger votre modèle au format ”.stl”
## 4. Configuration de base du logicielLychee Slicer est le logiciel utilisé pour préparer vos fichiers avant impression. Il convertit le modèle 3D (.stl) en un fichier exploitable par l’imprimante (.photon, .cbddlp, etc.).
### Installation Téléchargez Lychee Slicer ici :[https://mango3d.io/download-lychee-slicer](https://mango3d.io/download-lychee-slicer)
### Importation du modèleGlissez votre fichier “.stl” dans Lychee ou cliquez sur “Add Files” et chercher le modèle dans l’explorateur de fichier. 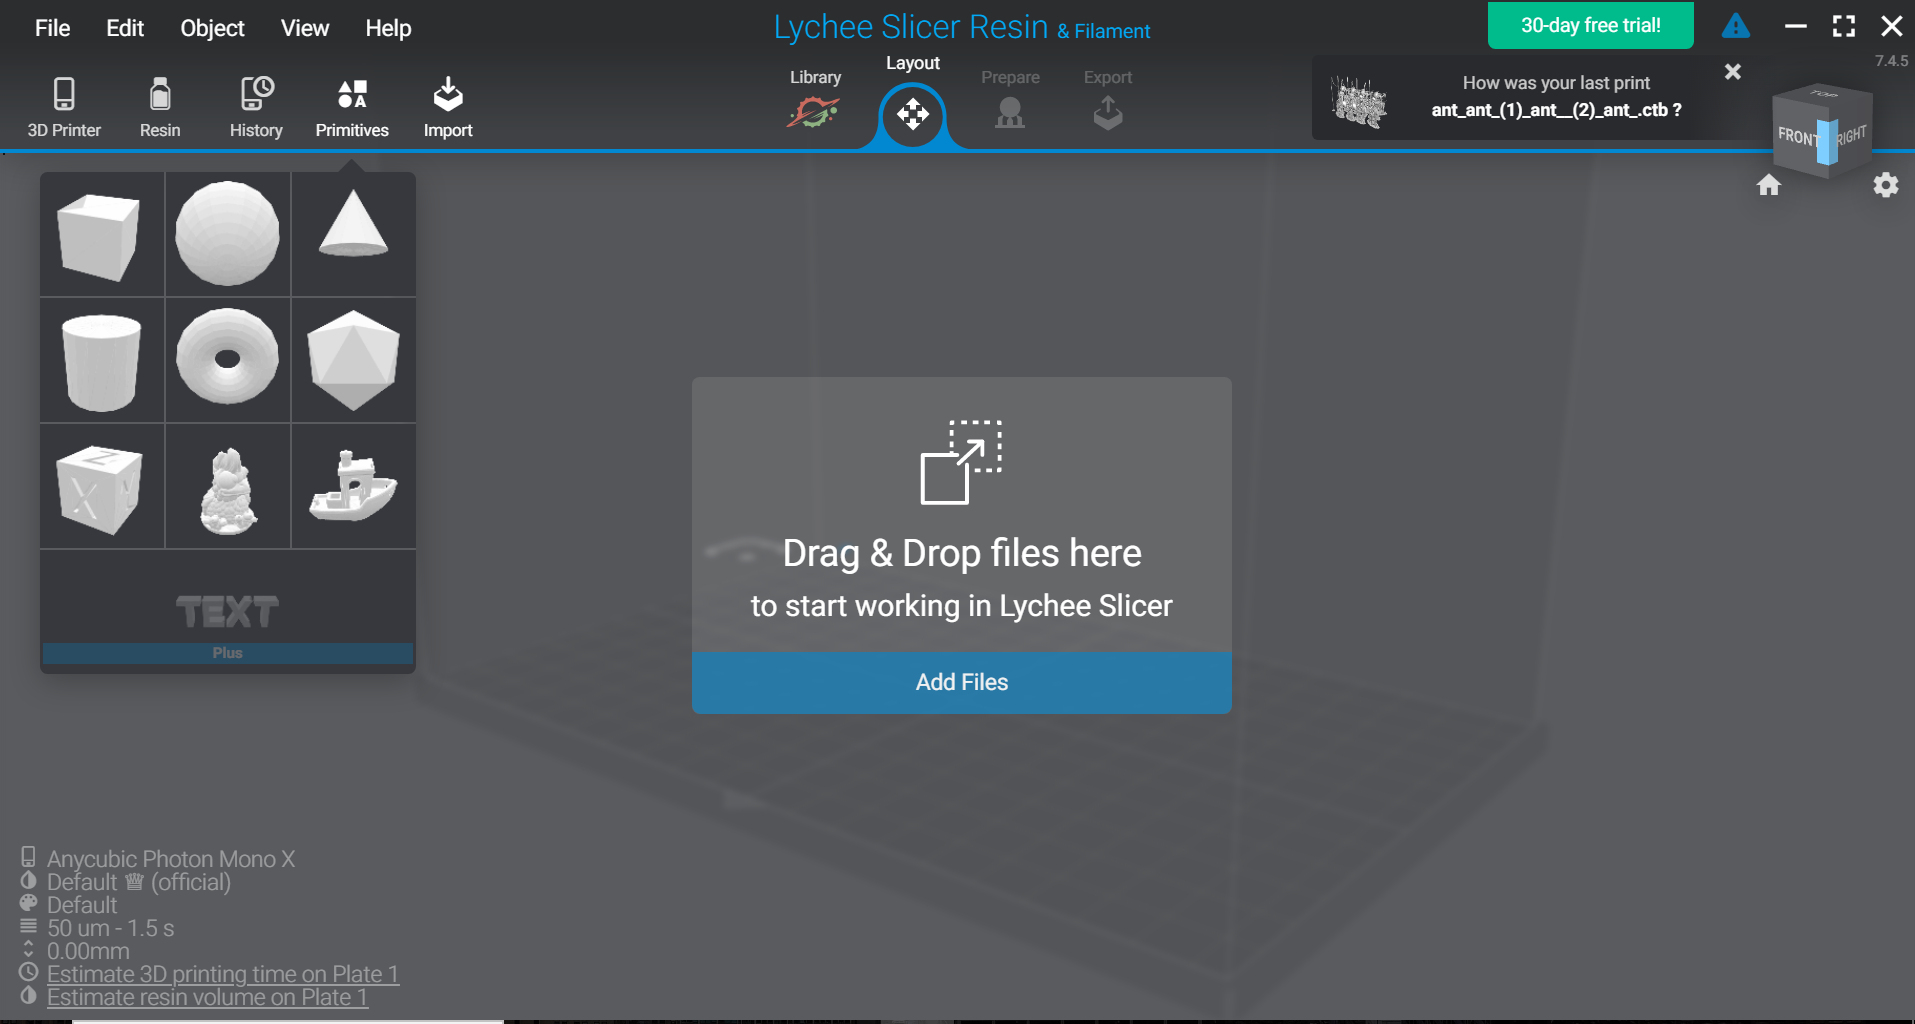
### Choix des machines1. Allez dans “3D Printer”2. Cliquez sur “Add”3. Cliquez sur “Resin 3D Printer”4. Dans le nouvel onglet qui apparaît, vous pouvez rechercher votre imprimante et la sélectionner.Au Fablab, nous avons les imprimantes :
- Anycubic Photon Mono X
- Elegoo Mars
- Elegoo Mars 2 Pro5. Sélectionner la machine que vous souhaitez utiliser pour l’impression.
### 5. Choix de la résine et paramètres1. Restez dans l’onglet de choix des imprimantes 2. Descendez en bas de l’onglet et cliquez sur “Add New Resin”3. Sélectionner la résine que vous utilisez : **Printer Brand** = Marque de l’imprimante utilisée**Printer Model** = Modèle de l’imprimante utilisée**Resin Brand** = Marque de la résine utilisée**Resin Name** = Nom de la résine utilisée**Resin Color** = Couleur de la résine utiliséeSi la résine que vous utilisez n’est pas répertoriée, il faudra paramétrer manuellement la résine. Cliquez sur “Add New Resin” en bas de l’onglet.Entrez les informations du fabricant de la résine.NB : Les informations les plus importantes pour le paramétrage sont généralement indiquées sur le contenant ou sur l’emballage.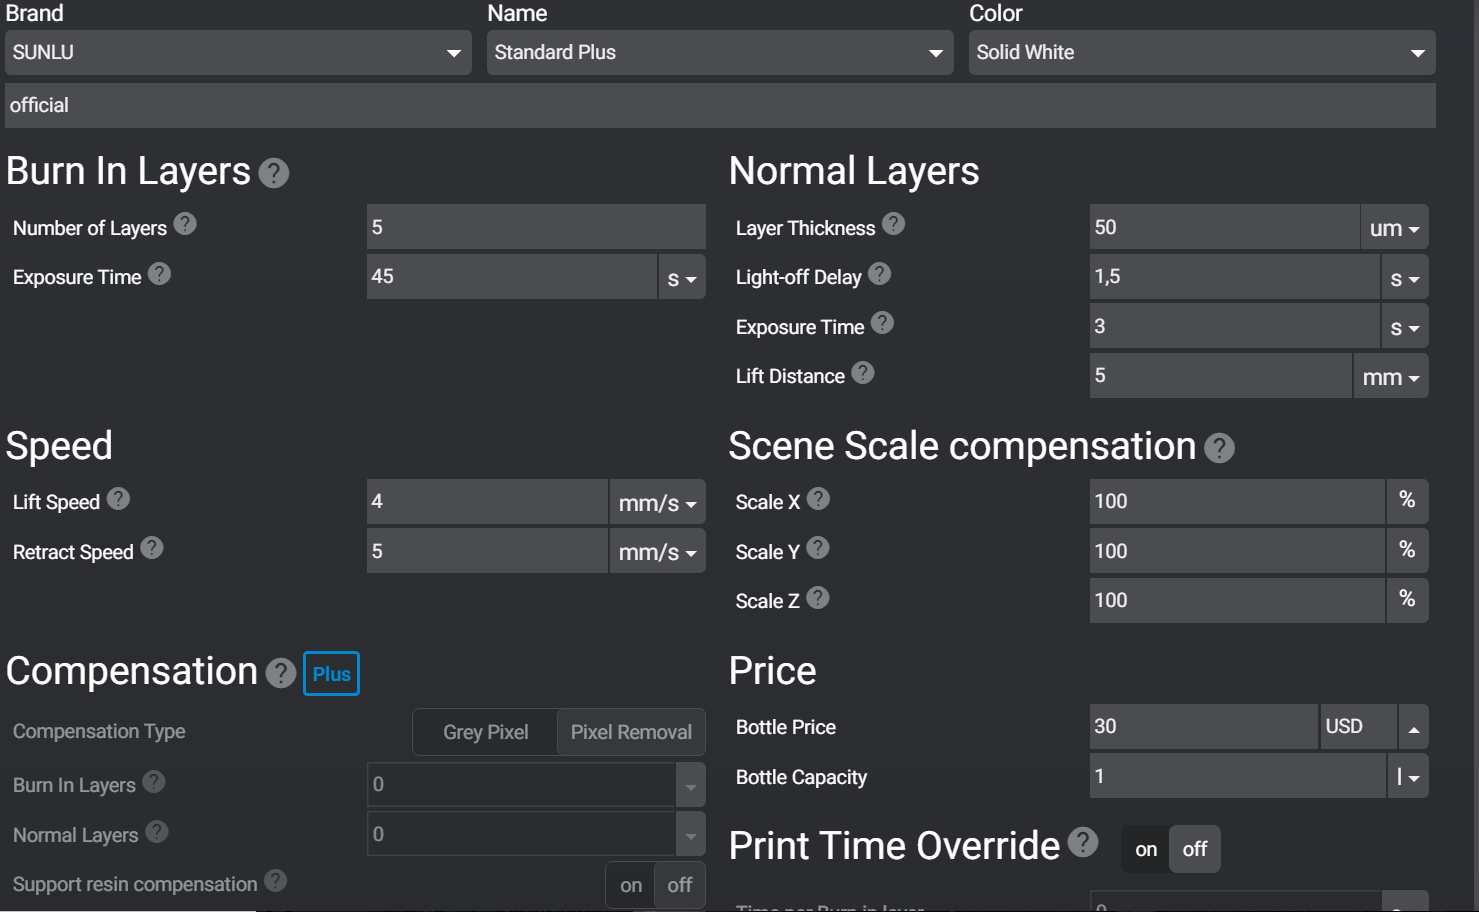4. Enregistrez les modifications et passez à l’étape suivante.6. Paramétrage du modèle 1. A gauche de l’écran, vous disposez de différents outils pour placer votre ou vos modèles correctement sur le plateau.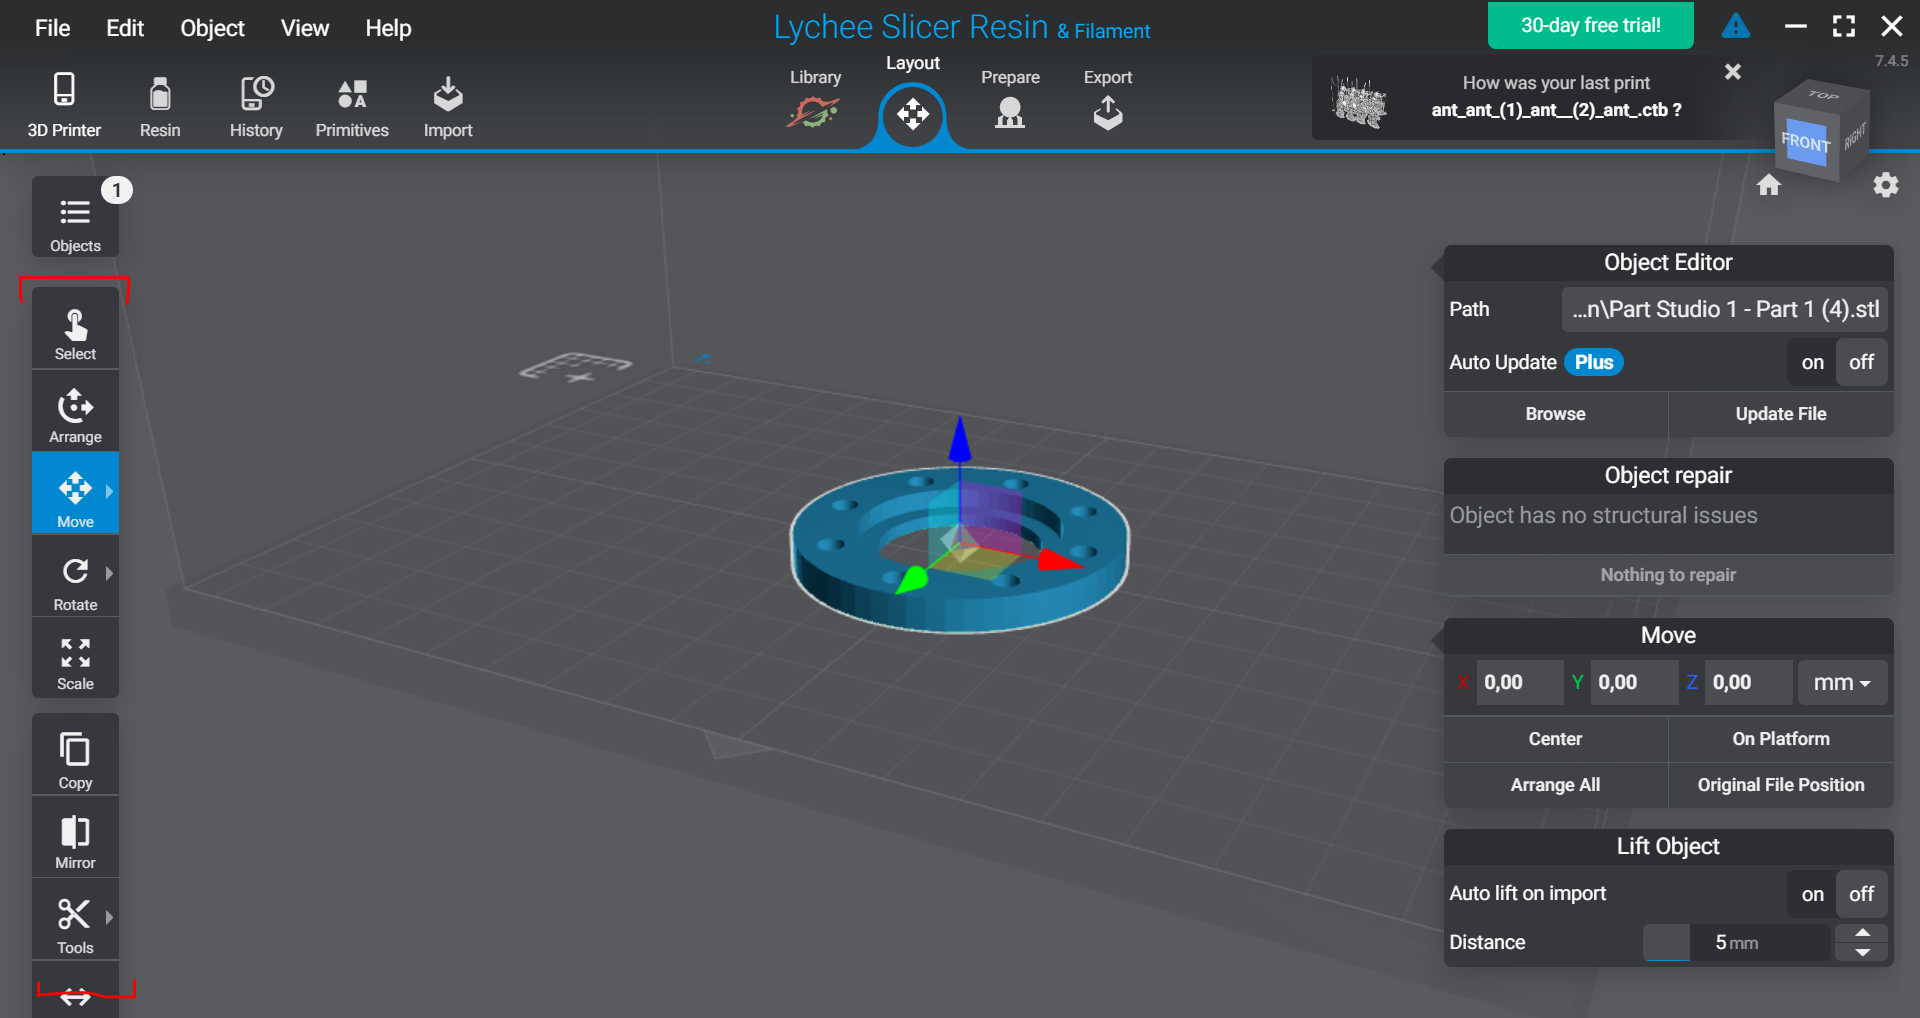Select : Permet de sélectionner votre modèleMove : Permet de déplacer le modèle où l’on souhaite. NB : Si vous avez plusieurs modèles, il vous suffit de cliquer sur “Arrange All” pour les disposer automatiquement et de façon bien ordonnée sur le plateauRotate : Permet d’orienter la pièce dans différents sens selon les axes X, Y et Z. Attention : Sélectionner votre modèle et utiliser l’outil “Auto orientation”Votre modèle ne doit jamais être imprimé à platNB : Pourquoi votre modèle ne doit jamais être imprimé à plat :
### **Risque de succion (effet ventouse)**
Lorsqu’une pièce est imprimée totalement à plat sur le plateau, la première couche couvre une grande surface en contact direct avec le film FEP. Au moment du levage, cela crée un vide entre la pièce et le film, empêchant l’air de circuler. Cette dépression génère une forte succion qui peut provoquer :
- Le décollement de la pièce du plateau,
- L’arrachement du film FEP,
- Ou un blocage du moteur de l’axe Z.
### **Mauvais pelage des couches**
Pendant l’impression, chaque couche doit se détacher du film FEP. Si la pièce est posée à plat, la surface à décoller est trop importante. Cela augmente les contraintes mécaniques et peut entraîner :
- Des déformations,
- Des couches irrégulières,
- Des marques visibles sur la surface inférieure.
**Surcure et marques visibles**
Les couches en contact direct avec le plateau reçoivent davantage de lumière UV, car elles restent plus longtemps exposées pendant la phase d’adhérence. Elles deviennent donc trop dures et forment une base brillante ou légèrement écrasée, souvent très différente du reste de la pièce.
**Difficulté de retrait**
Une pièce imprimée à plat adhère fortement au plateau, rendant son retrait difficile. L’usage d’une spatule devient risqué et peut endommager la surface d’adhérence ou casser la pièce.
**Tensions internes et déformations**
Le durcissement UV provoque une légère contraction du matériau. Lorsqu’une pièce est imprimée à plat, cette contraction ne peut pas se répartir uniformément, ce qui entraîne des déformations ou des fissures après impression.
**Bonne pratique : imprimer inclinée et surélevée**
Pour éviter ces problèmes, il est recommandé de toujours :
- Incliner la pièce entre 30° et 45° sur au moins un axe,
- L’élever de 2 à 5 mm au-dessus du plateau à l’aide de supports.
**Cette méthode présente plusieurs avantages :**
- Réduction de l’effet de succion,
- Décollage progressif et régulier,
- Meilleure circulation de la résine,
- Moins de déformations et de marques visibles,
- Retrait plus facile et plus sûr.L’outil “Auto orientation” permet d’optimiser tout cela.Scale : Permet de redimensionner votre modèleCopy : Permet de dupliquer votre modèle 2. Allez dans l’onglet “Prepare”.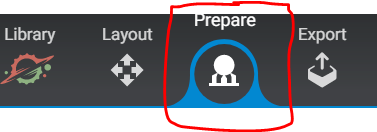3. Appliquer les paramètres comme indiqué ci-dessous et cliquer sur “Generate Automatic Supports”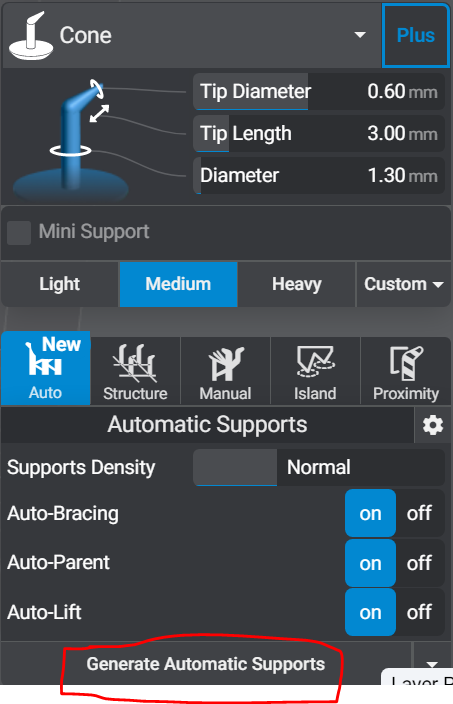4. Exportez votre modèle sur la clé USB de la machine en la sélectionnant dans “Destination” puis cliquez sur “Export slices to file”5. Attendez que le fichier se génère.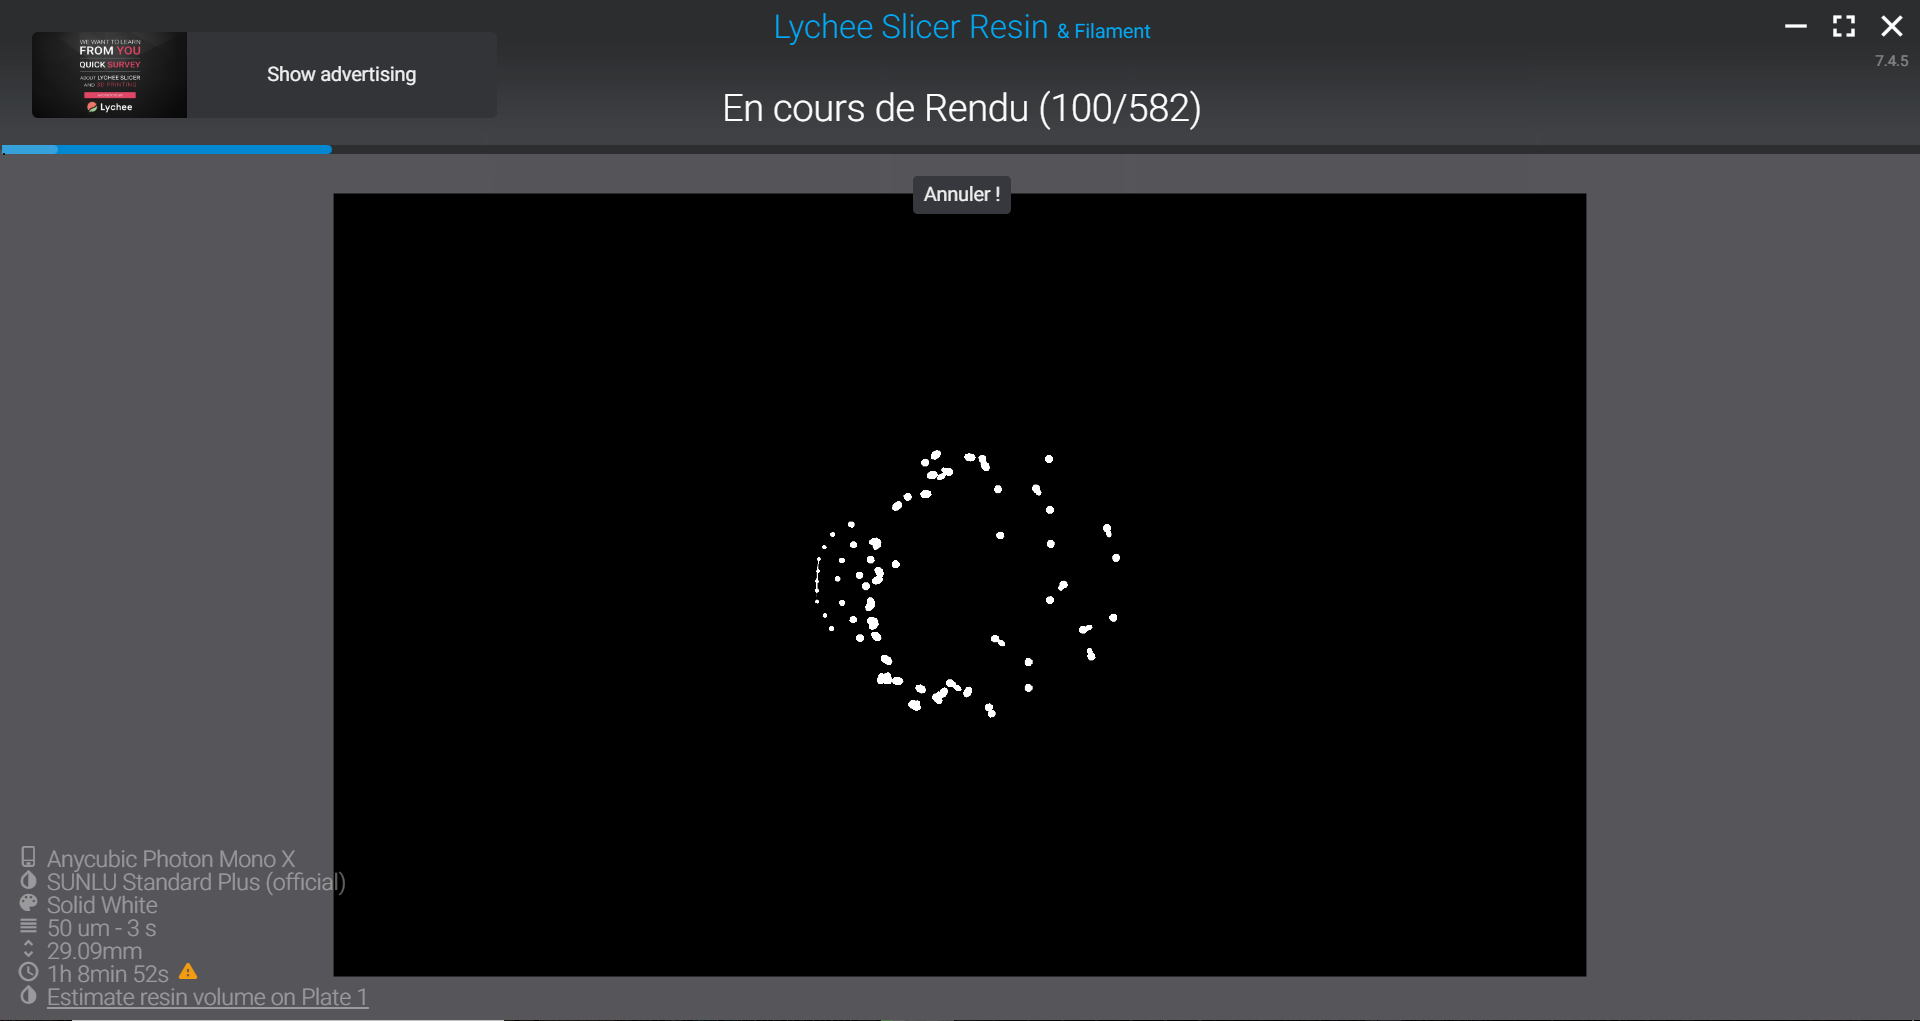6. Éjecter la clé USB et aller sur le poste machine.
## 7. Utilisation de la machine1. Allumer la machine et brancher votre clé USB2. Vérifier le niveau de résine, et remplir si nécessaire (se mettre quelques millilitres en dessous du max pour être tranquille)3. Cliquez sur “Print”, sélectionnez votre fichier, lancer l’impression et fermer le capot.
## 8. Post-traitementAttention : pour les étapes 2 et 4, veuillez vous référer à un responsableUne fois l’impression terminée :1. Retirez la pièce du plateau avec précaution.2. Lavez-la dans un bain d’alcool isopropylique (IPA) ou à l’eau pendant 3 à 5 minutes selon la résine 3. Laissez sécher.4. Polymériser la pièce sous lampe UV ou dans une station de cure pendant 5 à 10 minutes.
# Brodeuse Numérique
# Brodeuse Numérique - Lancement d'une broderie
Notice :
- [https://seafile.unistra.fr/f/4952853dd63b4f1c8571/](https://seafile.unistra.fr/f/4952853dd63b4f1c8571/)
Tuto brodeuse :
- [https://fablab.ledome.info/uploads/machine\_file/300/tuto\_brodeuse\_BROTHER2.pdf](https://fablab.ledome.info/uploads/machine_file/300/tuto_brodeuse_BROTHER2.pdf)
- Logiciel PE DESIGN à partir de la p.45
### Les outils de la brodeuse
[](https://innovation.iha.unistra.fr/uploads/images/gallery/2024-10/outils-broderie-1080p.jpg)
### Récupérer un motif sur internet
Il est possible de récupérer un fichier déjà prêt pour le lancement d'une broderie. Par exemple un fichier au format `.pes`
Voici quelques sites :
### Créer une broderie avec un logiciel
- Logiciel PE Design 11 [https://innovation.iha.unistra.fr/books/2-fablab-formation-machines-logiciels/page/brodeuse-numerique-logiciel-pe-design-11](https://innovation.iha.unistra.fr/books/2-fablab-formation-machines-logiciels/page/brodeuse-numerique-logiciel-pe-design-11)
- Inkscape et Inkstitch : [https://innovation.iha.unistra.fr/books/2-fablab-formation-machines-logiciels/page/extension-inkstitch-pour-la-broderie-avec-inkscape](https://innovation.iha.unistra.fr/books/2-fablab-formation-machines-logiciels/page/extension-inkstitch-pour-la-broderie-avec-inkscape)
### Créer une broderie avec un motif intégré
à compléter
### Préparation du tissu
Utiliser des tissus d'une épaisseur inférieure à 3mm (les tissus plus épais risquent de casser l'aiguille). Pour éviter que la brodeuse abime le tissu à broder, on vient y ajouter un renfort. C'est particulièrement important dans les cas suivants :
- Le tissu est fin
- Le tissu est élastique (tissu synthétique plutôt que coton)
- La trame du tissu se déforme facilement
Il existe 2 types de renforts de broderie
- La viseline : c'est un tissu non tissé servant de support **sous la broderie**
- Normale : **A utiliser avec tout tissu**
- Autocollante : réserver au cas des tissus particulièrement sensibles (fin, élastique) ou quand on brode une toute petite zone.
Le renfort **auto-collant est beaucoup plus cher** (> 10x) que la simple viseline.
- L'avalon : renfort de broderie **hydrosoluble**, à utiliser pour certains tissus
- Utilisé **sur l'endroit** lorsqu'on brode du tissu éponge ou polaire
- Il va aplatir des boucles et permettre à la broderie de rester bien en surface
- A Gauche : avec stabilisateur A Droite : sans stabilisateur
[](https://innovation.iha.unistra.fr/uploads/images/gallery/2023-11/RCaimage.png)[](https://innovation.iha.unistra.fr/uploads/images/gallery/2023-11/tE5image.png)
- Découpez un morceau de renfort de broderie plus grand que le cadre de broderie. Il faut qu'il soit **tenu dans le cadre au moins sur deux bords opposés**
[](https://innovation.iha.unistra.fr/uploads/images/gallery/2023-11/yMXimage.png)[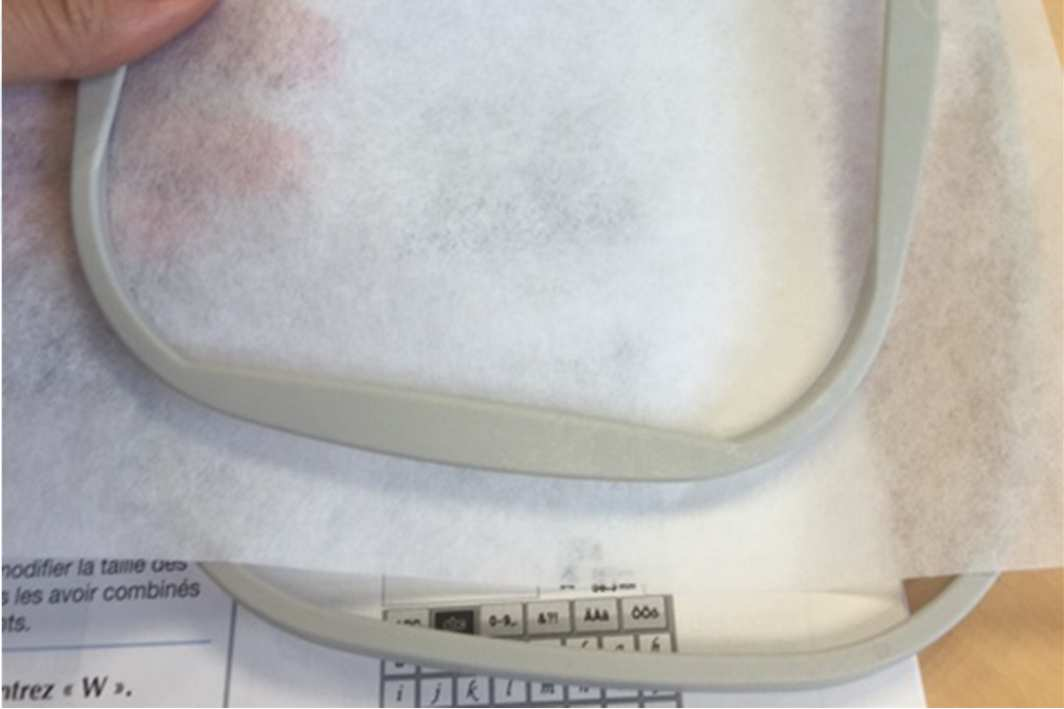](https://innovation.iha.unistra.fr/uploads/images/gallery/2023-11/dZYimage.png)
- Ou alors coller le renfort autocollant sur l'envers du motif
[](https://innovation.iha.unistra.fr/uploads/images/gallery/2023-11/pxl-20231120-141357355.jpg)
- Dévissez la partie basse du cadre de broderie
[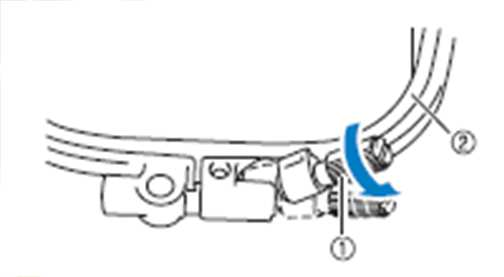](https://innovation.iha.unistra.fr/uploads/images/gallery/2023-11/FJNimage.png)
- Remettre le tissu à l'endroit
[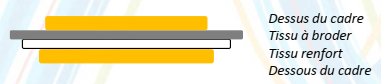](https://innovation.iha.unistra.fr/uploads/images/gallery/2023-11/Mocimage.png)
- Glisser le dessous du cadre sous le renfort (ou "dans" le t-shirt)
- Le dessus du cadre au-dessus du tissu
- Vue de dessus (face visible du tissu) : Face cachée du tissu (côté stabilisateur) :
[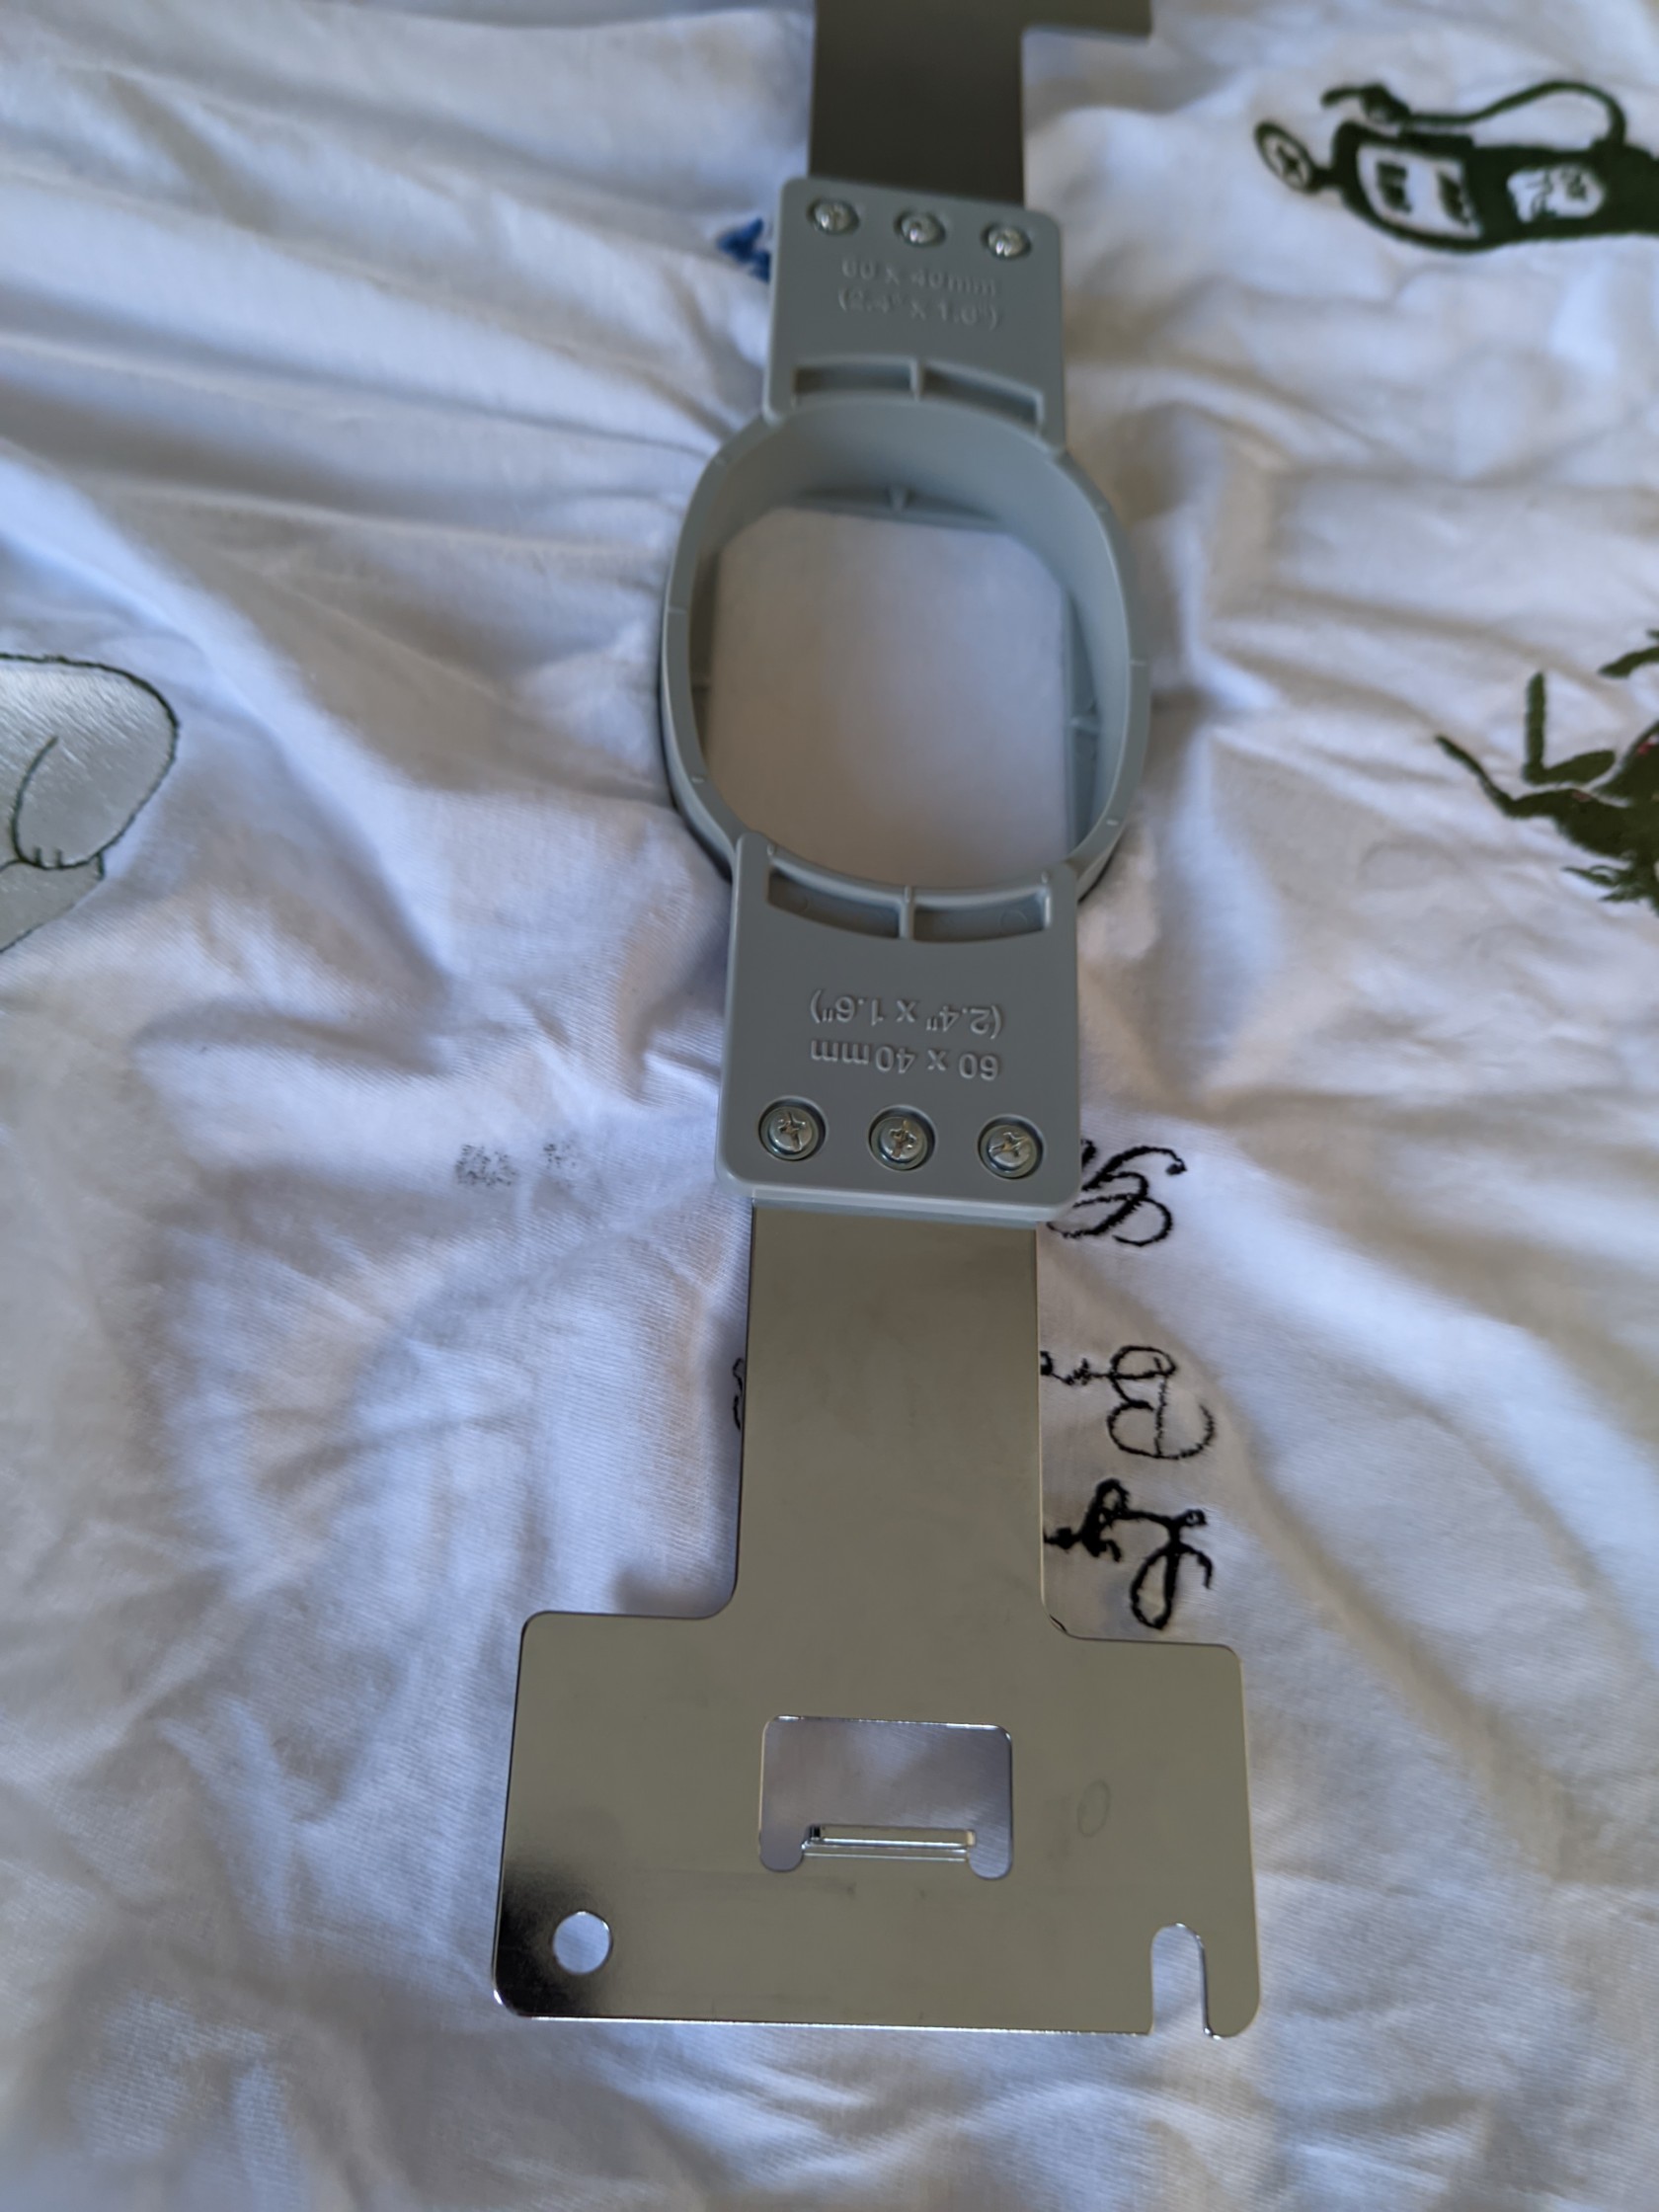 ](https://innovation.iha.unistra.fr/uploads/images/gallery/2023-11/pxl-20231120-141527941.jpg)[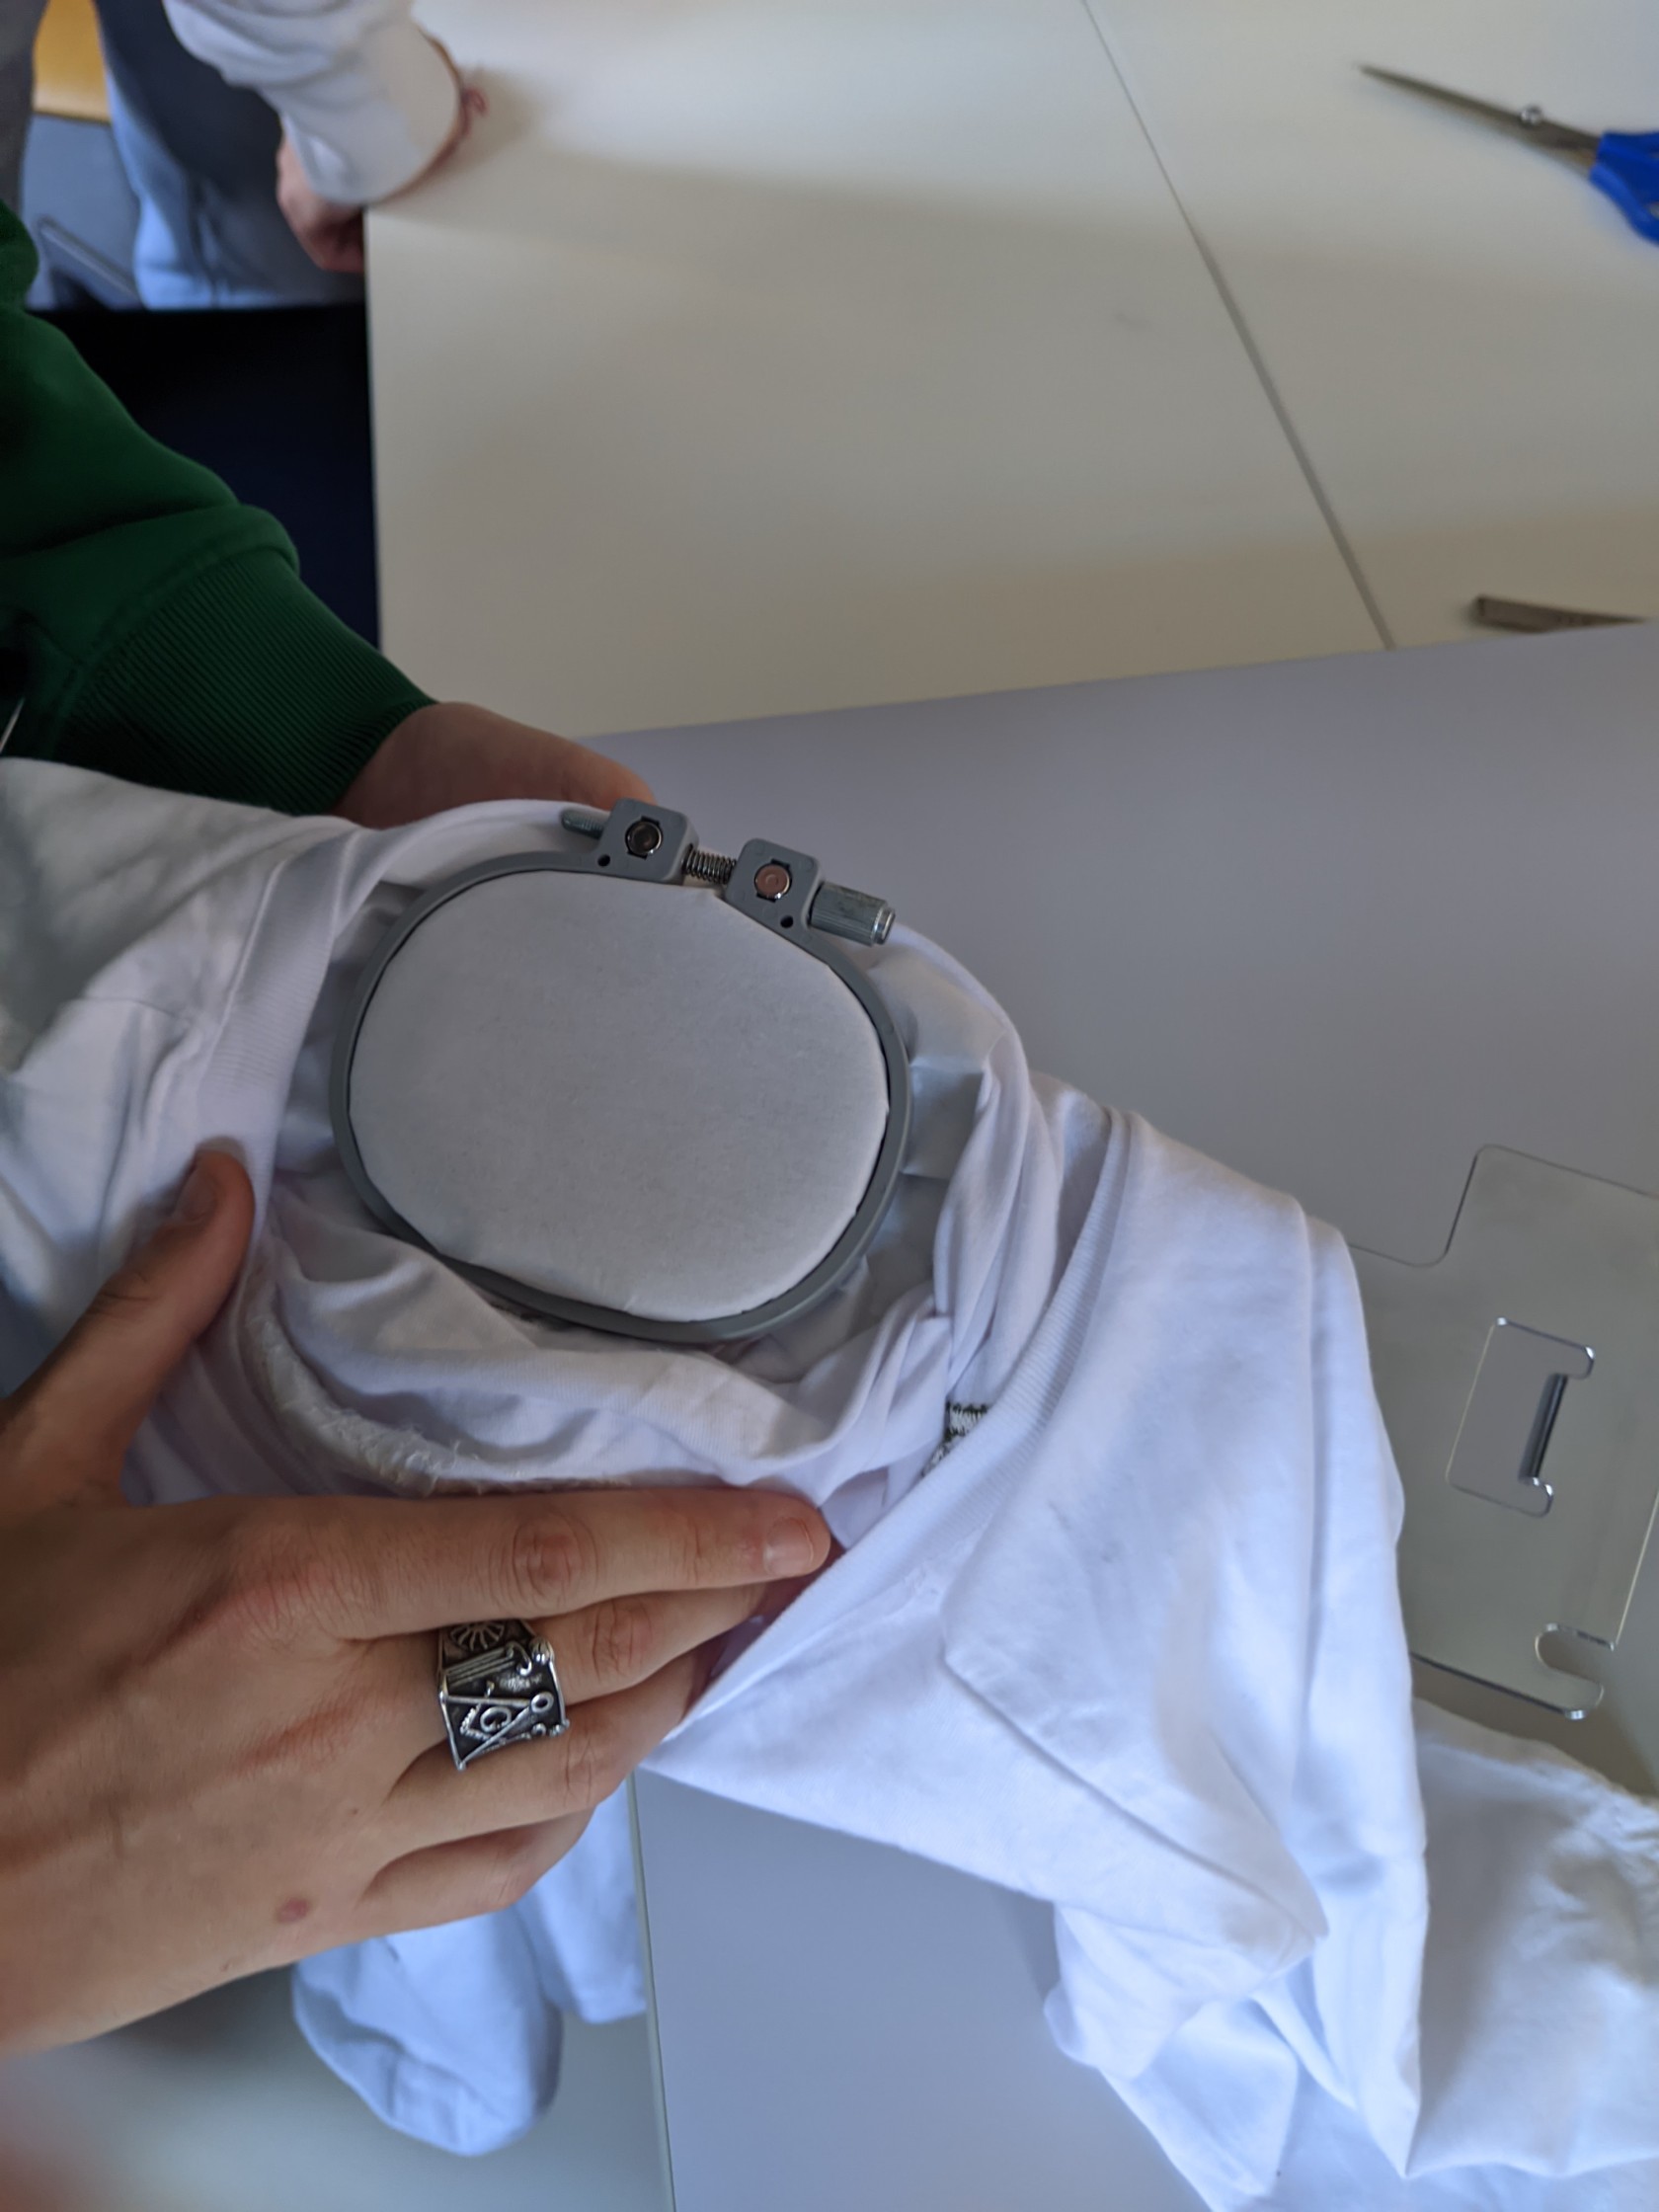](https://innovation.iha.unistra.fr/uploads/images/gallery/2023-11/pxl-20231120-141607308.jpg)
- Tendre le tissu et Serrer le cadre
- Plus le cadre est grand, plus il faut bien tendre le tissu
- Plus le motif est grand, plus il faut stabiliser le tissu
- Si le tissu est bien tendu, vous devriez pouvoir "jouer du tambour" en tapotant avec les doigts
- Engager le cadre dans le guide face visible du tissu vers le haut (le cadre ne s'engagera pas dans l'autre sens grâce aux détrompeurs) :
[](https://innovation.iha.unistra.fr/uploads/images/gallery/2023-11/g88pxl-20231120-141834493.jpg)
- Régler le guide pour qu'il s'enclenche dans le cadre. Bien serrer la vis avec l'outil de vissage :
[](https://innovation.iha.unistra.fr/uploads/images/gallery/2023-11/pxl-20231120-142002046.jpg)
# Brodeuse numérique - Logiciel PE-Design 11
### Comparaison des logiciels de broderie
- Explication des fonctionnalités attendues : [https://www.sewingmachinefun.com/best-embroidery-software/](https://www.sewingmachinefun.com/best-embroidery-software/)
- Tableau comparatif : [https://edutechwiki.unige.ch/fr/Logiciel\_de\_broderie#La\_comparaison\_syst%C3%A9matique\_de\_logiciels\_de\_broderie](https://edutechwiki.unige.ch/fr/Logiciel_de_broderie#La_comparaison_syst%C3%A9matique_de_logiciels_de_broderie)
### A propos
Nous n'avons qu'une licence du logiciel lié au dongle USB, il faut donc utiliser l'ordinateur FABLAB-3 (actuellement dans le bureau du Fab-Manager.
Création de motifs personnalisés à partir d'images vectorielles (.svg) ou matricielles (.png).
PE Design Plus permet :
- De créer un motif de broderie à partir d’une image ou d’une photo
(formats JPG, BMP…)
- D’y ajouter du texte,
- D’ouvrir des fichiers de broderie au format Brother, le .PESPE Design Plus ne permet pas :
- de modifier les images une fois qu’elles ont été vectorisées : il faut donc choisir de préférence des images de bonne résolution et bien contrastées… ou les travailler en amont avec un logiciel photo ou un logiciel vectoriel
- de créer directement des motifs. Pour cela, vous pouvez créer vos visuels dans un logiciel comme Inkscape, PhotoFiltre, ou même Paint… puis les ouvrir dans PE Design Plus
### Tutoriel PE-Design 11
Nouveau projet, 3 assistants disponibles :
- [](https://innovation.iha.unistra.fr/uploads/images/gallery/2023-11/b1Zimage.png) Création d'un nouveau design
- [](https://innovation.iha.unistra.fr/uploads/images/gallery/2023-11/sirimage.png) Ouvrir un design au format PES
- [](https://innovation.iha.unistra.fr/uploads/images/gallery/2023-11/VBQimage.png) Créer un design avec l'assistantAvant de commencer, entrer les dimensions du cadre (correspond à la zone de travail pour les aiguilles, hors marges, donc plus petit que les dimensions extérieures du cadre) :
- Grand cadre : 300 x 180 mm
- Moyen : 130 x 180 mm
- Petit : 100 x 100 mm
Pour commencer voici ce à quoi ressemble le logiciel à son ouverture.
Nous avons plusieurs fenêtre à connaitre :
- Le plan de travail
- L'arborescence
- Les outils
Ces 3 fenêtres sont les plus importantes à connaitre.
#### La piqûre automatique "auto-digitizing"
Cet outil nous permet de transformer un fichier (jpeg, png, svg..) en format de broderie (.pes).
Pour ce faire nous allons glisser déposer un ficher png dans le plan de travail.

Il faudra redimensionner le fichier à la taille de notre plan de travail.
Puis nous allons utiliser l'outil "Piqûre automatique".
Cette fenêtre s'ouvre, elle nous permettra de venir créer une forme autour de notre design pour éviter les contours blancs.
[](https://innovation.iha.unistra.fr/uploads/images/gallery/2023-12/vXt6.JPG)
Cette deuxième fenêtre nous permet de dimensionner correctement notre design sur notre plan de travail
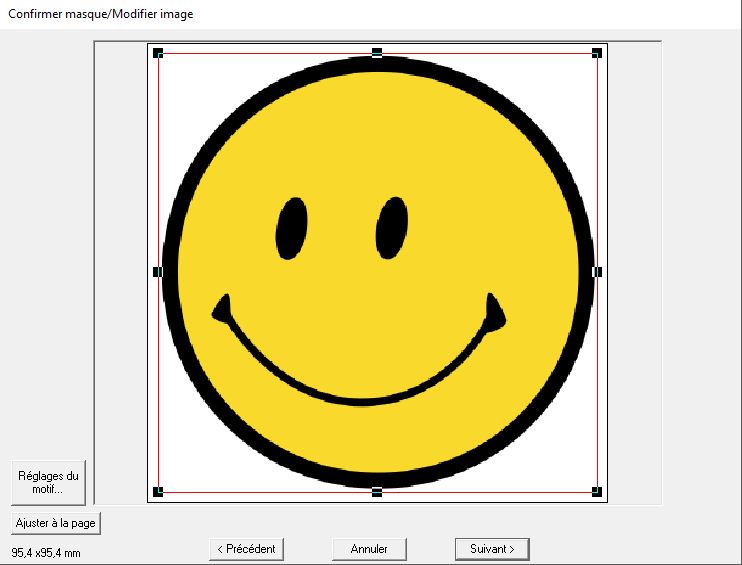
Cette dernière fenêtre est la plus importante, elle nous permet de sélectionner les couleurs que l'on désir sur notre design.
Ici nous ne voulons pas de "contour" blanc donc nous allons cliquer dessus pour la supprimer.
[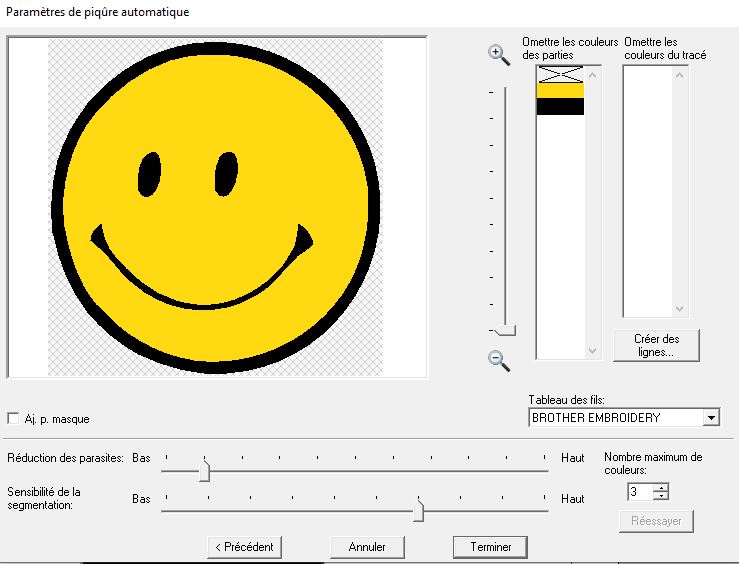](https://innovation.iha.unistra.fr/uploads/images/gallery/2023-12/8.JPG)
Quand nous avons le design que nous désirons, nous pouvons cliquer sur "Terminer".

Nous avons deux types de points :
- Le plumetis (généralement utilisé pour des contours, des formes spécifiques, du lettrage)
- Le point de remplissage (comme son nom l'indique pour du remplissage)
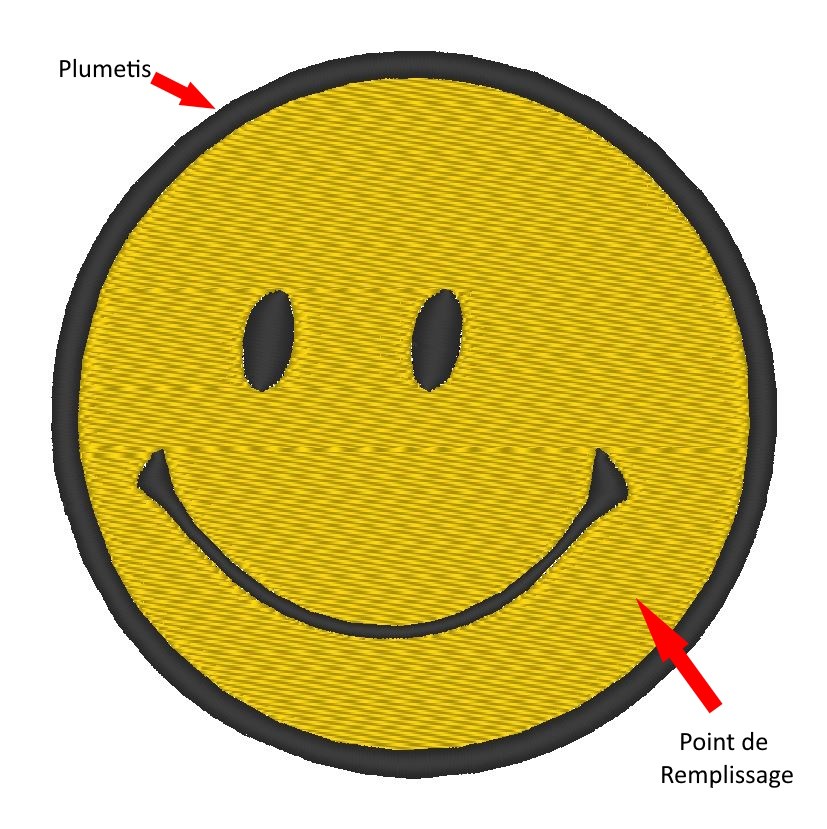
Nous pouvons changer le types de points en clic droit sur l'objet et sélectionner en haut le type de point
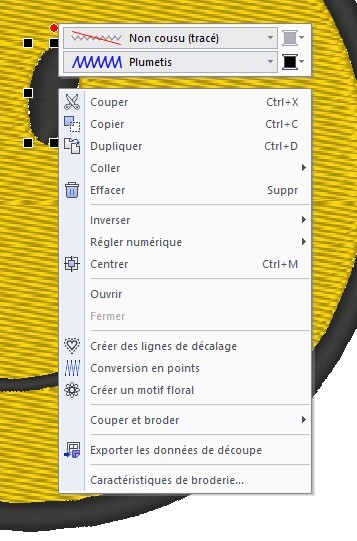
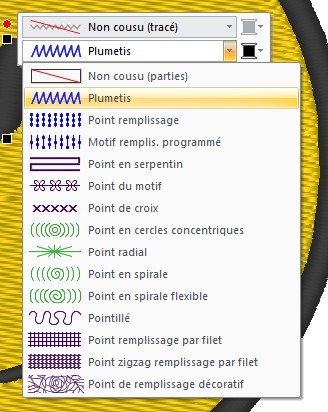
[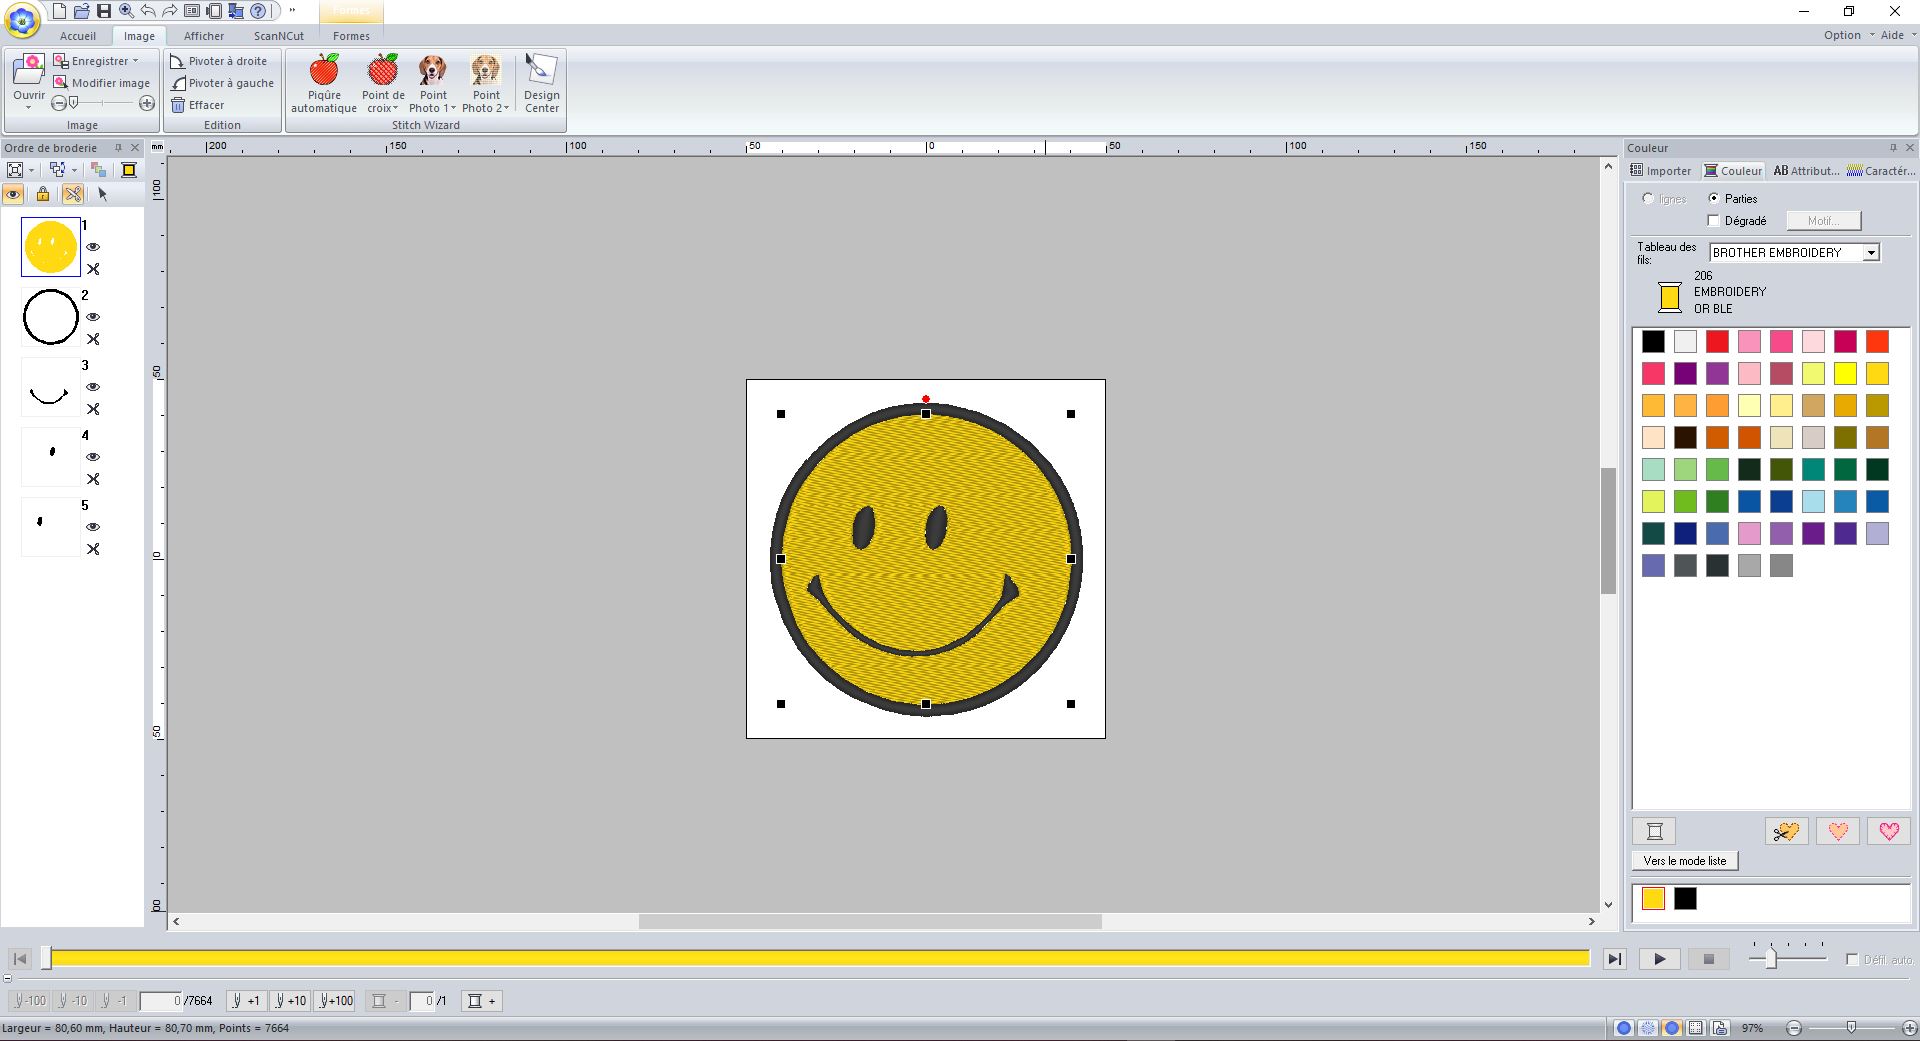](https://innovation.iha.unistra.fr/uploads/images/gallery/2023-12/Mti13.JPG)
- Voici à quoi ressemble notre fichier une fois prêt.
- Panneau de gauche : "Ordre de broderie"
- Chaque numéro dans l'arborescence correspond à un motif/calque qui sera brodé sans avoir à couper le fil
- Possibilité de changer l'ordre de broderie, et donc la superposition éventuelle des motifs en déplaçant chaque "calque"
- Panneau de droite : "Couleur"
- Possibilité de changer les couleurs de notre design pour avoir un meilleur aperçu de notre broderie terminée, cela permet aussi d'ajouter ou de réduire le nombre de couleurs de fil.
- Par exemple, changer la couleur des yeux, et cela ajoutera une bobine de fil.
[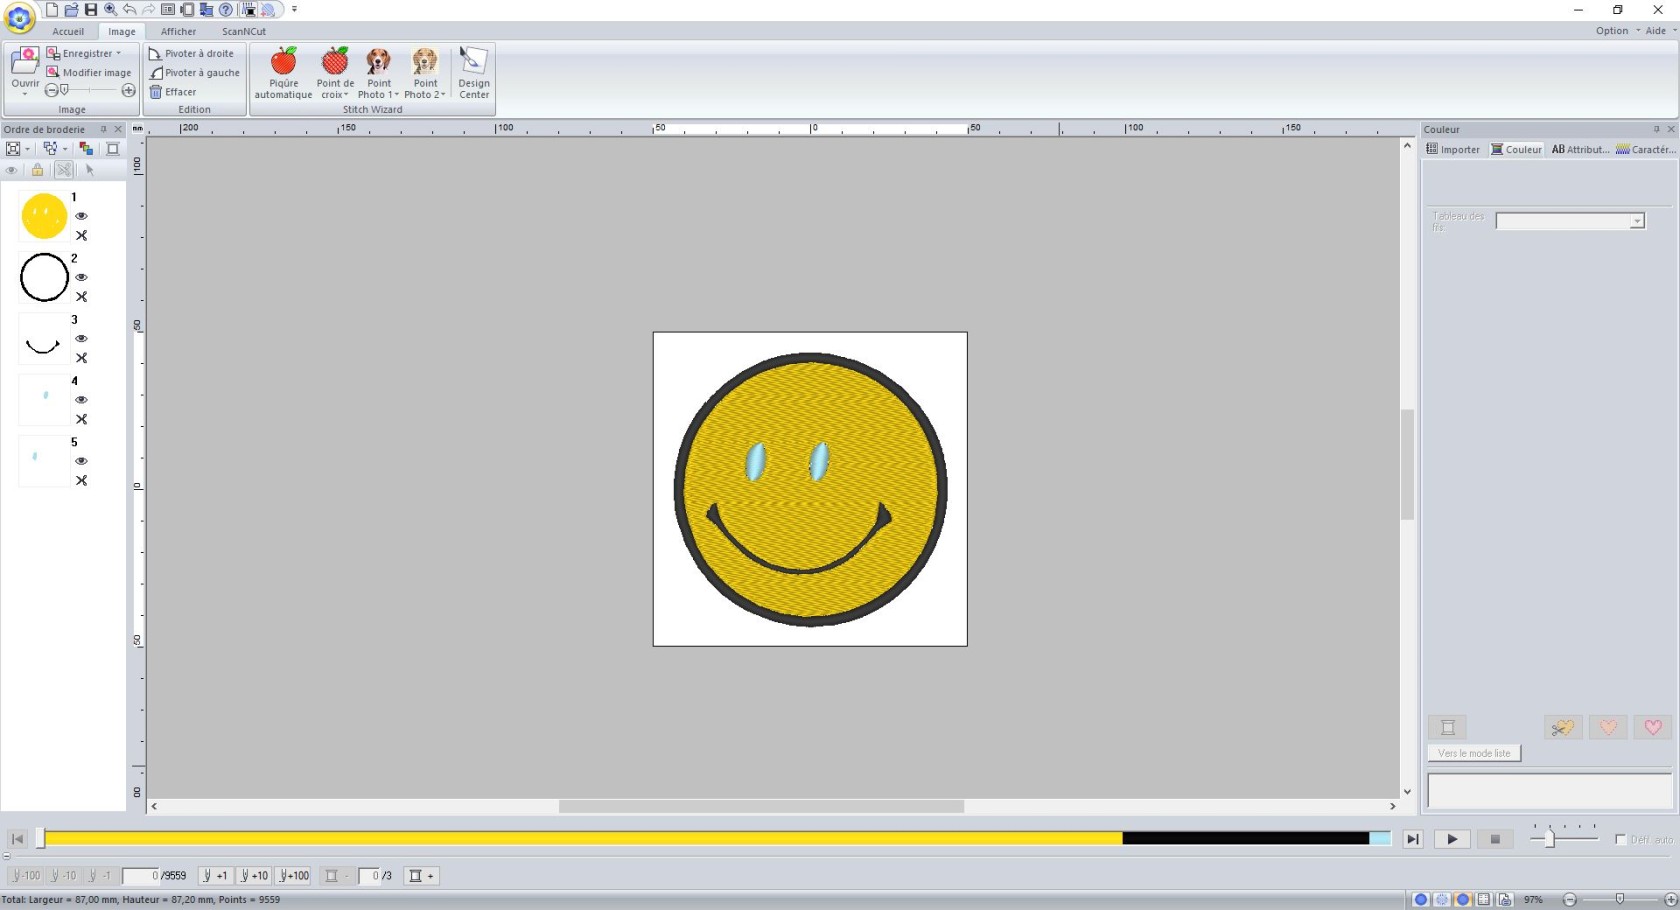](https://innovation.iha.unistra.fr/uploads/images/gallery/2023-12/14.JPG)
- Panneau de droite "Caractéristiques de broderie"
- cliquer sur la couleur à modifier
- cliquer "Caractéristiques" dans le bandeau de droite
[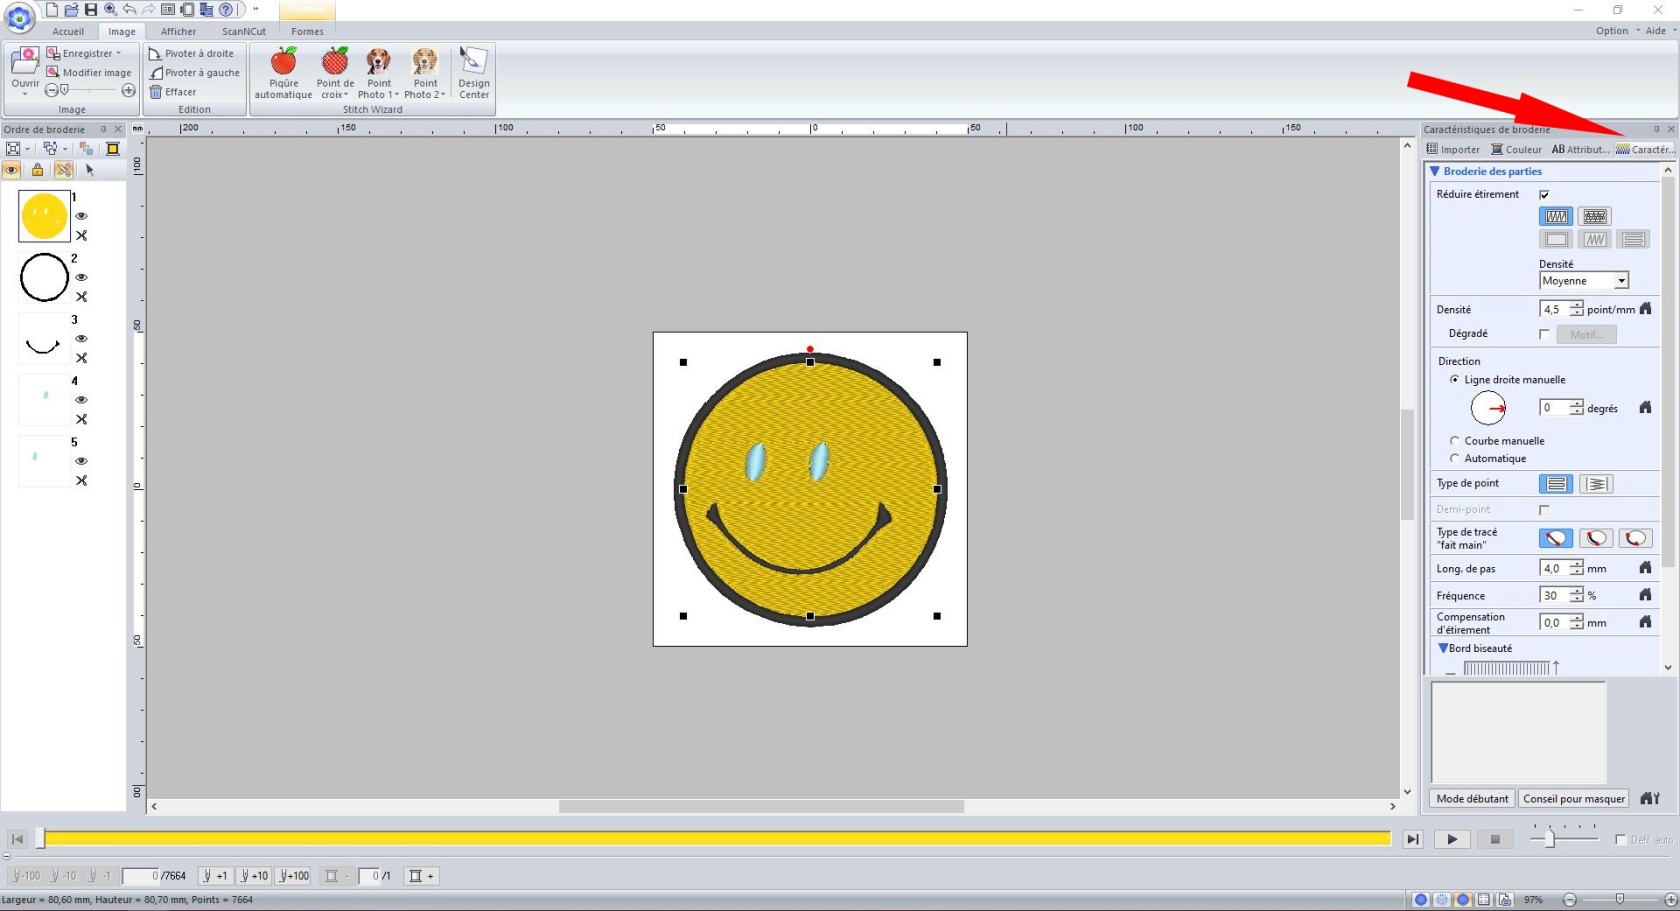](https://innovation.iha.unistra.fr/uploads/images/gallery/2023-12/15.JPG)
- Dans ce bandeau, nous pouvons modifier la densité de broderie en nombre de point/mm.
- "basse qualité" : 4.5 point/mm
- "qualité moyenne" : 6.5 point/mm
- "haute qualité" : 9 point/mm
Plus le nombre de point/mm est augmenté, plus la broderie peut s'interrompre, voire abimer votre vêtement.
[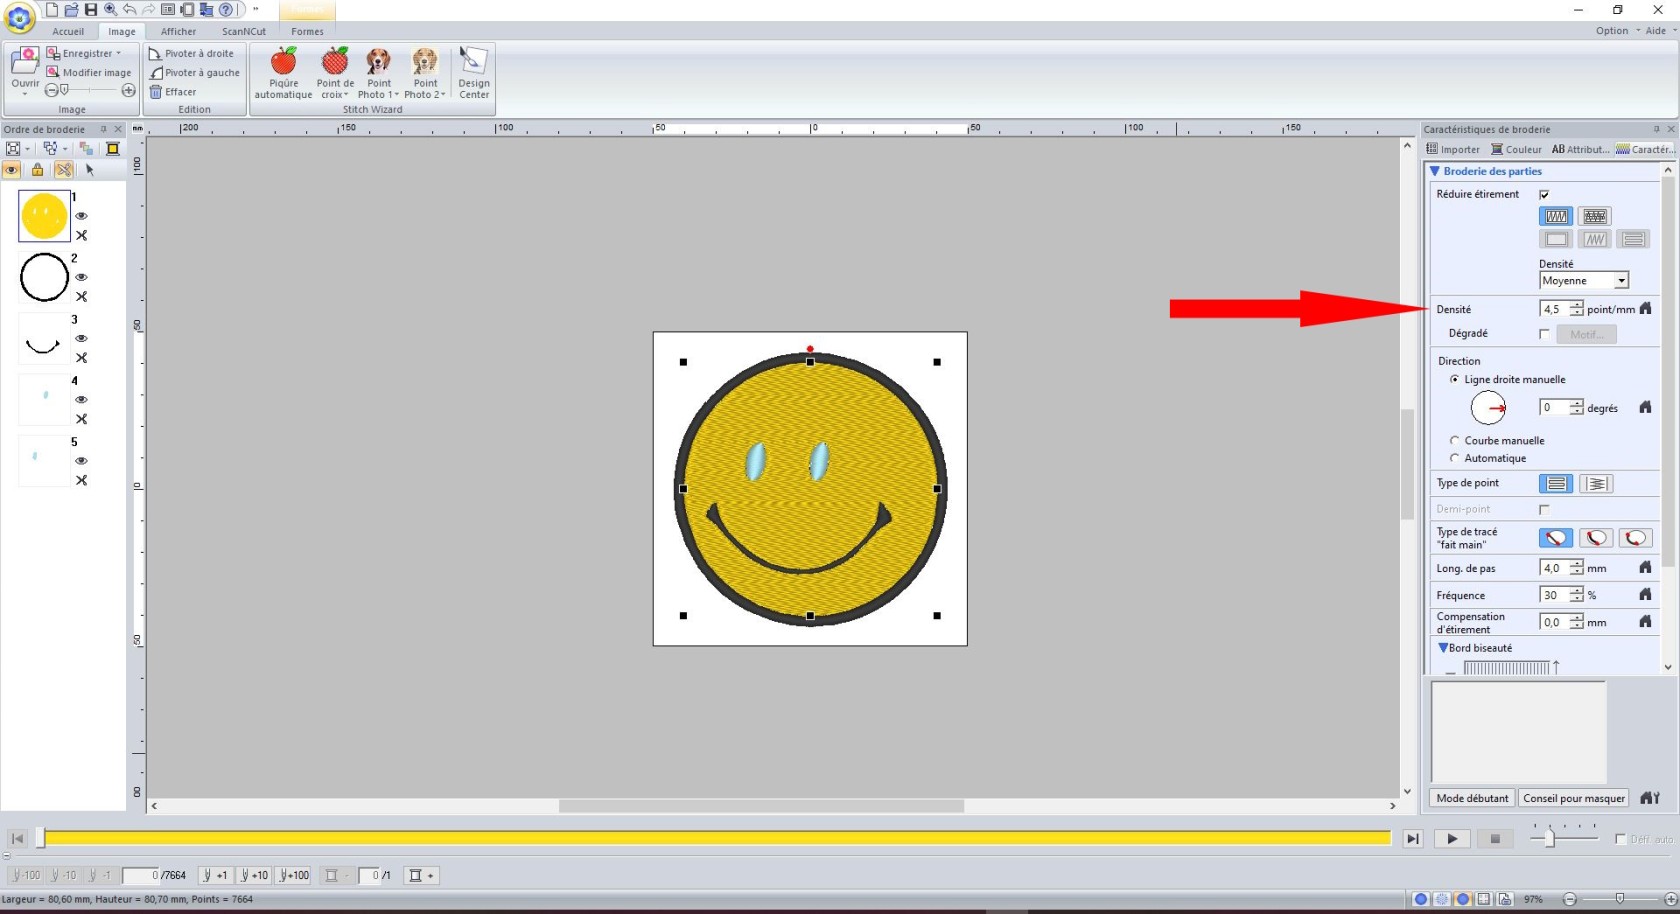](https://innovation.iha.unistra.fr/uploads/images/gallery/2023-12/NXW16.JPG)
- enregistrer le fichier sur une clé USB et lancer la broderie !
# Extension Inkstitch pour la broderie avec Inkscape
### Installation
#### sur Windows
- Télécharger [l'exécutable](https://github.com/inkstitch/inkstitch/releases/latest/download/inkstitch-v3.1.0-windows-64bit.exe)
- Double-cliquer pour installer
- Redémarrer Inkscape
#### sur Ubuntu
- [Télécharger le .deb](https://inkstitch.org/fr/docs/install-linux/)
- Installer GDebi Package Installer `sudo apt install gdebi`
- Ouvrir le .deb avec GDebi Package Installer
- Cliquer sur Install Package
- Redémarrer Inkscape, l'extension apparaît
### Bonnes pratiques liées au SVG et Inkscape
- Eviter de travailler sur un chemin/objet Inkscape qui a à la fois un fond et un contour
- Dupliquer le chemin et garder le fond pour l'un et le contour pour l'autre
### Les objets vectoriels de broderie
Inkstitch connaît trois types d'objets de broderie de base : les lignes, les colonnes satins et les remplissages. Ensuite il existe un module pour le lettrage avec des lettres numérisées. Voici les points de broderie :
1. **Lignes** (définies comme contour d'un chemin Inkscape)
- points droits simples ou répétés (style de contour pointillé)
- points zig-zag (style de contour continu)
2. les **colonnes satins**
- c'est classiquement ce que l'on obtient après avoir appliqué `contour en chemin` sur inkscape
- chemin SVG avec deux rails et lignes de direction (c.f. le contour de l'éléphant dans la figure suivante)
- ce doit être un chemin Inkscape unique composé de deux lignes ayant un nombre de points identique et des rails définissant l'orientation du satin
3. les **remplissages** (définis comme fond d'un chemin Inkscape)
- tapis ou tatami simple
- tatami guidé
- remplissage circulaire ou suivant les contours
Voici un éléphant composé de trois objets : 1. un œil en point triple, 2. un contour avec une ligne satin défini par un chemin composé de deux rails et des traverses de direction, 3. Un corps en tatami.
On peut ajouter des **textures** (Angl "stitch patterns") aux remplissages, satins et lignes. Ces textures ajoutent ou enlèvent des points.
[](https://innovation.iha.unistra.fr/uploads/images/gallery/2025-02/615px-twemoji-elephant-body-inkstitch-svg.png)
[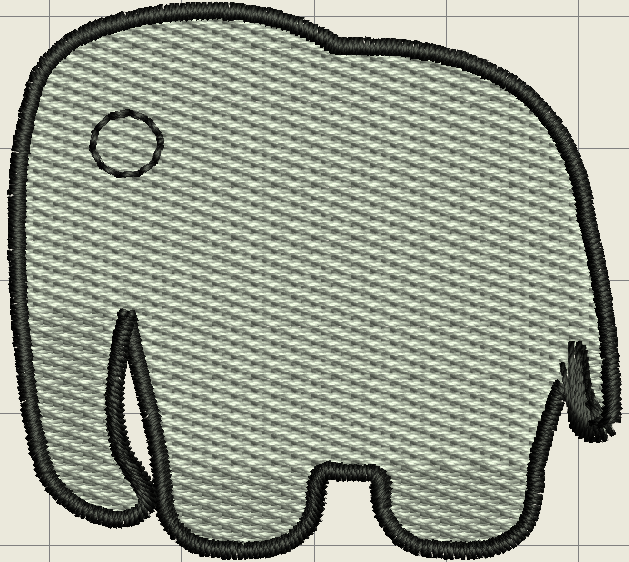](https://innovation.iha.unistra.fr/uploads/images/gallery/2025-02/twemoji-elephant-body-inkstitch.png)
### Tutoriel de découverte Inkstitch
Pour apprendre Inkstitch nous allons prendre l'exemple simple d'un écusson contenant :
1. Une **ligne** d'encadrement
2. Des **colonnes satins** d'encadrement
3. Le drapeau du pays en **remplissage**
4. Le nom du pays en **lettrage**
[](https://innovation.iha.unistra.fr/uploads/images/gallery/2025-02/badge-cameroun.png)
Ouvrez Inkscape et copiez-y l'image ci-dessus. Notez que c'est une image matricielle au format `.png`. Pour Inkstitch on a besoin d'objets vectoriels. On pourrait être tenté de vectoriser l'image mais celle-ci ne fonctionne pas bien car on n'a pas de couleurs unies (le rendu réaliste de la broderie n'aide pas). Plutôt qu'essayer de nettoyer des objets vectorisés automatiquement pour essayer d'obtenir les objets qu'on veut, ce qui peut être chronophage, on choisit de "décalquer" le motif avec Inkscape
### Les lignes
- Sélectionner l'outil plume (raccourci B comme Bézier)
[](https://innovation.iha.unistra.fr/uploads/images/gallery/2025-04/YDkimage.png)
- Cliquer sur les angles du contour à dessiner
-
### Les colonnes satins
### Le remplissage de zone
1) Réaliser le motif avec l'outil rectangle
2) Redimensionner le en fonction de ce que vous voulez obtenir
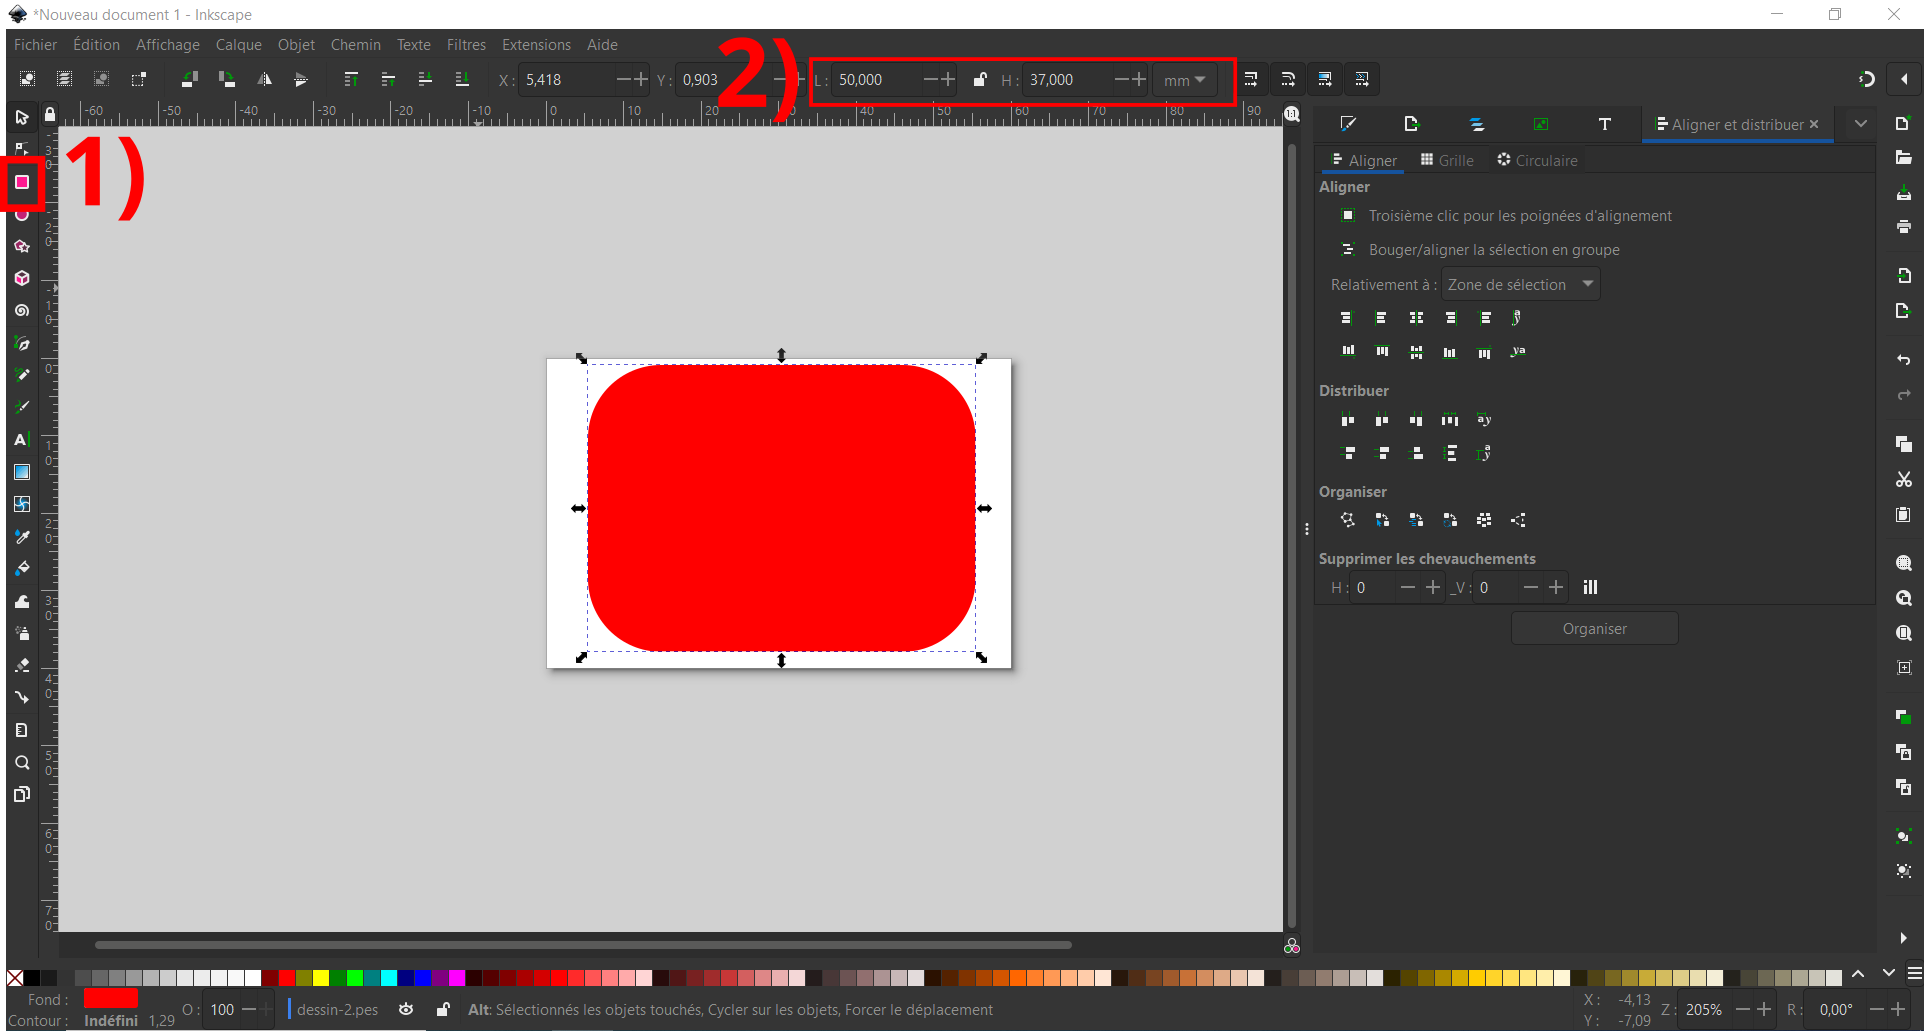
Aller dans "Extension>Ink/Stitch>Paramètres"
[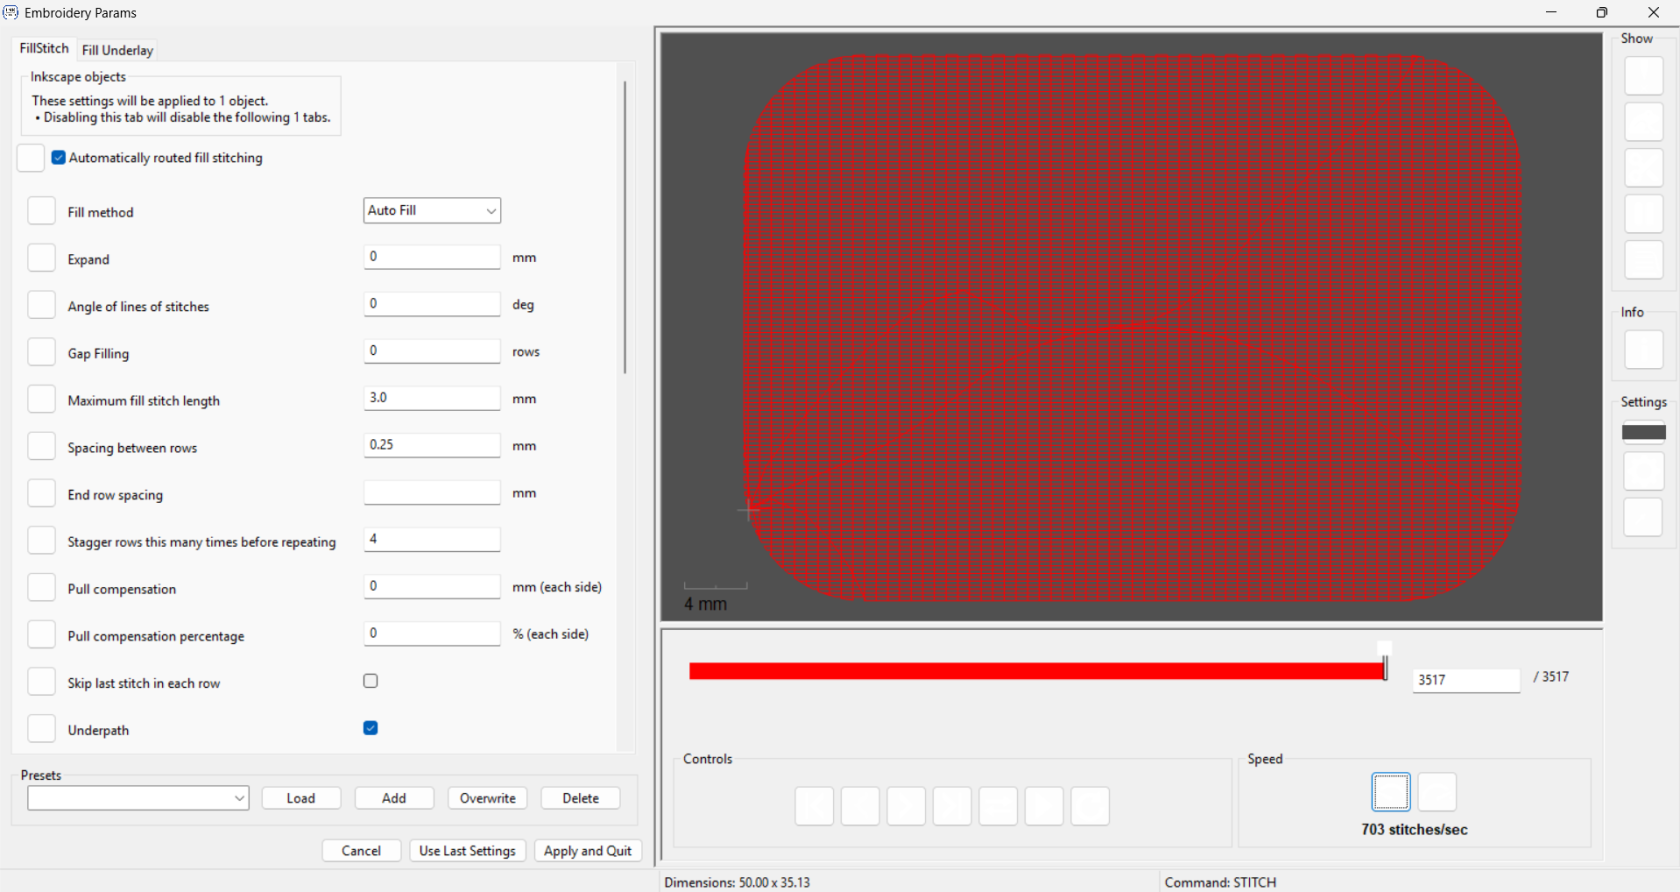](https://innovation.iha.unistra.fr/uploads/images/gallery/2025-02/tuto-broderie-fond.png)
Dans l'onglet FillStitch :
- "Automatically routed fill stitching" doit être coché.
- "Fill method" : Sélectionner la méthode de remplissage souhaitée (laisser Auto Fill pour un remplissage par défaut)
- "Angle of lines of stitches" : Définis l'angle vers lequel sera réalisée la broderie (0 est horizontal et l’angle augmente dans le sens contraire des aiguilles d’une montre. Les angles négatifs sont autorisés.)
- "Spacing between rows" : Définis l'espace entre les rangées (en mm). Mettre 0,2 par défaut et ajuster en fonction du rendu souhaité
Dans l'onglet Fill Underlay :
- "Underlay" doit être coché
- "Fill angle" : Par défaut : angle de remplissage + 90 degrés. Généralement la meilleur valeur, mais parfois vous souhaiterez la changer. Pour obtenir plusieurs sous-couches, insérer une liste de valeurs séparée par des espaces. (doit être différent de "Angle of lines of stitches" vue précédemment afin d'avoir une broderie solide. Si possible une valeur opposée)
- "Row spacing" : Définis l'espace entre les rangées (en mm).
- "Underpath" doit être coché
Appuyer sur "Apply and Quit" puis sur "Extension>Ink/Stitch>Visualiser et exporter>Prévisualisation du plan de broderie" puis cliquer sur "Appliquer" sans changer les paramètres.
[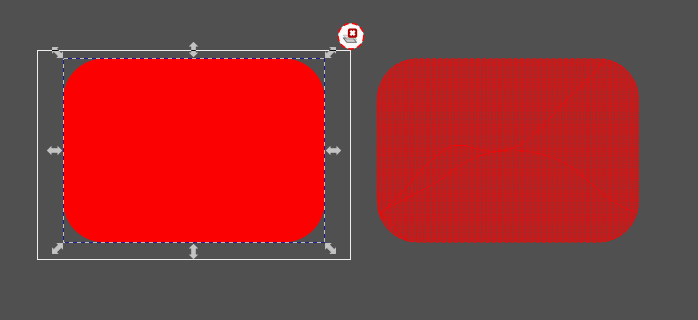](https://innovation.iha.unistra.fr/uploads/images/gallery/2025-02/tuto-broderie-previsualisation.png)
A gauche le motif réalisé et a droite la prévisualisation
Adapter les étapes précédentes avec votre motif. Si le motif vous convient pour pouvez passer à la partie "Exporter son motif de broderie" sinon continuer à suivre le tuto.
### Le lettrage
Pour réaliser du texte simplement, aller dans "Extensions>Ink/Stitch>Lettrage.
[](https://innovation.iha.unistra.fr/uploads/images/gallery/2025-01/Wykimage.png)
Dans l'onglet "Options" :
- "Font" : Choisir sa police d'écriture parmi celles proposées
- "Text" : Ecrire le texte que vous souhaitez broder
Appuyer sur "Apply and Quit" puis sur "Extension>Ink/Stitch>Visualiser et exporter>Prévisualisation du plan de broderie" puis cliquer sur "Appliquer" sans changer les paramètres.
Adapter les étapes précédentes avec votre motif. Si le motif vous convient pour pouvez passer à la partie "Exporter son motif de broderie" sinon continuer à suivre le tuto.
### Exporter son motif de broderie
### Sources
[https://edutechwiki.unige.ch/fr/Cours\_initiation\_%C3%A0\_la\_broderie\_num%C3%A9rique\_-\_Bases\_th%C3%A9oriques\_et\_pratiques](https://edutechwiki.unige.ch/fr/Cours_initiation_%C3%A0_la_broderie_num%C3%A9rique_-_Bases_th%C3%A9oriques_et_pratiques)
[https://edutechwiki.unige.ch/fr/InkStitch](https://edutechwiki.unige.ch/fr/InkStitch)
# Brodeuse Numérique - Entretien et réglage Brother PR680w
Notice :
- [https://seafile.unistra.fr/f/4952853dd63b4f1c8571/](https://seafile.unistra.fr/f/4952853dd63b4f1c8571/)
### Préparation de la machine
Le principe le plus important pour obtenir une bonne broderie nécessite de rappeler le fonctionnement de la broderie :
[](https://innovation.iha.unistra.fr/uploads/images/gallery/2025-02/lockstitch.gif)
On voit tout de suite l'importance d'huiler le crochet qui tourne à très haute vitesse pour récupérer le fil tout contre le chat de l'aiguille
- Si le fil de broderie (ici en jaune) est trop tendu, le fil de canette (généralement blanc) dépasse côté visible
- Si le fil de canette (ici en vert) est trop tendu, le fil de broderie aura tendance à rentrer dans la maille du tissu
- Si le fil de canette (ici en vert) est trop détendu, le fil de broderie aura tendance à être trop lâche et faire des boucles
Il faut donc régler et équilibrer la tension entre le fil de broderie et le fil de canette
- On a 6 fils de broderie réglable individuellement
- Mais qu'un seul réglage pour la canette
- On commence donc par régler la tension du fil de canette
- Puis on lance des tests pour régler la tension de chaque bobine
#### Réglage tension canette
[https://www.youtube.com/watch?v=A19jVsKpsiU](https://www.youtube.com/watch?v=A19jVsKpsiU)
#### Réglage tension bobine
[https://www.youtube.com/watch?v=TDrrf1ooYLw](https://www.youtube.com/watch?v=TDrrf1ooYLw)
#### Bobinage de la canette et enfilage inférieur
- La canette, c’est la petite bobine qui délivre le fil de canette : [](https://innovation.iha.unistra.fr/uploads/images/gallery/2023-11/fYuimage.png)
- Le fil de canette, c’est celui qui sera à l’envers de la broderie. La plupart du temps, on utilise du fil blanc, puisqu’il ne sera pas visible.
- Le fil utilisé est du fil spécial, moins cher que celui utilisé pour la broderie
- Démontage canette
[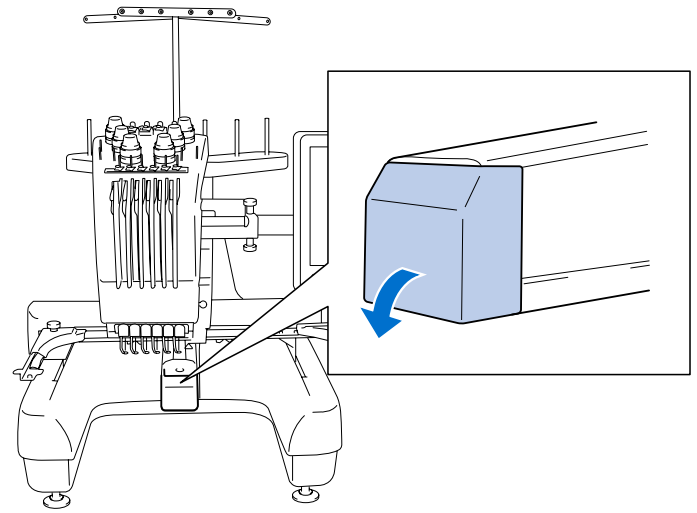](https://innovation.iha.unistra.fr/uploads/images/gallery/2023-11/Rd1image.png)[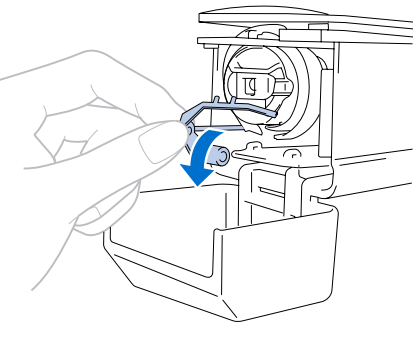](https://innovation.iha.unistra.fr/uploads/images/gallery/2023-11/3yCimage.png)
[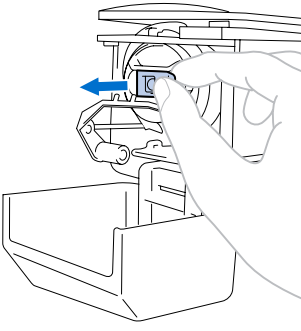 ](https://innovation.iha.unistra.fr/uploads/images/gallery/2023-11/15himage.png)[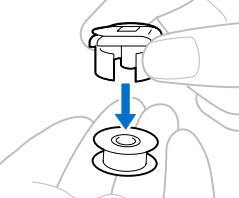](https://innovation.iha.unistra.fr/uploads/images/gallery/2023-11/2R0image.png)
- Remontage canette
[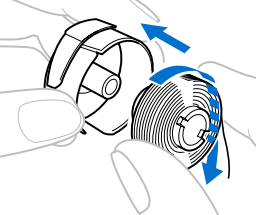](https://innovation.iha.unistra.fr/uploads/images/gallery/2023-11/6oPimage.png) [ ](https://innovation.iha.unistra.fr/uploads/images/gallery/2023-11/tY9image.png)[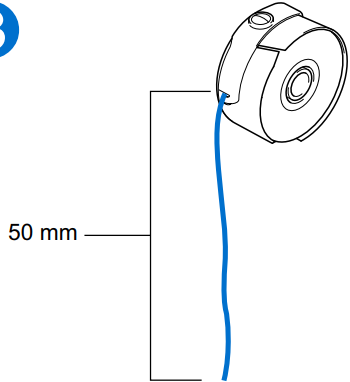](https://innovation.iha.unistra.fr/uploads/images/gallery/2023-11/hkaimage.png)
- Réengager la canette **jusqu'à ce que ça clique** et fermer le capot
[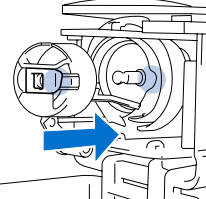 ](https://innovation.iha.unistra.fr/uploads/images/gallery/2023-11/UFCimage.png)[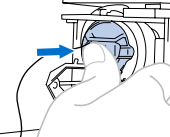 ](https://innovation.iha.unistra.fr/uploads/images/gallery/2023-11/dpUimage.png)[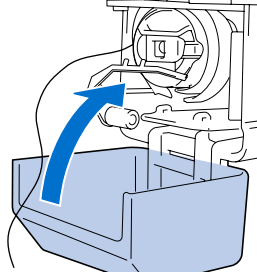](https://innovation.iha.unistra.fr/uploads/images/gallery/2023-11/2ZQimage.png)
#### Huilage fil de canette
- Appuyer sur le bouton de huilage
[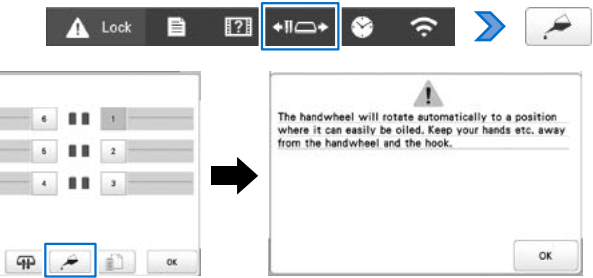](https://innovation.iha.unistra.fr/uploads/images/gallery/2023-11/vgMimage.png)
- La coursière se déplace vers la position appropriée pour l’application d’huile.
- Sortir la canette et verser une goutte d'huile sur le crochet
[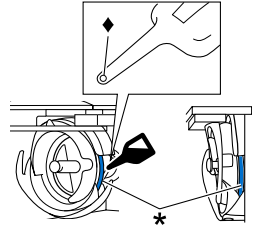](https://innovation.iha.unistra.fr/uploads/images/gallery/2023-11/F44image.png)
- Percer un petit trou dans le flacon d'huile si il est neuf
- Appuyer sur OK, la coursière revient à sa position d'origine
- Réengager la canette et fermer le capot.
# Concepts techniques - Broderie et Couture
### Principe de la broderie machine
- Un tissu est fixé dans un cadre (cerceau) qui se déplace dans les directions X / Y tandis qu'une aiguille monte et descend. Dans la broderie, c'est la surface de travail qui bouge.
- Cela implique que le tissu doit pouvoir bouger (impossible de broder sur une manche avec une brodeuse familiale)
- Le mécanisme pour coudre est le même que celui d'une machine à broder.
- Dans le schéma ci-dessous, on voit le fil de couture en jaune et le fil de canette en vert
[](https://innovation.iha.unistra.fr/uploads/images/gallery/2025-02/lockstitch.gif)
#### Contraintes physiques et difficultés de la broderie numériqueDirections du push/pull
[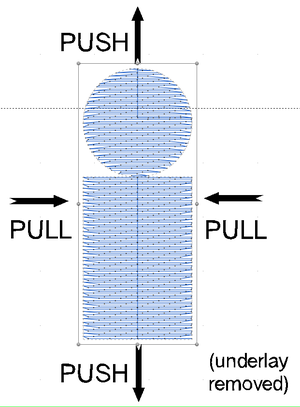](https://innovation.iha.unistra.fr/uploads/images/gallery/2025-02/300px-embroidery-push-pull-directions.png)
- **Taille de la broderie** : Elle est limitée à la taille des cadres de broderie. Une petite machine bon marché peut avoir un cadre limité à 10x10cm cm, une machine semi-professionnelle comme la PR1050X peut avoir des cadres jusqu'à 36 x 20 cm. Une familiale coûteuse ou une machine industrielle a des cadres encore plus larges. La même choses est vraie à l'inverse: Pour pouvoir broder sur des manche,s il faut ds tout petits cadres que seulement les machines semi-professionnelles et industrielles offrent.
- La plus **petite résolution pratique** est d'environ 1/4 mm. Un remplissage typique utilise 4 à 5 fils par mm. Pour éviter des nœuds et des trous, la longueur des points ne doit pas être inférieure aux dimensions de l'aiguille (0.7 à 1.1mm). Une machine bouge environ par 1/10e de mm, mais en pratique cette précision ne peut pas être atteinte.
- Les **petites lettres** sont mal brodées, justement parce que la distance entre points peut devenir trop petite. Une taille minimum de 17 points (6mm) est recommandée. Avec un fil 60 et une aiguille fine de 60 on peut descendre à 3-4mm, mais il faut broder sur un support très stable.
- La plupart des **tissus doivent être stabilisés** pendant la broderie. Selon le tissu, le type de fil et le type de broderie on utilise différents stabilisateurs.
- Le **nombre de couches est limité** : pas plus de 3 et même 2 couches est déjà trop la plupart du temps. On peut broder des lignes, des satins minces ou des petites surfaces par dessus un remplissage.
- Le **fil se contracte** dans la direction que prennent les points (Angl. "pull effect") mais peut également pousser dans l'autre direction (Angl. "push effect"). Pour gérer ces effets, il faut bien cercler, utiliser un stabilisateur approprié, numériser une sous-couche, superposer les bords des zones et satins, etc. Comme il y a toujours un peu de contraction (un cercle sera toujours brodé comme une ovale), on doit ajouter une compensation avec un paramètre du logiciel (donc on brode une ovale dans l'autre sens pour obtenir un cercle). Gérer les étirements est une **difficulté majeure pour débutants** et même les professionel-le-s doivent souvent corriger un design après avoir brodé une version test.
### Types de points de broderie
On peut distinguer cinq types principaux de points de broderie :
- **Points manuels**, objets définis point par point, principalement utilisés pour corriger certains points générés à partir d'un objet de broderie (par exemple des petits yeux), pour "coder" manuellement de petits objets, ou pour créer des motifs répétables dans les remplissages.
- **Points droits**, principalement utilisés pour coudre des lignes ou des contours (à ne pas confondre avec la notion "objet de ligne")
- longueur du pas (écart entre les points)
- répétition pas par pas, points triples (généralement entre un et trois)
- répétition de l'ensemble (1 à 3 fois)
- **Points satin** (appelés aussi point de damasse) , utilisés pour coudre des lignes plus larges, des colonnes ou des bordures. En règle générale, un point zigzag "Z" dense est utilisé.
- Largeur du satin (entre 1.3mm et 8mm max) pour un fil de poids 40.
- Type de zig-zag (Zig-zag classique, point Z, point E)
- Densité en distance entre les pics ou en lignes/mm (4-5 typiquement)
- Sous-couche (ligne, zigzag ou contour)
- Régularité (bordures droites ou irrégulières)
- **Points de remplissage** (appelés également remplissage tatami), utilisés pour remplir des zones plus grandes, à savoir des polygones pouvant comporter des trous.
- Le modèle (ou "motif" ou Angl. pattern)
- Longueur du point (souvent par défaut environ 3mm)
- Densité
- Direction
- Type de Sous-couche
- Densité de la sous-couche
- Présence ou absence d'un contour en satin ou point droit.
- **Points programmables ou spéciaux**. Ils permettent de définir toutes sortes de stratégies de remplissage imaginables, par ex. points de croix, points radiaux, points qui suivent le contour, points méandres, petites étoiles ...
[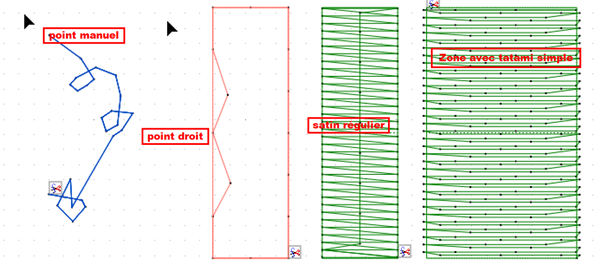](https://innovation.iha.unistra.fr/uploads/images/gallery/2025-02/OBBimage.png)
[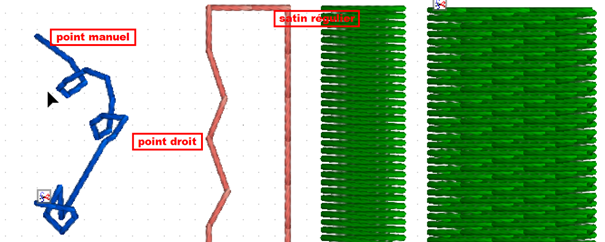](https://innovation.iha.unistra.fr/uploads/images/gallery/2025-02/PeUimage.png)
### Types d'objets vectoriel
Les logiciels de broderie modernes sont basés sur la notion d'objet de broderie, qui sont des objets vectoriels. Il existe quatre objets de base :
1. Les lignes (ou chemins)
2. Les colonnes
3. Les lettres (généralement composées de colonnes)
4. Les zones (remplissages de polygones)
Voici quelques exemples sur un coeur où le fond est une zone, et le contour est une colonne ou une ligne :
[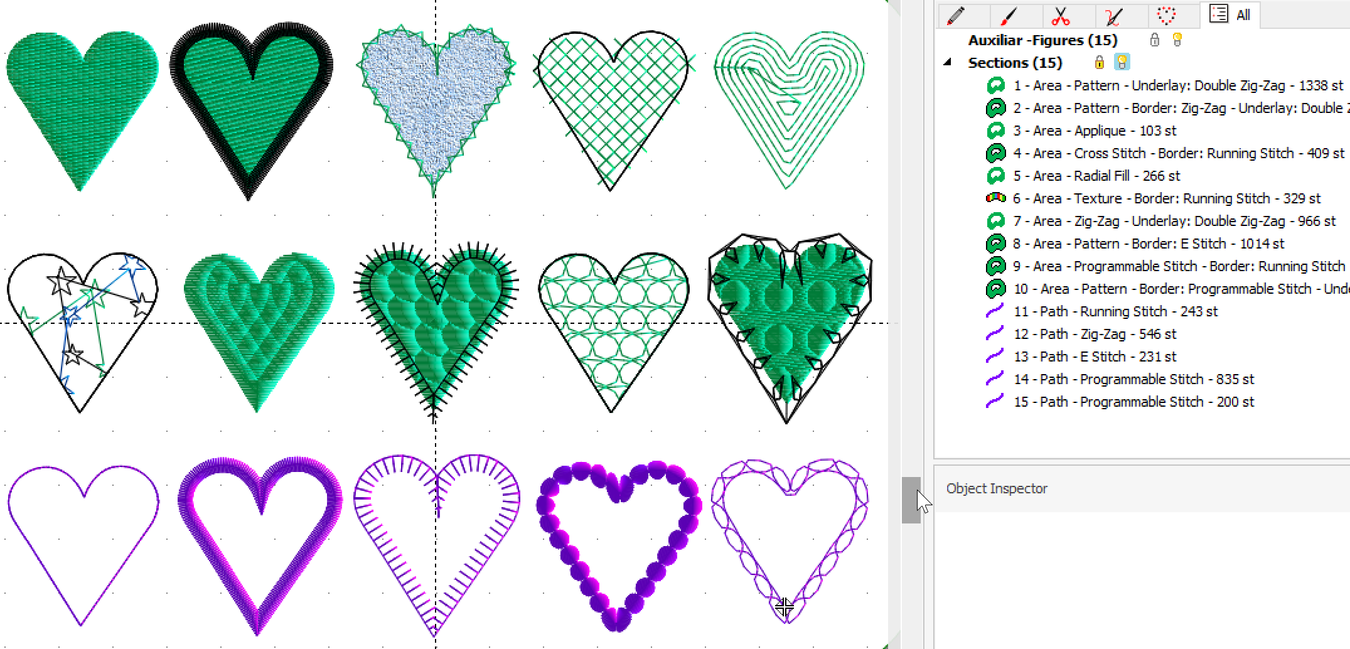](https://innovation.iha.unistra.fr/uploads/images/gallery/2025-02/1350px-stitch-era17-fill-style-4.png)
### Les sous-couches
Sauf contre-indication, un remplissage ou un satin doivent avoir une sous-couche. Elle permet de stabiliser la zone du tissu qui sera brodé et assure une meilleure couverture. Une sous-couche permet aussi de renforcer un effet relief.
- Par défaut, la sous-couche pour un satin mince est une simple ligne centrale, mais on peut également utiliser un zigzag espacé ou encore deux lignes plus près du bord.
- Par défaut, la sous-couche pour un remplissage de type tatami est un ensemble de simples lignes un peu espacées, donc une sorte de tatami écarté posé à 90 degrées. Leur direction ne doit donc pas aller dans le même sens que les rangées du tatami.
Voici un exemple:
- La sous-couche pour l'éléphant est plutôt verticale
- Dans l'image ci-dessous, le satin sélectionné (dans InkScape) montre les petits points du satin, plus les points de la ligne centrale qui fait sous-couche.
- L’œil sera brodé comme point triple (Angl. "bean stitch") et il n'y a pas de sous-couche.
[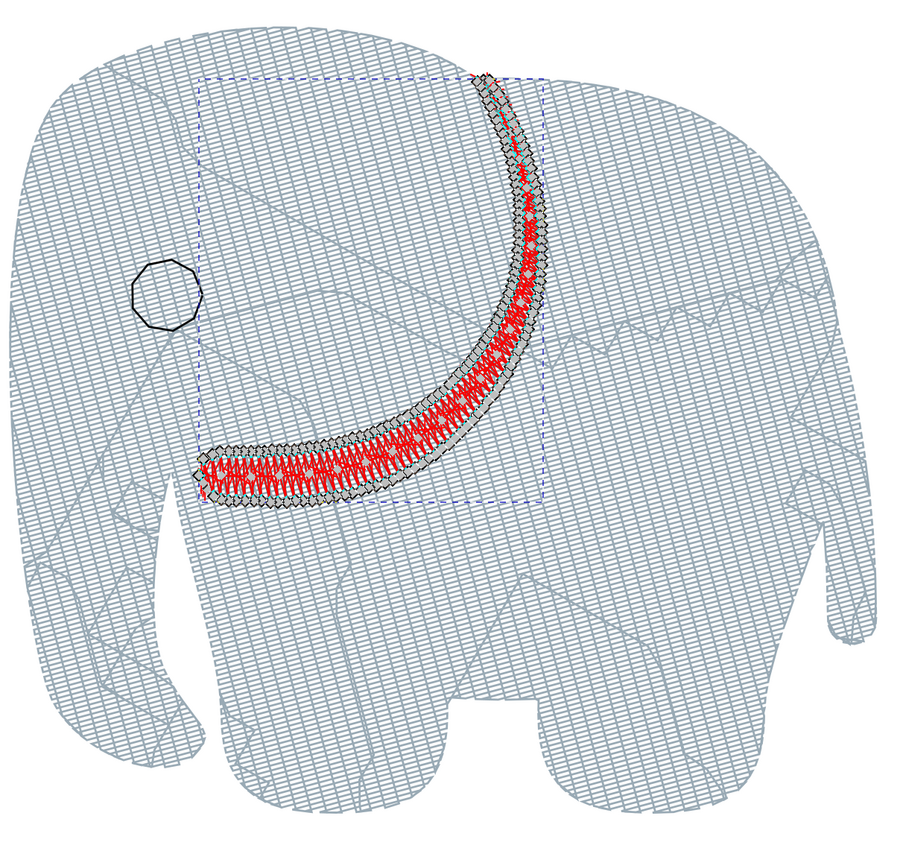](https://innovation.iha.unistra.fr/uploads/images/gallery/2025-02/900px-elephant-twemoji-stitch-plan.png)
### Taille de fils
Plus d'informations: [Fil à broder](https://edutechwiki.unige.ch/fr/Fil_%C3%A0_broder "Fil à broder")
Les tailles de fil sont **des poids standardisés** et non pas des diamètres. Dans le système de numérotation métrique le **plus populaire** (Wt/Nm), un numéro *plus élevé* veut dire *plus fin* et un numéro *plus bas* signifie une *épaisseur plus importante*. Wt est mesuré en *nombre d'unités de 1000 mètres par kilo*. Exemple: 40 km d'un fil qui pesant 1kg a la "taille" 40. Un fil 30 est plus lourd puisqu'il faut seulement 30 km pour 1 kg.
Quelques tailles (poids!) standards :
- 75 = très fin, par exemple pour des monogrammes sur des cravates en soie,
- 60 = fin, par exemple pour les tissus délicats et les petites lettres,
- 50 = moyennement fin, pour les tissus de poids moyen,
- 40 = pour tissu standard, le poids le plus populaire
- 30 = légèrement épais, pour remplir des plus grandes surfaces, des courtepointes, des points de croix,
- 12 = épais, ressemble à de la broderie faite main
Les tailles indiquées sont peu précises et les professionnels utilisent plutôt la mesure Dtex (le poids en grammes de 10000m de fil). Il faut lire les fiches techniques.
Il est impératif d'**ajuster les densités des broderies au poids des fils** !
### Sources
[https://edutechwiki.unige.ch/fr/Cours\_initiation\_%C3%A0\_la\_broderie\_num%C3%A9rique\_-\_Bases\_th%C3%A9oriques\_et\_pratiques#Types\_de\_points\_de\_broderie](https://edutechwiki.unige.ch/fr/Cours_initiation_%C3%A0_la_broderie_num%C3%A9rique_-_Bases_th%C3%A9oriques_et_pratiques#Types_de_points_de_broderie)
[https://edutechwiki.unige.ch/fr/Guide\_de\_tutoriels\_de\_broderie\_machine](https://edutechwiki.unige.ch/fr/Guide_de_tutoriels_de_broderie_machine)
[https://edutechwiki.unige.ch/fr/Cours\_initiation\_%C3%A0\_la\_broderie\_num%C3%A9rique\_-\_Bases\_th%C3%A9oriques\_et\_pratiques](https://edutechwiki.unige.ch/fr/Cours_initiation_%C3%A0_la_broderie_num%C3%A9rique_-_Bases_th%C3%A9oriques_et_pratiques)
[https://edutechwiki.unige.ch/fr/Aiguille\_pour\_machines\_%C3%A0\_broder\_et\_%C3%A0\_coudre](https://edutechwiki.unige.ch/fr/Aiguille_pour_machines_%C3%A0_broder_et_%C3%A0_coudre)
### Les types de machines
Bras libre ou non : [https://www.youtube.com/watch?v=TfPoYpl0JYY](https://www.youtube.com/watch?v=TfPoYpl0JYY)
# Inkstitch : Utilisation de base
Bonjour, aujourd'hui nous allons réaliser une broderie simple pour apprendre un utiliser l'extension inkstitch du logiciel inkscape pour faire de la borderie. Nous allons partir du principe que vous possédez des bases de réalisation avec inkscape. Si ce n'est pas le cas, je vous invite à consulter notre tutoriel sur l'utilisation de inkscape via le lien ci-desssous.
https://innovation.iha.unistra.fr/books/2-fablab-formation-machines-logiciels/page/utilisation-dinkscape
**Étape 1 : Ouvrir inkscape et adapter la page à votre cadre de broderie :**
Pour ce faire, lorsque le logiciel est ouvert. Vous pouvez cliquer sur "Fichier>Propriétés du document". Maintenant dans "Largeur" et "Hauteur" vous pouvez indiquer la taille du cadre de broderie choisi.
En ce qui nous concerne, nous avons des tailles de cadre de : 60x40 mm / 100x100 mm / 180x130 mm / 300x200 mm
Pour ma part et pour éviter le gaspillage comme je réaliser un test. Je vais choisir le plus petit cadre, je rentre donc les valeur 60 et 40 dans "Largeur" et "Hauteur".
**Étape 2 : Réalisation de notre motif :**
Pour ce test je vais réaliser un petit cadre avec du texte à l'intérieure.
Je commence donc pas faire le cadre :
1) Je réalise mon cadre avec l'outil rectangle
2) Je le redimensionne en fonction de se que je veux obtenir

Une fois le cadre réaliser, je vais placer mon texte. Pour ce faire, je vais dans "Extensions>Ink/Stitch>Lettrage.
La fenêtre suivante s'ouvre :
[](https://innovation.iha.unistra.fr/uploads/images/gallery/2025-01/Wykimage.png)
Vous pouvez choisir la police d'écriture de votre choix parmi toutes celles déjà paramétrées. Si celles proposées ne vous conviennent pas, il faudra attendre patiemment que nous réalisons un tutoriel sur comment crée sa police d'écriture sur Inkstitch.
# Problèmes et astuces Broderie
### Inkstitch
#### Le fil n'est pas coupé entre deux zones distantes d'une même couleur
Par défaut, la brodeuse ne coupe pas mais "saute" entre deux zones de même couleur, pour optimiser le temps de production.
Lorsque deux zones sont distantes de plus de quelques mm, on n'a pas envie d'avoir un fil qui traverse une autre zone qui peut être d'une autre couleur.
Ne pas utiliser cette extension avant d’avoir optimisé le chemin de broderie: il faut éviter au maximum les coupes de fil. Vous trouverez dans [optimisation du chemin de broderie](https://inkstitch.org/tutorials/routing/) l’ensemble des outils qu’Ink/Stitch mets à votre disposition pour vous aider dans votre tâche d’optimisation.
- Ouvrir la fonction de transformation de Saut en Coupe
[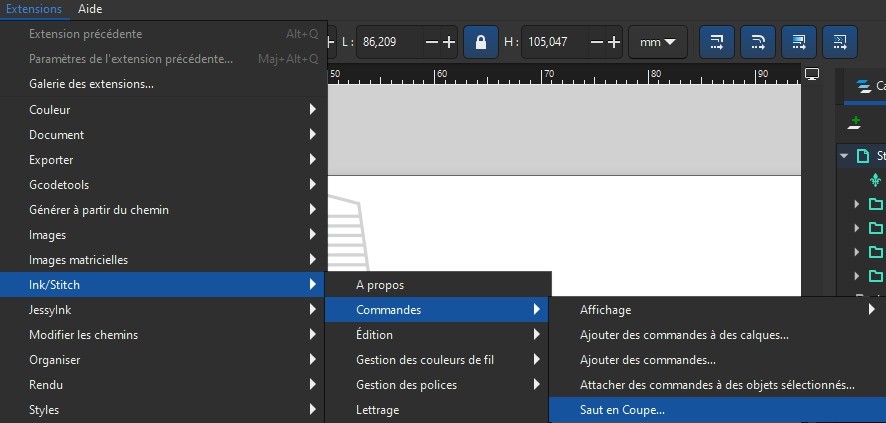](https://innovation.iha.unistra.fr/uploads/images/gallery/2025-03/whatsapp-image-2025-03-13-a-19-03-31-fc30bb82.jpg)
- Convertir les sauts en coupe en précisant les longueurs de sauts à traiter ou à ne pas convertir
[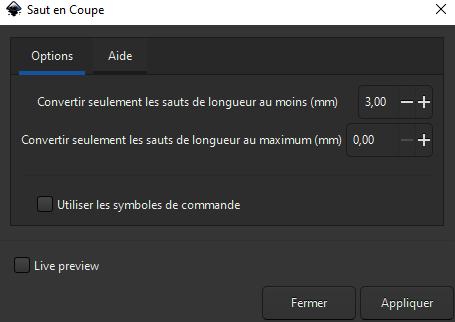](https://innovation.iha.unistra.fr/uploads/images/gallery/2025-03/W7Yimage.png)
Source : [https://inkstitch.org/fr/docs/commands/#jump-to-trim](https://inkstitch.org/fr/docs/commands/#jump-to-trim)
### L'aiguille casse trop souvent
- C'est en général parce-qu'il y a trop de densité de fil à l'endroit où elle casse.
- Vérifier qu'il n'y a pas plusieurs zones superposées, ou que la densité de fil de la zone n'est pas trop élevée.
Sur Inkscape la fonction `Chemin > Aplatir` permet de séparer tous les chemins de sorte qu'aucun ne se superpose. Les morceaux de chemins se trouvant sous un autre chemin seront supprimés.
[](https://innovation.iha.unistra.fr/uploads/images/gallery/2025-03/unHimage.png)
# Pistes de fournisseurs pour broderie
## **Pistes de fournisseurs pour la broderie**
Voici quelques fournisseurs pour du matériel de broderie et des motifs de broderies (il y en a plein d'autres, mais je vous donne ceux que je connais)
### **Matériel de broderie**
##### Merckling, Espace Couture & Services (chez qui se fournit le Fablab)
29, Grand'Rue 67500 HAGUENAU
[https://www.espace-couture.fr/](https://www.espace-couture.fr/)
On y trouve fils, stabilisateurs, etc.
##### Le Fil de vos idées:
[https://www.lefildevosidees.com/](https://www.lefildevosidees.com/)
On y trouve des fils en viscose, polyester, coton, phosphorescent, etc., des stabilisateurs, des tissus spécial écussons avec stabilisateur déjà en place,...
(Ils proposent également des nuanciers et j'en ai plusieurs, donc n'hésitez pas à demander si vous souhaitez des précisions)
### **Tutoriels pour la broderie (essentiellement Inkstitch)**
##### Médiathèque départementale de l'Essonne
[leur site](https://mde.essonne.fr/search.aspx?SC=DEFAULT&QUERY=Thesaurus_id_exact:THESAURUS1%7CBRODE+AND+sys_base:%22SYRACUSE%22&QUERY_LABEL=Broderie+num%C3%A9rique#/Search/(query:(FacetFilter:%7B%7D,ForceSearch:!f,InitialSearch:!f,Page:0,PageRange:3,QueryGuid:'61b71fd6-3258-4538-ac39-6940ae9325df',QueryString:'Thesaurus_id_exact:THESAURUS1%7CBRODE%20AND%20sys_base:%22SYRACUSE%22',ResultSize:'96',ScenarioCode:DEFAULT,ScenarioDisplayMode:display-vignet,SearchGridFieldsShownOnResultsDTO:!(),SearchLabel:'Broderie%20num%C3%A9rique',SearchTerms:'Thesaurus_id_exact:THESAURUS1%7CBRODE%20AND%20sys_base:%22SYRACUSE%22',SortField:!n,SortOrder:0,TemplateParams:(Scenario:'',Scope:Default,Size:!n,Source:'',Support:'',UseCompact:!f),UseSpellChecking:!n),sst:4) "tutos broderie Médiathèque départementale de l'Essonne")
[leurs tutos pour Inkstitch](https://mde.essonne.fr/search.aspx?SC=MDE_PARTOUT&QUERY=inkstitch&QUERY_LABEL=#/Search/(query:(InitialSearch:!t,Page:0,PageRange:3,QueryString:inkstitch,ResultSize:-1,ScenarioCode:MDE_PARTOUT,SearchContext:0,SearchLabel:'')) "tutos Inkstitch Médiathèque départementale de l'Essonne")
##### Le blog d'Alyogau
Son site: [https://lyogau.over-blog.com/page-1463087.html](https://lyogau.over-blog.com/page-1463087.html)
### **Motifs de broderie**
##### Motifs gratuits
**Brother**: [https://sewingcraft.brother.eu/fr-fr/idees-creatives/motifs-gratuits](https://sewingcraft.brother.eu/fr-fr/idees-creatives/motifs-gratuits)
**Royal Present Embroidery**: ils ont une sélection de motifs gratuits et aussi des payants
[https://royal-present.com/blog/free-machine-embroidery-designs-2/](https://royal-present.com/blog/free-machine-embroidery-designs-2/)
**Ann The Gran**: possibilité d'avoir **3 designs gratuits par semaine**, mais il y a aussi des motifs payants
[https://www.annthegran.com/free-embroidery-designs#/?pg=1&sort=popular&ipp=120&view=grid&prdtype=stockdesign&fp=true&fpo=](https://www.annthegran.com/free-embroidery-designs#/?pg=1&sort=popular&ipp=120&view=grid&prdtype=stockdesign&fp=true&fpo=)
**Embroideres**: ils ont une sélection de mtoifs gratuits et une autre de motifs payants
[https://embroideres.com/free-embroidery-designs](https://embroideres.com/free-embroidery-designs)
**Embroidery Designs**: [https://www.embroiderydesigns.com/freeembroiderydesigns#/?pg=1&sort=popular&ipp=120&view=grid&prdtype=stockdesign&availability=in-stock&fp=true&fpo=](https://www.embroiderydesigns.com/freeembroiderydesigns#/?pg=1&sort=popular&ipp=120&view=grid&prdtype=stockdesign&availability=in-stock&fp=true&fpo=)
##### Motifs à acheter
**Etsy**: (n'hésitez pas à ajouter des mots-clés pour faciliter votre recherche!): [https://www.etsy.com/fr/market/motif\_broderie\_machine](https://www.etsy.com/fr/market/motif_broderie_machine)
**Urban Threads**: en anglais, mais ils ont un blog avec des tutoriels pour vous aider à réaliser leurs différents types de broderie (paiement en USD)
[https://urbanthreads.com/](https://urbanthreads.com/)
**Embroidery Library**: en anglais, mais ils ont un blog avec des tutoriels pour vous aider à réaliser leurs différents types de broderie (paiement en USD)
[https://emblibrary.com/?country=US](https://emblibrary.com/?country=US)
# Mise en place pour de la broderie sur tissu
## **Mise en place pour de la broderie sur tissu**
Voici une technique qui, contrairement à celle de broder sur vêtements finis type T-shirts ou sacs, vous permettra de réaliser des choses comme des écussons, des galons et même des boutonnières et des appliqués.
#### **Présentation**Pour broder, l’idéal est que votre morceau de tissu mesure au **minimum 5-6cm** de plus que le cadre choisi **de chaque côté**.Dans ce cas-là, il vous suffit d’avoir un morceau de stabilisateur (classique ou hydrosoluble) et de le placer au-dessus ou en-dessous du tissu suivant les instructions et de placer le tout dans le cadre de broderie choisi.Cependant, il arrive parfois que le morceau de tissu n’ait pas assez de marge ou qu’il corresponde pile aux dimensions du cadre.Dans ce cas de figure, je vous présente deux options pour remédier à ce problème.
#### **Option n°1 : machine à coudre**
##### Matériel :- Machine à coudre- Epingles- Fil- Stabilisateur- Tissu à broder- Chutes de tissu- Ciseaux de couture
##### Technique :Commencez par superposer votre tissu et le stabilisateur de votre choix.Prenez deux chutes de tissu de la largeur de votre tissu à broder et épinglez-les de façon à ce qu’ils se superposent d’environ 5-10mm sur le tissu. [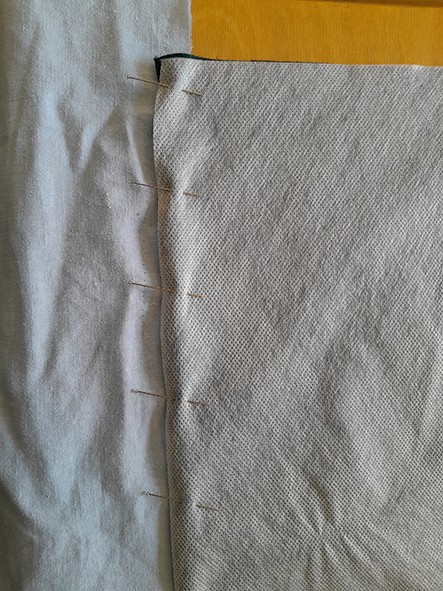](https://innovation.iha.unistra.fr/uploads/images/gallery/2025-10/tissu-epingle-cote.jpg)(Astuce : si vous n’avez pas de chutes de tissus, prenez par exemple une vieille taie d’oreiller. Défaites les coutures et faites un repère à 5-10cm le long du bord du tissu. Coupez le long de cette ligne ou faites une fente et tirez des deux côtés. On trouve des taies d’oreiller et des draps chez Emmaüs)[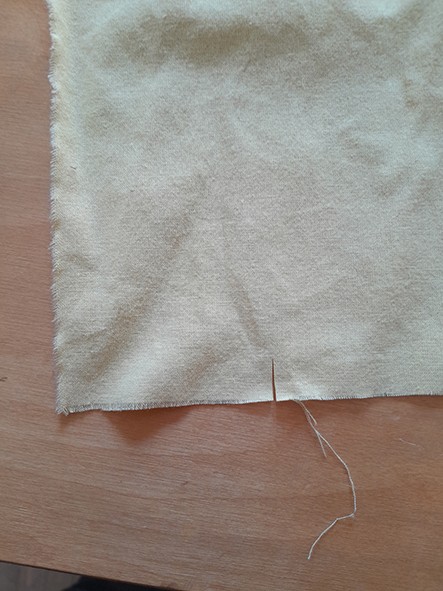](https://innovation.iha.unistra.fr/uploads/images/gallery/2025-10/tissu-fendu.jpg)[ 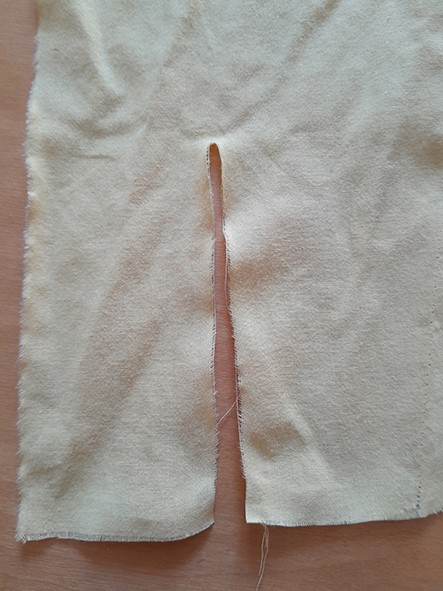](https://innovation.iha.unistra.fr/uploads/images/gallery/2025-10/tissu-dechire.jpg)Réglez le point de votre machine au plus long. [](https://innovation.iha.unistra.fr/uploads/images/gallery/2025-10/reglage-point-machine.jpg)Cousez à quelques millimètres le long des bords.[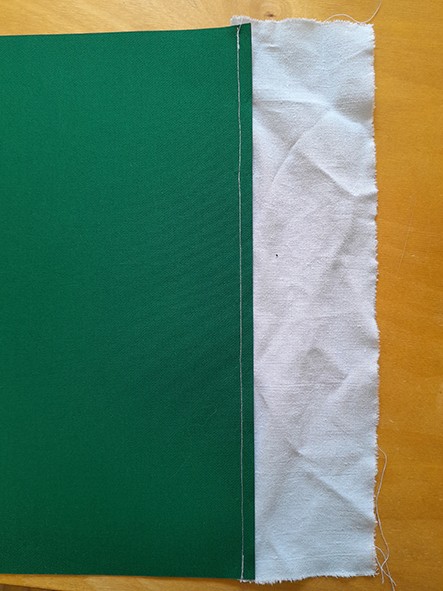 ](https://innovation.iha.unistra.fr/uploads/images/gallery/2025-10/tissu-cote-cousu.jpg)[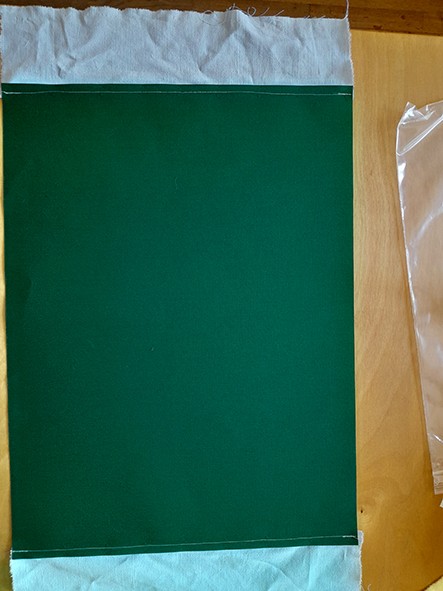](https://innovation.iha.unistra.fr/uploads/images/gallery/2025-10/tissu-cousu.jpg)Recommencez de la même façon avec les longueurs.[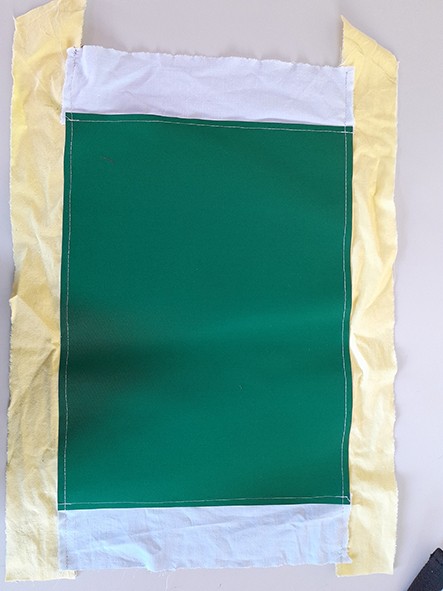](https://innovation.iha.unistra.fr/uploads/images/gallery/2025-10/tissu-preparation-finie.jpg)Vous pouvez ensuite broder.[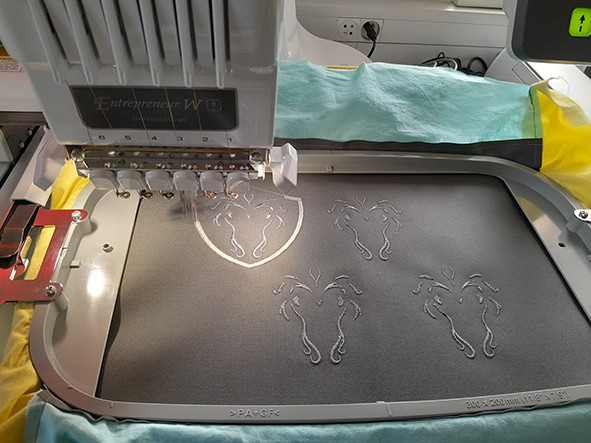](https://innovation.iha.unistra.fr/uploads/images/gallery/2025-10/broderie.jpg)Quand la broderie est terminée, défaites les coutures et enlevez les chutes de tissu.
#### **Option n°2 : couture main**
Si vous n’avez pas de machine à coudre, vous pouvez coudre les chutes de tissu à la main.
##### Matériel :- Aiguille à coudre- Epingles- Fil- Stabilisateur- Tissu à broder- Chutes de tissu- Ciseaux de couture- Optionnel : dé à coudre
##### Technique :Préparez le tissu à broder, le stabilisateur et les chutes de tissu comme pour **l’option n°1**.Coupez une longueur de fil et passez-le dans le chas de votre aiguille.Optionnel : Faites un nœud au bout du fil.Piquez l’aiguille dans votre tissu et tirez-le de façon à ce qu’un bout dépasse.Repassez l’aiguille au même endroit et tirez : cela va bloquer le fil.[ ](https://innovation.iha.unistra.fr/uploads/images/gallery/2025-10/couture-main-premier-point-noeud.jpg)[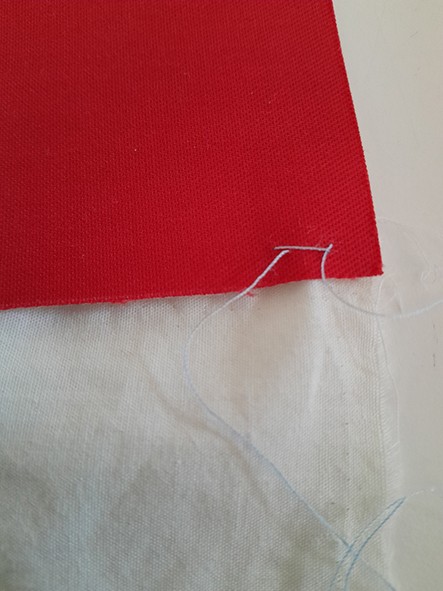](https://innovation.iha.unistra.fr/uploads/images/gallery/2025-10/couture-main-noeud.jpg)Piquez l’aiguille dans le tissu de façon à faire un point avant. Continuez tout le long du tissu.[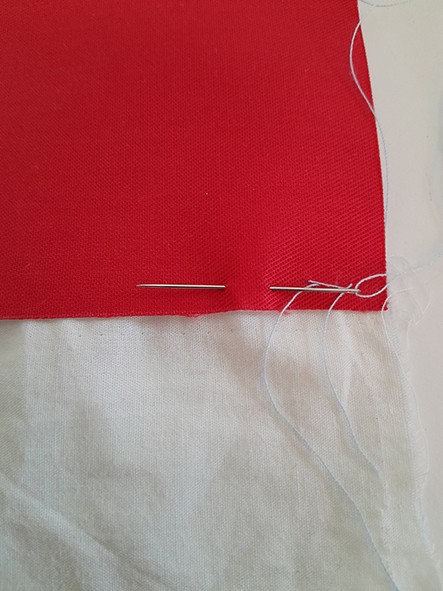 ](https://innovation.iha.unistra.fr/uploads/images/gallery/2025-10/couture-main-premier-point.jpg)[](https://innovation.iha.unistra.fr/uploads/images/gallery/2025-10/couture-main-detail.jpg)Quand vous arrivez au bout du tissu, repassez l’aiguille au niveau du dernier point, comme au début de la couture pour bloquer le fil.[](https://innovation.iha.unistra.fr/uploads/images/gallery/2025-10/couture-main-points-avant.jpg)Coupez le fil en laissant une petite longueur.[](https://innovation.iha.unistra.fr/uploads/images/gallery/2025-10/couture-main-noeud-fin.jpg)Recommencez avec les autres chutes de tissu.Quand la broderie est terminée, enlevez les fils et les chutes de tissu.Astuce : ces points main sont aussi pratiques si on veut faire des repères sur le tissu pour aider au placement de la broderie.[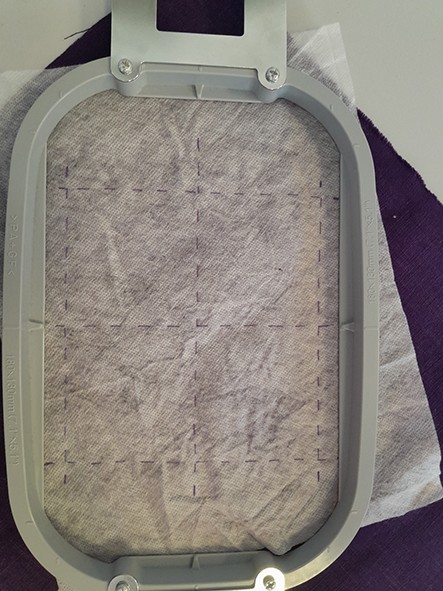 ](https://innovation.iha.unistra.fr/uploads/images/gallery/2025-10/tissu-prepare.jpg)[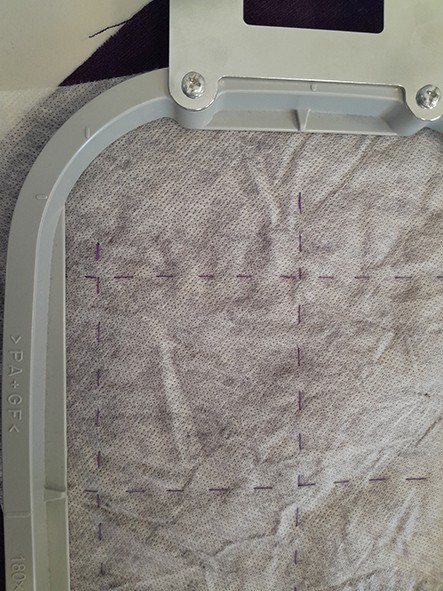](https://innovation.iha.unistra.fr/uploads/images/gallery/2025-10/tissu-prepare-detail-marquage.jpg)
# Scan 3D
# BQ Ciclop
[http://toulonux.org/ciclope.html](http://toulonux.org/ciclope.html)
[https://premium-forum.fr/viewforum.php?f=38](https://premium-forum.fr/viewforum.php?f=38)
Firmware Arduino Uno
A flasher avec Arduino IDE
[https://github.com/bqlabs/horus-fw](https://github.com/bqlabs/horus-fw)
[https://reprap.org/wiki/Horus](https://reprap.org/wiki/Horus)
Logiciel Horus
[https://horus.readthedocs.io/en/release-0.2/](https://horus.readthedocs.io/en/release-0.2/)
[https://github.com/bqlabs/horus](https://github.com/bqlabs/horus)
source CAO Ciclop :
[https://github.com/bqlabs/ciclop](https://github.com/bqlabs/ciclop)
[https://reprap.org/wiki/Ciclop](https://reprap.org/wiki/Ciclop)
[https://www.instructables.com/Ciclop-3d-Scanner-My-Way-Step-by-Step/](https://www.instructables.com/Ciclop-3d-Scanner-My-Way-Step-by-Step/)
# Matter and Form v1
### Logiciel MFStudio
#### Calibration
[https://matterandform.zendesk.com/hc/en-us/articles/360045310891-Calibrating-the-Scanner](https://matterandform.zendesk.com/hc/en-us/articles/360045310891-Calibrating-the-Scanner)
[https://matterandform.zendesk.com/hc/en-us/articles/360045380792-Calibration-Troubleshooting](https://matterandform.zendesk.com/hc/en-us/articles/360045380792-Calibration-Troubleshooting)
#### Lancer un scan
Le scan est réalisé avec +Quickscan qui est inclus dans le logiciel MFStudio.
- Télécharger et installer MFStudio [https://www.matterandform.net/pages/v2](https://www.matterandform.net/pages/v2)
- Brancher le scanner à l'ordinateur
- Choisir les limites inférieure et supérieure du scan
- Régler la résolution du scan pour tourner plus ou moins vite (pas de 1° ou 5° max)
- Lancer le scan
### Achat composants
[https://www.comprise.de/matter-and-form-3d-scanner-accessories-bundle\_49505\_8671](https://www.comprise.de/matter-and-form-3d-scanner-accessories-bundle_49505_8671)
[https://www.amazon.com/Matter-Form-Scanner-Replacement-Calibration/dp/B0C47TL8YD](https://www.amazon.com/Matter-Form-Scanner-Replacement-Calibration/dp/B0C47TL8YD)
### Sources
Doc : [https://matterandform.zendesk.com/hc/en-us/categories/360003490832-V2-V1-and-MFStudio](https://matterandform.zendesk.com/hc/en-us/categories/360003490832-V2-V1-and-MFStudio)
[https://libguides.library.universityofgalway.ie/scanner](https://libguides.library.universityofgalway.ie/scanner)
[https://www.eduporium.com/blog/tips-tricks-matter-and-form-3d-scanner/](https://www.eduporium.com/blog/tips-tricks-matter-and-form-3d-scanner/)
[https://filmvideoandvirtualreality.wordpress.com/2021/12/23/review-matter-and-form-3d-scanner-from-jaycar/](https://filmvideoandvirtualreality.wordpress.com/2021/12/23/review-matter-and-form-3d-scanner-from-jaycar/)
[https://www.engineering.com/a-portable-desktop-scanner-for-makers-and-educators/](https://www.engineering.com/a-portable-desktop-scanner-for-makers-and-educators/)
Projets STEM : [https://matterandformedu.net/steam-projects/](https://matterandformedu.net/steam-projects/)
# Scanner 3D creality Otter et Raptor
##### Caractéristiques techniques
Caractéristiques techniques du scanner 3D creality **Otter** (Fablab Alsace-Nord) :
[](https://innovation.iha.unistra.fr/uploads/images/gallery/2025-06/aM8image.png)
Caractéristiques techniques du scanner 3D **CR Scan Raptor** (Fablab Usocome) :
[](https://innovation.iha.unistra.fr/uploads/images/gallery/2025-05/6U5image.png)
[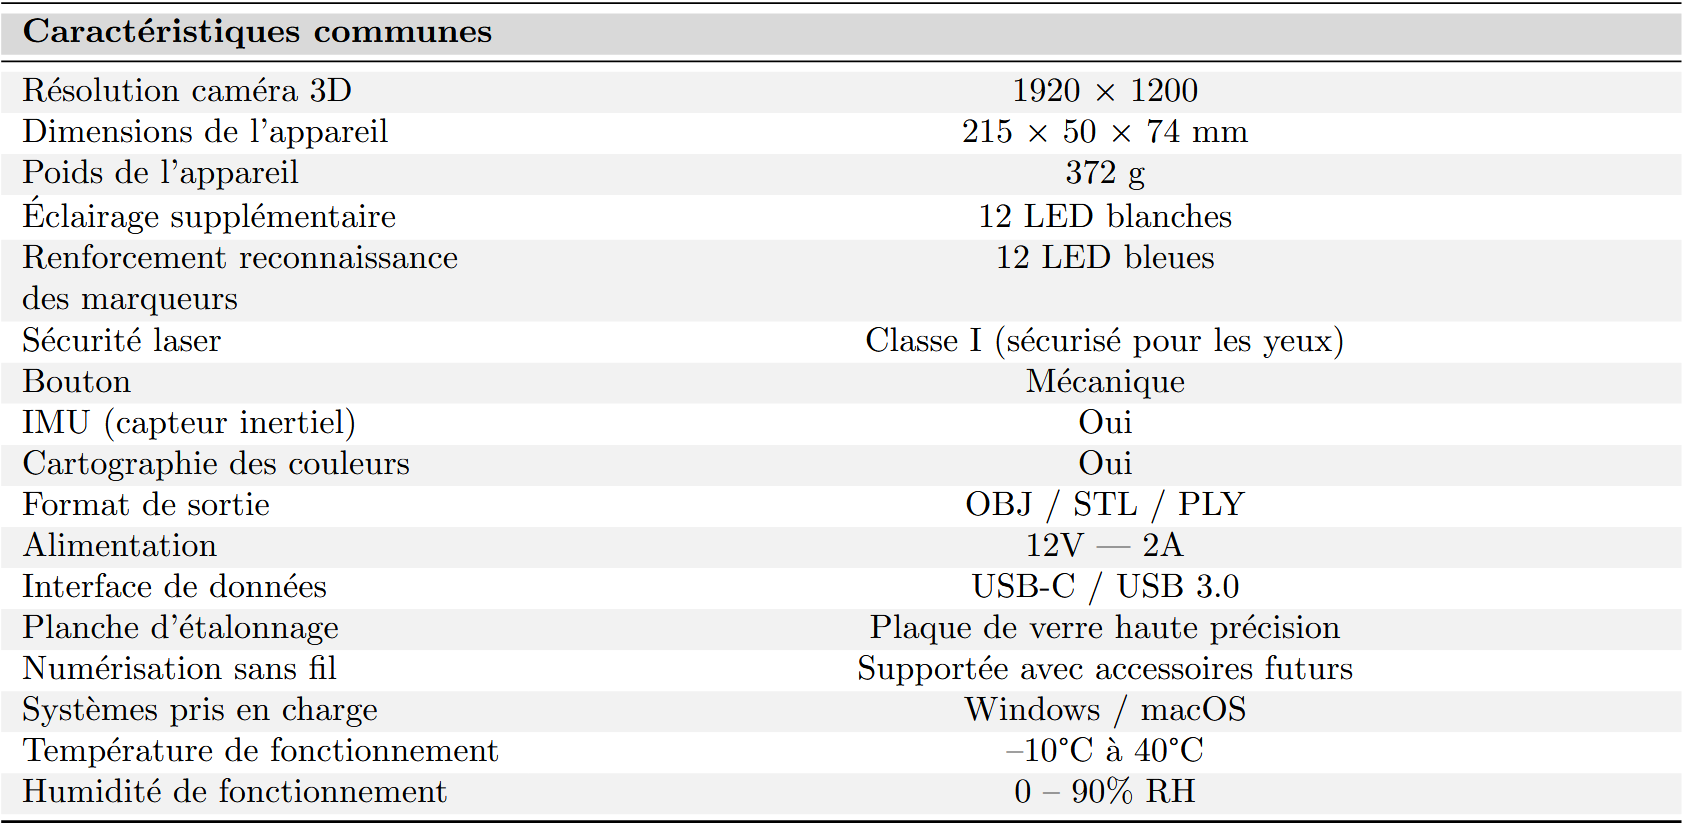](https://innovation.iha.unistra.fr/uploads/images/gallery/2025-05/HuDimage.png)
##### Quand choisir le mode Lumière Bleue (laser), et quand choisir le mode Infrarouge (IR) ?
🌑 Absorbe trop la lumière (surtout lumière bleue) → **signal faible ou absent** pour le capteur.
**Transparente (verre, plastique translucide)**
❌ La lumière **ne revient pas au capteur de façon prévisible** → données inexploitables sans traitement préalable.
##### Configuration des modes (IR + Lumière bleue)Le logiciel de scan associé aux scanners de la marque Creality est Creality Scan (disponible sur Windows et MacOS), nous allons dans un premier temps voir les paramètres de scan du mode infrarouge (commun aux deux scanners mentionnés plus tôt).
[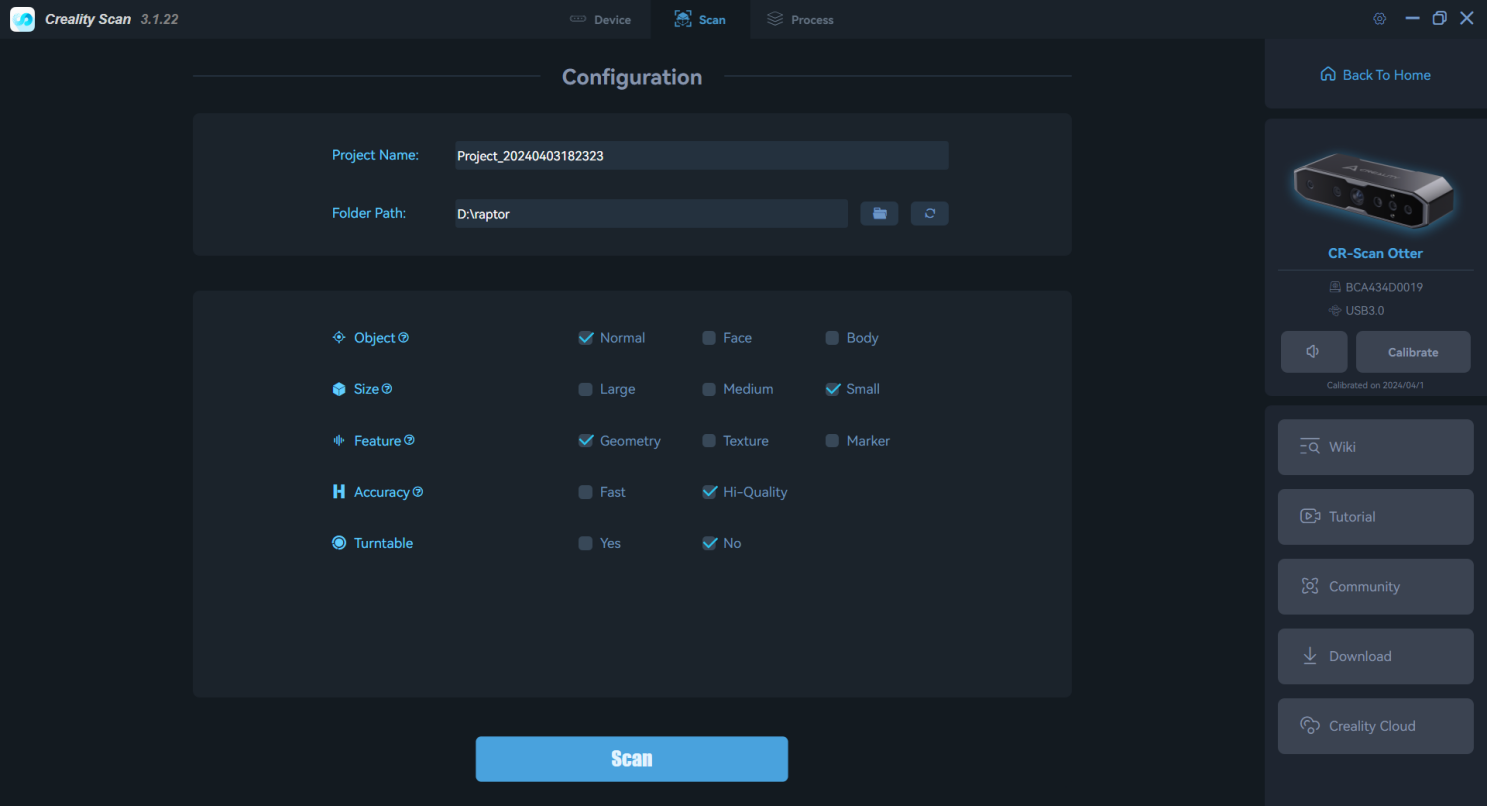](https://innovation.iha.unistra.fr/uploads/images/gallery/2025-05/uzsimage.png)
Le **premier** paramètre `Object` est assez parlant, 3 options sont possibles `Normal`, `Face`, et `Body`. Pour tout type d'objet choisir `Normal`, pour le scan d'un visage choisir `Face`, et pour le scan d'un corps entier choisir `Body`.
Le **second** paramètre `Size`, 3 options à nouveau, `Large`, `Medium`, et `Small`, à définir en fonction de la taille de votre sujet de scan, pour des objets de 5 à 15 cm choisir `Small`, pour des objets de 20 à 70 cm choisir `Medium`, et pour des objets de plus de 70 cm ou des personnes choisir `Large`.
Le **troisième** paramètre `Feature`, concerne la méthode de suivi (tracking) que le scanner utilisera pour se repérer dans l'espace afin de pouvoir numériser la surface du sujet de scan. A nouveau 3 options, `Geometry`, `Texture` et `Marker`.
*Geometry* : La pièce possède une géométrie irrégulière et non répétitive, permettant au scanner de se repérer à l’aide des variations de la géométrie.
Exemples de pièces adaptées :
• Pièce organique, sculpture manuelle
Pièces déconseillées :
• Formes régulières comme cube, sphère, cylindre, pyramide (risque de
perte de tracking)
*Texture* : La pièce possède une surface avec beaucoup de relief, facilement distinguable par le laser.
Exemples de pièces adaptées :
• Figurine avec détails sculptés, objet peint ou texturé, textile structuré
Conditions idéales :
• Bon éclairage uniforme (éviter les ombres marquées)
• Surface non réfléchissante
*Marker*****: Généralement le plus précis, peu importe la forme ou l’aspect de la pièce, mais demande une préparation dont les deux autres modes sont exemptés. Il faut placer les marqueurs de façon aléatoire sur la surface et/ou l’environnement de scan autour de la pièce, plus il y a de marqueurs meilleur sera le tracking du scanner.
Le **quatrième** paramètre `Accuracy`, vous propose deux options à nouveau assez parlante, qui concerne la qualité de scan, ce paramètre joue sur le temps que prendra votre scan et la qualité de ce dernier. (`Fast` = moins long, moins qualitatif, `Hi-Quality`= plus long, plus qualitatif)
Le **cinquième** et dernier paramètre `Turntable`\*, il s'agit de si oui ou non nous utilisons un plateau rotatif compatible avec le logiciel Creality Scan, dans le cas où vous utiliseriez un plateau rotatif motorisé pour votre pièce et un trépied pour le scanner choisir `Yes`, autrement choisir `No`. \*Ce paramètre a changé dans la dernière version du logiciel, et se nomme désormais `Disable Flatbase` et semblerait avoir une autre utilité, non déterminé à l'heure actuelle.
**A noter :** Sur la dernière version du logiciel (3 juin 2025), le **cinquième paramètre** s'appelle désormais `Disable flatbase` et n'est pas sensiblement différent de son prédécesseur, ce dernier servant à retirer la surface place sur laquelle l'objet est scanné. Quelques utilisateurs ont pu rapporter que l'utilisation de cette fonctionnalité pouvait amener quelques soucis lors du scan (à approfondir). Pour utiliser cette fonctionnalité, sélectionner `No`, dans l'autre cas `Yes`.
[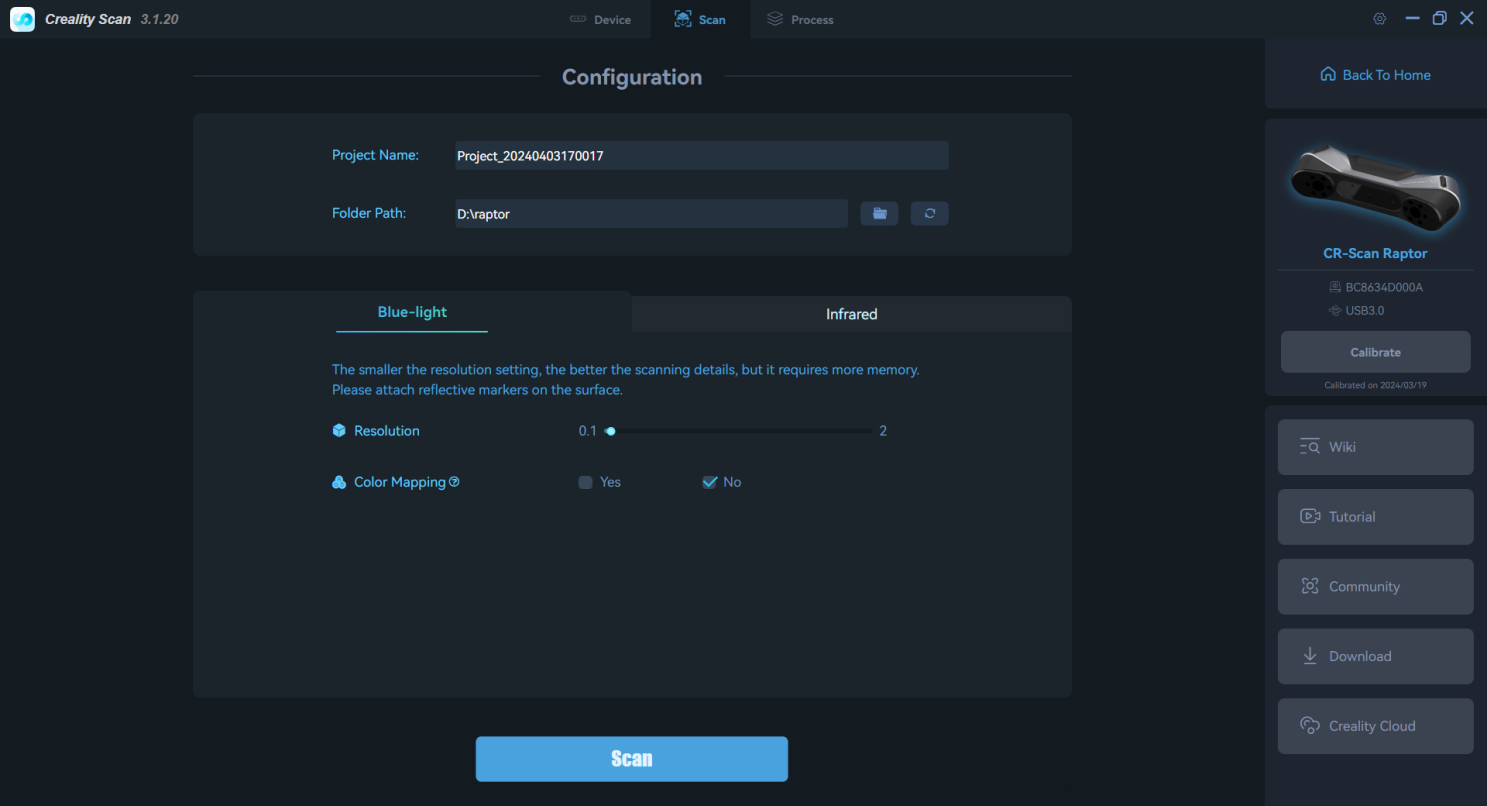](https://innovation.iha.unistra.fr/uploads/images/gallery/2025-05/kfCimage.png)
Le mode `Lumière bleue` (Blue-light) est un peu plus simple à configurer mais demande l'utilisation de marqueurs systématiquement (petites gommettes réfléchissante, placées aléatoirement), plus la `Resolution` est faible, meilleur sera la résolution de vos résultats mais ça vous demandera un PC plus capable. Si vous êtes limités par votre hardware, nous vous conseillons d'effectuer quelques essais pour trouver l'équilibre entre qualité suffisante et confort de scan. `Color Mapping` est un simple paramètre vous demandant si vous souhaité inclure les couleurs de l'objets scanné (dans ce cas la lumière sera importante pour obtenir de bons résultats), ce paramètre n'influe pas sur la qualité ou le temps de scan.
> #### ✅ Configuration recommandée :
>
> - **Processeur (CPU)** : Intel **Core i7 de 8ᵉ génération ou plus récent**
> 🔁 *Équivalent AMD* : **Ryzen 7 2700** ou supérieur
> - **Carte graphique (GPU)** : Carte graphique **NVIDIA** dédiée (ex. : GTX 1660, RTX 2060 ou supérieur)
> 🔁 *Équivalent AMD* : **Radeon RX 5600 XT**, RX 5700 ou supérieur
> - **Mémoire vive (RAM)** : **16 Go ou plus**
>
> ---
>
> #### ⚠️ Configuration minimale :
>
> - **Processeur (CPU)** : Intel **Core i5 de 8ᵉ génération ou plus récent**
> 🔁 *Équivalent AMD* : **Ryzen 5 2500U / 2600** ou supérieur
> - **Mémoire vive (RAM)** : **8 Go ou plus**
##### Montage pour un scan sans prise de têtePour obtenir des résultats répétables et reproductibles, le montage suivant semble donner de bons résultats, en limitant la manipulation du scanner au minimum. Vous aurez besoin d'un trépied, et d'un plateau rotatif motorisé (un plateau de 30 cm de diamètre est assez polyvalent pour la plupart des objets).
[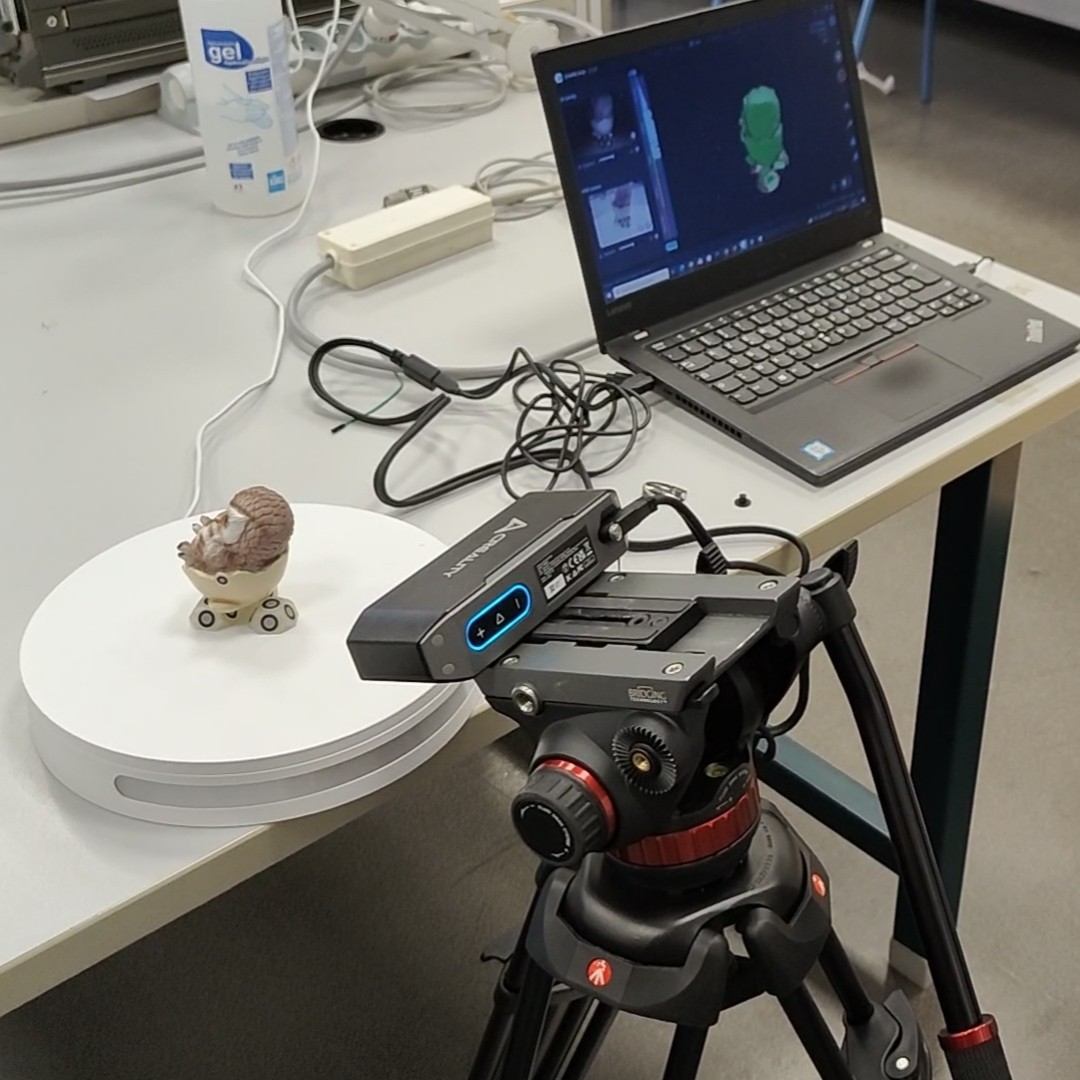](https://innovation.iha.unistra.fr/uploads/images/gallery/2025-05/montage.jpg)
Résultat du scan (IR) ( à gauche ) avec son modèle original ( à droite ) :
[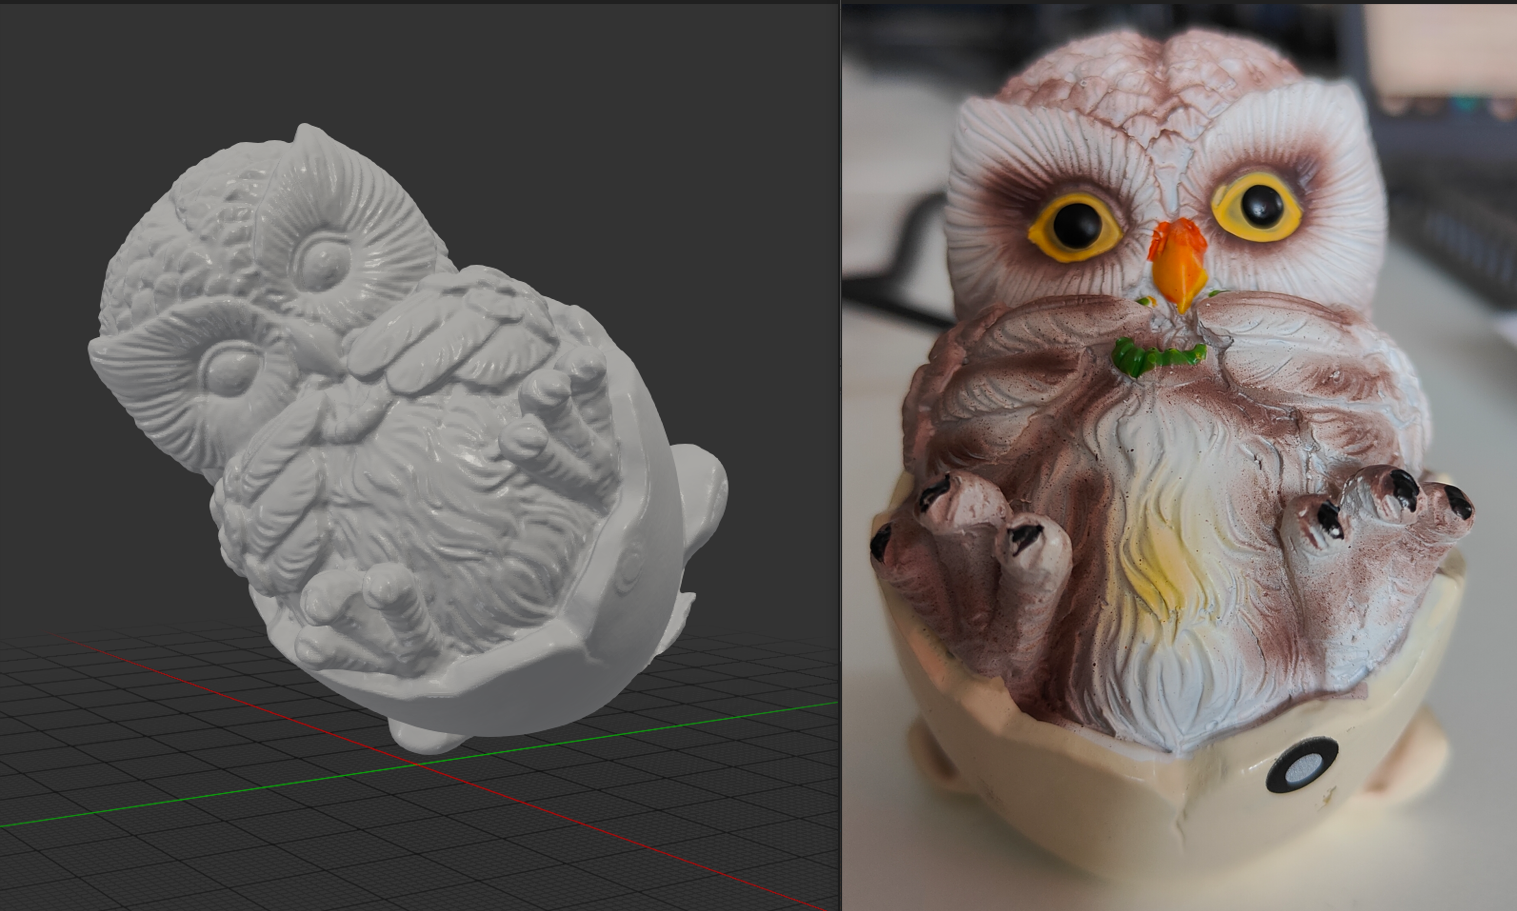](https://innovation.iha.unistra.fr/uploads/images/gallery/2025-05/K1Iimage.png)
Pour des objets de taille moyenne ou de grande taille, l'utilisation de marqueurs sera nécessaire. A revoir
*Exemple de disposition sur l'objet pour l'utilisation de marqueur*
[](https://innovation.iha.unistra.fr/uploads/images/gallery/2025-04/7kUimage.png)[](https://innovation.iha.unistra.fr/uploads/images/gallery/2025-04/ksIimage.png)
Une fois toutes les les étapes de paramétrages et de montages réalisées, vous pouvez scanner votre pièce.
#####
Utilisation du logiciel :Une fois le scan réalisé, commencer par supprimer les points indésirables. Il faut ensuite optimiser le nuage de points obtenu pour fusionner les multiples images numérisées de nuages de points (plusieurs centaines voire milliers d'images) et obtenir un nuage de points de meilleure qualité.Si le mode auto ne donne pas un résultat satisfaisant, passer en mode Manuel En mode manuel : - **Résolution** : Plus cette valeur est faible plus le modèle sera détaillé. Donc un temps de traitement plus long. Attention, résolution trop faible, par exemple 0,05 mm, peut entraîner l'absence de certaines parties du modèle. - **Sensibilité** : Plus cette valeur est élevée, plus le nombre de points retenus est élevé. Plus elle est faible, plus le nombre de points filtrés est élevé.
> Astuce : Lorsque vous traitez des objets plus petits (de moins de 25 cm), ou lorsque vous recherchez de meilleurs détails, il est recommandé de régler la résolution sur 0,1 mm ou 0,15 mm.
[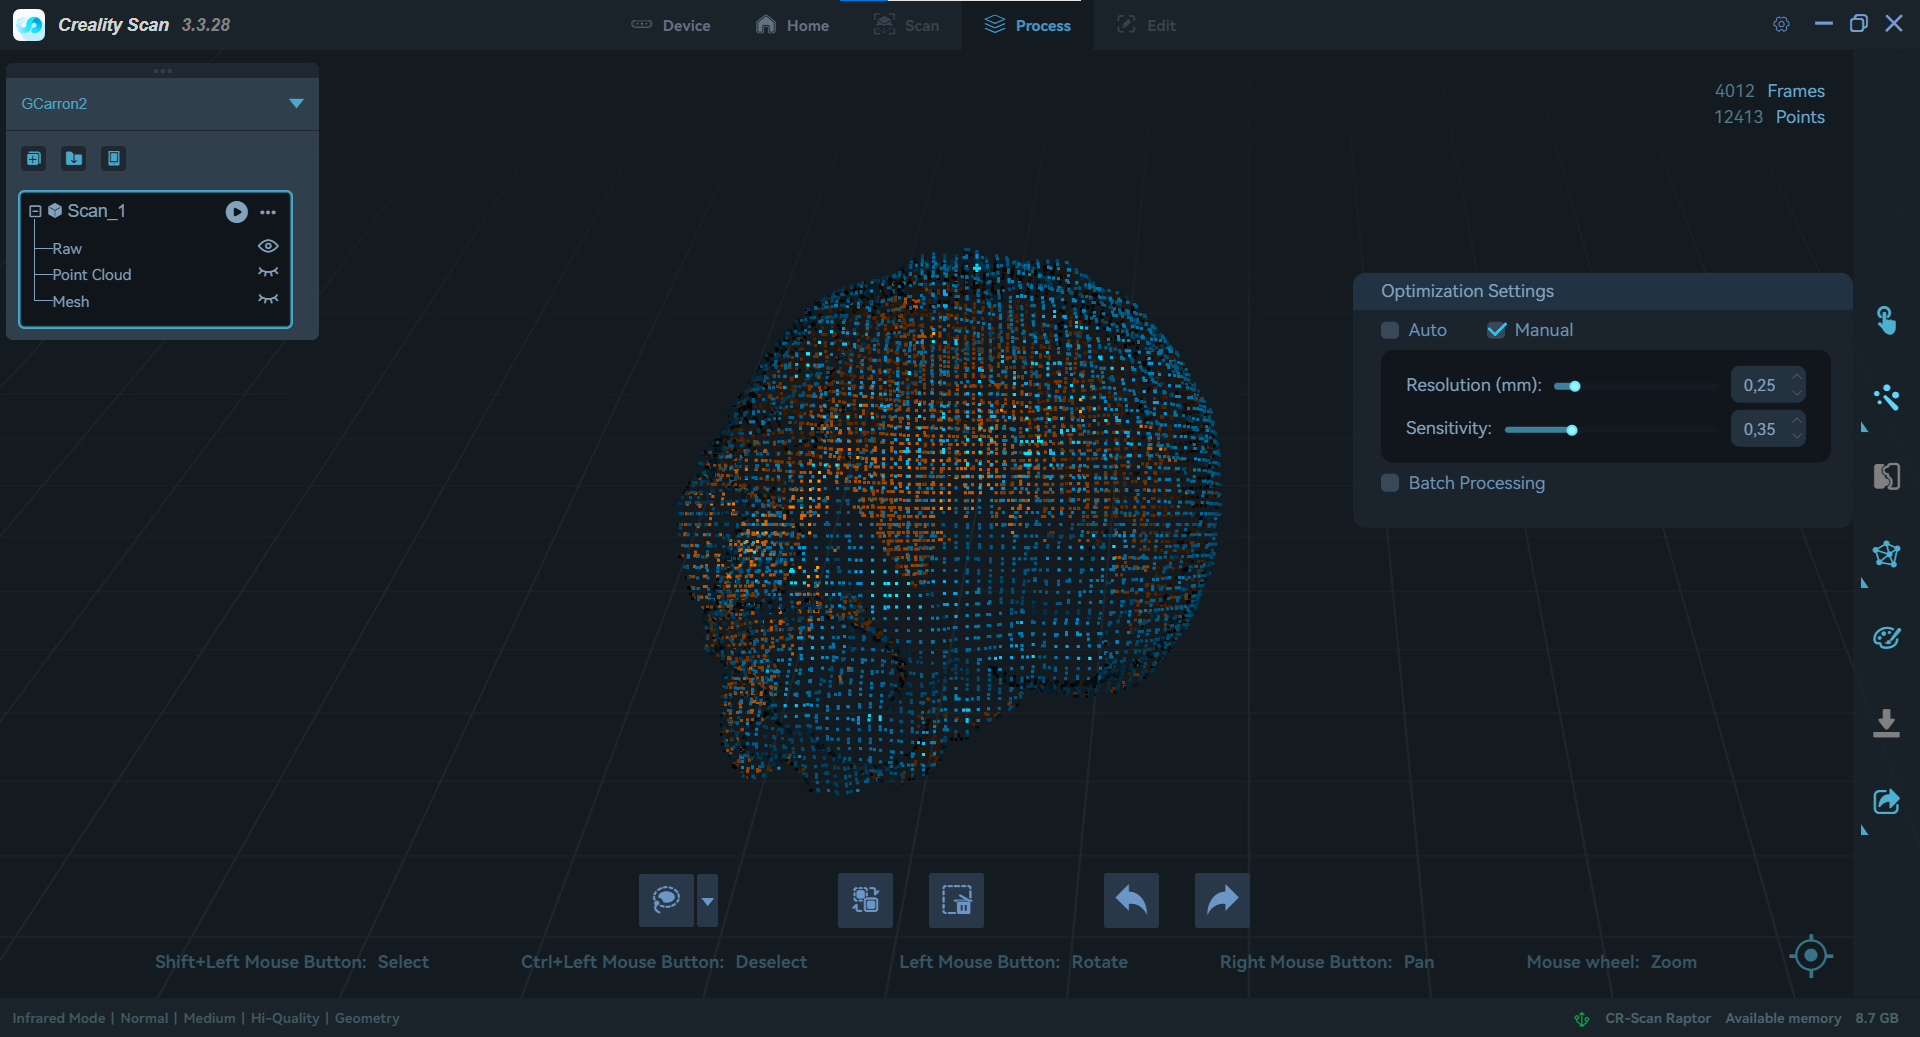](https://innovation.iha.unistra.fr/uploads/images/gallery/2025-04/capture-decran-2025-04-22-155458.png)
Ensuite les données de nuage de points sont convertit en un modèle de maillage triangulaire.
[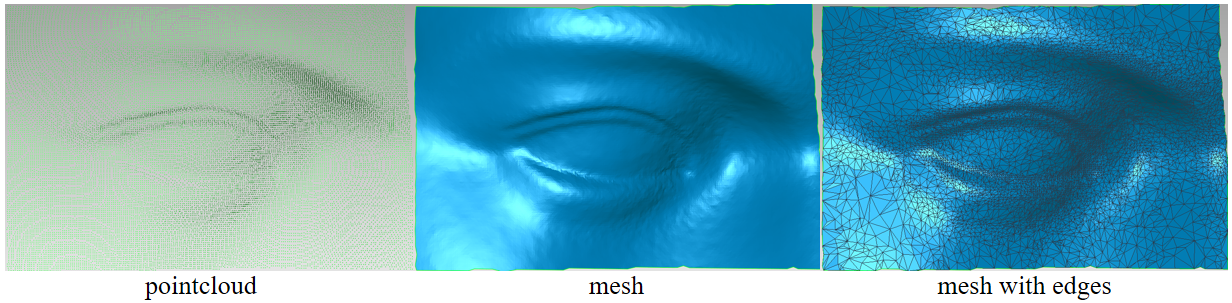](https://innovation.iha.unistra.fr/uploads/images/gallery/2025-05/meshing.png)
Lors du maillage, vous pouvez régler le nombre de faces, le lissage, et choisir de combler les trous. Un maillage plus dense offre plus de détails mais prend plus de temps.
[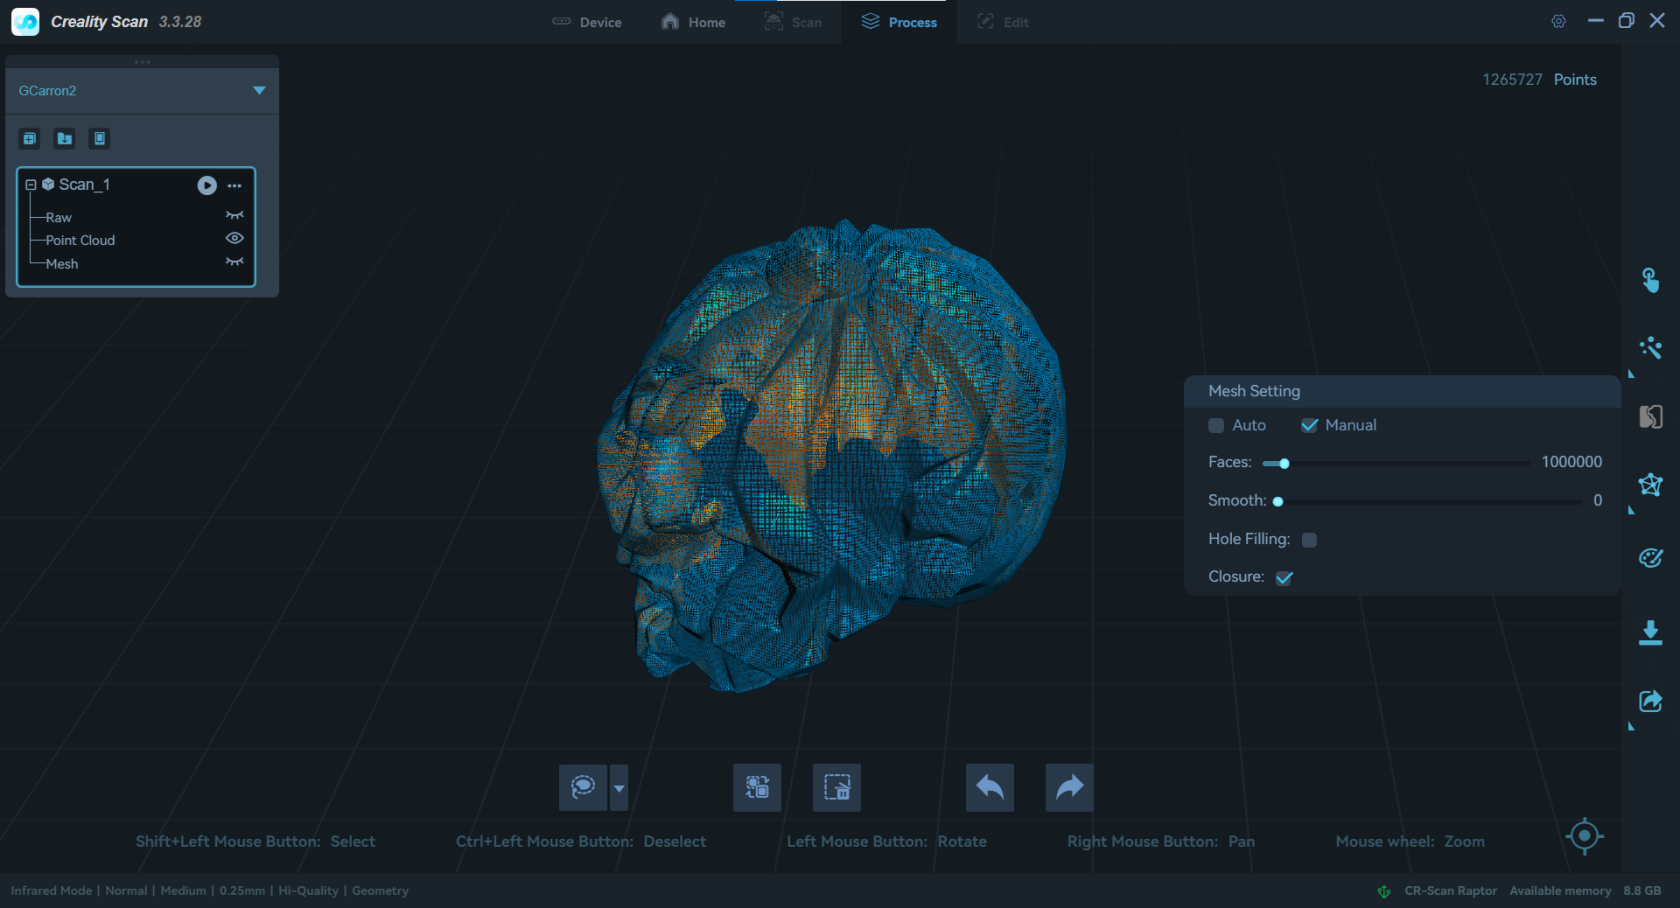](https://innovation.iha.unistra.fr/uploads/images/gallery/2025-04/capture-decran-2025-04-22-155416.png)
Une fois l'optimisation terminée, Vous pouvez sélectionner et supprimer les points indésirables.
[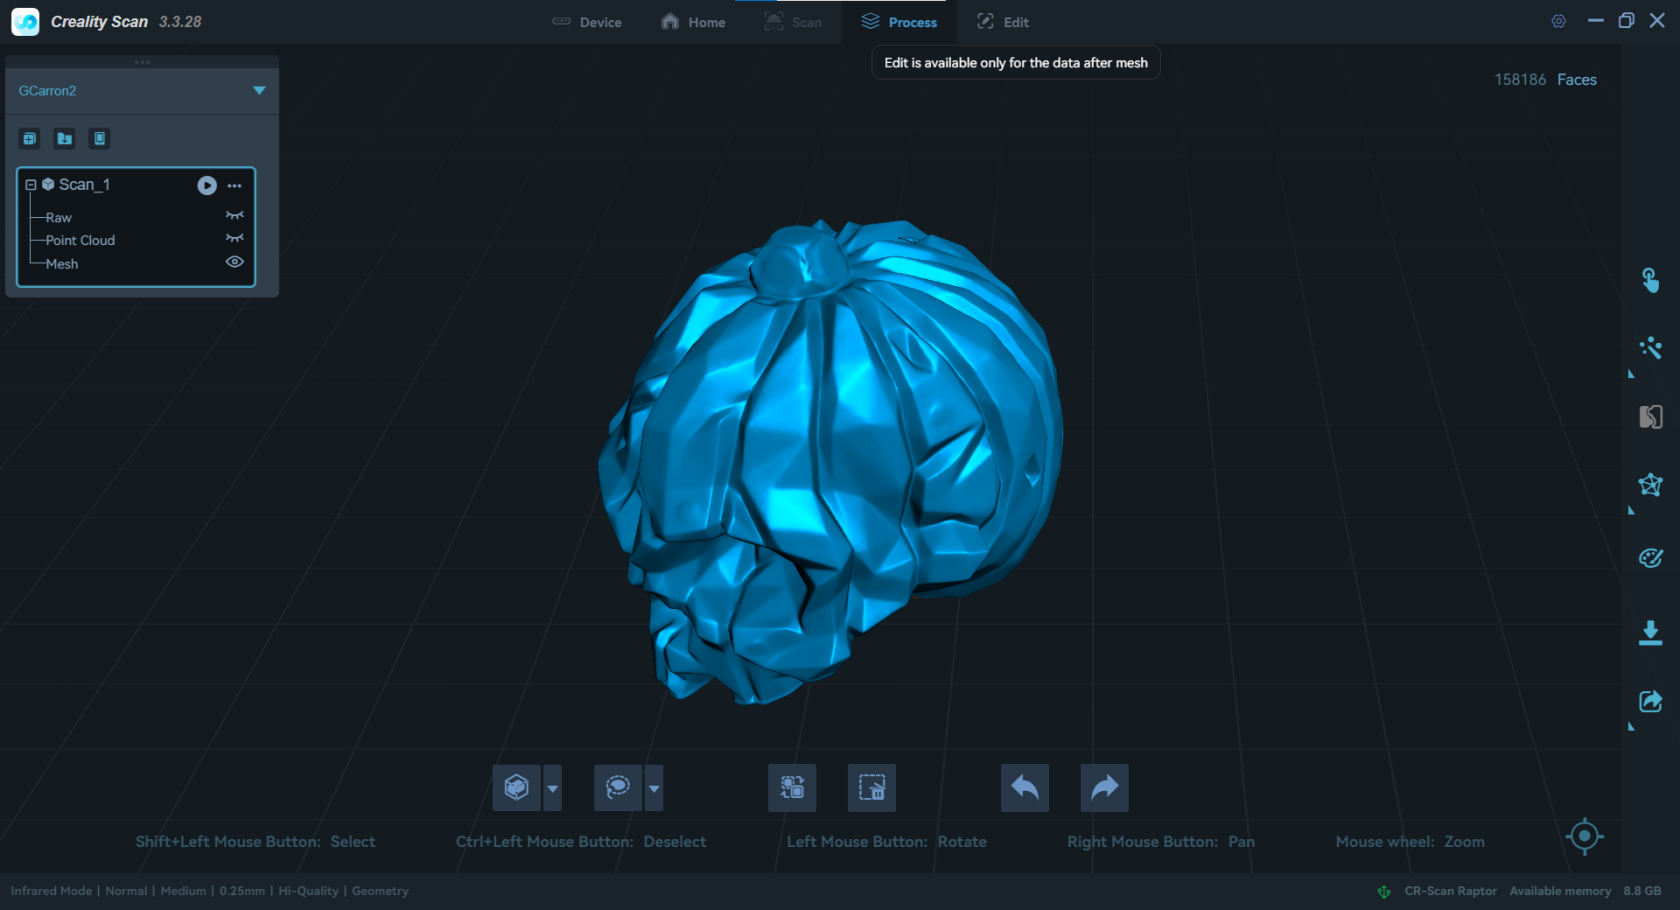](https://innovation.iha.unistra.fr/uploads/images/gallery/2025-04/capture-decran-2025-04-22-155441.png)
##### Scanner le dessous d'un objet :
Afin de pouvoir scanner l'objet dans son entièreté, il est souvent nécessaire de le scanner en plusieurs fois.
Pour ce faire, réaliser deux scans dans deux positions différentes en créant deux projets différents. Ici je vais scanner un objet de taille moyenne, je vais donc utiliser les marqueurs.
*Exemple de disposition pour deux scans différents pour la fonction multi-projet. (à droite le premier scan, à gauche le second)*
[](https://innovation.iha.unistra.fr/uploads/images/gallery/2025-04/7kUimage.png)[](https://innovation.iha.unistra.fr/uploads/images/gallery/2025-04/ksIimage.png)
Une fois les deux scans réalisées dans deux projets différents vous pouvez utiliser la fonction fusion multi-projets afin de fusionner les scans des différents projets.
[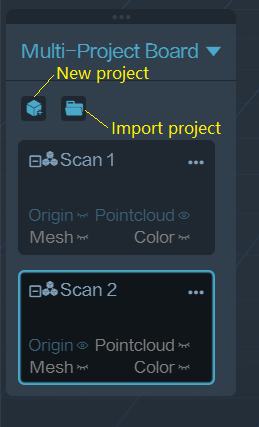](https://innovation.iha.unistra.fr/uploads/images/gallery/2025-05/fonction-multiscan.png)
A nouveau, vous pouvez choisir entre un mode automatique ou un mode manuel.
Pour le mode automatique :
\- Sélectionner les fichiers à fusionner et cliquer sur "start"
Pour le mode manuel :
\- Dans "Fixed Window", il doit y avoir le modèle de référence
\- Dans "Float Window", il doit y avoir le modèle qui va se greffer sur le modèle de référence
Vous pouvez déplacer le modèle en maintenant appuyé sur le clic de votre souris et ensuite attribuer des points de repère sur votre modèle afin de sélectionner les des zones précises de fusion du modèle.
Vous pouvez ensuite cliquer sur "Start"
[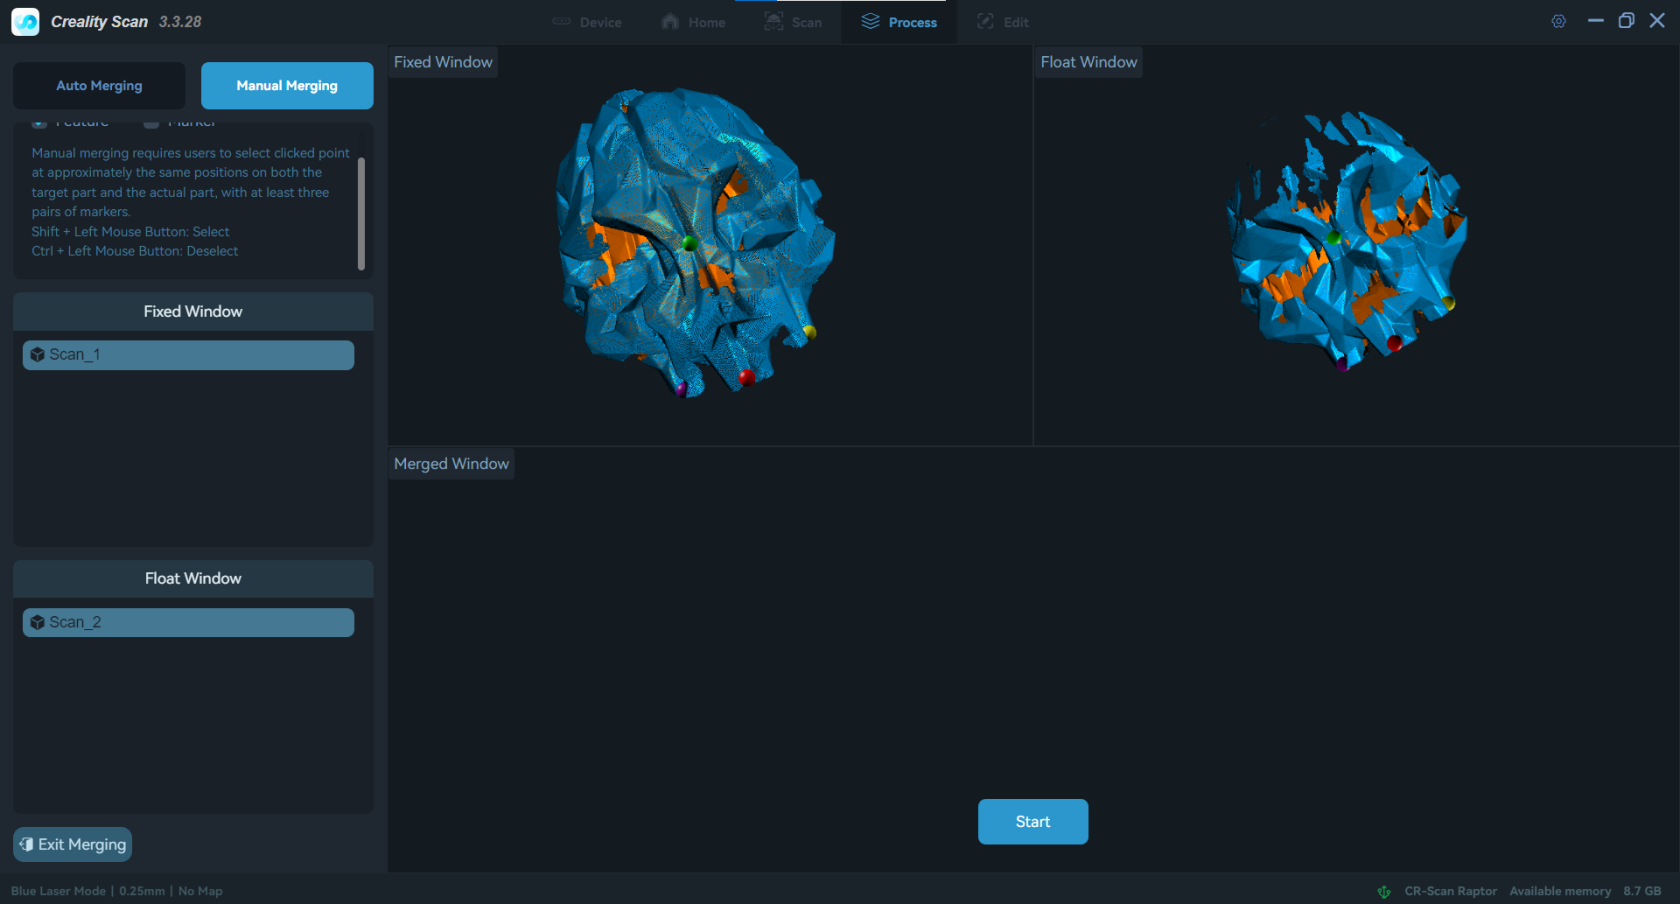](https://innovation.iha.unistra.fr/uploads/images/gallery/2025-04/capture-decran-2025-04-22-160535.png)
[](https://innovation.iha.unistra.fr/uploads/images/gallery/2025-04/capture-decran-2025-04-22-160609.png)
Ci-dessous, une comparaison des résultats de numérisation : à gauche, un seul scan réalisé avec le crâne placé à l’endroit ; à droite, deux scans fusionnés (un scan à l’endroit, et un scan à l’envers). On observe clairement l’amélioration de la qualité apportée par un second scan effectué sous un angle difficilement accessible lors du premier passage.
[](https://innovation.iha.unistra.fr/uploads/images/gallery/2025-04/ngpimage.png)
# Couture
# Machine à coudre Pfaff
- Machine à coudre Pfaff, Typ 205, 80W
- Don de Sophie (enseignante en MMI) suite à une réparation réussie lors d'un atelier de réparation organisé par "Haupla c'est réparé"
[](https://innovation.iha.unistra.fr/uploads/images/gallery/2024-08/pxl-20240527-092209684.jpg)
# Autre
# Imprimante et scanner 3D Da Vinci 1.0 AiO
Da Vinci 1.0 AiO de chez XYZprinting
[https://www.3dnatives.com/test-imprimante-da-vinci-10-aio-xyzprinting-18122015/](https://www.3dnatives.com/test-imprimante-da-vinci-10-aio-xyzprinting-18122015/)
Logiciel XYZscan [https://www.xyzprinting.com/support/en-US/Help/download/XYZscan](https://www.xyzprinting.com/support/en-US/Help/download/XYZscan)
# Flocage à sublimation
# Création du fichier
L’imprimante à sublimation Epson **SC-F100** est un outil conçu spécialement pour la personnalisation d’objets et de textiles en petite série. Compacte et simple d’utilisation, elle permet de transférer des visuels haute qualité sur divers supports tels que les tasses, coques de téléphone, textiles en polyester ou encore plaques rigides traitées pour la sublimation.
Ce tutoriel a pour objectif de vous guider pas à pas dans la prise en main de la SC-F100, depuis son installation jusqu’à la réalisation de vos premières impressions. Vous découvrirez les étapes essentielles : préparation des visuels, réglages spécifiques à la sublimation, impression, puis transfert à l’aide d’une presse thermique.
Que vous soyez débutant ou utilisateur confirmé, ce guide vous permettra d’exploiter pleinement les capacités de la SC-F100 afin d’obtenir des résultats professionnels et durables.
Pour réaliser vos fichiers vous pouvez utiliser le logiciel Cricut Design Space ou bien utiliser un logiciel de dessin vectoriel comme inkscape ou vous pourrez exporter votre design en format ".SVG".
Lien pour télécharger Cricut Design Space : https://design.cricut.com/?visitorId=4c1acd86-0b91-4205-808a-0acd4a6480f9&deepLinkGuid=0701efb8-a183-4711-b71b-958ed3cf34ee
Lien pour télécharger inkscape : [https://inkscape.org/fr/release/inkscape-1.4.2/windows/64-bit/msi/?redirected=1](https://inkscape.org/fr/release/inkscape-1.4.2/windows/64-bit/msi/?redirected=1)
Et ensuite vous passerez sur Cricut Design Space pour paramétrer votre impression.
Lien pour télécharger le driver et le logiciel de la machine:
##### **Inkscape :**
Pour l'utilisation de inkscape, nous avons déjà un tuto de base pour apprendre à utiliser le logiciel. Je vous laisse vous y référer pour la création de vos designs si vous les réaliser vous mêmes.
[https://innovation.iha.unistra.fr/books/2-fablab-formation-machines-logiciels/chapter/formation-au-logiciel-inkscape](https://innovation.iha.unistra.fr/books/2-fablab-formation-machines-logiciels/chapter/formation-au-logiciel-inkscape)
Si vous souhaitez directement partir d'une image trouver sur internet vous pourrez directement passer à la partie suivante 'Cricut Design Space'
Attention aux dimensions de votre motif, ici nous utilisons des mugs de la marque Cricut. Les dimensions Max. sont d'environ 22 cm pour le tour du mug et de 10 cm pour la hauteur. Ce sont les dimensions moyenne, vous pouvez bien évidement réaliser des motifs plus petit ou plus grand en fonction de la taille de vos mugs.
##### **Cricut Design Space :**
Dans ce tutoriel, nous allons utiliser la Cricut Maker 3 :
[](https://innovation.iha.unistra.fr/uploads/images/gallery/2025-09/cricut-maker-3-imprimante-de-decoupe-et-de-gravure.jpg)
La Cricut Maker 3 est un traceur de découpe permettant de découper plusieurs types de matériaux. Le plus souvent utilisé pour le flocage de vêtement, voici tout les matériaux utilisable :
- Papier à sublimation
- Vinyle (stickers)
- Thermocollant (flocage de vêtement)
- Papier cartonné
- Carton
- Planche de bois
- Papier
- Plexiglass
- Cuir
- et pleins d'autres à découvrir
Attention, les formats des feuilles de sublimation que nous utilisons sont des feuilles au format lettre US et non des feuilles A4.
Commencer par ouvrir le logiciel 'Cricut Design Space'
Puis, branchez l'imprimante EPSON SC-F100 Series sur la prise secteur et à l'ordinateur (via un câble USB ou en wifi).
Si le logiciel est utilisé pour la première fois depuis un nouvel ordinateur :
Vous devrez suivre les étapes indiquées sur le logiciel pour :
- Créer un compte
- Réaliser la configuration de la machine :
1\)
[](https://innovation.iha.unistra.fr/uploads/images/gallery/2025-09/qcKimage.png)
2\) Sélectionner la "Cricut Maker 3"
[](https://innovation.iha.unistra.fr/uploads/images/gallery/2025-09/gxXimage.png)
3\)
[](https://innovation.iha.unistra.fr/uploads/images/gallery/2025-09/E40image.png)
4\) Vous pouvez au choix en USB ou par Bluetooth
[](https://innovation.iha.unistra.fr/uploads/images/gallery/2025-09/UzYimage.png)
5\) Cliquez sur "Non merci"
[](https://innovation.iha.unistra.fr/uploads/images/gallery/2025-09/Sv0image.png)
6\) Ignorer le test de la machine
[](https://innovation.iha.unistra.fr/uploads/images/gallery/2025-09/BK2image.png)
Maintenant la machine et le logiciel configurés nous pouvons poursuivre.
Si vous avez crée votre design depuis inkscape. Exporter le en format ".SVG" et poursuivez le tutoriel.
Ouvrir le logiciel Cricut Design Space puis cliquer sur "+ Nouveau projet"
[](https://innovation.iha.unistra.fr/uploads/images/gallery/2025-09/Ur0image.png)
Si vous souhaitez importer votre design réalisé sur inkscape ou une image télécharger sur internet.
Commençons déjà par ouvrir le logiciel "Cricut design space". Une fois ouvert vous vous retrouverez sur la même page que l'image ci-dessous. Vous pouvez cliquer sur le bouton "+ Nouveau projet " afin de créer un nouveau projet. [](https://innovation.iha.unistra.fr/uploads/images/gallery/2024-10/1-1.png)
---
Ensuite, appuyer sur le bouton "Télécharger" -> "télécharger une Image" -> "Parcourir" et sélectionner vos fichiers en fonction de la ou vous les avez rangés dans votre explorateur de fichier comme ci-dessous afin de télécharger votre modèles.
[](https://innovation.iha.unistra.fr/uploads/images/gallery/2024-10/1.png)
[](https://innovation.iha.unistra.fr/uploads/images/gallery/2024-10/3.png)
[](https://innovation.iha.unistra.fr/uploads/images/gallery/2024-10/4.png)
Une fois que vous avez sélectionner votre fichier, il faut appuyer sur "Continuer"
[](https://innovation.iha.unistra.fr/uploads/images/gallery/2024-10/5.png)
"Appliquer et continuer"
[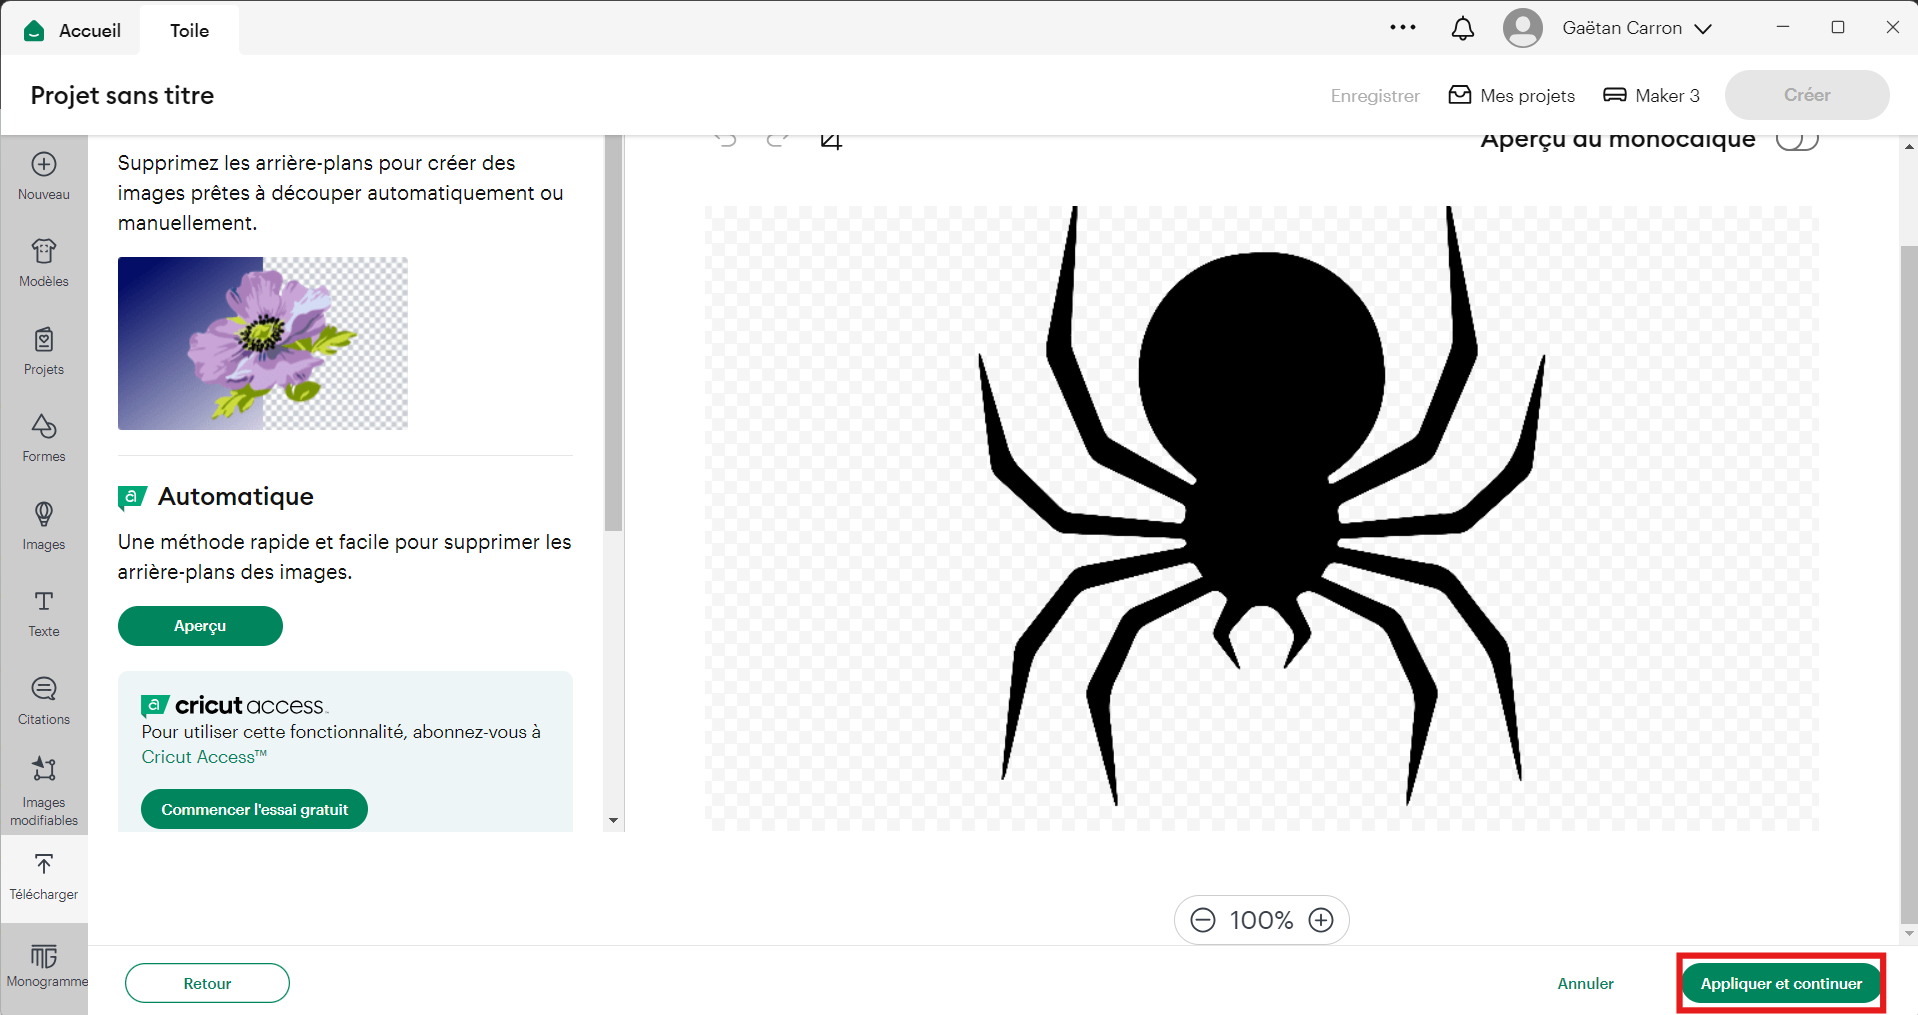](https://innovation.iha.unistra.fr/uploads/images/gallery/2024-10/6.png)
Nous utiliserons la fonction Print&Cut de la Cricut Maker 3. Cette fonctionnalité nous permet d’imprimer un modèle avec des repères, que la machine détectera pour découper précisément les contours sur la feuille de papier à sublimation. Afin de pouvoir Utiliser cette fonction, faudra sélectionner "Design plat"->"Continuer"-> "Télécharger" comme indiqué ci-dessous.
[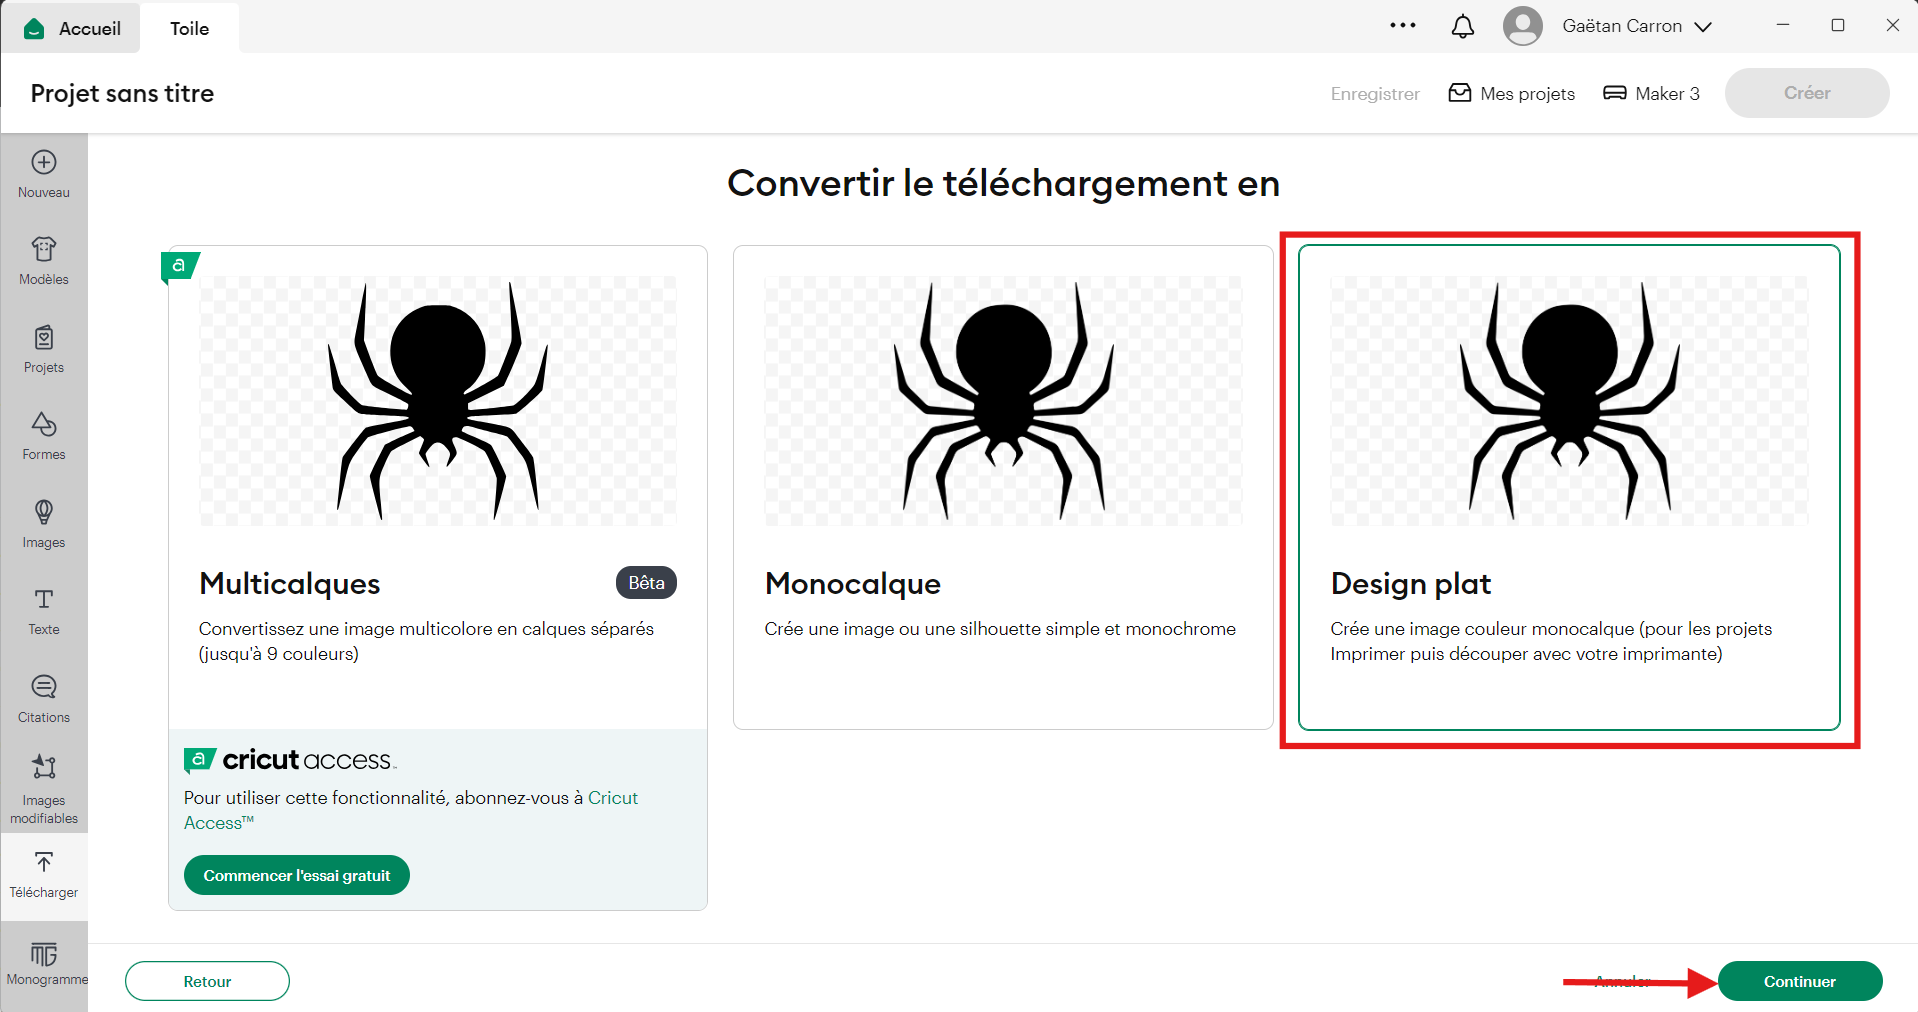](https://innovation.iha.unistra.fr/uploads/images/gallery/2024-10/7.png)
Pour la prochaine étape, il va falloir vérifier trois choses comme indiqué sur l'image ci-dessous.
1\) Que l'on utilise bien l'Opération "Imprimer puis découper"
2\) Que l'on a bien redimensionner notre image à la taille souhaité
3\) Nous pouvons appuyer sur le bouton "Créer"
Vous avez à présent importé votre design dans le logiciel.
!Attention! : Si votre résultat est **flou**, soit :
- Votre image est de mauvaise qualité et il faut soit la redimensionné, soit en prendre une autre
- Essayer de vectorisé votre image (voir tuto inkscape comment vectoriser une image)
Attention si vous utiliser un autre support de personnalisation qu'un mug (exemple : t-shirt, dessous de verre, tapis de souris, etc...), adapter les dimensions de votre design aux dimensions de votre support de personnalisation
Si vous souhaitez créer votre motif sur le logiciel Cricut Design Space :
1\) Outils de création d'objet
2\) Outils d'édition d'objet
Exemple :
A l'aide des outils présent dans l'encadré 1, je vais créer du texte, une forme, etc...
ET à l'aide des outils présent dans l'encadré 2, je vais pouvoir éditer le texte ou les formes en modifiant leurs dimensions, symétries, alignement, etc...
[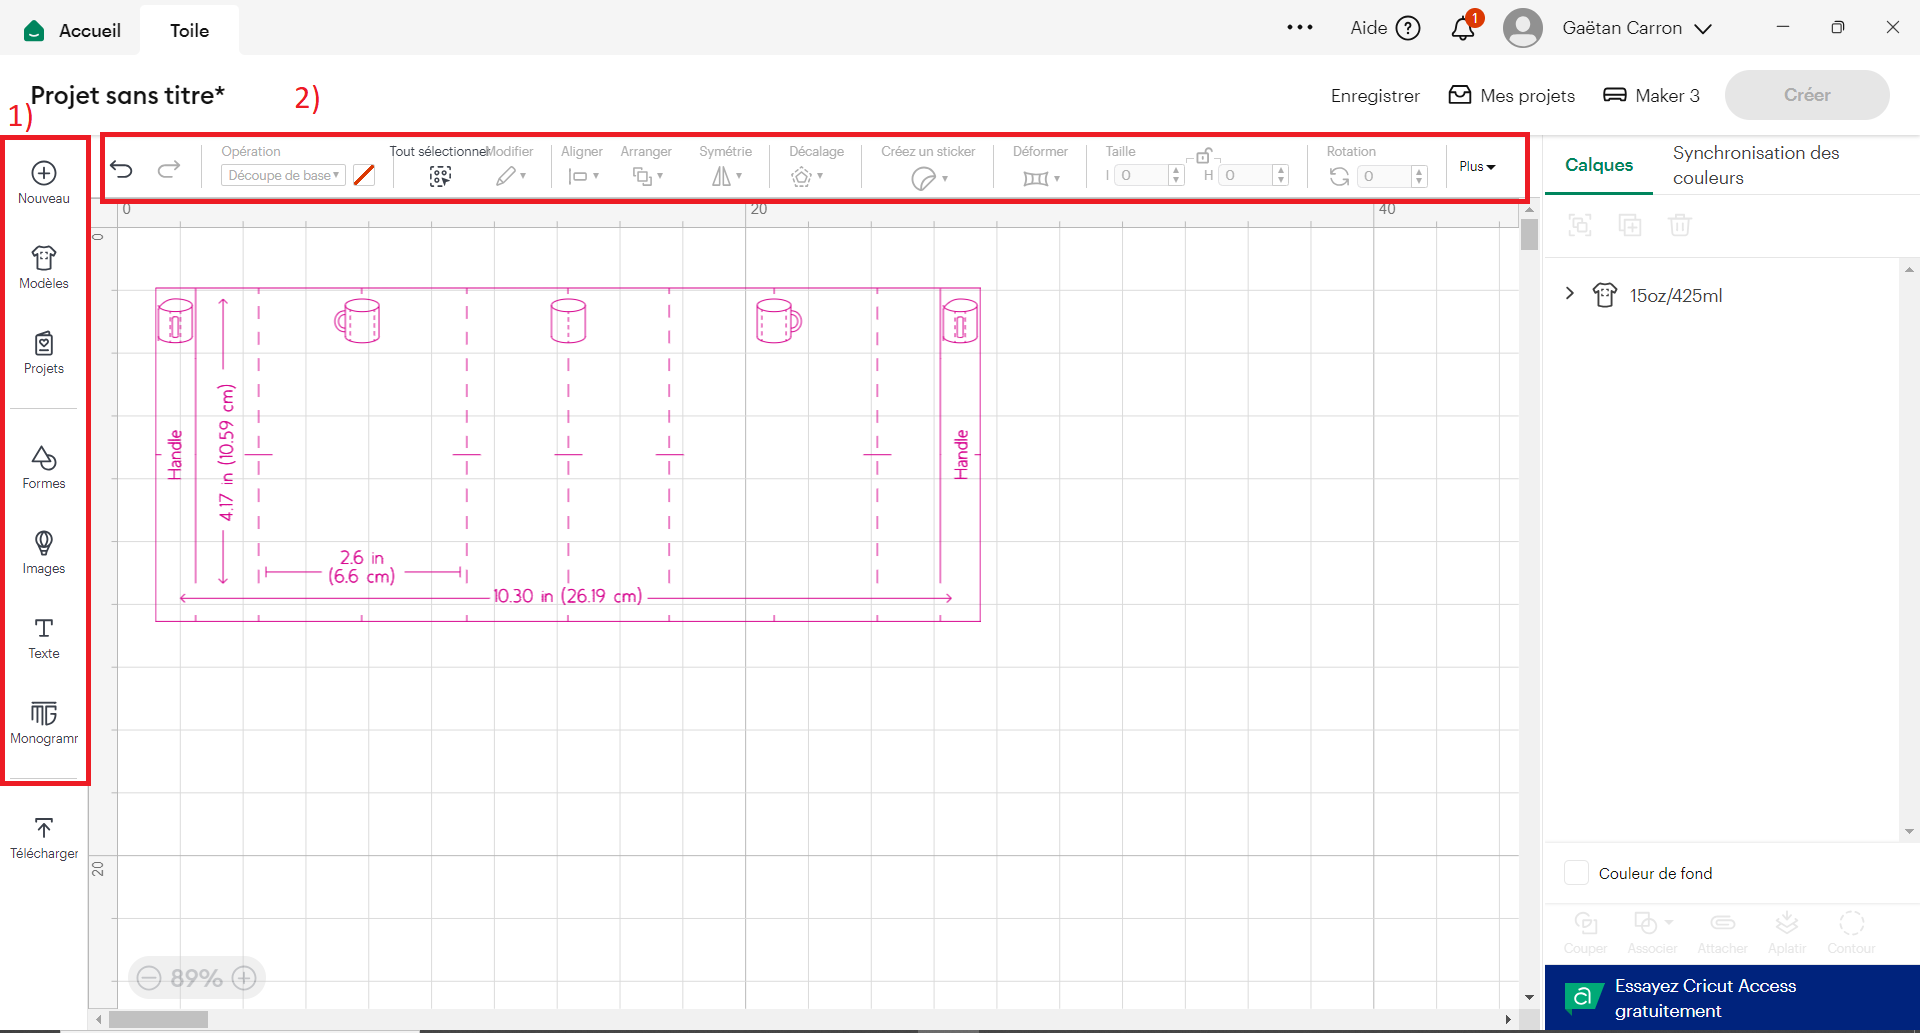](https://innovation.iha.unistra.fr/uploads/images/gallery/2025-09/Pdwimage.png)
Pour le tutoriel je vais réaliser un texte :
1\) En utilisant l'outil texte, je vais écrire le texte souhaité
2\) Puis je vais pouvoir éditer ce texte en l'agrandissant, changeant la police et la taille de l'écriture, etc...
[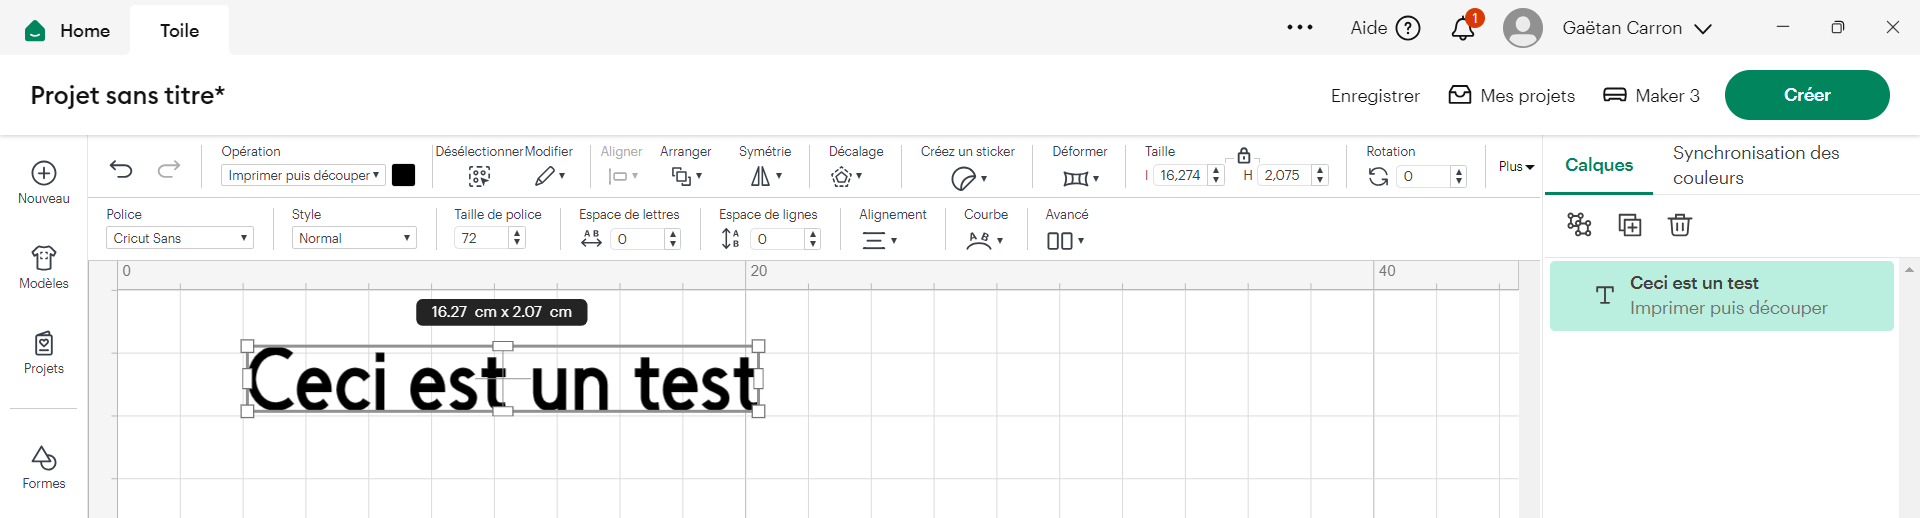](https://innovation.iha.unistra.fr/uploads/images/gallery/2025-09/rpSimage.png)
En rose, vous pouvez voir les dimensions des mugs que nous possédons au Fablab. Attention, adapter les dimensions de votre motifs en conséquence.
Attention à bien sélectionner votre texte et dans "Opération" bien sélectionner la fonction "Imprimer puis découper"
[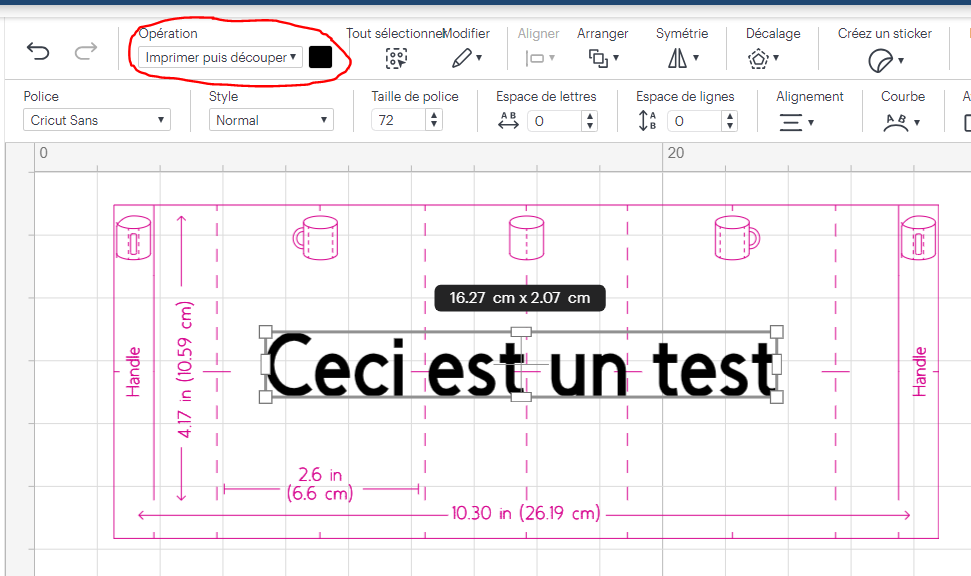](https://innovation.iha.unistra.fr/uploads/images/gallery/2025-09/0N1image.png)
Attention à bien sélectionner les mêmes paramètres que ci-dessous.
**Taille du matériaux** : 26.1 cm x 27 cm (Ici nous utilisons des feuilles de ce format, cela peut changer. Attention à bien regarder l'emballage de vos feuilles de sublimation)
Et le mode **Miroir** doit être activé. Nous allons mettre notre feuille de face sur notre support. Nous devons donc inverser notre image lors de l'impression pour qu'elle soit dans le bon sens lors sur notre support.
Attention à **bien positionner votre motif** pour qu'il prenne le moins de place possible afin d'éviter le gaspillage de matière première.
[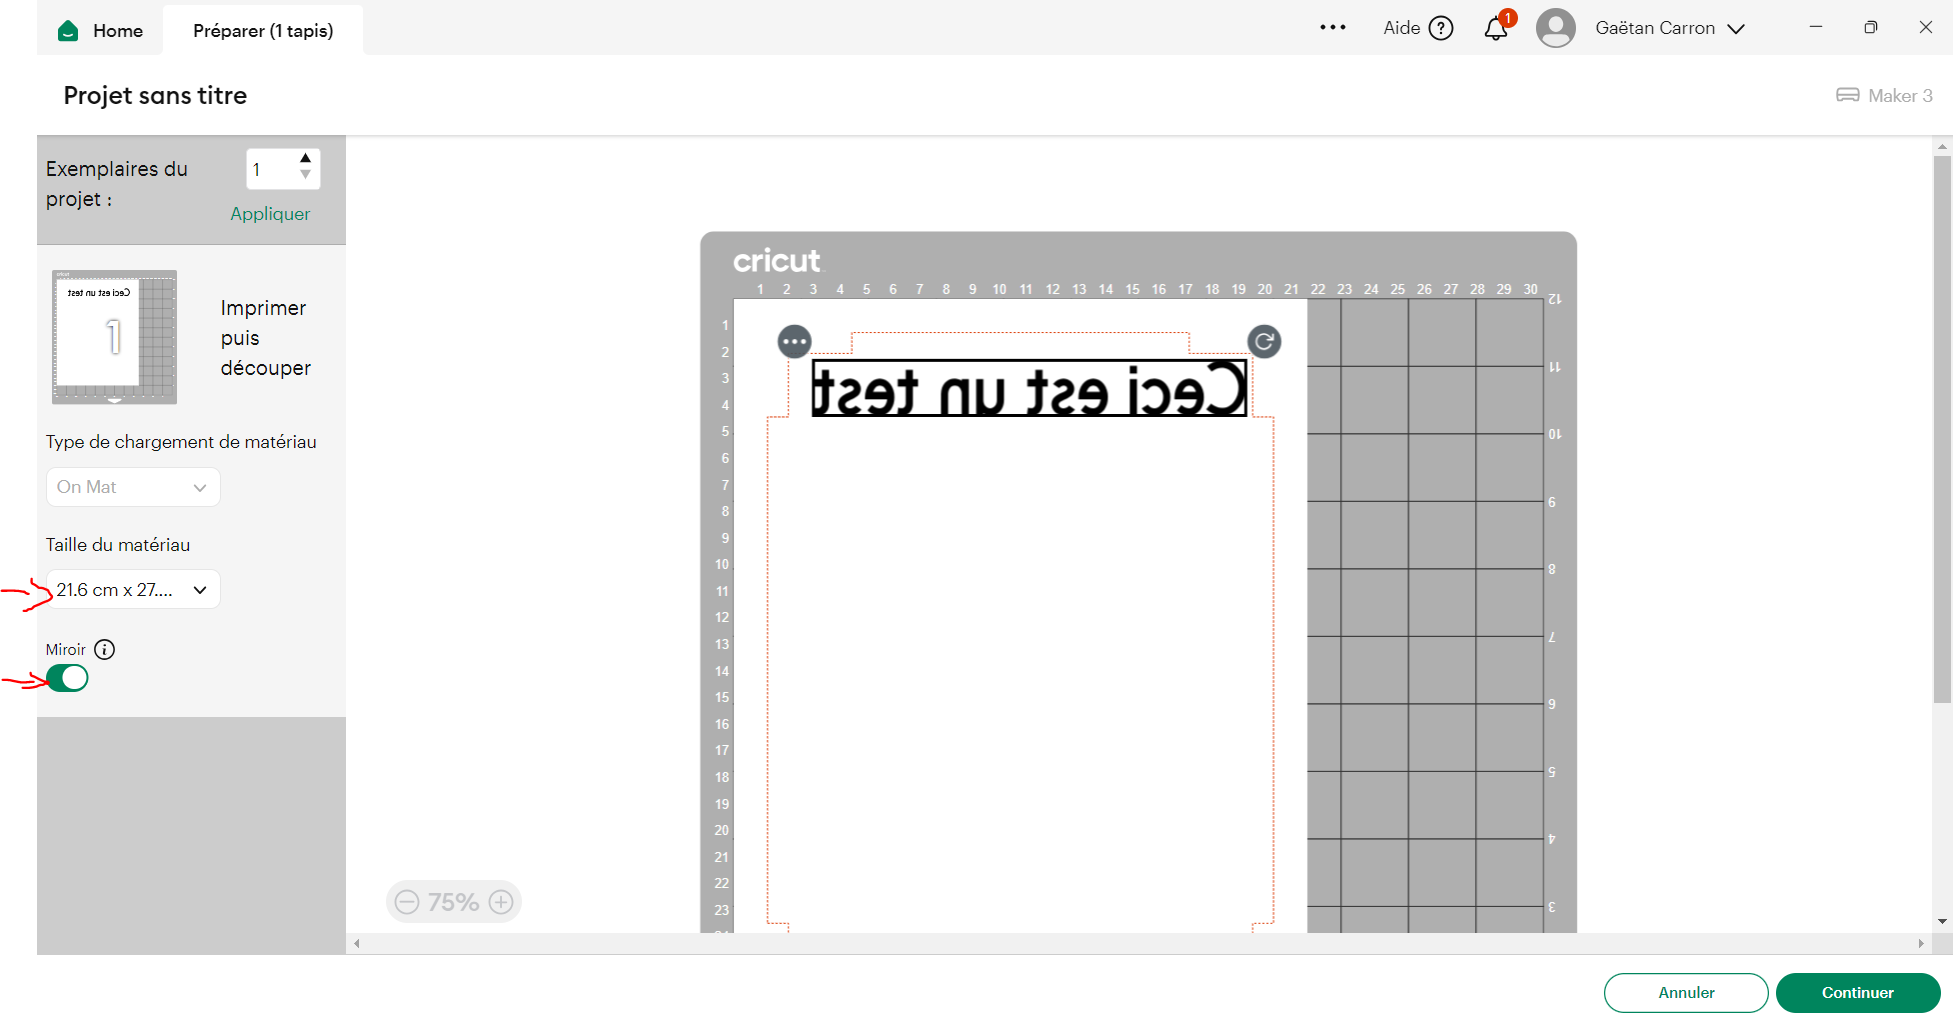](https://innovation.iha.unistra.fr/uploads/images/gallery/2025-09/hthimage.png)
Vous pouvez découper le contour de votre modèle avec des ciseaux avant de passer à la prochaine page 'Utilisation de la machine'
Lien vers la suite du tutoriel :
https://innovation.iha.unistra.fr/books/2-fablab-formation-machines-logiciels/page/utilisation-de-la-machine
# Utilisation de la machine
Une fois votre motif imprimé et les contours découpés. Prendre du scotch thermique et à l'aide de ce dernier placer votre design à l'endroit souhaité.
[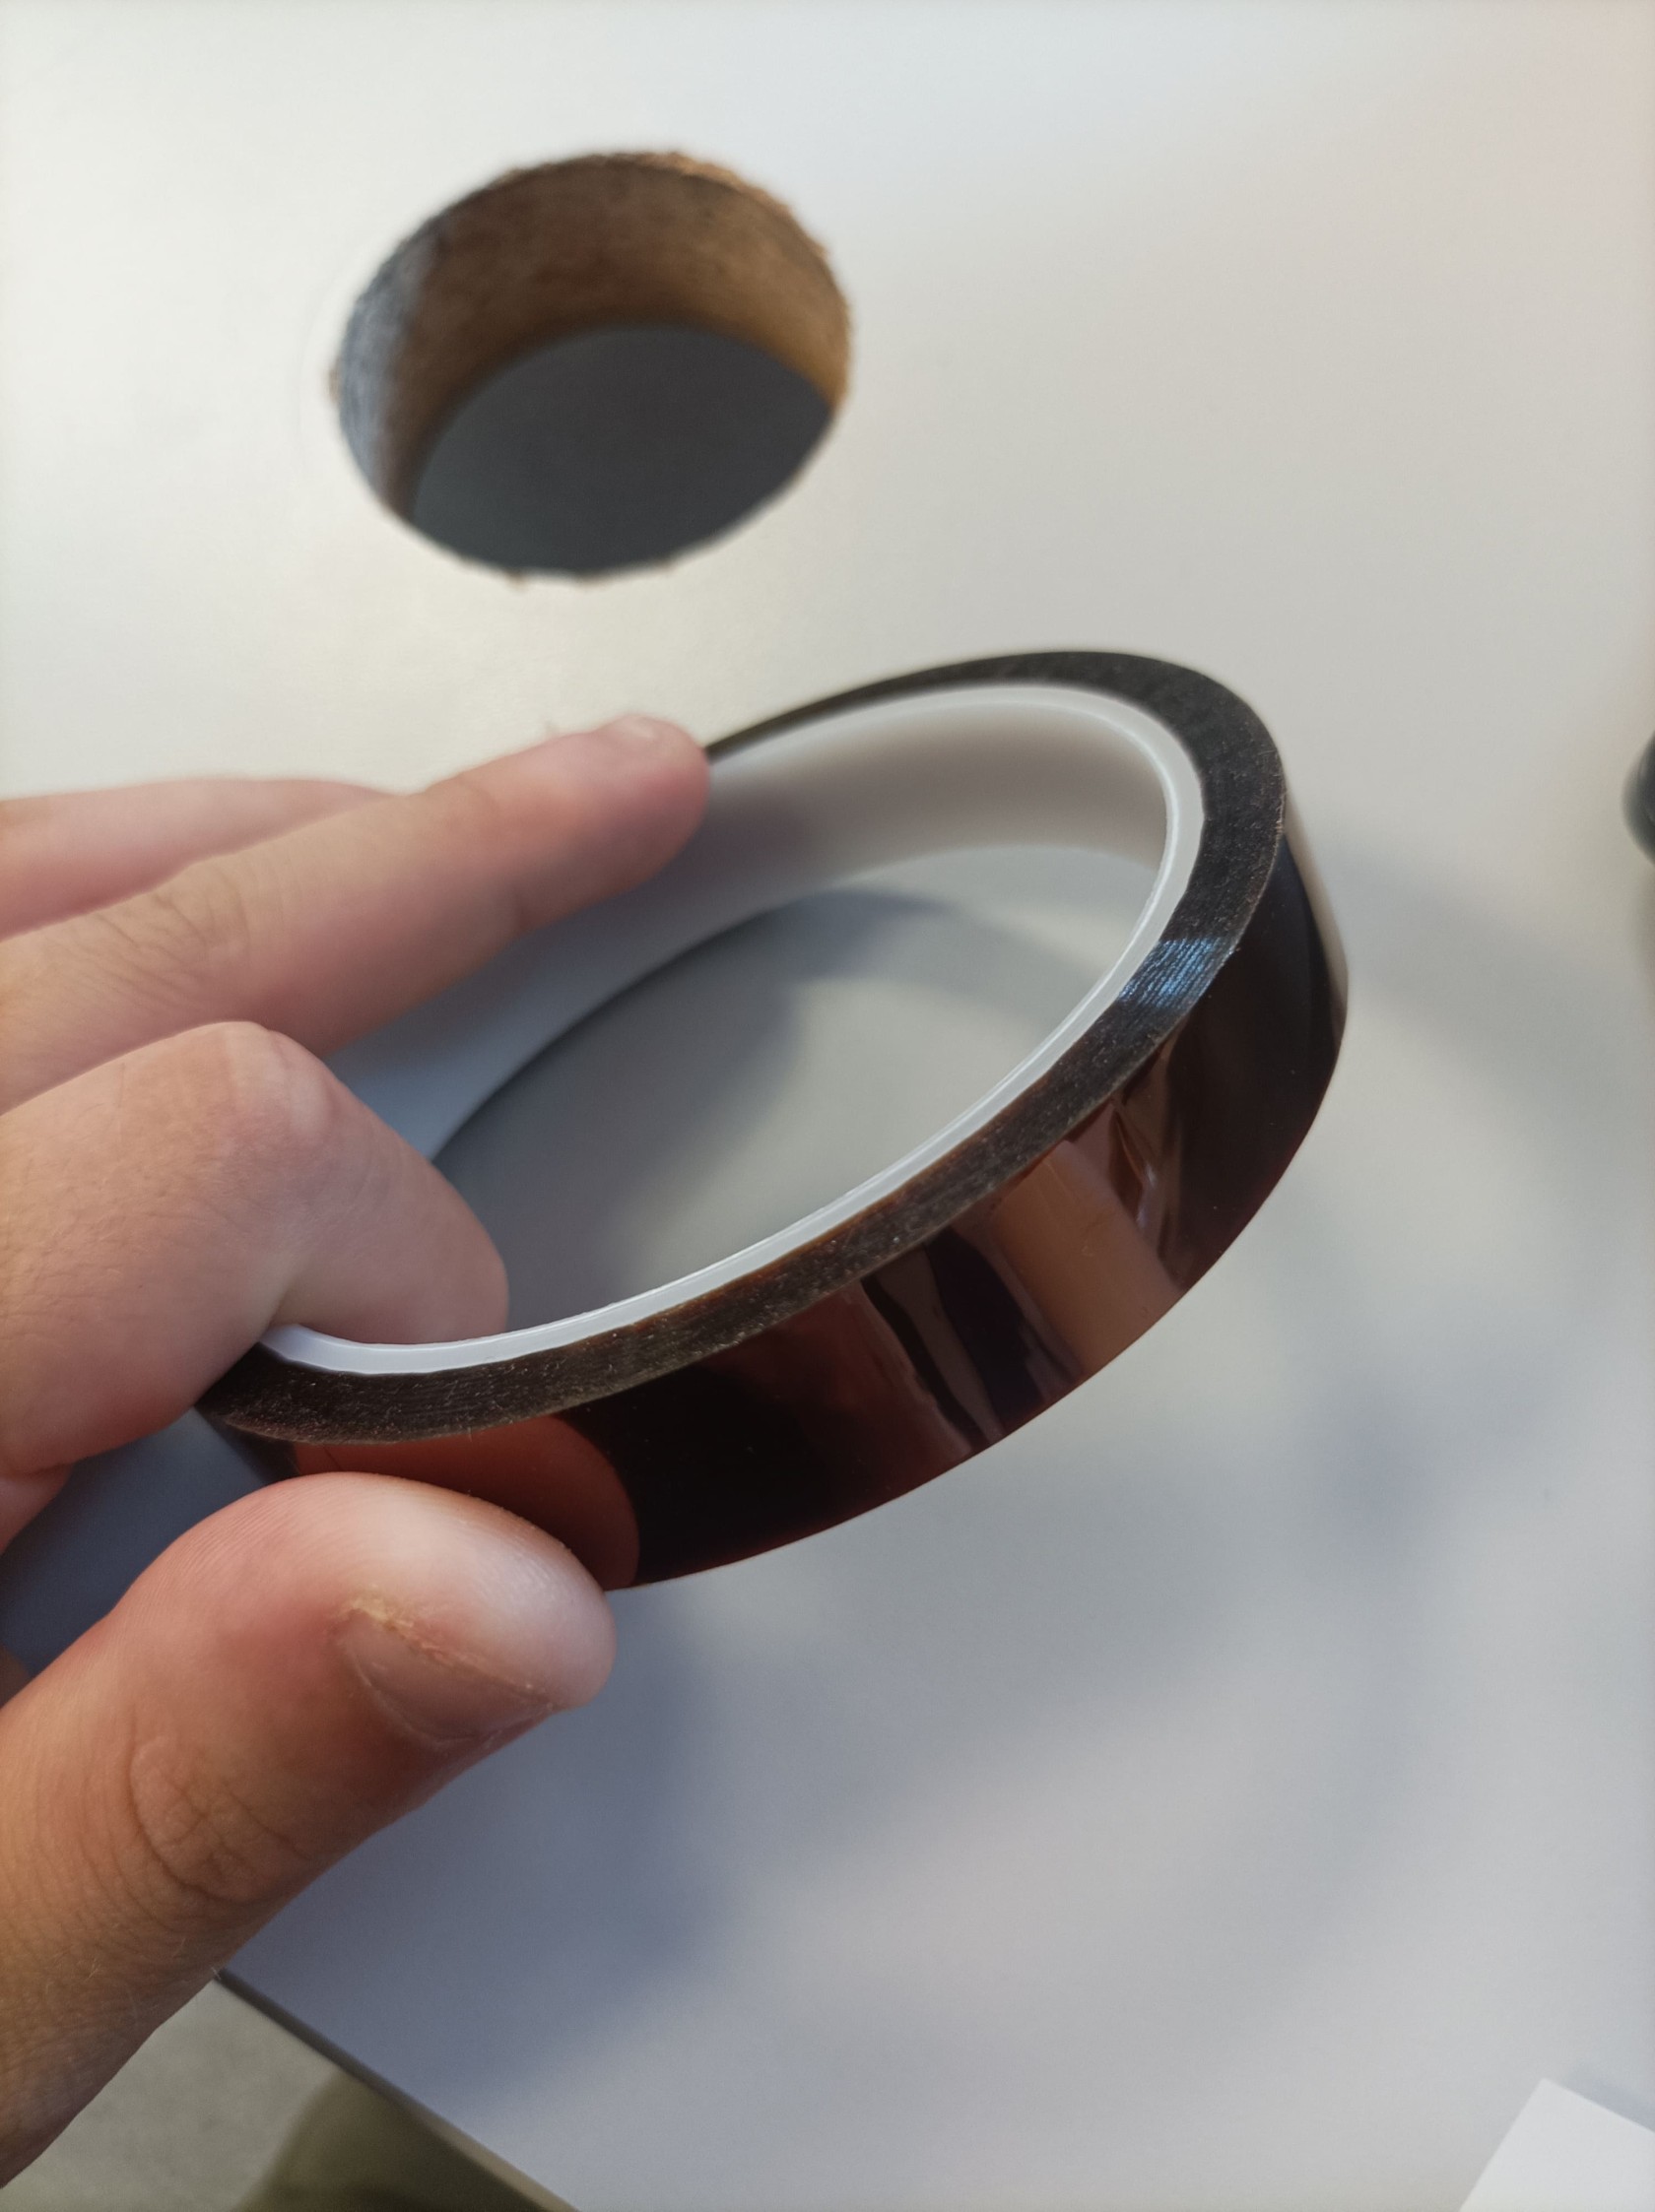](https://innovation.iha.unistra.fr/uploads/images/gallery/2025-06/1000011909.jpg)[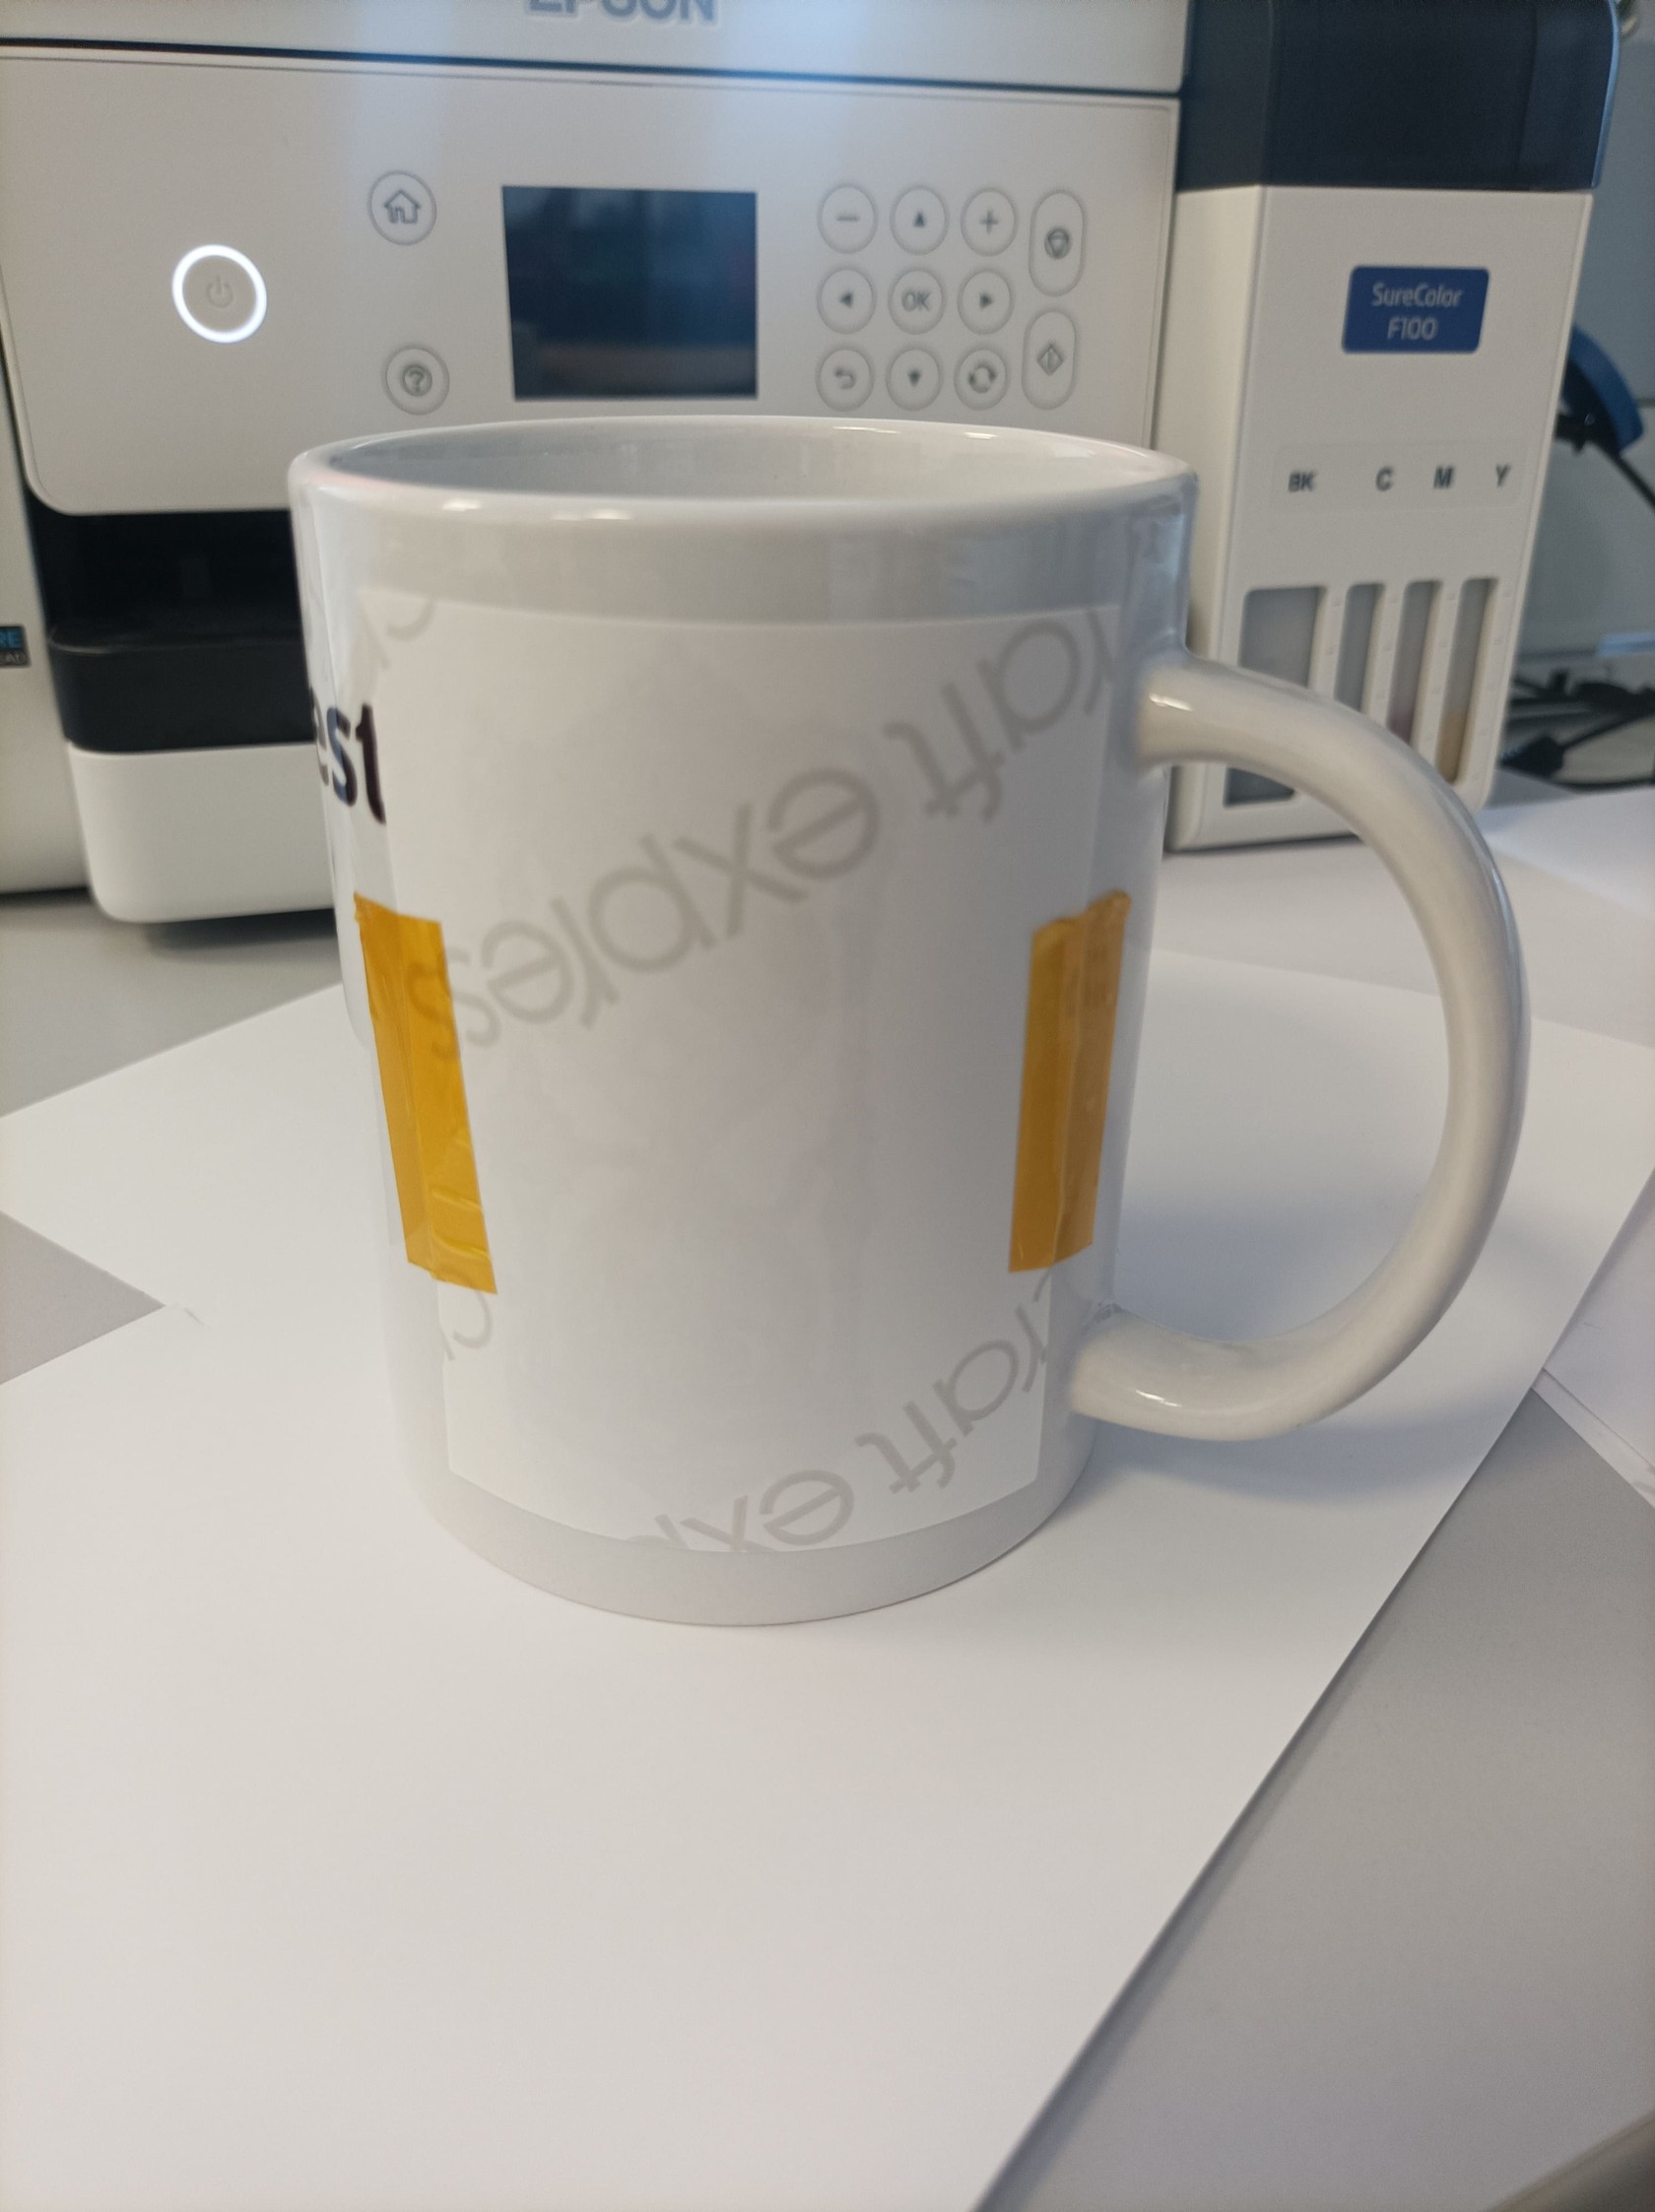](https://innovation.iha.unistra.fr/uploads/images/gallery/2025-06/1751312738794.jpg)
Brancher la presse à chaud pour mug sur l'appareil à la place de la presse à chaud textile.
Vérifier sur l'emballage des feuilles à sublimation les températures de chauffe pour le transfert à sublimation et paramétrer la machine aux bonnes températures. (demander au Fabmanager si vous ne savez pas comment faire).
Ensuite Placer le mug dans la presse à chaud et presser le temps indiqué sur l'emballage. Pour les feuilles utilisées, nous sommes à 360°F et entre 280 et 300 secondes d'attente pendant la presse.
[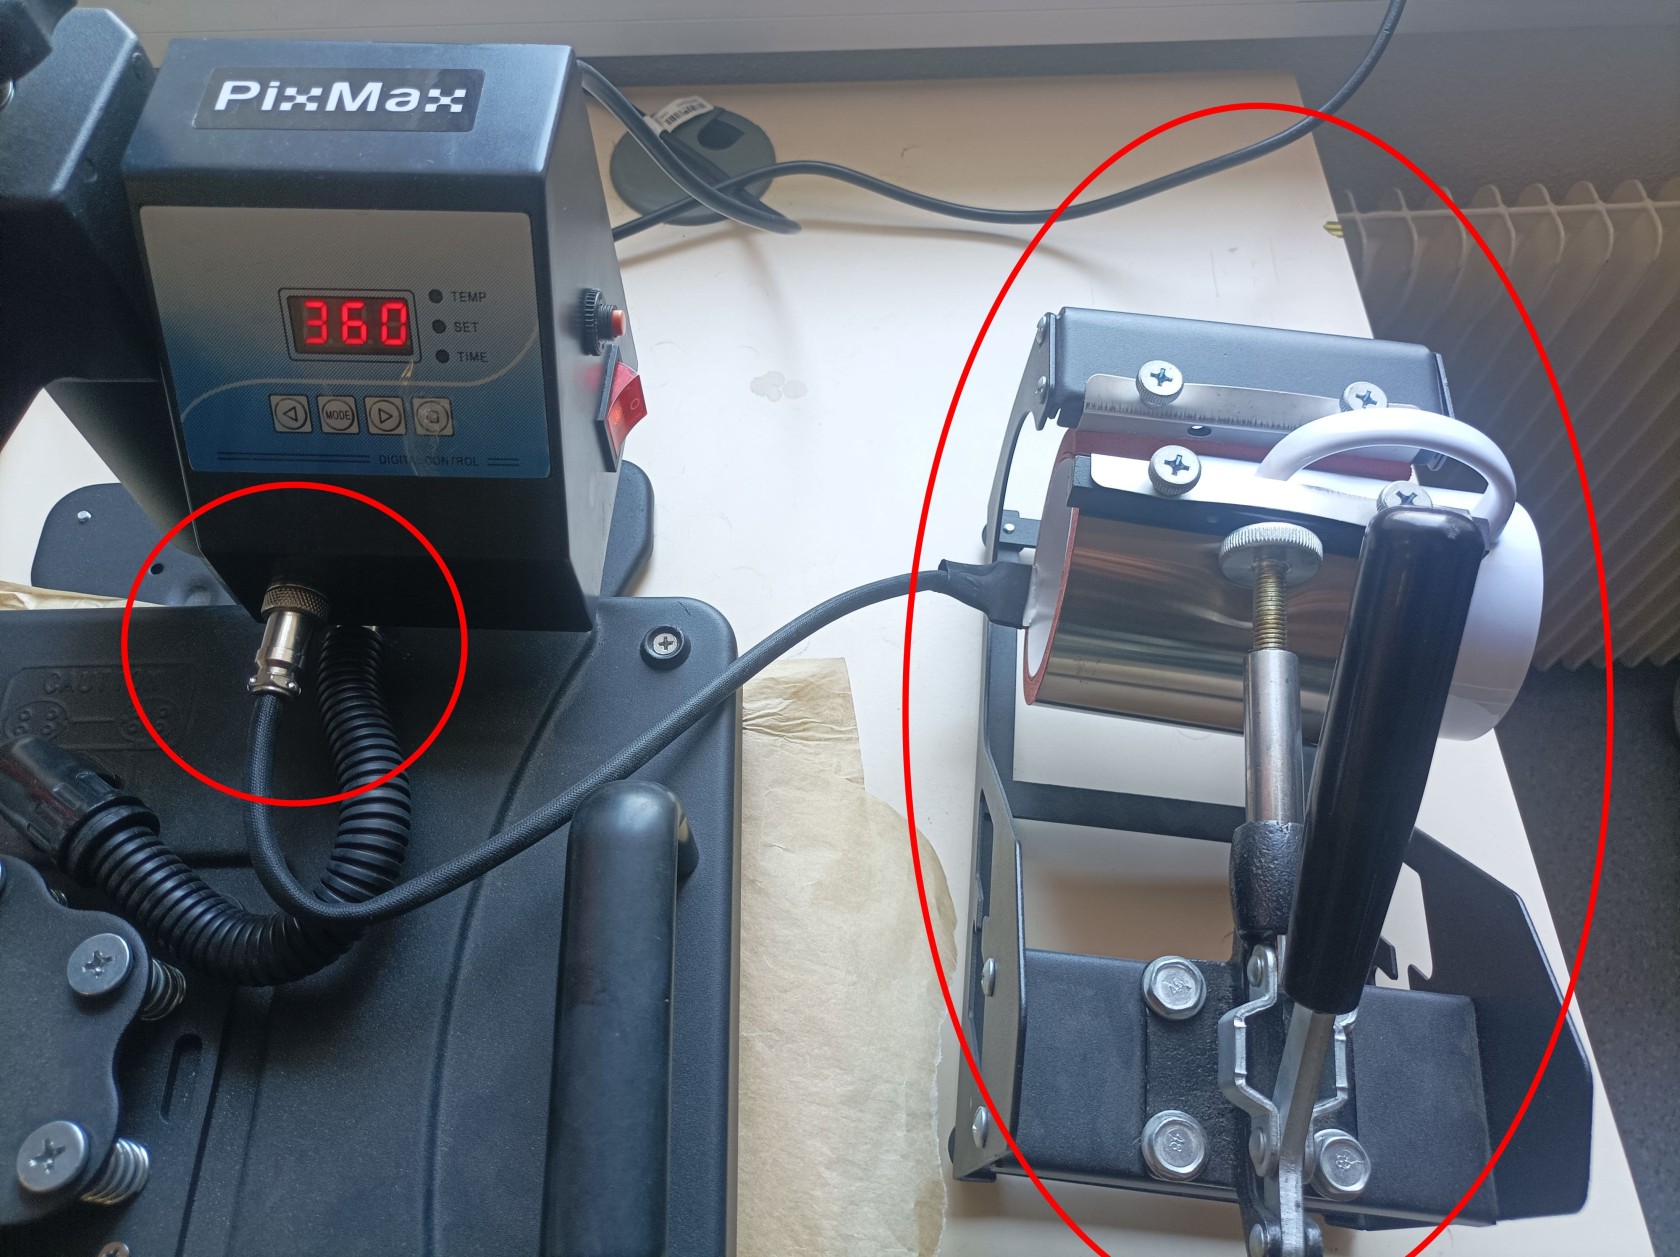](https://innovation.iha.unistra.fr/uploads/images/gallery/2025-06/zAL1000011915.jpg)
Une fois le temps écoulé, munissez-vous de gants (présents dans la servante) afin de récupérer le mug dans la machine car le mug est chaud. Une fois le mug retiré de la machine, aidez-vous d'une pince afin de retirer la feuille de sublimation que vous avez scotchée un peu plus tôt, attendez que le mug refroidisse ensuite et admirez votre œuvre.
[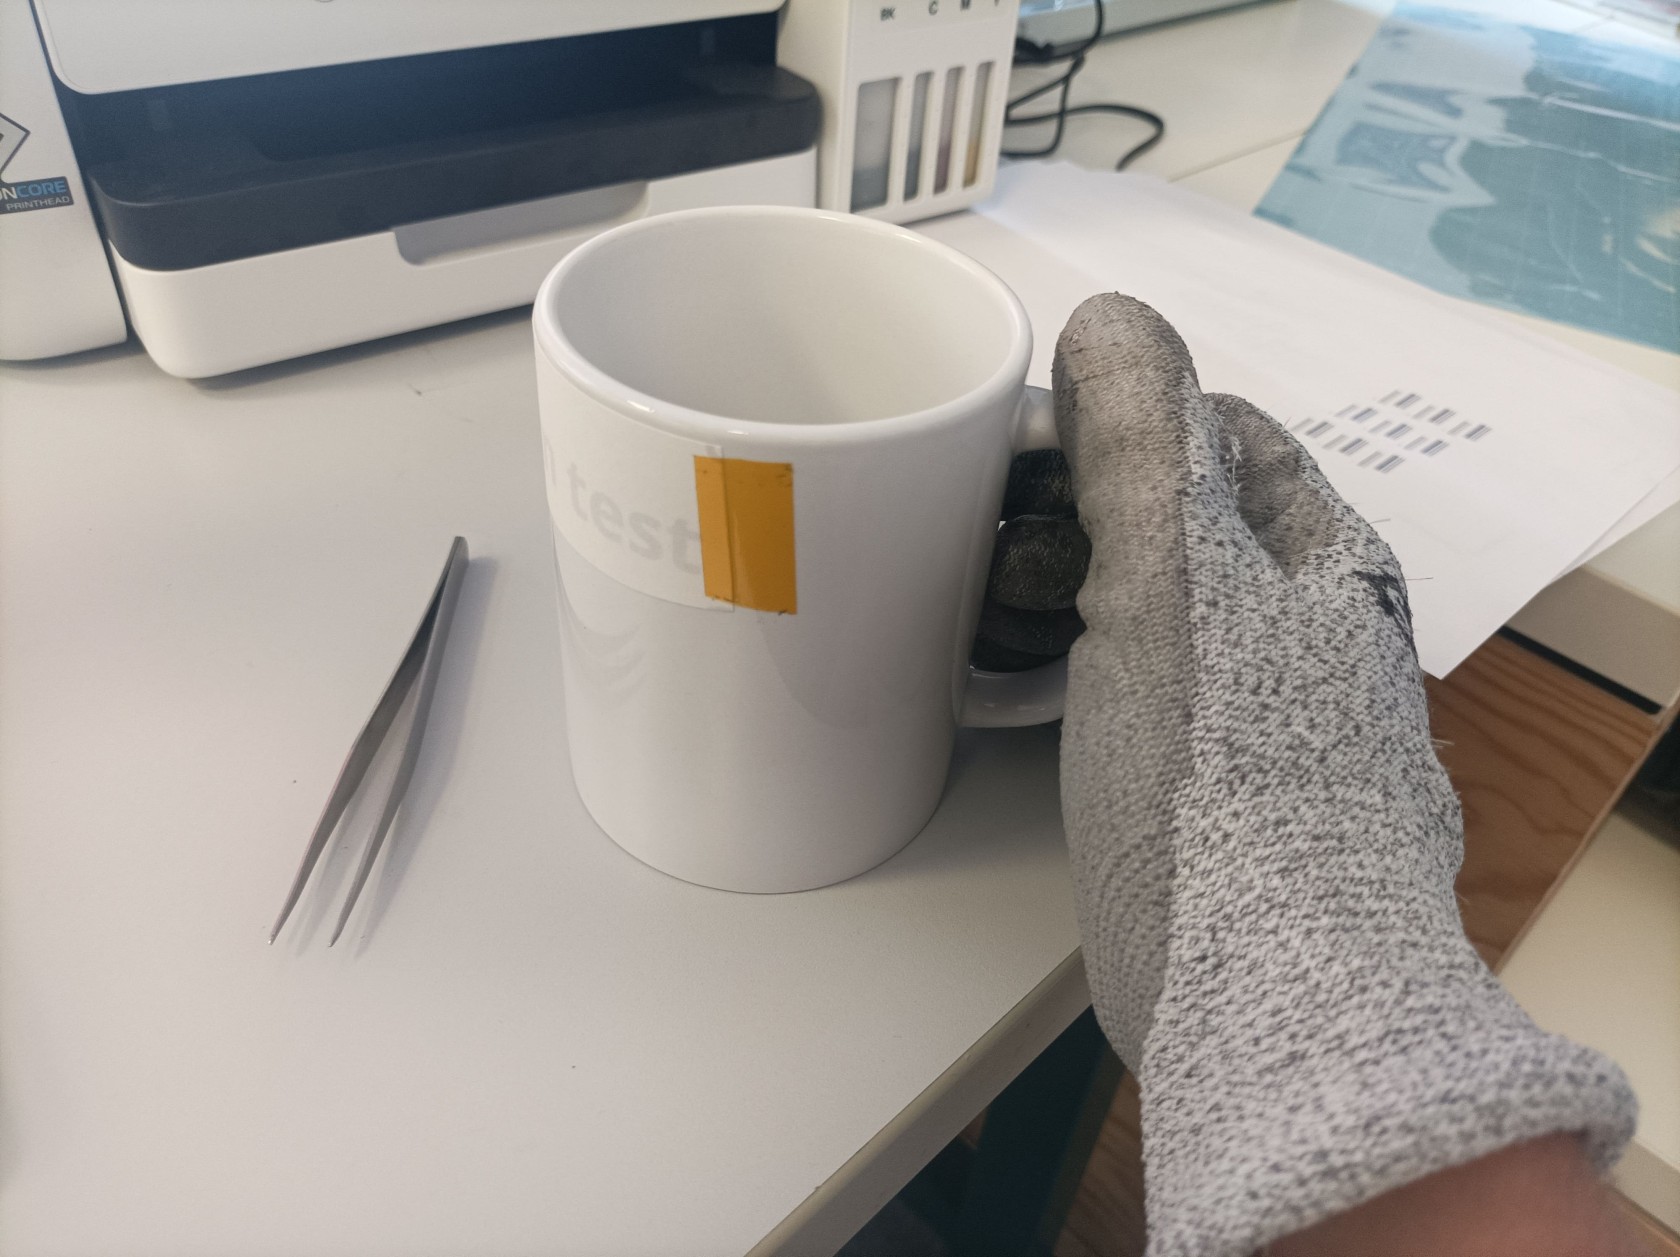](https://innovation.iha.unistra.fr/uploads/images/gallery/2025-06/1000011916.jpg)
Félicitations, vous avez réalisé votre propre mug personnalisé !
# Commande numérique
Dédiée exclusivement à l'usinage de circuits imprimés développés sous KiCad
# Imprimante DTF - xTool DTF Apparel Printer
**1. Introduction à l’impression DTF**
La technologie **DTF (Direct To Film)** consiste à imprimer un motif sur un film PET, appliquer une poudre thermofusible puis transférer le visuel sur textile grâce à une presse à chaud.
Le procédé offre un rendu durable, compatible avec la majorité des textiles (coton, polyester, mélanges).
[](https://innovation.iha.unistra.fr/uploads/images/gallery/2025-11/wUaimage.png)
**2. Présentation de la machine Xtool DTF Apparel Printer**
La Xtool DTF Apparel Printer permet d’imprimer des visuels couleur haute précision destinés au flocage textile.
**Caractéristiques principales :**
- Impression CMJN + blanc
- Système d’alimentation automatique du film PET
- Encre DTF water-based
- Poudrage manuel ou automatique selon kit utilisé
- Compatibilité textile large
- Maintenance simplifiée
**3. Installation du logiciel Xtool DTF Studio**
Xtool DTF Studio est le logiciel RIP qui convertit votre image en données imprimables (gestion du blanc, densité, mirroring…).
**3.1 Télécharger le logiciel**
Lien : https://fr.xtool.com/pages/logiciel
**3.2 Configuration**
Une fois le logiciel téléchargé, créez vous un compte (si vous êtes sur votre ordinateur personnel).
[](https://innovation.iha.unistra.fr/uploads/images/gallery/2025-11/Pe9image.png)
Si vous êtes au Fablab, utilisez un des postes de travail disponibles et cliquez sur "Nouveau Projet".
[](https://innovation.iha.unistra.fr/uploads/images/gallery/2025-11/image.png)
Ajouter l'appareil "Apparel Printer" en cliquant sur "+".
[](https://innovation.iha.unistra.fr/uploads/images/gallery/2025-11/LcHimage.png)
[](https://innovation.iha.unistra.fr/uploads/images/gallery/2025-11/tHMimage.png)
**4. Préparer votre fichier graphique**
Il existe différentes méthodes afin de réaliser son design.
**4.1 Créer son design avec Xtool Studio**
Grâce aux différents outils présents sur la barre verticale à gauche de l'écran, vous pouvez réaliser des designs depuis le logiciel.
[](https://innovation.iha.unistra.fr/uploads/images/gallery/2025-11/stgimage.png)
**Outil "Texte" :**
[ : En sélectionnant l'outil texte, puis en cliquant sur le plan de travail, vous pouvez écrire du texte.](https://innovation.iha.unistra.fr/uploads/images/gallery/2025-11/5O3image.png)
En sélectionnant le texte, vous pourrez :1 ) Pivoter le texte 2 ) Arrondir le texte
[](https://innovation.iha.unistra.fr/uploads/images/gallery/2025-11/zJQimage.png)
Vous pouvez également :1) Modifier les dimensions du texte2) Choisir la police et la taille d'écriture3) Modifier la couleur de remplissage et de contour du texte ainsi que l'épaisseur des contours
[](https://innovation.iha.unistra.fr/uploads/images/gallery/2025-11/PWEimage.png)
**Outil "Formes" :**
En sélectionnant les outils Formes, vous pourrez créer des formes diverses et variées.
L'outil Vecteur :
- Il permet de **placer des points d’ancrage** pour créer des lignes droites ou des courbes.
- Chaque point peut être **déplacé**, **modifié** ou ajusté grâce aux **poignées de Bézier**, ce qui offre une précision très élevée.
- Le tracé généré est un **vecteur**, donc parfaitement exploitable pour la **découpe**, la **gravure** ou la **création de formes sur mesure**.
- C’est l’outil idéal pour reproduire des contours spécifiques, créer un dessin technique ou adapter un motif que les formes prédéfinies ne permettent pas.
En résumé : l’outil “plume” sert à **dessiner manuellement des chemins vectoriels précis.**
[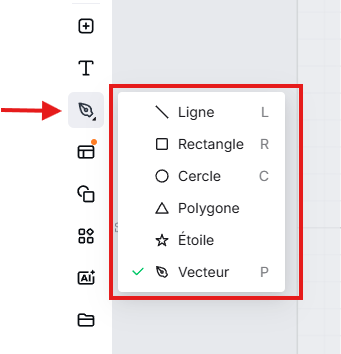](https://innovation.iha.unistra.fr/uploads/images/gallery/2025-11/O3Nimage.png)
**Outil "Bibliothèque de modèles":**
En sélectionnant la bibliothèque de modèles, vous pourrez utiliser les projets/fichiers créés par d'autres utilisateurs.
Attention : les modèles que vous trouverez peuvent être réalisés avec d'autres machines de la marque,. Vérifiez que le projet a été réalisé avec la "Xtool Apparel Printer" et non pas une autre machine de la marque comme une découpe laser.
[](https://innovation.iha.unistra.fr/uploads/images/gallery/2025-11/0wkimage.png)
**Outil "Bibliothèque de matériaux" :**
En sélectionnant la bibliothèque de matériaux, vous pourrez utiliser des motifs prédéfinis.
[](https://innovation.iha.unistra.fr/uploads/images/gallery/2025-11/el1image.png)
**Outil "Applications" :**
[](https://innovation.iha.unistra.fr/uploads/images/gallery/2025-11/BvWimage.png)
**1. Grille déployée**
Crée automatiquement une **grille régulière** d’objets à partir d’un modèle unique.
**Fonctions :**
- Répétition horizontale et verticale
- Espacement personnalisable en mm
- Création de planches d’objets (porte-clés, stickers, badges)
- Alignement automatique
**Utilisation :**
Production en série, gravure multiple, tests d’échantillons.
**2. Réseau circulaire (Circular Array)**
Génère une **distribution circulaire** d’un objet autour d’un point central.
**Réglages :**
- Angle total
- Nombre de copies
- Rayon
- Rotation individuelle des éléments
**Utilisation :**
Ornements, mandalas, décorations, motifs répétitifs.
**3. Génération de code**
Crée des **codes lisibles par machines** :
- QR Code
- Code-barres EAN
- Code-barres UPC
- Datamatrix
**Paramètres :**
- Taille du code
- Correction d’erreur
- Contenu texte ou URL
**Utilisation :**
Étiquettes industrielles, inventaire, badges, systèmes de gestion, plaques techniques.
**4. Nesting intelligent**
Organisation automatique d’un ensemble de pièces sur la surface de travail pour **optimiser la matière**.
**Fonctions :**
- Placement automatique des pièces
- Rotation automatique pour un meilleur ajustement
- Minimisation des chutes de matériau
- Gestion des marges de sécurité
**Utilisation :**
Découpe laser, fabrication de kits, optimisation de panneaux bois, cuir ou acrylique.
**5. Mesure**
Outil de **métrologie simple** pour mesurer distances et dimensions.
**Fonctions :**
- Mesure point à point
- Lecture en mm
- Aide à la conception précise
- Vérification avant découpe
**Utilisation :**
Contrôle dimensionnel, ajustage, calibrage.
**Outil "AImake" :**
[ : Permet de générer des images grâce à du texte](https://innovation.iha.unistra.fr/uploads/images/gallery/2025-11/cMgimage.png)
**4.2 Créer son design avec un logiciel tiers de conception 2D**
Vous pouvez créer votre visuel avec n'importe quel logiciel de conception 2D :
- Inkscape
- Illustrator
- GIMP
- Canva (avec export PNG transparent)
- Etc...
Une fois votre design créé, il vous faudra exporter le design au format compatible du logiciel xTool Studio.
**Formats de fichiers compatibles avec xTool studio:**
- SVG, PNG, JPEG, ...
Si vous souhaitez vous former sur Inkscape, voici notre tutoriel sur le logiciel :
https://innovation.iha.unistra.fr/books/2-fablab-formation-machines-logiciels/chapter/formation-au-logiciel-inkscape
Vous pouvez également trouver des modèles tout faits sur internet sur des sites tels que :
- [https://worldvectorlogo.com/](https://worldvectorlogo.com/)
**5. Importer le visuel dans Xtool DTF Studio**
Cliquez sur l'icône "+" pour importer votre design depuis votre explorateur de fichiers.
[](https://innovation.iha.unistra.fr/uploads/images/gallery/2025-11/Khvimage.png)
Sélectionnez votre design et cliquez sur "Modifier"
[](https://innovation.iha.unistra.fr/uploads/images/gallery/2025-11/ha0image.png)
Des outils de modifications de votre design.
[](https://innovation.iha.unistra.fr/uploads/images/gallery/2025-11/jMoimage.png)
**SECTION 1 – Outils (édition / retouche)**
**1. Recadrer l’image**
Permet de **modifier le cadrage** d’une photo ou d’un visuel.
Fonctions :
- Recadrage libre
- Recadrage proportionnel (1:1, 16:9, 4:5…)
- Rotation / redressement
- Ajustement manuel du cadre
Utilisation :
- Supprimer les zones inutiles
- Centrer un objet
**2. Détourage IA**
Supprime automatiquement l’arrière-plan grâce à l’intelligence artificielle.
Fonctions :
- Isolation du sujet
- Suppression de fond complexe
- Option « conserver cheveux et textures » selon version
Utilisation :
- Découper un portrait
- Garder uniquement la silhouette du sujet
**3. AI Expand**
Génère de l’image autour de la photo d’origine pour **agrandir le cadre**.
Fonctions :
- Remplissage IA cohérent
- Extension du décor
- Correction de cadrage trop serré
Utilisation :
- Transformer un format vertical en horizontal
- Reconstituer un décor manquant
**4. Suppression d’objet**
Efface proprement un élément gênant dans l’image.
Fonctions :
- Sélection au pinceau
- Remplissage IA intelligent
- Réintégration du décor sans artefact majeur
Utilisation :
- Retirer une personne ou un objet parasite
- Nettoyer une photo
- Corriger un défaut visuel
**5. Magic Edit**
Outil IA permettant de modifier ou remplacer une zone par un contenu généré.
Fonctions :
- Sélection d’une zone
- Description textuelle de la transformation (ex. : “remplacer la tasse par une fleur”)
- Génération intelligente cohérente
Utilisation :
- Création artistique
- Personnalisation d’image
- Préparation de visuels uniques
**6. Amélioration IA**
Optimise automatiquement la qualité générale de l’image.
Améliore :
- Netteté
- Contraste
- Balance des couleurs
- Luminosité
- Réduction du bruit
Utilisation :
- Préparer une photo (contrastes plus clairs)
- Rendre une image ancienne plus nette
- Uniformiser des visuels variés
**7. Traçage**
Transforme une image en **dessin vectoriel**.
Fonctions :
- Détection des contours
- Simplification des formes
- Export en tracé exploitable pour découpe/gravure
- Choix du niveau de détail
Utilisation :
- Vectorisation pour découpe laser
- Création de logos
- Conversion de photos simples en lignes gravables
**8. Masque (NEW)**
Outil permettant de **masquer ou révéler une partie de l’image** selon une forme définie.
Fonctions :
- Définition d’une zone visible
- Découpage virtuel
- Applique l’image uniquement dans la zone masquée
Utilisation :
- Découpe esthétique
- Encadrement artistique
- Création de zones d’impression ou de gravure personnalisées
**SECTION 2 – Filtres**
Les filtres appliquent un **style visuel instantané** à l’image pour adapter le rendu à la gravure ou à un effet artistique.
**Exemples visibles :**
**1. Chiffre ou… (probablement “Chiffre ou Pixel”)**
Donne un rendu simplifié ou pixelisé.
**2. Grille**
Effet style trame ou quadrillage.
**3. Dessin**
Transforme l’image en style “dessin au trait”.
**4. Banc… (probablement “Banc de couleurs” ou “Banc solaire”)**
Effet lumineux ou contrasté selon le type.
**Utilisation générale des filtres :**
- Préparer une photo pour gravure (meilleur contraste)
- Effet artistique pour posters, cartes
- Simplification pour rendre l’image gravable sans bruit visuel
**SECTION 3 – Restyle (IA)**
Transforme l’image dans un **autre style artistique** via l’IA.
Exemples visibles :
- Art de ligne
- Dessin au crayon
- Noir & blanc stylisé
- Illustration cartoon
- Esquisse artistique
Fonctions :
- Recréation IA de l’image dans le style demandé
- Conservation du contenu
- Adaptation automatique de la palette, textures, ombres
Utilisation :
- Portraits stylisés
- Gravures artistiques
- Création de visuels décoratifs
- Transformations pour cadeaux personnalisés
**SECTION 4 – Génération (bouton Générer)**
Lorsque tu cliques “Générer”, XCS applique le **style IA sélectionné** à ton image.
Le chiffre (**Crédits requis 6**) indique le **coût de l’opération IA**.
**6. Paramètres d’impression****6.1 Taille et positionnement**
Ajuster la taille en mm ou en pourcentage.[](https://innovation.iha.unistra.fr/uploads/images/gallery/2025-11/omwimage.png)Placer votre motif où vous souhaitez qu'il soit imprimé sur le film par la machine.
[](https://innovation.iha.unistra.fr/uploads/images/gallery/2025-11/tt5image.png)
Définissez la résolution (Qualité) de votre impression.
Adaptez la qualité d’impression au niveau de détail du motif et au rendu attendu :
- **Standard (720×720 dpi)** : logos, textes, formes simples.
*Consomme peu d’encre → coût le plus faible.*
- **Haute (1440×720 dpi)** : motifs intermédiaires ou avec légers dégradés.
*Consommation d’encre moyenne.*
- **Ultra / Photo (1440×1440 dpi)** : portraits, visuels très détaillés, rendu premium.
*Consomme beaucoup d’encre → coût du motif plus élevé.*
**Plus la résolution est élevée, plus la consommation d’encre augmente, ce qui impacte directement le coût du transfert.**
[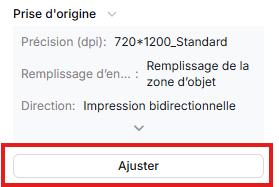 ](https://innovation.iha.unistra.fr/uploads/images/gallery/2025-11/Sylimage.png)[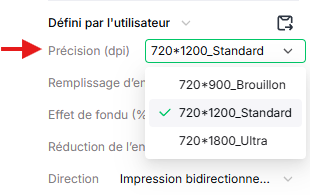](https://innovation.iha.unistra.fr/uploads/images/gallery/2025-11/2UUimage.png)
**6.3 Type de film**
Sélectionner le film adéquat : xTool Selected DTF Film.
[](https://innovation.iha.unistra.fr/uploads/images/gallery/2025-11/P5vimage.png)
**6.4 Mode miroir (Mirroring)**
Cocher "Impression miroir".
Indispensable car le transfert s’effectue face contre tissu.
[](https://innovation.iha.unistra.fr/uploads/images/gallery/2025-11/ef1image.png)
**7. Mockup**
Vous pouvez réaliser un mockup de votre design.
[](https://innovation.iha.unistra.fr/uploads/images/gallery/2025-11/Jkhimage.png)
Vous pourrez sélectionner les tissus souhaités ainsi que leurs tailles et couleurs.
[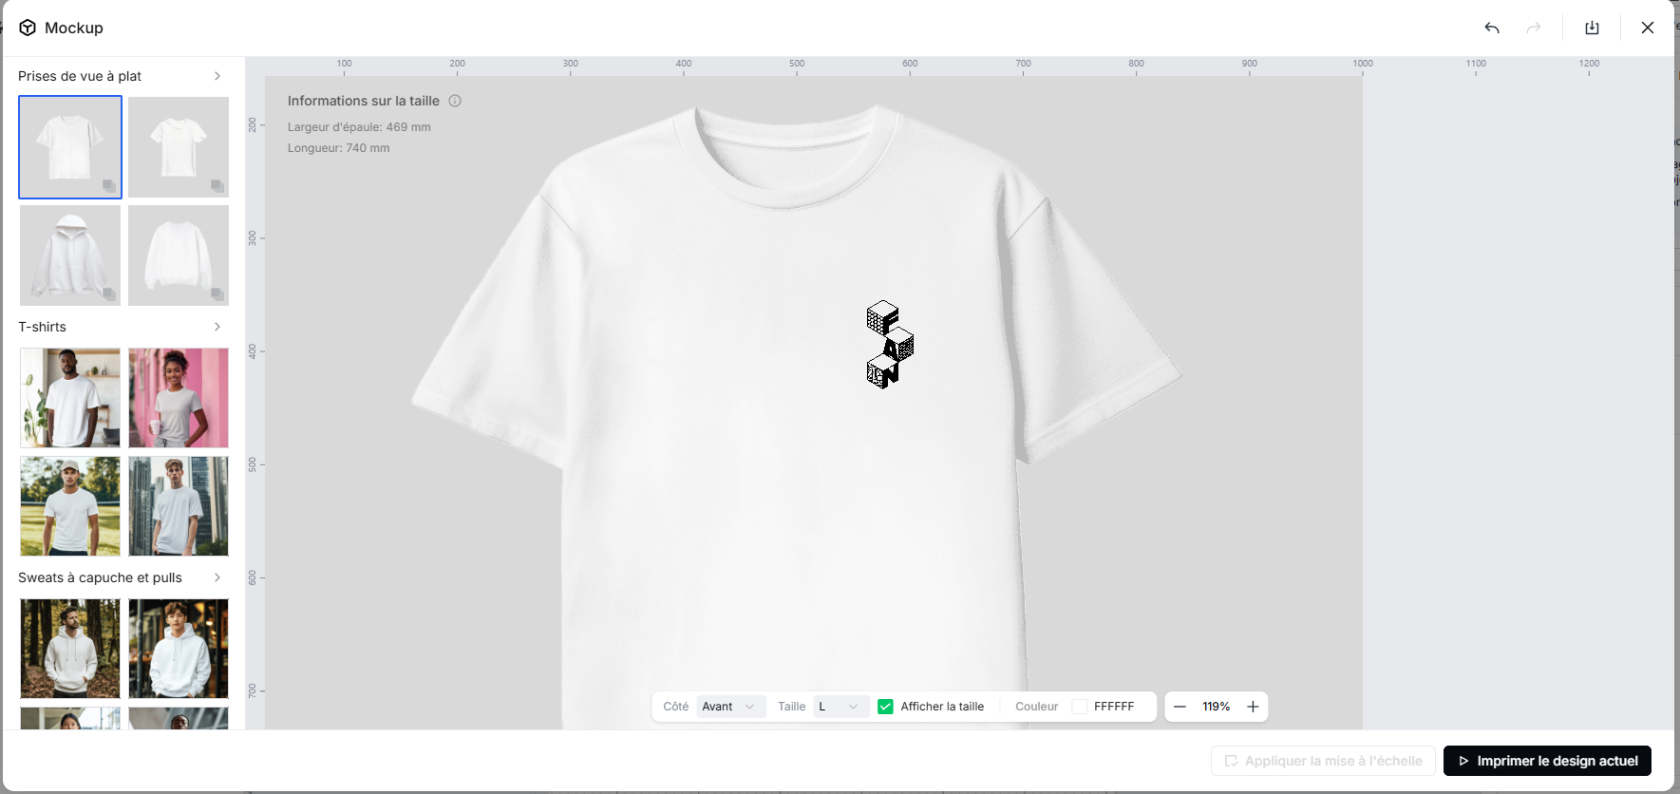](https://innovation.iha.unistra.fr/uploads/images/gallery/2025-11/8OLimage.png)
**8. Lancer l’impression**
Cliquez sur "Imprimez".
[](https://innovation.iha.unistra.fr/uploads/images/gallery/2025-11/Lqtimage.png)
Vous pouvez voir le temps d'impression du modèle et calculer le coût de revient du motif.
[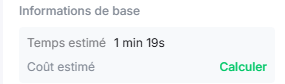](https://innovation.iha.unistra.fr/uploads/images/gallery/2025-11/F8pimage.png)
Vérifier les paramètres
[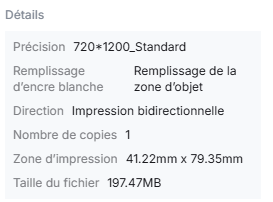](https://innovation.iha.unistra.fr/uploads/images/gallery/2025-11/jBHimage.png)
Vérifiez que la machine est allumée, puis cliquez sur "Imprimez"
[](https://innovation.iha.unistra.fr/uploads/images/gallery/2025-11/Lqtimage.png)
Attendre que le motif s'imprime
**9. Transfert sur textile****9.1 Préparer le textile**
- Allumez la presse à chaud (valeur de chauffe de 290°F à 300°F)
- Défroisser en passant le textile dans la presse à chaud
**9.2 Positionner le film**
- Placer le motif à l'endroit souhaité sur le textile
- Placer le papier sulfurisé par-dessus le motif et le textile
**9.3 Pressage final**
- 290-300°F
- 15 secondes
- Pression moyenne
**10. Pelage (peel)**
- **Cold peel** : attendre le refroidissement du textile, puis retirer le film
Félicitations, vous avez réalisé votre textile personnalisé avec la xTool Apparel Printer !