Moteur CC - Contrôler la vitesse avec une roue encodeuse
Utilisation des encodeurs
https://wiki.dfrobot.com/Micro_DC_Motor_with_Encoder-SJ01_SKU__FIT0450
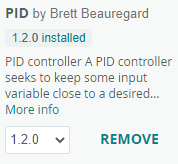
- Installer Arduino PID depuis le gestionnaire de librairies
//source Sample Code 2 https://wiki.dfrobot.com/Micro_DC_Motor_with_Encoder-SJ01_SKU__FIT0450#target_3
//The sample code for driving one way motor encoder
#include <PID_v1.h>
const byte encoder0pinA = 2;//A pin -> the interrupt pin 0
const byte encoder0pinB = 3;//B pin -> the digital pin 3
// int E_left =5; //The enabling of L298PDC motor driver board connection to the digital interface port 5
// int M_left =4; //The enabling of L298PDC motor driver board connection to the digital interface port 4
int MOTEUR_A_1 =5; //Connexion du pilote de moteur CC l9110s au port digital 5
int MOTEUR_A_2 =6; //Connexion du pilote de moteur CC l9110s au port digital 6
byte encoder0PinALast;
double duration,abs_duration;//the number of the pulses
boolean Direction;//the rotation direction
boolean result;

double val_output;//Power supplied to the motor PWM value.
double Setpoint;
double Kp=0.6, Ki=5, Kd=0;
PID myPID(&abs_duration, &val_output, &Setpoint, Kp, Ki, Kd, DIRECT);

void setup()
{
  Serial.begin(9600);//Initialize the serial port
   pinMode(MOTEUR_A_1, OUTPUT);   //L298P Control port settings DC motor driver board for the output mode
   pinMode(MOTEUR_A_2, OUTPUT);
   Setpoint =80;  //Set the output value of the PID
   myPID.SetMode(AUTOMATIC);//PID is set to automatic mode
   myPID.SetSampleTime(100);//Set PID sampling frequency is 100ms
  EncoderInit();//Initialize the module
}

void loop()
{
      advance();//Motor Forward
      abs_duration=abs(duration);
      result=myPID.Compute();//PID conversion is complete and returns 1
      if(result)
      {
        Serial.print("Pluse: ");
        Serial.println(duration);
        duration = 0; //Count clear, wait for the next count
      }


}

void EncoderInit()
{
  Direction = true;//default -> Forward
  pinMode(encoder0pinB,INPUT);
  attachInterrupt(0, wheelSpeed, CHANGE);
}

void wheelSpeed()
{
  int Lstate = digitalRead(encoder0pinA);
  if((encoder0PinALast == LOW) && Lstate==HIGH)
  {
    int val = digitalRead(encoder0pinB);
    if(val == LOW && Direction)
    {
      Direction = false; //Reverse
    }
    else if(val == HIGH && !Direction)
    {
      Direction = true;  //Forward
    }
  }
  encoder0PinALast = Lstate;

  if(!Direction)  duration++;
  else  duration--;

}
void advance()//Motor Forward
{
     digitalWrite(MOTEUR_A_1,LOW);
     analogWrite(MOTEUR_A_2,val_output);
}
void back()//Motor reverse
{
     digitalWrite(MOTEUR_A_1,HIGH);
     analogWrite(MOTEUR_A_2,val_output);
}

void Stop()//Motor stops
{
     digitalWrite(MOTEUR_A_2, LOW);
}
Avec la librairie Motor PID
https://github.com/natnqweb/Motor_PID
Interruptions
https://www.best-microcontroller-projects.com/arduino-interrupt.html
https://forum.arduino.cc/t/solved-arduino-nano-and-interrupt-on-pin-6/1090623/3
Sources
https://www.robot-maker.com/shop/blog/32_Utilisation-des-encodeurs.html


No Comments